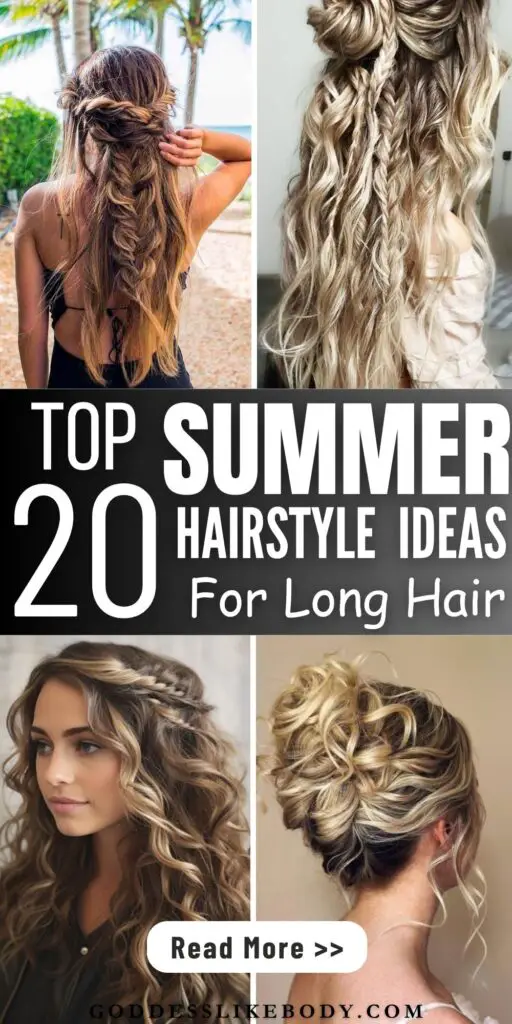
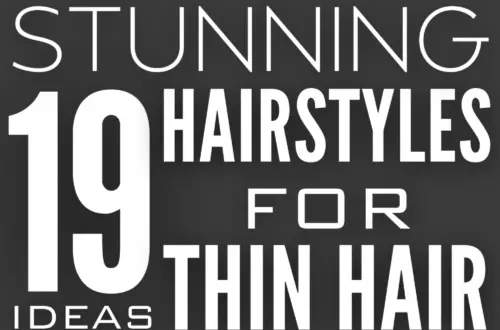
20 Best Summer Hairstyle Ideas for Long Hair (2024)
As summer 2024 approaches, the search for perfect Summer Hairstyle Ideas for Long Hair takes center stage.
Whether you’re envisioning sun-kissed balayage highlights or contemplating the elegance of dutch braids and half up half down hairstyles, the upcoming season is all about embodying confidence through natural beauty and effortless charm.
Long hairstyles, poised to dominate the scene, promise a blend of convenience and style, making every day a good hair day.
This compilation of 20 summer hairstyles for long hair is your ultimate guide to staying ahead of the curve.
Busy? Save this pin for later.
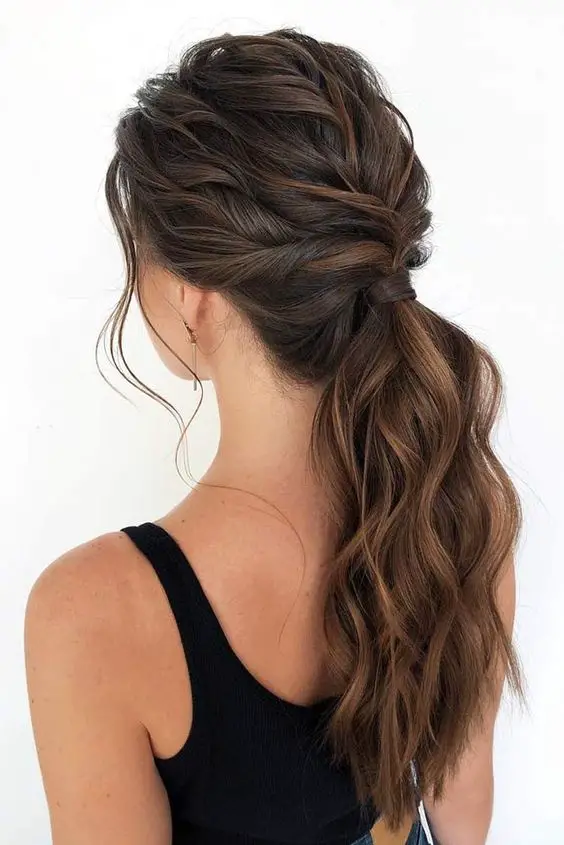
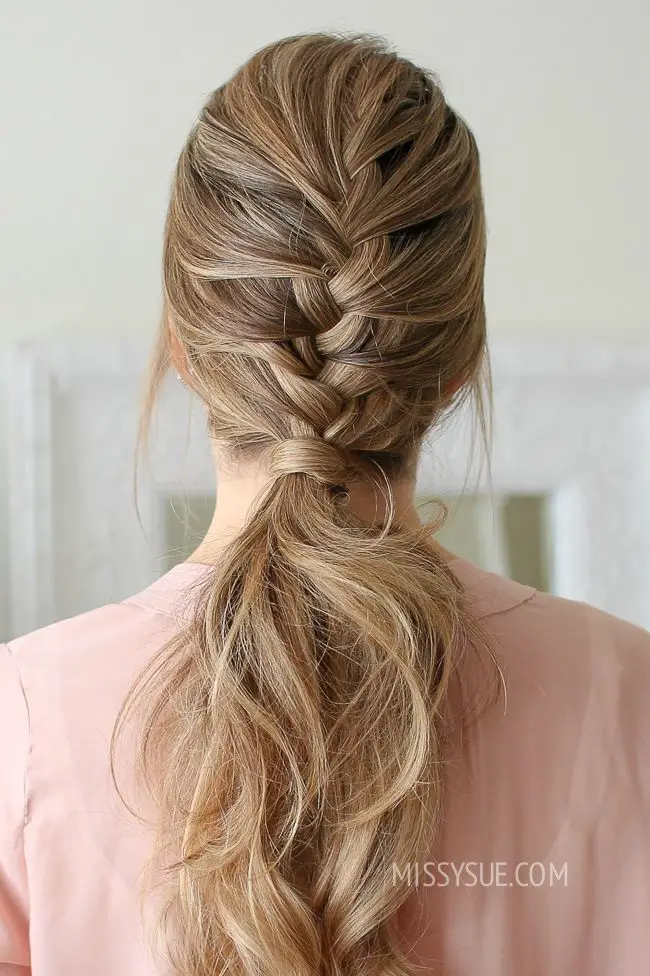
1. Sleek High Ponytail
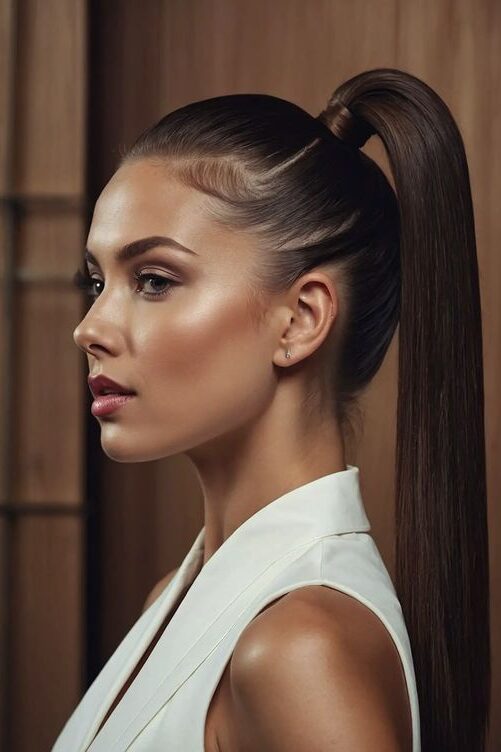
Steps to Achieve a Sleek High Ponytail
Preparation:
Start by brushing your hair thoroughly to ensure it is smooth and tangle-free, which is essential for a sleek look.
Forming the Base:
Gather all your hair into a high ponytail at the crown of your head. Use a brush to smooth out any bumps and secure the ponytail with a strong hair elastic.
Adding Detail and Volume:
To add a touch of elegance, take a small section of hair from the ponytail and wrap it around the base to hide the elastic. Secure this with a bobby pin underneath.
For volume, gently tug at the crown of your head to loosen the hair slightly. Be careful not to disrupt the smoothness of the overall style.
Finishing Touches:
Use a light hairspray to tame any flyaways and add an extra hold to your sleek high ponytail.
For a more personalized touch, consider adding hair accessories like a ribbon or a decorative clip.
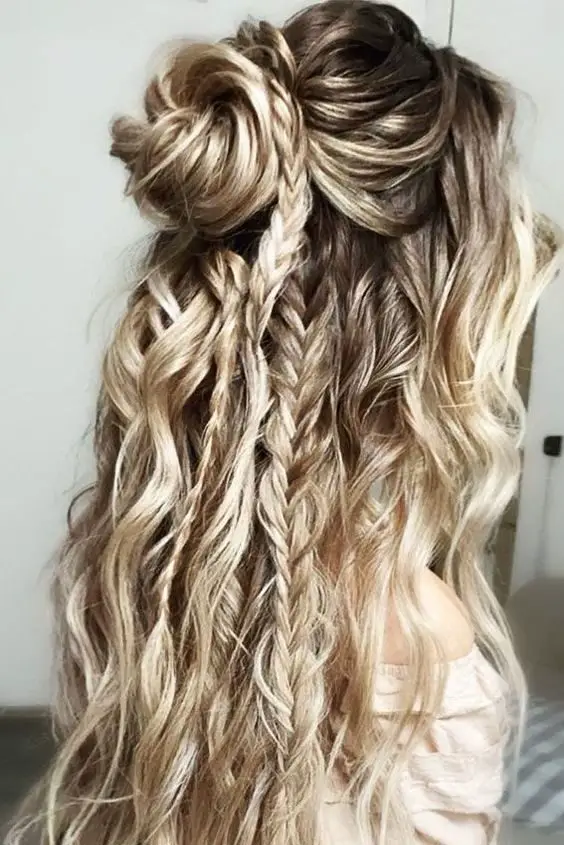
2. Braided Crown
Steps to Create a Braided Crown
Preparation:
Begin with day 2 hair that’s been loosely curled for a more textured look. This adds volume and grip, making it easier to manage the braids.
Sectioning the Hair:
Divide your hair into two equal sections down the middle of your scalp.
Braiding:
Braid each section starting from the nape of the neck towards the crown. Ensure that you braid straight away from the head, parallel to the shoulders.
Enhancing the Braids:
Once each braid is complete, gently pull apart each braid starting about 1/3 of the way down. This creates a fuller appearance.
Arranging the Crown:
Take one braid and wrap it over the top of your head, securing it with bobby pins. Repeat with the other braid, ensuring the ends are tucked under and hidden.
Securing Loose Ends:
Pin back any stray pieces at the front or back to maintain a neat appearance.
Framing the Face:
Gently pull out small sections of hair around the face to soften the look and frame your features.
Tips for a Perfect Braided Crown
For a seamless look, overlap the braids in the middle when pinning them on top of the head. This technique makes it appear as if there’s one continuous braid wrapped around your head.
Explore variations like the simple three-strand crown braid or a more intricate lace braid crown for different occasions. These styles can add a touch of elegance or playful charm to your summer look.
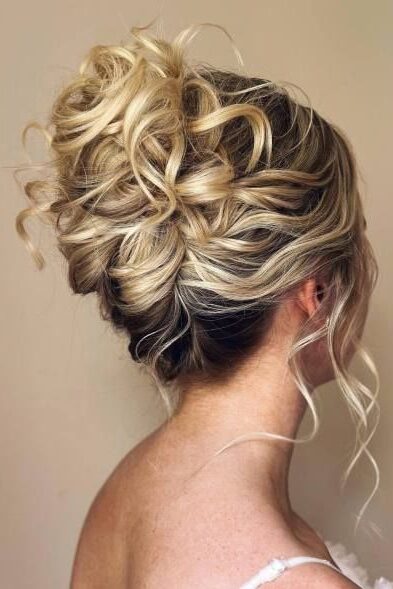
3. Messy Bun with Accents

Textured Low Bun
Preparation: Start by curling your hair to add texture. This not only enhances the bun’s appearance but also makes it easier to manage.
Creating the Bun: Gather your hair at the nape of your neck. Twist it into a low bun, securing it loosely with bobby pins for a relaxed look.
Adding Accents: Incorporate face-framing tendrils to soften the style, pulling out a few curls around the face.
Messy Midi Bun
Height and Placement: Position this bun at the midpoint of your head to accentuate your neckline and shoulders.
Styling Tips: Use a texturizing spray before styling to add grip and volume. Backcomb the roots slightly for added fullness.
High Twisted Bun
Styling Steps: Twist your hair into a high, stacked bun. This style is inspired by popular celebrity looks and adds a touch of glamour.
Securing the Style: Ensure the bun’s longevity by starting with a ponytail base, especially for long and heavy hair.
Boho Bun with Infinity Braids
Braid Details: Start by creating small infinity braids around your head. These will add a striking visual element to the bun.
Combining Styles: Integrate these braids into a textured low bun, securing everything with bobby pins preferred over U-pins for better hold.
Additional Styling Tips
Volume and Texture: Always backcomb the roots slightly and apply a generous amount of texturizing spray. This preparation step is crucial for creating the perfect messy bun.
Lasting Hold: Don’t forget to finish with a strong hold hairspray, ensuring your messy bun stays intact throughout your summer activities.
Accessorizing: Elevate your messy bun with cute accessories like bun cuffs or decorative pins, perfect for enhancing the hairstyle for special summer outings.
4. Bubble Braids
Steps to Create Bubble Braids
Preparation:
Start with either naturally curly or straight hair. Use a brush to detangle and smooth your hair.
Sectioning the Hair:
If opting for a Bubble Half-Ponytail, gather the top half of your hair and secure it with a small hair tie at the crown.
Creating Bubbles:
Place another hair tie approximately 2-3 inches down from the first one. Gently tug the hair between the ties outward to form a bubble. Repeat this step down the length of the ponytail or braid until you achieve the desired number of bubbles.
Finishing Touches:
Use hairspray to tame any flyaways and ensure a sleek look. For a softer appearance, gently pull a few strands loose around your face.
Additional Tips for Perfecting Bubble Braids
Choosing Hair Ties: Use clear or hair-colored elastics to keep the focus on the bubbles.
Accessorizing: Enhance your bubble braids with fun barrettes or decorative pins, especially in the ‘For the Love of Nudes’ color palette for a subtle, chic look.
Checking Your Work: Always use a handheld mirror to check all sides of your hairstyle to ensure even volume and symmetry in the bubbles.
User Feedback and Tutorial Popularity
Engagement: Bubble braid tutorials are popular, with thousands of views and shares, indicating a strong interest in this playful hairstyle.
Community Tips: Some users recommend slowing down the tutorial for better comprehension and have shared their successful attempts at recreating this look at home.
Bubble braids are versatile and can be adapted for various occasions, making them a fantastic choice for adding a playful touch to your summer hairstyle repertoire.
5. Boho Half-Up Half-Down
Creating a Boho Half-Up Half-Down Hairstyle
Volume at the Crown:
Begin by teasing the hair at the crown to create extra volume, essential for achieving the perfect boho look.
Incorporating Braids:
Add a chic touch with a side braid. This hairstyle incorporates three types of braids: Dutch, rope, and French. Consider using hair extensions to add length and fullness to the braids.
Accessorizing:
Enhance the bohemian vibe with stylish boho hair accessories or a flower garland, ideal for weddings or spring-inspired events.
Considerations for Styling
Hairstyling Skills:
Due to its complexity, this hairstyle might be challenging to achieve on your own. Booking an appointment with a hairstylist is recommended, especially for events like weddings.
Hairstyle Variations:
This versatile style suits various hair lengths—long, medium, and even short. Adjust the braiding and accessories according to hair length and occasion.
Event Suitability:
Whether it’s a casual outing or a formal event like a wedding, the boho half-up half-down can be tailored to fit the occasion. For weddings, consider integrating a veil or opting for a half-up half-down style with chic bohemian braids.
Tips for Perfecting the Look
Textured Styling:
For a more textured appearance, opt for curly or wavy hair before styling. This adds a romantic flair perfect for boho bridal looks.
DIY Styling:
If you prefer to style your hair at home, follow tutorials specifically designed for boho hairstyles, which often include step-by-step instructions on creating these intricate braids and updos.
6. Beachy Waves
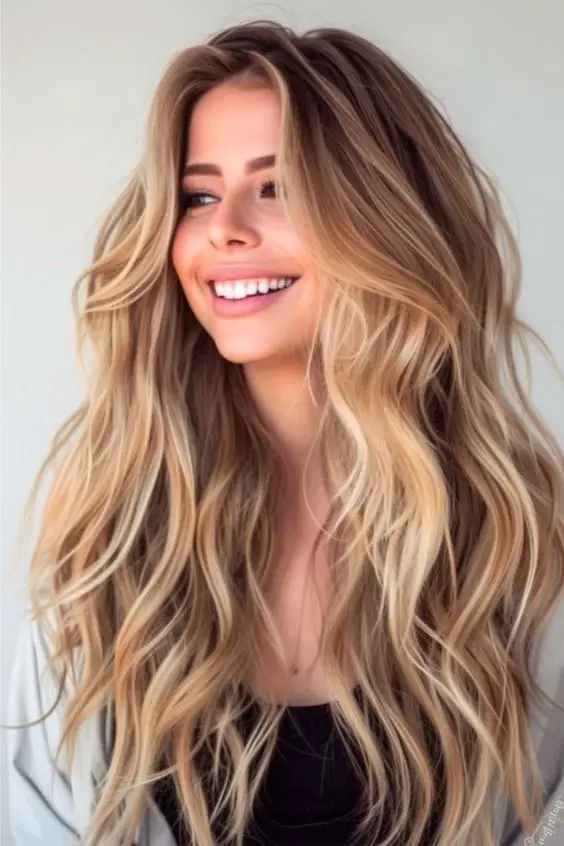
Achieving Beachy Waves for Different Hair Types
Short Hair
Curling Technique: Use a smaller curling iron or wand. Wind hair around it, twisting away from the face.
Finishing Touch: Blast with thickening or texture spray for added volume and grit.
Using a Flat Iron
Preparation: Braid your hair.
Heating: Clamp the flat iron down on each braid to set the wave pattern.
Consistency: Ensure consistent waves throughout.
Natural or 4c Hair
Preparation: Blow out hair to stretch it.
Styling: Work in one-inch strips, creating a flat twist into a three-strand twist.
Finishing: Before unraveling, rub hair oil between hands to redefine waves.
Overnight Beachy Waves
Braid Technique: Create a basic three-strand ponytail braid on damp hair, about 90% dry.
Morning Routine: Unravel braid upon waking, shake out waves, and blast with texturizing spray.
Heatless Method
Tools Needed: Use a bathrobe belt and hair ties.
Styling: Braid damp hair in a high bun.
Finishing: Gently unravel braids when awake, mist with hairspray, and rake through waves with fingers.
Additional Tips for Perfect Waves
For Long Hair: Prep hair with mousse or dry shampoo if it doesn’t hold curl well. Curl away from your face using a 1″ curling iron, twirling the iron as you release the curl to create a tighter pattern. Let hair cool completely before separating the curls.
Volume and Texture: Apply dry shampoo to the roots for lift and optionally use texturizing sea salt spray for added texture and volume.
Styling Variations: Beachy waves are versatile and can be adapted for various occasions, making them a fantastic choice for adding a playful touch to your summer hairstyle repertoire.
7. Loose Bun (Ribbon)
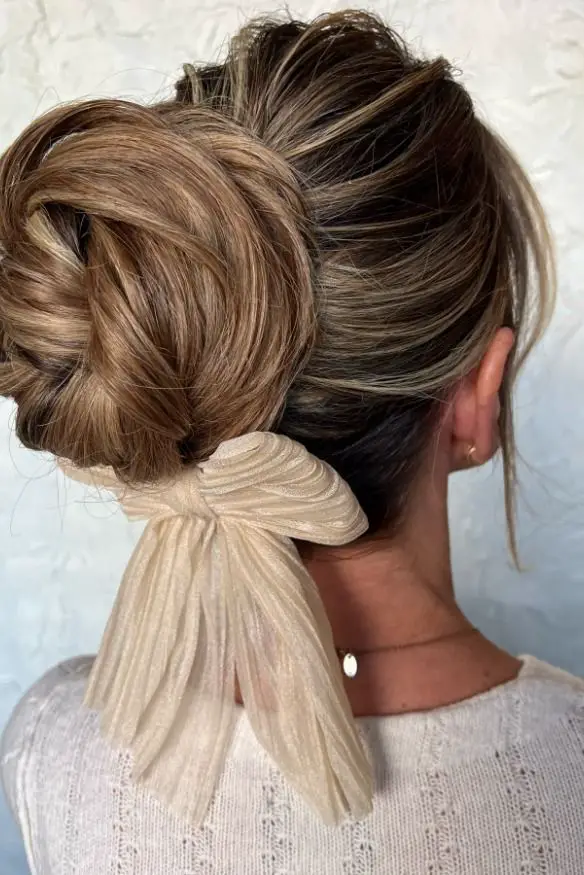
Steps to Create a Loose Bun with Ribbon
Starting the Style:
Begin by tying your hair into a low ponytail using a clear elastic. This forms the base of your updo.
Incorporating the Ribbon:
Thread a skinny ribbon through the elastic. Choose a ribbon color that complements your outfit or occasion.
Braiding the Ponytail:
Split the ponytail into four strands. Start creating a rope braid by twisting the strands around each other.
Forming the Bun:
Coil the braided ponytail around the base to form the bun. Secure the end with a rubber band or additional bobby pins.
Adjusting for Fullness and Shape:
Gently tug at parts of the bun to adjust its tightness and fullness to your liking.
Styling Variations
Loose Ringlets:
For a softer look, remove the coils to reveal loose ringlets that frame the face beautifully.
Restyling Into a Different Bun:
You can easily transform the look by restyling the ringlets into a different bun style, offering versatility throughout your event.
This hairstyle is not only elegant but also versatile, making it suitable for various formal occasions. Whether you’re attending a wedding or a formal dinner, the loose bun with ribbon adds a touch of sophistication to your ensemble. Adjust the tightness and the style of the bun according to the formality of the event and your personal preference.
8. Cascading Curls
Styling Cascading Curls for Summer 2024
Step-by-Step Guide to Achieving Cascading Curls
Preparation:
Apply a small amount of hair wax to your bangs to control flyaways.
Styling the Braid:
Sweep your bangs to one side.
Begin a French braid, adding new hair only to the bottom side to create asymmetry.
Creating the Cascading Effect:
Gently tug on the newly added section of the braid to loosen it slightly, enhancing the cascading look.
Continuing the Braid:
Keep adding new sections from the back of your head to the braid, maintaining gentle tension.
Securing the Braid:
Once you reach the desired length, secure the braid with a hair tie.
Repeating on the Opposite Side:
Mirror the steps on the other side of your head and tie the two braids together at the back.
Additional Styling Tips
Using Tools and Extensions:
Employ a 19mm curling wand from the Nume Titan 3 set for uniform curls.
Add Foxy Locks extensions for extra length and volume.
Finishing Touches:
Backcomb the top section of your hair for added volume.
Secure the style with hairspray to maintain the volume.
Conceal any visible clips by twisting large sections of hair and pinning them strategically.
Creative Variations:
Experiment with different wrapping techniques, such as alternating between wrapping hair around itself and tying into a ponytail or tucking ends into a previous ponytail for a unique look.
This approach not only ensures your cascading curls are ready for any summer event but also allows for creativity in styling, making it a versatile choice for long hair in summer 2024.
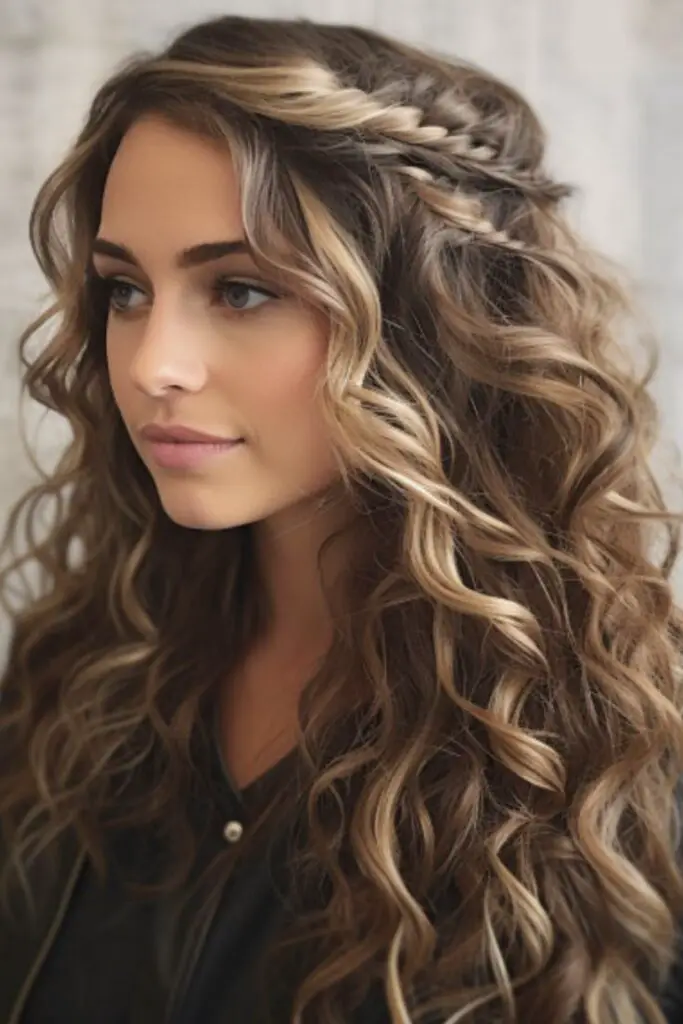
9. Headband Braid
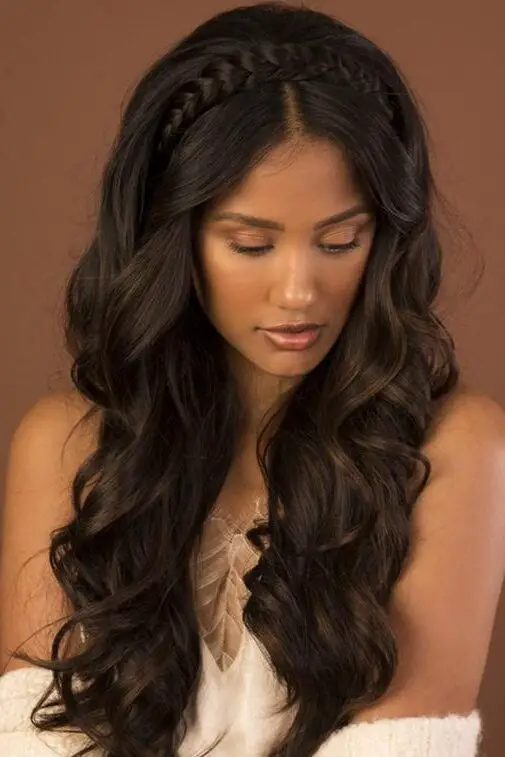
Steps to Create a Headband Braid
Preparation:
Brush your hair thoroughly to remove any tangles, ensuring a smooth starting base for the braid.
Sectioning:
Divide your hair into two equal parts from the middle.
Starting the Braid:
Begin by taking a small section of hair from one side near your temple and start twisting it towards your face.
Adding Hair:
Gradually add more hair to the twist as you move along your hairline towards the back of your head.
Repeating on the Other Side:
Mirror the twisting on the other side, ensuring both twists are symmetrical.
Securing the Braid:
Once both twists meet at the back of your head, tie them together with a hair tie.
Finishing Touches:
Adjust the braid to sit comfortably like a headband and use bobby pins to secure any loose ends.
User Engagement and Feedback
High Viewership: The tutorial by Johanna Westbrook has garnered significant attention with over 203.8K views and numerous shares, highlighting its popularity.
Community Interaction: Users actively engage with the content, asking for additional tips on hairstyles suitable for various professional settings and special occasions.
Personal Challenges: Some viewers, like Sarah Veachelle Adki, discuss personal hair challenges such as managing bangs or adapting the style to suit different forehead sizes.
Requests for More Tutorials: Requests for more diverse updos and styles indicate a strong follower interest in versatile, easy-to-manage hairstyles.
Tips for Perfecting the Headband Braid
Volume and Texture: For those like Suzie looking for added volume, consider lightly teasing your hair at the roots before starting the braid.
Adaptability: This style is adaptable for both casual and formal occasions, making it a versatile addition to your hairstyling repertoire.
Accessorizing: Enhance the braid with decorative hair pins or subtle flowers to elevate the look for special events.
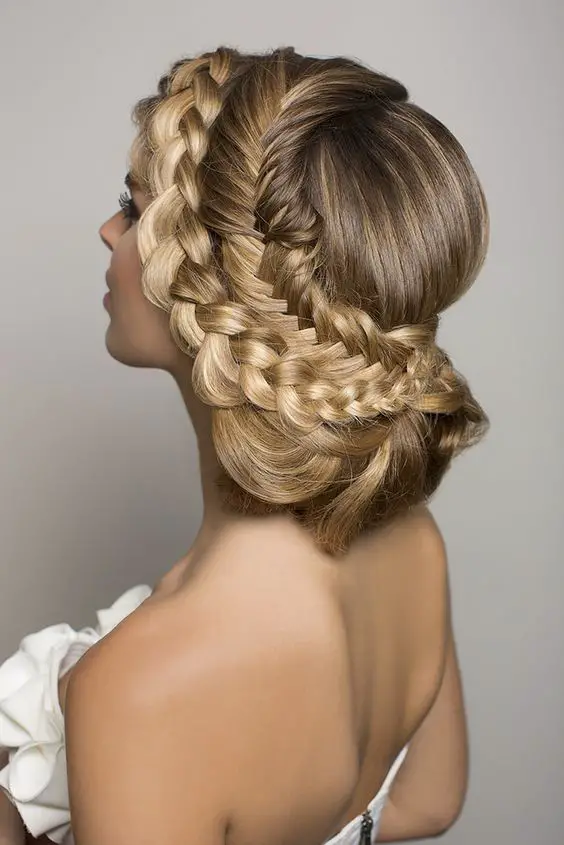
10. Braided Halo
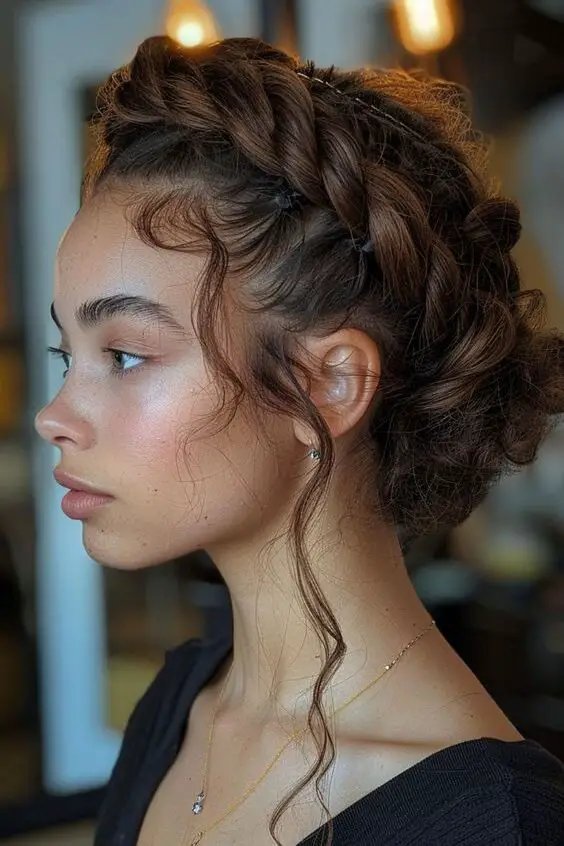
Achieving the Braided Halo
Preparation and Products
Prep the Hair: Start by using Mizani Moisture Fusion Gentle Clarifying Shampoo followed by a hydrating conditioner.
Blow Dry and Straighten: Blow-Dry Concentrate for a sleek finish.
Hydration and Styling: Before braiding, apply a leave-in conditioner to keep hair manageable and moisturized.
Braiding Techniques
Single Halo Braid:
Forming the Braid: Create a single braid by parting your hair from the middle and braiding around your head. Tuck in the tail with a hairpin.
Double Halo Braid:
Creating Braids: Part hair down the middle and braid each section across the top of your head in opposite directions.
Final Touches: Secure the braids with meta grip pins available on Amazon or at Sally’s.
Styling and Maintenance
Duration: The style can last between 7 to 10 days with proper care.
Night Care: Wrap your hair in a satin scarf to maintain the braids overnight.
Accessorizing: Add embellishments like gold clips or decorative bobby pins for a personalized touch.
This versatile hairstyle is perfect for both casual and formal settings, adapting easily to various hair lengths with the option to include extensions.
11. Half-Up Fishtail
Instructions for a Half-Up Fishtail Braid
Preparation:
Start with clean, dry hair and brush thoroughly to remove any tangles.
Creating the Base:
Section the top half of your hair and secure it with a clear baby elastic into a ponytail.
Braiding:
Divide the ponytail into two equal sections.
Begin the fishtail braid by taking a small section of hair from the outside of the left piece and crossing it over to the inside of the right piece. Repeat the process with a section from the outside of the right to the inside of the left. Continue alternating sides until you reach the end of the hair.
Securing the Braid:
Tie off the end of the fishtail braid with another clear baby elastic.
Adding Volume:
Gently pull on the edges of the braid to widen it and create a fuller appearance.
Creating the Bun
Forming the Bun:
Fold the fishtail braid upwards to cover the base elastic and secure the bun in place with bobby pins.
Finishing Touches:
Drape the end of the fishtail across the top of the bun, tucking the ends underneath. Pull gently on the layer underneath to enhance the bun shape.
Adding a Second Fishtail Braid
Additional Braiding:
Take a section of hair beside the bun and start another fishtail braid.
Secure with a clear baby elastic and repeat on the other side of the bun.
Styling Tips
For a more relaxed look, consider starting with loose waves before creating the half-up style.
Enhance the hairstyle with chic accessories or a touch of hairspray for extra hold.
12. French Twist Updo

Achieving the Classic French Twist Updo
Step-by-Step Guide
Preparation:
Begin by applying volumizing powder at the crown to enhance texture and volume. Ensure it’s evenly distributed for a smooth base.
Forming the Base:
Gather your hair into a low ponytail just above the nape, allowing side sections to elegantly sweep over the ears.
Creating the Twist:
Hold the ponytail with your right hand and wrap the base upwards and over your fingers to the right, forming the initial roll.
Securing the Twist:
Tighten the twist against your head, gently pulling the base upwards to refine the shape. Tuck the hair underneath to maintain a neat profile.
Finishing Touches:
Use approximately five to six French pins to secure the twist, focusing on the top if it’s volumized for better hold.
Additional Tips
Pinning Technique: Ensure the pins are inserted discreetly within the twist to avoid visible hardware.
Final Look: For a flawless finish, consider a light mist of hairspray to tame any flyaways and add extra hold.
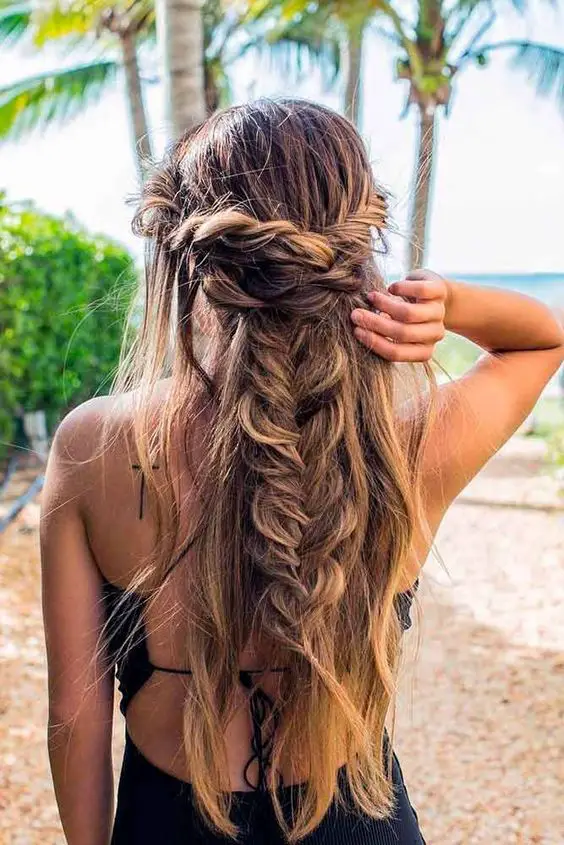
13. Waterfall Braid
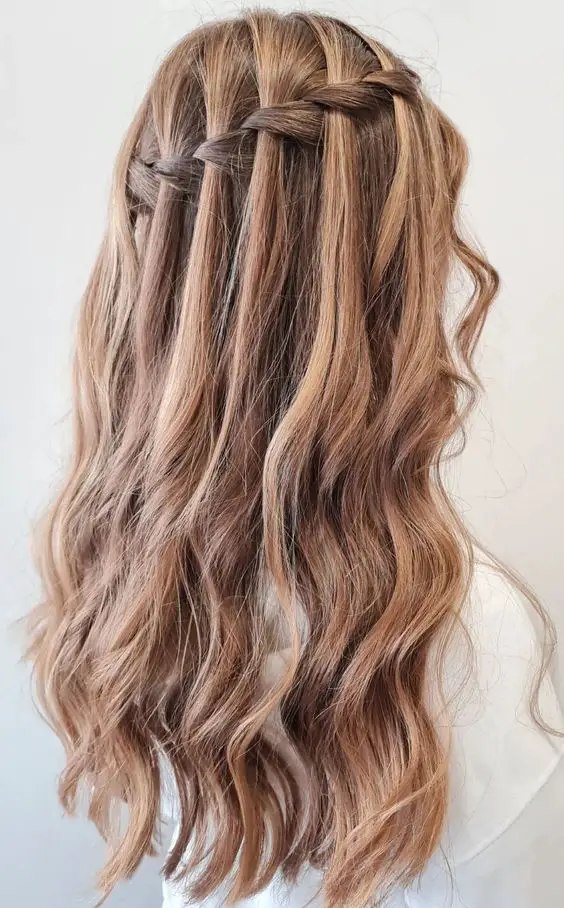
Steps to Create a Waterfall Braid
Starting the Braid:
Begin by selecting a section of hair from the front and divide it into three even parts.
Initial Stitch:
Perform one normal braid stitch to start the foundation of the waterfall braid.
Creating the Waterfall Effect:
Drop the bottom strand of hair, replacing it by picking up a new section from behind. Add this new section to the middle strand.
Cross the top strand over the middle and repeat the process by dropping the bottom strand and picking up a new section to add to the middle.
Continuing Across the Head:
Keep repeating the process across the head. Decide whether to continue around the ear or to finish with a regular three-strand braid once you reach the opposite side.
Additional Styling Tips
Combining with Curls: For a more dramatic look, combine the waterfall braid with curls. This adds volume and enhances the cascading effect, making it suitable for summer events.
Securing the Style: Ensure the braid holds well throughout the day by securing loose ends with bobby pins and applying a light hold hairspray.
Accessorizing: Elevate the hairstyle by incorporating decorative hair pins or flowers into the braid for a chic summer look.
Tutorial and Popularity
Tutorial Accessibility: A detailed tutorial presented by JaidaGreen and Coriann Nicholson can be found on iviejohnson.blogspot.com.tr, showcasing the steps on a live model which helps in understanding the technique better.
Social Media Engagement: The hairstyle’s tutorial on Facebook has garnered 133K views, indicating its popularity and user interest in learning this style.
This hairstyle, with its elegant and flowing strands, is perfect for both casual outings and more formal summer gatherings, making it a versatile addition to your hairstyling options for long hair in summer 2024.
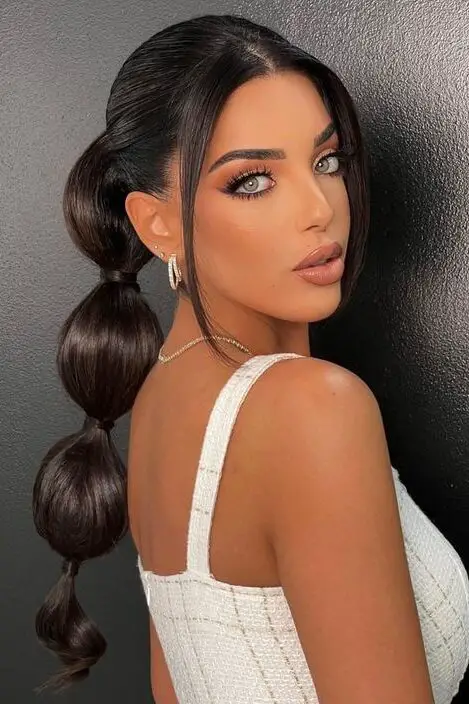
14. Textured Ponytail
Studio 54 Ponytail
Steps to Achieve:
Preparation: Start with hair that has been curled to add volume.
Styling: Gather your hair into a high ponytail, ensuring it’s voluminous and curly.
Finishing Touches: Use hairspray to maintain the style’s hold throughout the day.
Bobby-Pinned Ponytail
Steps to Achieve:
Preparation: Smooth your hair into a sleek ponytail.
Styling: Adorn the side of the ponytail with a line of bobby pins for a chic look.
Finishing Touches: Apply a light hairspray to keep everything in place.
Bow Pony
Steps to Achieve:
Preparation: Tie your hair into a ponytail at your preferred height.
Styling: Attach a wide, silky bow at the base of the ponytail for a playful touch.
Finishing Touches: Adjust the bow and ponytail to ensure the bow sits perfectly.
Cuffed Ponytail
Steps to Achieve:
Preparation: Pull your hair up into a high ponytail.
Styling: Add a ponytail cuff around the base for an edgy look.
Finishing Touches: Secure the cuff and use hairspray for extra hold.
Modern Topsy Tail Ponytail
Steps to Achieve:
Preparation: Gather all hair into a ponytail at the crown.
Styling: Create a hole above the elastic and flip the ponytail through it.
Finishing Touches: Fan out the twist and wrap a small piece of hair around the elastic.
Unique Twists
Idea: Integrate braids or twists into your ponytail for a unique and chic look.
Tips: Start with a basic ponytail, then add simple braids or twists along the sides or through the length of the ponytail.
These textured ponytail styles offer a range of looks from playful to elegant, perfect for various occasions and easy to personalize with simple adjustments.
15. Boxer Braids
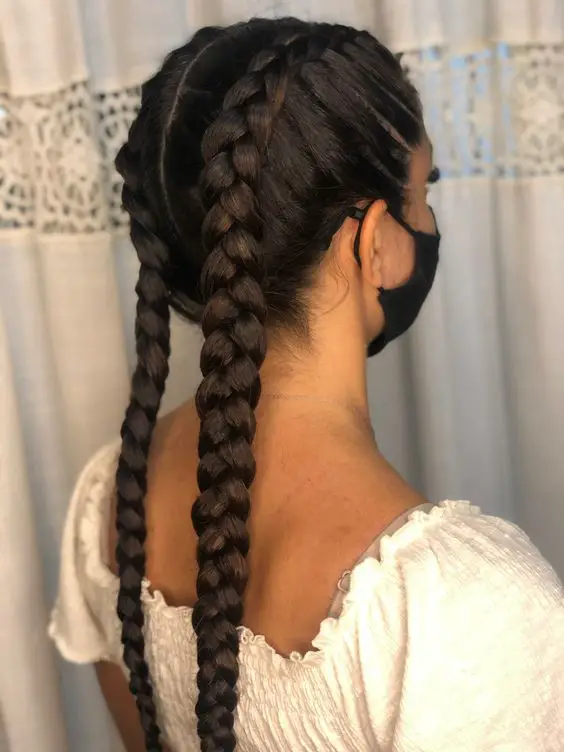
Understanding Boxer Braids
Boxer braids, often referred to as cornrows, are a protective hairstyle that involves tight braiding close to the scalp. This style is particularly beneficial for textured hair as it minimizes manipulation and shields the ends from damage, promoting healthier hair.
Tutorial Insights and Styling Tips
Braiding with Curls:
For an added flair, curls can be incorporated into boxer braids using perm rods, flexi rods, or rollers, creating a dynamic look.
Hair Length Considerations:
The complexity of boxer braids increases with hair length. Longer hair requires more time and skill to braid effectively.
Accessorizing Your Braids:
Personalize your braids with beads or cuffs at the ends for a unique touch.
Tutorial and Product Use
Step-by-Step Guide:
Detailed tutorials are available for creating Dutch boxer braids, an inside-out version of French braids, providing clear instructions for DIY styling.
Using Quality Extensions:
The tutorials recommend using 100% human hair extensions from ywigs.com, specifically the loose wavy bundo for a soft, bouncy finish.
The hair is noted for its ease of braiding and styling versatility, suitable for various braid types including goddess and box braids.
Maintenance and Reusability
Securing and Longevity:
A knotless method is used to ensure the extensions stay in place without sliding. Glue is applied at the braid ends for enhanced durability, even when exposed to water.
Hair Care Post-Use:
The extensions are reusable. Post-use, they can be combed out using heat and steam after applying oil products like coconut or black castor oil to dissolve any residual glue.
This section provides a comprehensive guide to creating and maintaining boxer braids, ensuring they remain a stylish and practical choice for summer 2024.
16. Mermaid Waves
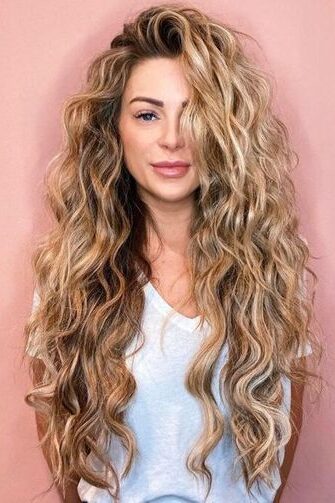
Achieving Mermaid Waves: A Guide
Essential Tools and Techniques
Choosing the Right Tool:
Utilize a triple barrel curling iron or a large-barrel curling wand to create the perfect mermaid waves. These tools help in achieving the soft, flowing waves characteristic of this style.
Technique:
For those using a flat iron, twist the iron while you move down your hair to create undulating waves. This technique ensures the waves have a natural and effortless look.
Styling Products for Definition and Texture
Sea Salt Spray: Apply generously to damp hair before styling. This enhances the natural texture and adds to the beachy vibe of the waves.
Texturizing Spray: Use on dry hair to add volume and define the waves, making them stand out more prominently.
Step-by-Step Styling
Preparation:
Start with hair that is about 80% dry for optimal styling.
Sectioning:
Divide your hair into manageable sections, depending on the thickness and length of your hair.
Curling:
Begin at the lower layers, wrapping sections around the curling tool, holding for a few seconds before releasing.
Finishing Touches:
After curling all sections, run your fingers gently through your hair to separate the waves. Apply a light hairspray to hold the style in place.
Tips for Long-Lasting Waves
Avoid Over-Brushing: After styling, minimize brushing to keep the waves intact.
Touch-Up Spray: Keep a mini sea salt spray or texturizing spray in your bag for quick touch-ups throughout the day.
Mermaid waves are not only versatile for various hair types but also enhance your summer style with their relaxed and chic look. Whether you’re hitting the beach or dressing up for a casual outing, these waves add a touch of elegance to your overall appearance.
17. Braided Ponytail with Shells:
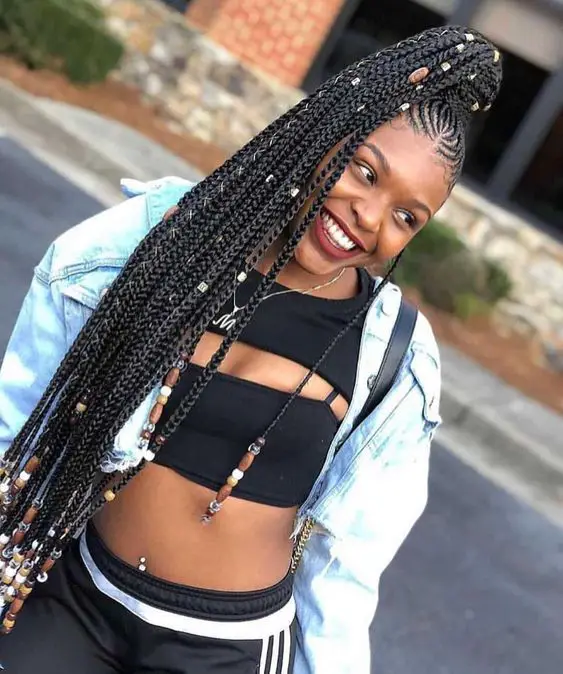
Steps to Create a Braided Ponytail with Shells
Preparation:
Wash your hair with a sulfate-free clarifying shampoo, then condition deeply. Detangle and blow-dry your hair using a heat protectant.
Hair Sectioning:
Smooth your hair back from the top of your head, creating a triangle-shaped section with your fingers. Secure this section with a small hair elastic.
Creating Texture and Volume:
Pinch and pull small pieces of hair throughout the top section. Add volumizing powder to the base of the ponytail for enhanced volume.
Forming the Braided Ponytail:
Unclip the top ponytail, divide it into two sections, and perform a pull-through braid. Secure each new section created with a hair elastic, repeating the process to form multiple pull-through braids.
Adding Shells:
Integrate decorative shells by weaving them into the braid. Use clear adhesive or glue dots to attach the shells securely.
Final Touches:
Combine all ponytails together at the base. Wrap a small piece of hair around the base for a polished look. Finish with a strong hold hairspray to keep everything intact.
Additional Styling Tips
Textured Hair Extensions: For added length and volume, consider using textured kanekalon hair extensions. Wrap these around each braid section, securing with extra-strong rubber bands.
Bubble Effect: To achieve a trendy bubble effect, gently pull on the sections of hair between the rubber bands to increase their size.
Hair Care: Post-styling, use products like silk pressing solutions or beeswax for maintenance and to ensure the hairstyle lasts longer.
This hairstyle is perfect for summer 2024, blending practicality with a touch of whimsical charm.
18. French Braid Ponytail
Hair Prep and Product Use
To start, if your hair is clean and lacks texture, consider using a curling iron with a 1.25 inch barrel and apply light bulb hairspray or dry shampoo at the crown to add grip without leaving residue. This preparation ensures your French Braid Ponytail holds better and looks more voluminous. Don’t forget to protect your strands by using Bumble and bumble styling cream, which offers heat protection up to 450 degrees.
Step-by-Step Creation
Initial Setup:
Smoothly brush back the top of your hair and create a triangle-shaped section with your fingers. Secure this section with a small hair elastic.
Add texture by pinching and pulling small pieces of hair within the top section.
Forming the Ponytail:
Clip up the initial ponytail to keep it out of the way.
Create a new section an inch below the first, tracing back and down in a V-shape, and secure with another elastic.
Repeat the texturizing step for this new section.
Creating Pull-Throughs:
Divide the top ponytail into two sections. Bring the lower ponytail up between these two sections and secure with an elastic.
Enhance the volume by pinching and pulling pieces of the pull-through to create a bubbled look.
Continue repeating these steps for additional volume and layers.
Finishing the Style:
Join the two ponytails, wrapping a small piece of hair around to conceal the elastic.
Apply volumizing powder at the base and touch up any curls for a polished look.
Troubleshooting Tips
If you encounter tangled ends, pause to comb them out for a smoother finish.
Use a comb to integrate sections neatly, ensuring a sleeker braid.
Before finalizing the braid, smooth out each section for a neater appearance.
This structured approach not only helps in achieving a sophisticated French Braid Ponytail but also ensures it lasts throughout your summer activities.
19. Messy Bun with Tendrils
Achieving the Messy Bun with Tendrils
Step-by-Step Guide
Starting with a High Ponytail:
Begin by pulling your hair into a high ponytail, ensuring it’s not too tight to maintain a relaxed look.
Creating the Bun:
Twist the ponytail around its base, wrapping it loosely to form the bun. This technique adds to the messy aesthetic.
Securing the Bun:
Use bobby pins to secure the bun in place. Allow some strands to fall naturally to enhance the tousled appearance.
Styling the Tendrils:
Pull out a few wavy tendrils around the face to frame your features softly.
Celebrity Inspiration
Popular Among Celebrities:
Notable figures like Deepika Padukone and Katrina Kaif have embraced this style, showcasing its versatility and elegance at various events.
Styling Tips for Different Hair Types
For All Hair Types:
This hairstyle suits any hair type, from straight to curly. Adjust the tightness of the bun and the number of tendrils based on your hair’s texture.
Adding Polish:
For a more refined look, consult styling guides like those found in Southern Living magazine, which recommend specific products and techniques to polish the messy bun.
Tutorial Popularity
Online Tutorials:
Online platforms offer numerous tutorials for creating this look, indicating its popularity and ease of styling at home.
This hairstyle’s adaptability makes it a perfect choice for both casual outings and more formal occasions, reflecting a blend of comfort and chic style.
20. Pineapple Updo
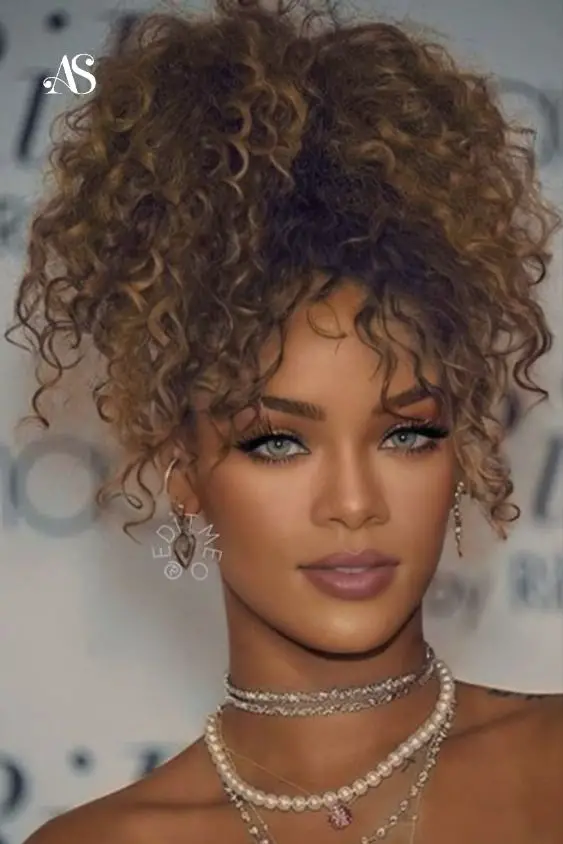
Rejuvenating and Styling the Pineapple Updo
Preparation and Tools
Remoisturization: Begin by revitalizing your curls with water and a leave-in conditioner or grape seed serum. This step is crucial for maintaining the hair’s moisture throughout the styling process.
Essential Accessories: Utilize a silk scrunchie to secure the updo. This choice helps prevent hair damage and dryness, ensuring the health of your hair.
Step-by-Step Procedure
Initial Setup:
On the first day of styling, stretch the hair overnight using the pineapple updo method to prepare it for subsequent styling.
Maintaining the Style:
To preserve the form of your curls, especially at the back, wrap a second scrunchie around the front of your head and tie it at the back.
Overnight Care:
Cover your head with a large satin bonnet while sleeping to protect the hairstyle and maintain its shape.
Additional Styling Tips
Longevity of Style: This method allows wash and gos to last up to a week with minimal maintenance.
Avoid Overstretching: Be cautious not to stretch the hair excessively to prevent the curls on top from becoming flat. This helps in maintaining the volume and shape of your curls.
Maintenance Tips
Daily Care: Refresh your curls by smoothing out frizz, filling in gaps with bobby pins, and gently brushing the sides. This minimal upkeep ensures the style remains fresh and vibrant.
Tutorial Overview
Starting Point: Begin with colored hair for a vibrant look.
Creating the Base:
Separate the bangs and pull the rest of the hair upwards.
Secure the base with a thick hair tie, looping it around twice for a firm hold.
Elevating the Style:
Raise the ponytail higher by adding another, thinner hair tie above the first one, also looping it around twice.
Final Adjustments:
Fluff the ponytail to add volume and style the bangs as desired.
Ensure the pineapple is securely held by a hair tie to maintain the updo throughout the day.

One Comment
pillow
you are in reality a just right webmaster The site loading velocity is incredible It seems that you are doing any unique trick In addition The contents are masterwork you have performed a wonderful task on this topic