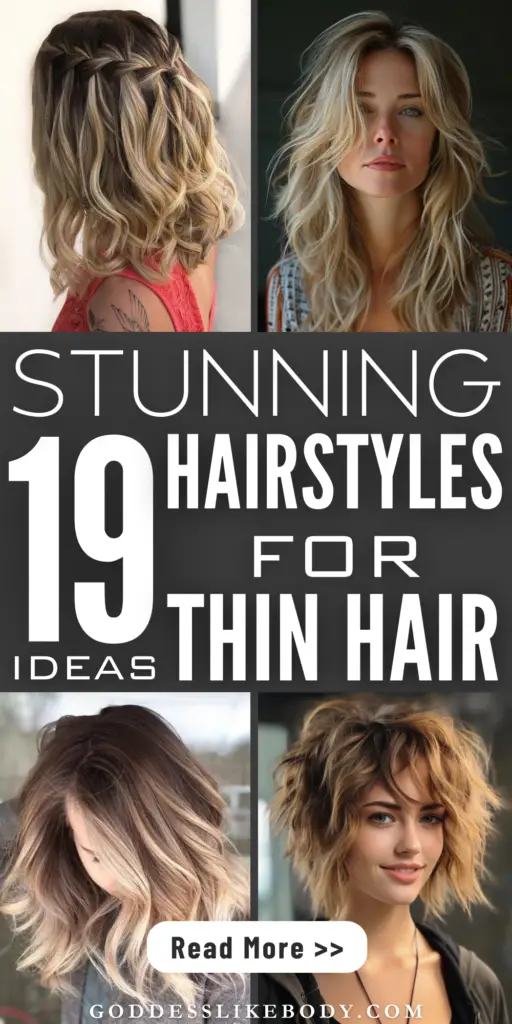
Chic & Simple: Top 19 Hairstyle for Thin Hair Every Woman Should Try
Facing thin hair challenges is common among women, with up to 40% experiencing some degree of hair thinning by the age of 40.
Discovering the right hairstyles for thin hair, such as pixie cuts, medium length hairstyles, and buns enhanced with volume, not only boosts your confidence but also transforms the appearance of thin hair, making it look denser.
This post delves into 19 chic and simple hairstyles specifically curated for thin or fine hair. Optimized for haircuts for women with thin hair, including strategic tips for creating volume and the illusion of thickness, these hairstyles promise a revitalizing makeover for your delicate strands, steering clear of conventional popularity metrics and focusing solely on enhancing your hair’s natural beauty.
Busy? Save this pin for later.
1. Pixie Cut with Choppy Layers
For women with thin hair seeking a fresh, voluminous look, the pixie cut with choppy layers is an excellent choice.
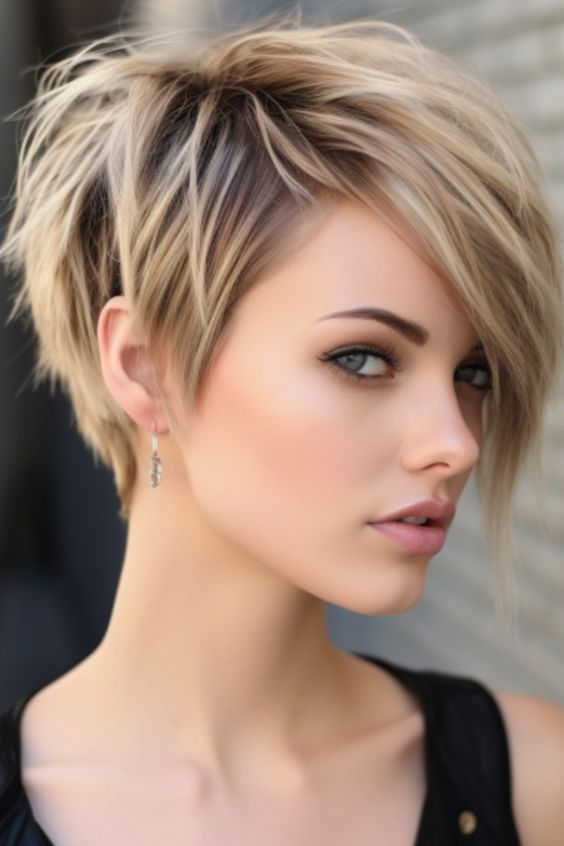
Volume Enhancement: The strategic longer layers at the top allow for added volume right at the roots, making this ideal for short, thin hair that typically lacks body.
Texture and Fullness: Pixie cuts are inherently good at adding texture. The choppy layers break up the uniformity, giving your hair a fuller appearance and dynamic movement.
Styling Versatility: Whether you prefer a subtle side part with a fringe or a bold, textured look with side-swept bangs, the pixie cut adapts easily. It fits various looks from the understated to the edgy, such as the asymmetrical pixie or the choppy pixie with an undercut.
Low Maintenance: This haircut is a boon for anyone looking for easy upkeep. Regular trims and some light styling are all it takes to keep this look fresh. Plus, it’s perfect for starting anew if you have damaged hair.
Enhanced Facial Features: The short style draws attention to the face, accentuating your features beautifully. Whether you opt for a mocha pixie cut with blonde highlights or a chic brunette mullet pixie, each variation beautifully frames the face.
Practical Benefits: Beyond style, a pixie cut is cooler and lightweight, making it ideal for active lifestyles or warmer climates. It also supports overall hair health by removing damaged ends and promoting healthier hair growth.
To maintain the fresh look of a pixie cut with choppy layers, regular trims are essential. Additionally, using the right products to add texture and volume will keep your hair looking its best.
Experiment with different styling techniques and embrace accessories like headbands or clips for a personalized touch.
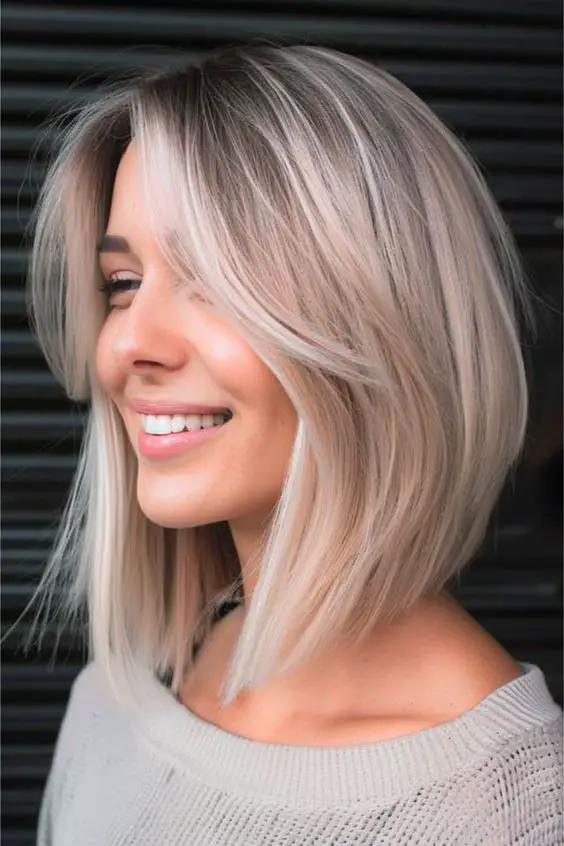
2. Short Bob with Angled Layers
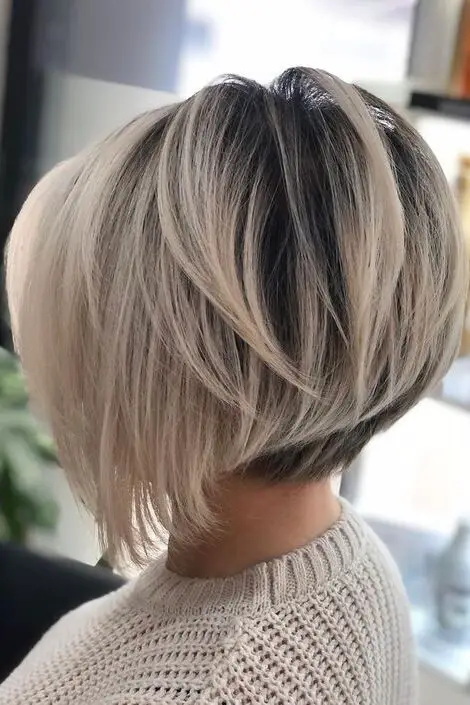
A short bob with angled layers is trending as a top choice for 2024, especially for those with fine hair.
Achieving the Look:
Start by asking your stylist for a bob that is slightly shorter at the back with longer, angled layers towards the front. This cut is ideal for creating the illusion of depth and volume.
For those with fine hair, consider incorporating subtle highlights and lowlights to add a sense of fullness and movement.
Styling Tips:
Use a round brush while blow-drying to lift the roots and create a rounded, voluminous finish.
Apply a light amount of dry shampoo at the roots to add texture and further enhance the volume.
Suitable Variations:
Whether you prefer a collarbone, chin-length, or cropped style, angled layers can be tailored to complement your face shape and personal style.
Consider an inverted bob to add a dynamic twist or a blunt cut for a more structured look with added density.
Maintaining Your Style:
Regular trims are crucial to keep your bob in perfect shape. Aim for a trim every 6-8 weeks to maintain the angles and prevent the ends from appearing thin.
Experiment with soft, angular highlights or a stacked bob with gentle lines to maintain a flawless shape and introduce fabulous texture.
This versatile hairstyle adapts to both casual and formal settings, making it a practical and stylish choice for women with thin hair looking to add volume and elegance to their look.
3. Blunt Bob with Textured Ends
A blunt bob with textured ends is a standout choice for enhancing the appearance of thin hair.
Achieving the Blunt Bob with Textured Ends
Ask for a Precision Cut: Request a blunt cut which makes the ends of your hair look thicker. Opt for a chin-length or slightly longer style to best suit your face shape.
Add Light Layers: Incorporate light layers and feathered ends to introduce body and shape without sacrificing the blunt cut’s clean lines.
Consider Texturing Techniques: Ask your stylist to use texturizing shears on the ends to create a lived-in, slightly messy look that adds volume.
Styling Your Blunt Bob
Use Volumizing Products: Apply a volumizing mousse or spray at the roots to lift the hair and create an illusion of thicker strands.
Blow-Dry with a Round Brush: Use a small to medium round brush to blow-dry your hair. This technique helps to add a subtle curve to the ends, enhancing the textured effect.
Incorporate Highlights: Adding a few well-placed highlights or lowlights can create depth, making your thin hair appear fuller.
Maintaining Your Look
Regular Trims: To keep your blunt bob looking sharp and fresh, schedule regular trims every 6-8 weeks. This will help maintain the shape and texture of the cut.
Embrace Dry Shampoo: Between washes, use dry shampoo at the roots to maintain volume and texture. This product is excellent for giving your hair a quick lift and extending the life of your style.
4. Shaggy Bob with Fringe
Shaggy bob hairstyles, especially with a fringe, are a fantastic choice for those with thin or fine hair, aiming to create an illusion of volume and thickness.
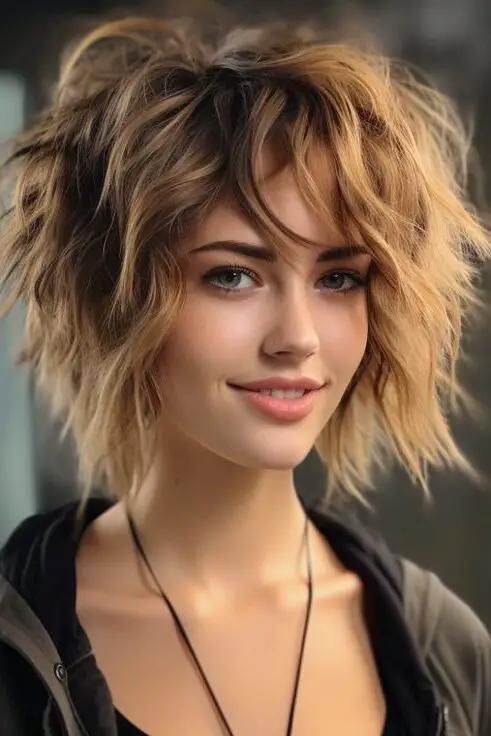
Here’s a deeper look into why this style might just be your next hair transformation.
Key Features of Shaggy Bob Hairstyles
Layering: The essence of a shaggy bob is its layered texture, which adds significant body and movement to fine hair.
Variety of Styles: Whether you opt for a choppy layered bob, a medium shaggy hairstyle, or a chin-length cut, the shaggy bob is versatile.
Fringe Benefits: Incorporating a fringe can modify the overall shape of the hairstyle, enhancing facial features and adding a youthful touch.
Styling Tips for a Shaggy Bob with Fringe
Mousse for Texture: Applying mousse can boost your hair’s texture, giving a fuller appearance.
Defined Edges: Styling with defined edges can help disguise thinner areas around the temples.
Loose Waves: Adding loose waves to the shaggy bob introduces additional volume, perfect for a casual yet chic look.
Adaptability to Face Shapes and Hair Types
Shaggy bobs can be tailored to flatter various face shapes, making it a universally appealing style.
Celebrities like Isabelle Hubbert and Selena Gomez have popularized this trend, demonstrating its wide appeal.
Maintenance and Tools
To maintain a shaggy bob’s chic look, using high-quality styling tools like the BaByliss Straight and Curl Brilliance Rose Gold Straightener is recommended.
Regular trims are essential to keep the layers distinct and the hairstyle fresh.
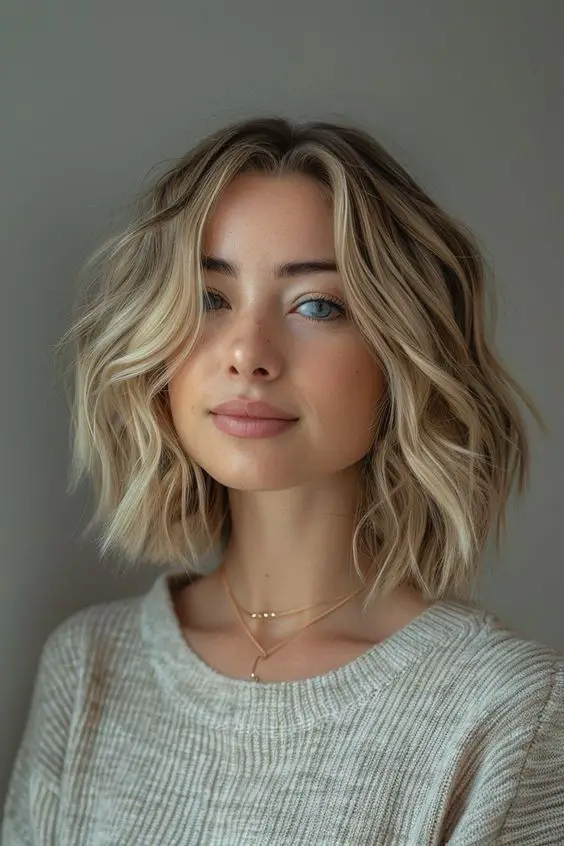
5. Lob (Long Bob) with Face-Framing Layers
Lob (Long Bob) with Face-Framing Layers
The lob, or long bob, is celebrated for its versatility and suitability for all face shapes and hair types, especially thin hair. This hairstyle elegantly skims just above the collarbone, a crucial length to maintain fullness towards the ends. Here’s how you can embrace this chic style:
Opt for an Asymmetric Cut:
Choose a slightly asymmetric lob where one side is subtly longer than the other. This modern twist not only adds an edge to your look but also gives the illusion of volume.
Incorporate Soft, Long Layers:
Ask your stylist to add soft, long layers around your face. These layers enhance the hair’s natural movement without reducing overall density, making your hair appear thicker.
Consider a Full Fringe:
A full fringe can dramatically transform your hairstyle, adding not only a youthful vibe but also creating the illusion of denser hair at the forehead.
Style with a Deep Side Part:
Experiment with a deep side part to instantly lift the roots and volumize your hair. This simple adjustment can make a significant difference in how full your hair appears.
Add Texture with Waves:
Incorporate soft waves into your lob to boost texture and volume. This can be achieved with a light curling iron or a salt spray for a more natural look.
Highlight for Dimension:
Apply balayage or subtle highlights around the face. This technique adds depth and dimension, making your thin hair look fuller.
Each of these steps contributes to a fuller-looking hairstyle, perfect for those with fine or thin hair.
6. Layered Shag with Curtain Bangs

Achieving the Layered Shag with Curtain Bangs
Consult with Your Stylist: To ensure that the layered shag with curtain bangs suits your face shape and hair texture, discuss with your stylist. This haircut works well for adding volume to thin hair and framing the face attractively.
Cutting Technique: Your stylist should use a technique that layers the hair while keeping the weight at the ends, creating a fuller look. Curtain bangs should be long enough to tuck behind the ears or styled to frame the face.
Styling Tips
Use Texturizing Products: Apply a texturizing spray or mousse to damp hair. This helps to create the piecey and voluminous effect characteristic of a shag haircut.
Blow Dry with a Diffuser: For added volume and to accentuate the layers, blow dry your hair using a diffuser. Tilt your head forward to maximize root lift.
Style the Bangs: Curtain bangs can be styled straight or with a slight curve depending on your preference. Use a round brush for blow-drying the bangs to give them a soft, sweeping look.
Maintenance Advice
Regular Trims: To maintain the shape and texture of the layered shag, regular trims every six to eight weeks are recommended. This keeps the hairstyle looking fresh and the layers well-defined.
Moisturizing Treatments: Especially for those with fine or thin hair, incorporating moisturizing treatments can help maintain hair health and prevent split ends, which are more noticeable in layered styles.
7. Blunt Cut with Root Lift

Achieving a Blunt Cut with Root Lift
Consult Your Stylist for an A-line Chin Bob: This specific cut naturally enhances volume at the crown, making it ideal for thin hair. The A-line shape is shorter at the back and gradually lengthens towards the front, lifting the roots and providing a fuller appearance.
Opt for a Root Fade: A root fade involves subtly lightening the hair at the roots compared to the rest of the hair. This technique not only adds depth but also keeps your blunt bob looking polished and youthful.
Use Tools for Root Lift: To add extra volume without relying on heavy products, consider using tools designed to lift the roots. These can range from volumizing inserts to simple techniques with a blow dryer and round brush to boost the hair at the base.
Styling Your Blunt Cut for Maximum Volume
Volumizing Mousse: Apply a lightweight mousse directly to the roots of damp hair before styling. This provides a lift without weighing down your hair.
Blow Dry Upside Down: Flip your hair over while blow-drying to encourage the roots to stand up, enhancing the voluminous effect of your blunt cut.
Texturizing Spray: After styling, spritz a texturizing spray to add a final touch of volume and to hold the style in place without stiffness.
Maintaining Your Blunt Cut with Root Lift
Regular Trims: Keep your blunt cut fresh and voluminous with regular trims every 6-8 weeks. This helps maintain the sharp, clean lines of the cut, which is essential for keeping the style looking its best.
Root Touch-Ups: If you opt for a root fade, regular touch-ups will be necessary to maintain the contrast that gives the illusion of depth and volume.
8. Wavy Bob with Highlights
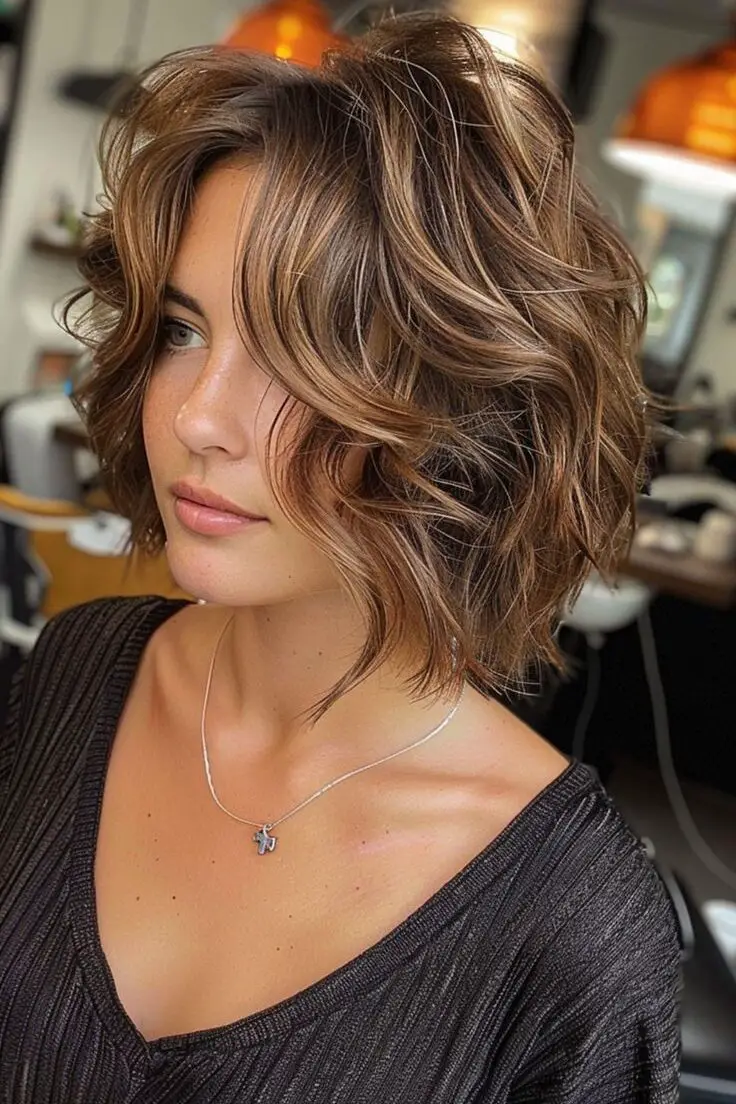
Achieving a Wavy Bob with Highlights
Choose the Right Length: Opt for a bob that suits your face shape—be it collarbone, chin-length, or cropped. This versatility ensures it complements your features while enhancing volume.
Add Layers for Volume: Request layers from your stylist; they introduce bounce and movement, making your hair appear thicker.
Selecting Highlights: Incorporate highlights that complement your natural hair color. Cool-toned blonde and ash blonde are trendy choices that suit many complexions. Highlights like honey or icy blonde add dimension and can make strands appear fuller.
Styling with Waves: Use a curling iron or a salt spray to add loose waves to your bob. This not only adds texture but also boosts the overall volume of your hair.
Side Part for Added Volume: A deep side part can lift the roots, instantly making your hair look more voluminous.
Maintain with Minimal Products: To keep your wavy bob looking great, use volumizing sprays or mousse. Avoid heavy products that might weigh down your fine hair.
9. Long Layers with Balayage Highlights
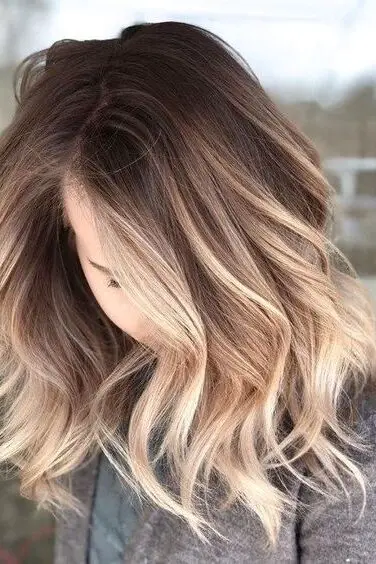
Achieving Long Layers with Balayage Highlights
Consultation and Planning:
Discuss with your stylist the desired length and style of your long layers. Mention your preference for subtle or bold balayage highlights that can enhance the natural flow of your hair.
Cutting Technique:
Request long, flowing layers that will add movement and volume. The layers should be strategically placed to maximize the illusion of fullness, particularly around the crown and face.
Balayage Application:
Choose balayage highlights that complement your base hair color. This hand-painted technique allows for a more natural, sun-kissed effect, which can make thin hair appear fuller and more dimensional.
Styling and Maintaining Your Hairstyle
Styling for Volume:
Use a volumizing mousse or spray at the roots before blow-drying. Flip your head upside down while drying to lift the roots and enhance body.
Maintaining Color and Health:
Invest in color-safe shampoos and conditioners to maintain the vibrancy of your balayage highlights. Regular deep-conditioning treatments can help keep your hair healthy and prevent damage.
Regular Trims:
Schedule trims every 8-10 weeks to maintain the shape of the layers and keep your hair looking fresh.
10. Half-Up, Half-Down with Messy Bun
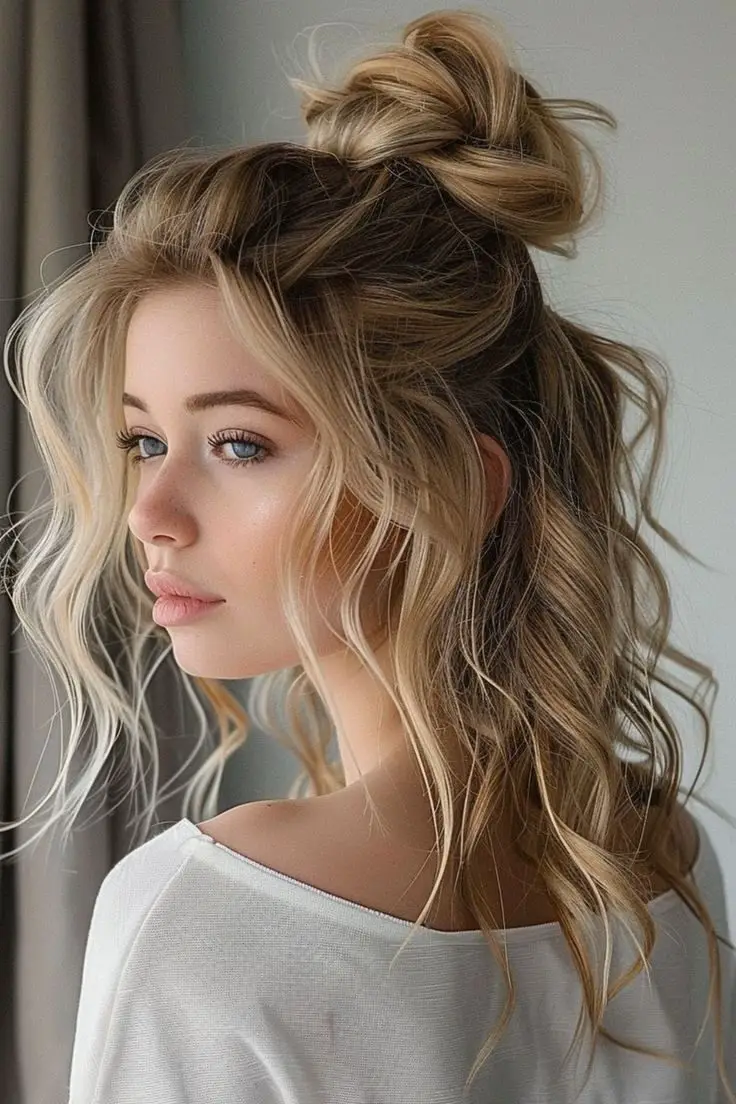
Achieving the Half-Up, Half-Down with Messy Bun
Gather Your Tools:
You will need 1 hair elastic and bobby pins. For better grip, opt for high-quality bobby pins or use a little hairspray on regular ones to prevent slipping.
Prep Your Hair:
Apply a texture spray to your hair to enhance grip and volume, crucial for maintaining the style in thin hair.
Create the Half-Up Bun:
Take the top half of your hair and pull it back into a high ponytail. Secure it with the hair elastic. Twist the ponytail around the base, forming a bun, and secure with bobby pins.
Add Volume and Texture:
Gently tug at the bun to loosen it slightly, creating a more voluminous, messy look. Use your fingers to tease small sections of the bun for added texture.
Style the Remaining Hair:
Leave the bottom half of your hair down. For a softer look, curl the ends lightly or add waves using a curling iron.
Personalize Your Style:
Cut small, baby hair pieces around the face with a razor for soft, face-framing fallout pieces that enhance the casual yet chic vibe of the hairstyle.
11. Headband Braid
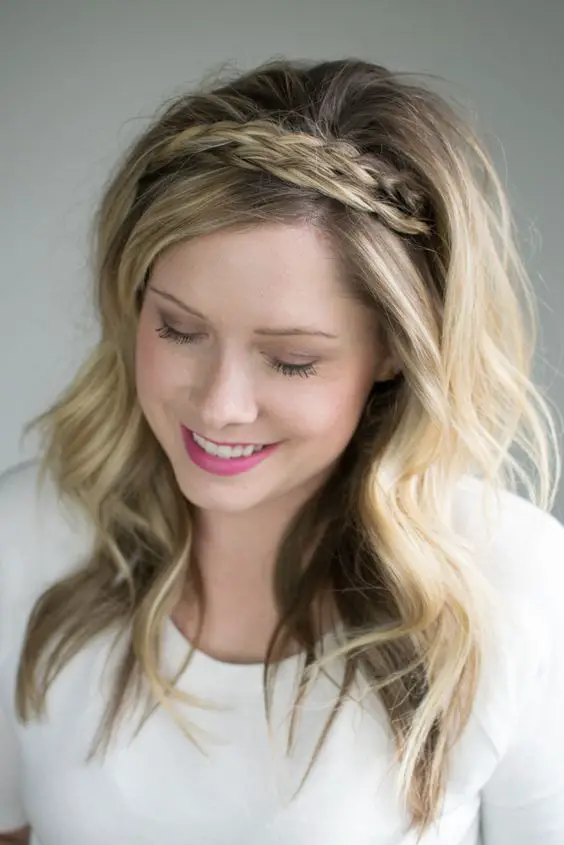
Achieving the Headband Braid
Start Above the Ear: Begin by drawing a line with your finger right above your ear to split your hair in half. This will be your starting point for creating the braid.
Selecting the Hair: Take a chunk of hair from just behind your ear. The thickness of this section should be about as thick as you want your braid to be.
Braiding Technique: Braid this section upward, ensuring it’s tight and neat. This technique helps in giving the appearance of a natural headband.
Securing the Braid: Once you’ve braided across to the other side of your head, secure the braid right above your opposite ear with one or two bobby pins. Make sure it’s snug but comfortable.
Repeat on the Other Side: Perform the same process on the other side of your head, ensuring symmetry and balance for both braids.
Add Volume: If you desire more volume, gently tease your hair at the back. This step is optional but beneficial for those with thin hair.
Final Touches: You can either leave your hair down, straighten it, curl it for a more styled look, or pull it back into a loose bun or ponytail. Ensure that the hair in front of your ears swoops over the top where your braids begin to create a seamless transition.
Styling and Maintenance Tips
Wax Spray for Flyaways: To maintain the neatness of your braids throughout the day, use a wax spray. This will help tame any flyaways and keep your hairstyle looking polished.
Enhancing Facial Features: The headband braid frames your face beautifully, enhancing your facial features. It’s a simple yet elegant way to style your hair, especially on days when you’re short on time.
12. Voluminous Ponytail with Clip-In Extensions (Optional)
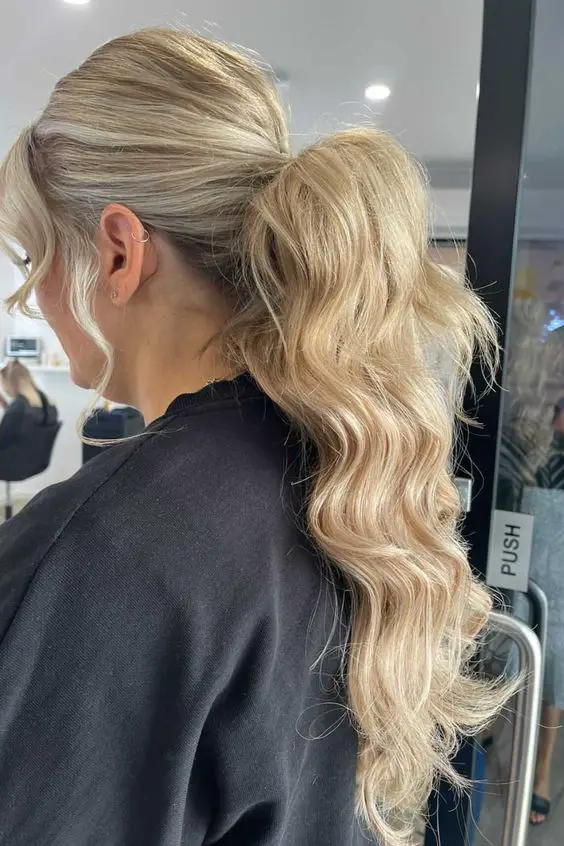
Clip-in ponytail extensions offer a quick and easy way to achieve a voluminous ponytail, perfect for those with thin hair looking for a fuller look. Here’s a straightforward guide to creating this hairstyle:
Step-by-Step Guide to Creating a Voluminous Ponytail with Clip-In Extensions
Prepare Your Hair:
Start by brushing your hair to remove any knots or tangles, ensuring a smooth base for the extension.
Create a Base:
Pull your hair into a half-up, half-down style. This step is crucial as it provides a secure base for attaching the clip-in extension.
Attach the Extension:
Select a hair extension that matches your hair color and texture. Attach it to the ponytail you just created, making sure it’s secure.
Blend and Style:
Gently brush the ponytail and the extension together to blend them seamlessly. Style the ponytail according to your preference, whether it’s a high, mid, or low ponytail.
Additional Tips for Enhanced Volume
Creating an Illusion of Fullness:
Consider pulling your hair into a half ponytail first, then gather the remaining hair into a full ponytail. This technique layers the hair, creating an illusion of a thicker ponytail.
Texture and Hold:
Apply a dry texture spray for added grip and volume. For extra fullness, you can back-brush or finger comb the roots and the body of the ponytail gently.
Advantages of Using Clip-In Ponytail Extensions
Flexibility and Ease:
Clip-in extensions are non-committal and can be easily attached and removed, allowing you to change your hairstyle frequently without commitment.
Styling Versatility:
These extensions can be styled with heat tools if they are made from human hair or high-quality synthetic materials that allow heat styling.
Variety and Accessibility:
Available in various lengths, colors, and styles, clip-in extensions can fit any budget and preference.
Proper Placement and Maintenance
Placement Technique:
To avoid any visible signs of the extension, place the clip-in ponytail at a diagonal slant across the base of your ponytail.
Caring for Extensions:
Limit heat exposure and use salon-quality products to maintain the extension’s quality. Regularly using a wide-tooth comb or a suitable brush will help prevent tangles and keep the extensions smooth.
13. French Braid with Waterfall Braid
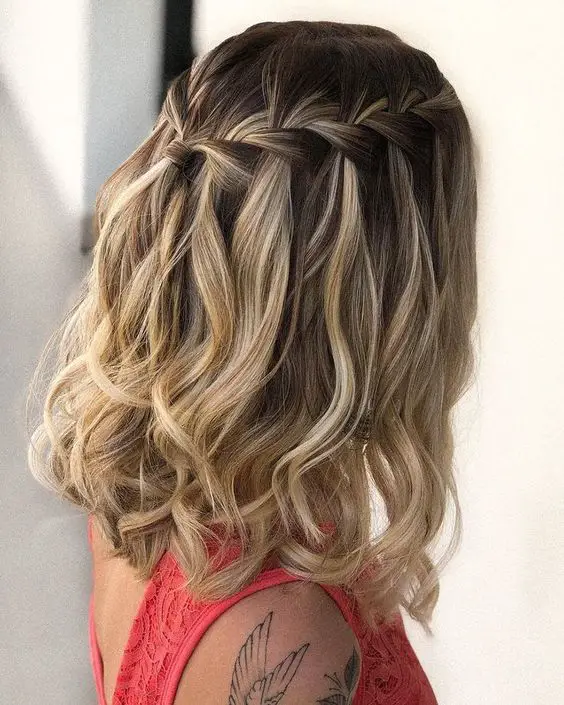
Achieving the French Braid with Waterfall Braid
Start with a Waterfall Braid: Begin at the top half of your head. Section off the front part of your hair and start braiding, dropping one strand as you add a new one to create the cascading effect of the waterfall braid.
Initiate the French Braid: Once you reach the back of your head with the waterfall braid, start the French braid on the bottom half. Incorporate the dropped strands from the waterfall braid into this new braid to connect the two styles seamlessly.
Continue the French Braid: Braid along the back of your head, integrating all strands to ensure a unified look. Secure the braid with an elastic band at the end.
Styling and Accessorizing
Transform into a Ponytail or Bun: You can choose to leave the braids as a ponytail or wrap the length into a bun for a more formal appearance.
Add Accessories: Enhance the hairstyle with decorative elements like bows, headbands, or flowers. These not only add a personal touch but can also help conceal any imperfections in the braiding.
Maintenance and Tips
Regular Practice: Mastering this braid may require practice. Don’t hesitate to watch the accompanying video for clearer guidance.
Moisturize and Prepare: Use a light mousse or spray to add texture to your hair before starting the braiding. This preparation helps in handling the hair and maintaining the style longer.
14. Fishtail Braid
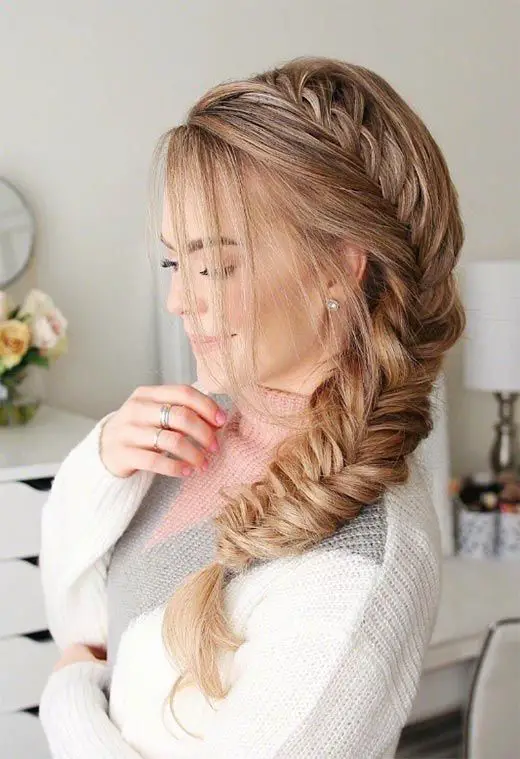
Achieving the Fishtail Braid
Prepare Your Hair: For optimal braiding, ensure your hair is slightly damp or apply a small amount of hair wax to the tips. This helps in managing and maintaining the braid’s shape.
Divide Your Hair: Split your hair into two even sections. This is the foundational step to start your fishtail braid.
Start Braiding:
Take a small strand from the outside of the right section.
Cross it over to the inside of the left section.
Repeat this step with a small strand from the outside of the left section, crossing it over to the inside of the right section.
Continue the Pattern: Maintain the rhythm of alternating strands from each side, pulling small pieces to keep the braid tight and even.
Secure the Braid: Once you reach the end of your hair, secure the braid with a hair tie. Optionally, cover the tie with a clip or barrette for a polished look.
Add Volume: Gently pull apart the braid to widen it, creating the illusion of thickness and volume, especially beneficial for thin hair.
Variations and Tips
For Short Hair: If your hair is short, gather it to one side before starting the braid. This approach helps in managing shorter layers.
French Fishtail Braid: Begin at the crown of your head, gradually adding hair to the braid as you work towards the nape, then continue with the regular fishtail technique.
Faux Fishtail Braid: For a simpler version, create a series of small ponytails and pull them through each other to mimic the look of a fishtail.
Maintenance: Avoid using heavy styling products as they can complicate the braiding process. Instead, opt for light texturizing sprays or mousses.
15. Crown Braid
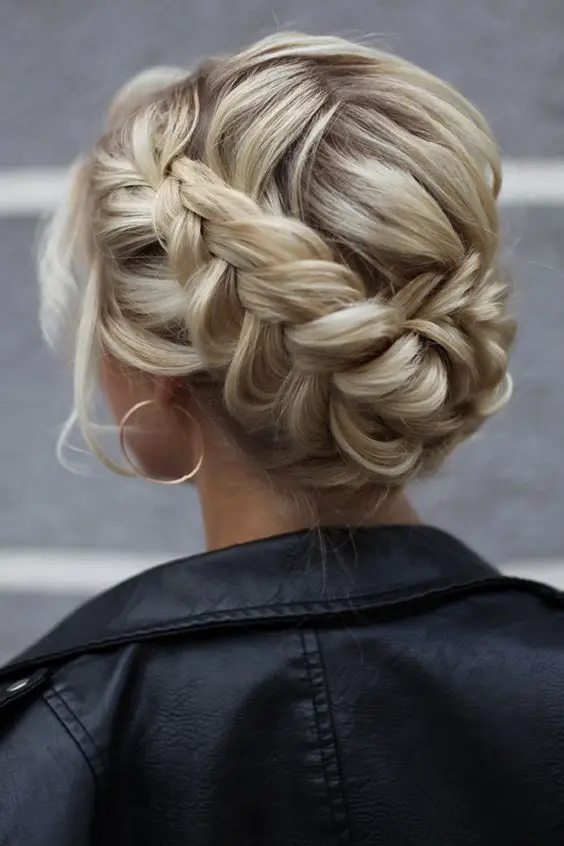
Achieving the Crown Braid
Preparation: Begin by curling your hair for added texture and apply a texturizing spray. This step is crucial for thin hair as it provides the necessary grip and volume for the braid.
Sectioning the Hair: Use a rat tail comb (optional) to divide your hair down the center into two equal sections. Brush each section to ensure it’s smooth and tangle-free.
Braiding:
Start braiding just above one ear, continue up and over your head, just above your hairline, and direct the braid behind your ear, continuing straight down to the ends.
Secure each braid with a clear mini elastic.
Placing the Braids:
Lift one braid and place it on top of your head, a few inches back from your forehead, and pin it securely with bobby pins.
Repeat with the other braid, ensuring to tuck the ends underneath to hide them.
Securing the Style: Spritz the braids with more texturizing spray to lock everything in place and add a final touch of volume.
Tips for Enhanced Style
Backcombing: Gently backcomb sections of your hair before you start braiding. This technique adds more fullness and makes the braids look thicker.
Smaller Sections: Use smaller sections of hair when braiding to create a more intricate and detailed look.
Variations: For a different style, consider the Dutch lace braid, which adds an elegant twist and helps keep bangs or layers neatly away from the face.
Crown Braid #1 and #2
Crown Braid #1: This simpler version involves creating two basic three-strand braids and pinning them across the top of your head.
Crown Braid #2: This more advanced style features a Dutch lace braid that wraps around the head, showcasing the texture of your hair and providing a more polished look.
16. Messy Bun with Textured Teasing

Messy Bun with Textured Teasing
Creating a messy bun with textured teasing is a fantastic way to add volume and style to thin hair. Here’s how you can achieve this look:
Start by Brushing Your Hair: Ensure your hair is free of tangles by brushing it thoroughly. This step is crucial for a smooth styling process.
Create a High Ponytail: Gather your hair and tie it into a high ponytail. Secure it with a hair tie, wrapping it a few times to lift the ponytail higher away from the head.
Tease Your Ponytail: Use a fine-tooth comb to gently backcomb your ponytail. This teasing process is key to creating the volume needed for a fuller bun.
Form the Bun: Take sections of your teased ponytail and loosely pin them around the base of the ponytail. Allow some strands to fall freely for a naturally messy look.
Secure with Hairspray: Apply a generous amount of hairspray to set your style in place, ensuring your messy bun holds throughout the day.
Add Texture: For additional volume, apply a texture spray before styling. This product enhances the thickness of your hair, making the bun appear fuller.
Maintain Your Style: To keep your messy bun looking great all day, consider using a lightweight, volumizing shampoo and conditioner. These products help maintain the health and thickness of your hair.
17. Sock Bun
Creating a sock bun is a clever and cost-effective way to achieve a voluminous updo, especially for those with thin hair.
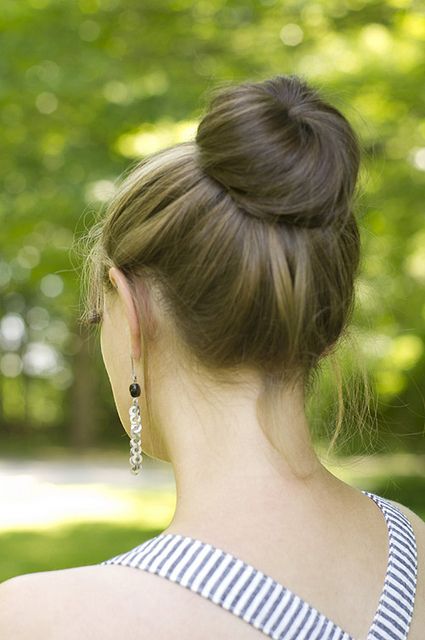
This method utilizes a sock to form a donut shape around which hair is styled, providing fullness and height without the need for expensive accessories or products.
Here’s a detailed guide on how to master the sock bun technique:
Step-by-Step Guide to Creating a Sock Bun
Prepare Your Sock: Choose an old sock that matches your hair color. Cut off the toe area and roll the sock into a donut shape.
Ponytail: Start by pulling your hair into a ponytail at the height where you want the bun to sit.
Set the Foundation: Place the ponytail through the hole in the center of your sock donut.
Distribute Your Hair: Fan out your hair around the sock, making sure it’s evenly spread over the sock to cover it completely.
Secure the Bun: Place another hair tie over the bun to hold the hair in place. Use bobby pins for additional security and to tuck in any loose ends or stray hairs.
Finishing Touches: Adjust the bun by rotating or spreading the hair to cover any visible parts of the sock. Apply a light mist of hairspray for extra hold if desired.
18. Chignon Updo
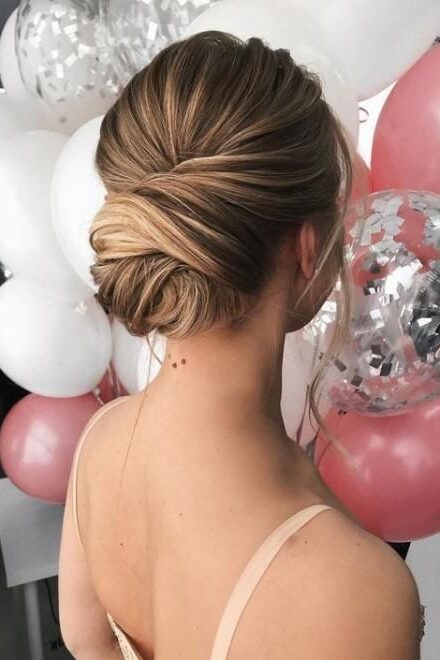
Achieving a Chignon Updo
Prepare Your Hair: Start by ensuring your hair is smooth and free of tangles. For fine hair, apply root volume products and use big-barrel rollers on the top section of roots before blow-drying to add volume.
Create a Ponytail: Gather your hair into a low ponytail at the nape of your neck. The position is crucial as it forms the base of your chignon.
Form the Bun: Loop the ponytail, twisting it slightly so the ends point towards the crown. This helps in securing the chignon neatly.
Secure with Bobby Pins: Fasten the loop at the base of your neck. Wrap the remaining ends around the ponytail elastic and pin them discreetly under the bun.
Finish with Hairspray: Use a strong-hold hairspray to lock in your style, ensuring your chignon holds throughout your event or day.
Tips for Different Hair Types
For Short or Fine Hair: Coil the hair tightly in a counter-clockwise direction for a sleek look, or loosely for a more casual appearance.
For Thick or Long Hair: Section your hair at the ears, pinning the top half up. Create a low ponytail with the bottom half, then twist and wrap the top section over and around the bottom ponytail, securing with pins.
19. Hairstyles with Clip-In Hairpieces (Optional)

Hairstyles with Clip-In Hairpieces (Optional)
Clip-in hairpieces are a fabulous option for adding volume and thickness to thin hair. Here’s a guide on how to choose and style these versatile accessories:
Choosing the Right Hairpiece:
Hair Toppers: Ideal for covering thinning areas, hair toppers come in various sizes and colors. A popular choice is the 6×5.5 inch human hair topper, available in black, which blends seamlessly with natural hair.
Clip-In Extensions: Both tape-in and clip-in extensions are excellent for adding length and volume. They are easy to apply and can be found in multiple shades to match your hair color perfectly.
Styling with Hairpieces:
For Volume: Place the hairpiece strategically where your hair is thinnest to add fullness. This is particularly effective on the crown or back of the head.
For Length: Clip-in extensions are perfect for achieving longer hairstyles without waiting for natural growth. They can be styled just like your natural hair with tools and products.
Maintenance Tips:
Caring for Hairpieces: Use a gentle shampoo and conditioner to clean your hairpieces. Avoid harsh chemicals that can damage the hair.
Styling Products: Lightweight products like mousse or spray can enhance the volume without weighing down the hairpiece.
Final Thoughts
Empowering women with thin hair to confidently navigate their hairstyling journey, this article explored an array of chic and simple hairstyles tailored to enhance volume and movement.
The careful selection of hairstyles optimized for thin hair underscores a commitment to providing practical, versatile solutions that celebrate individuality and emphasize the natural fullness of one’s hair.
The emphasis on volume-boosting techniques and the strategic use of hairpieces as optional enhancements further empower individuals to navigate the realm of hairstyling with confidence and grace.


You May Also Like
16 Stunning Blonde Hairstyle Ideas to Look Gorgeous
19 Prettiest Summer Hairstyle Ideas For Black Women