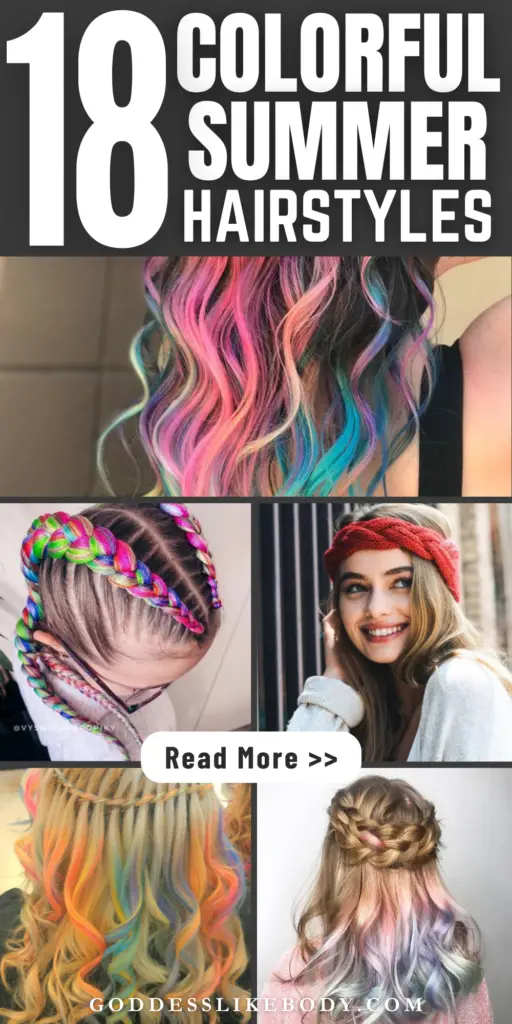
Festival Hair Inspiration: 18 Cute & Colorful Summer Hairstyles
Summer is the perfect season to experiment with your look, and what better way to do so than by embracing cute and colorful summer hairstyles? Whether you’re drawn to the whimsy of rainbow beach waves, the chic appeal of a side part, or the vibrant tones of honey-colored hair, festival season offers the ideal backdrop for showcasing your unique style.
This post will show you 18 trendy looks that capture the essence of summer hair color ideas.
Busy? Save this pin for later.
1. Rainbow Beach Waves
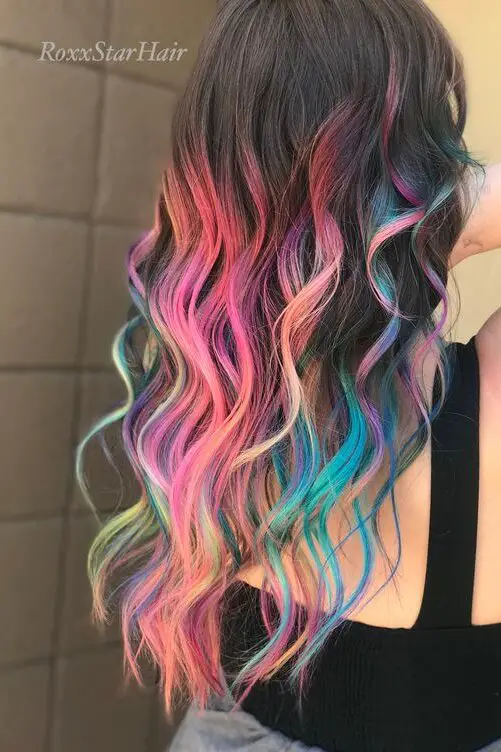
To achieve the vibrant and playful Rainbow Beach Waves, follow these straightforward steps:
Section Your Hair: Begin by dividing your hair into two parts using a silk scrunchie, one above each ear. This helps in managing your hair easily during the styling process.
Protect From Heat: Spray a heat protectant on each layer of hair. Use a wide-toothed comb to evenly distribute the product.
Curling: Employ a one-inch interchangeable barrel with a clip to curl your hair. Remember to alternate the curling direction for each section to enhance the natural look.
Cool Down: Allow the curls to cool before you style them further. This step is crucial as it sets the curls and prevents frizz.
Straighten the Underside (Optional): For a more laid-back vibe, use a flat iron to straighten the underside of your hair.
Wave Formation: Apply more heat protectant, then use a flat iron to create waves by pushing the hair down and curling the ends under.
Add Volume with Hairspray: Focus on the roots when applying hairspray to add volume.
Create the Beachy Effect: Gently brush through the curls with a wide-toothed comb to form a beachy wave look. Ensure to leave the ends out during curling to maintain the ‘beachy’ effect.
Loosen and Texturize: Run your fingers through your hair to loosen the waves for a more natural appearance. Finish off by applying a dry texturising spray for added texture.
By following these steps, you can effortlessly create Rainbow Beach Waves that are perfect for any summer festival, giving you a look that’s as colorful and dynamic as the season itself.
2. Fishtail Braid with Colored Hair Clips

Starting Your Fishtail Braid
Prepare Your Hair: Begin by integrating 100 grams of Kanekalon hair with your natural hair. This helps to add length and volume, making your braid fuller and more vibrant.
Section and Cross: Take a small section from the front of your hair and cross it under to the opposite side. This crossing action is the basis of the fishtail technique.
Building the Braid
Form Three Strands: Initially create three strands by combining two strands on one side and compensating with larger sections from the side with more hair.
Incorporate Hair Evenly: Start by gathering all your hair into the braid at the scalp and then gradually work towards the ends, slowly loosening the braid for a more relaxed look.
Maintain Proximity to the Body: Keep the braid close to your body to avoid loose strands and ensure the braid looks thick and neat.
Securing and Enhancing the Braid
Secure with a Ponytail Holder: Use a sturdy ponytail holder to keep the braid in place. Add a couple of twists above the ponytail to introduce an element of volume.
Add Extensions: For more flair, incorporate additional hair extensions by braiding them with small sections of your hair and securing with elastics.
Face-Framing Technique: Create a more personalized look by taking small sections from both sides of your face and crossing them over to form a fishtail that frames your face.
Personalizing Your Fishtail Braid
Add Color with Hair Clips: Use colored hair clips strategically placed along the braid to introduce pops of color and personalize your hairstyle.
Lock the Style: Pinch the hair at each crossing point to secure it in place, which helps in managing the braid as you create it.
Finish with Elastics: Tie off the end of the braid with elastics to ensure it stays intact. Optionally, pull at the sides of the braid to loosen it slightly and add volume for a fuller appearance.
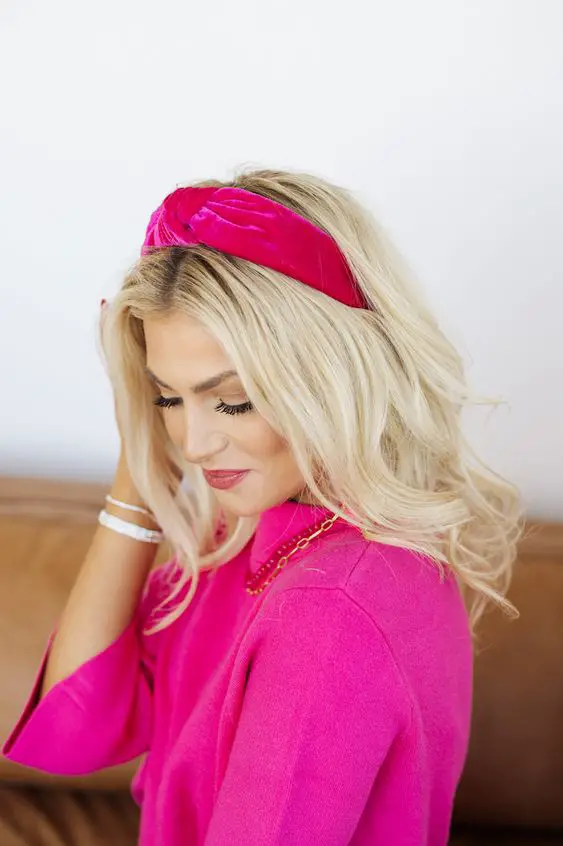
3. Half-Up, Half-Down with Neon Headband
Preparation and Styling
Apply Heat Protectant: Start by spraying your hair with a heat protectant to shield it from damage.
Curl Your Hair: Use a clipless curling wand to curl your hair, enhancing its texture and volume.
Brush Out Curls: Gently brush through the curls with a boar bristle brush for a softer, more natural wave.
Creating the Half-Up, Half-Down Style
Section Your Hair: Separate the top section of your hair at the level of your ears, ensuring not to take the entire top section to create an illusion of more volume.
Secure with Elastic: Tie this section with a hair elastic. For a polished look, wrap a small strand of hair around the elastic to conceal it.
Add Volume: Backcomb the hair at the crown of your head before securing to add a subtle lift to the style.
Incorporating the Neon Headband
Position the Headband: Place the neon headband either over your forehead or just above the secured section of hair, based on what suits your style best.
Cover the Band: Take small sections of hair, approximately the width of the headband, and flip them underneath the band. Loop some hair through the back of the headband and repeat until the headband is fully integrated into the style.
Finishing Touches
Secure and Set: Use bobby pins to secure any loose strands and ensure the headband stays in place. Finish the look with a spritz of hairspray for lasting hold.
Personalize: Add your personal touch by incorporating colorful hair clips or additional accessories that complement the neon headband.
This hairstyle, with its blend of playful and polished elements, is perfect for any summer festival, offering both style and comfort.
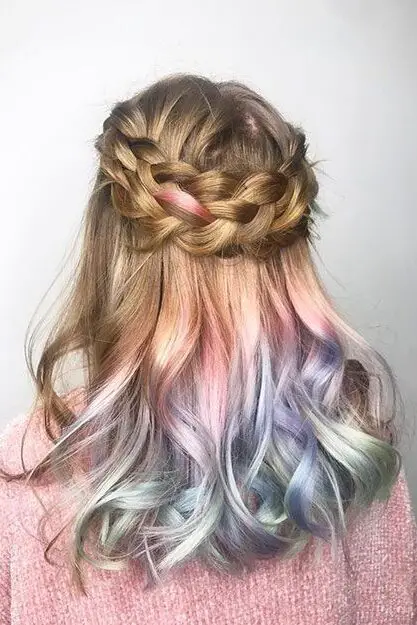
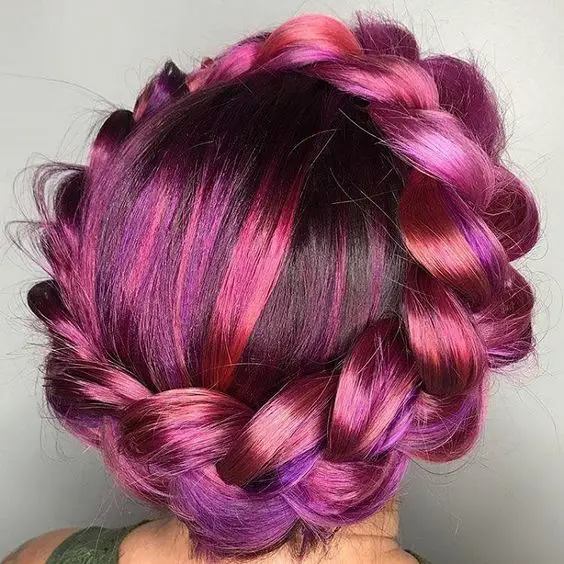
4. Dutch Braid Crown with Pastel Highlights
Starting Your Dutch Braid
Prepare Your Hair: Begin by making a deep side part and ensure your hair is tangle-free.
Sectioning: Pick up a section of hair near the part and split it into three equal sections.
Braiding Begins: Cross the upper strand under into the middle, then the bottom strand under into the middle.
Building the Crown
Adding Hair: Gradually add loose hair from above the braid to the upper strand before crossing it under and into the middle.
Continue Around the Head: Keep the braid close to the hairline and over the ears, continuing to incorporate hair into the outside sections and bringing it under the middle.
Securing the Braid: Once you reach the opposite ear, add in all the remaining loose hair and secure the braid with a small clear elastic.
Enhancing the Crown
Pancake for Volume: Tug on the edges of the braid to add volume if desired.
Positioning the Braid: Lay the loose braid across the front of the top of your head, alongside the beginning of the braid, and pin it down with bobby pins.
Hide the Ends: Tuck and hide the ends of the braid behind the Dutch braid for a neat finish.
Personalizing with Pastel Highlights
Add Color: Integrate pastel highlights into your hair before starting the braid for a charming summer look.
Accessorize: Consider adorning the hairstyle with accessories like ribbons to enhance the festive vibe.
This style not only gives you a chic look but also keeps your hair neatly tucked away, perfect for enjoying those warmer days.
5. Waterfall Braid with Neon Streaks

Starting Your Waterfall Braid
Prepare Your Hair: If your hair is not naturally curly, start by curling it with a Babyliss curling iron to create the necessary texture for the braid.
Sectioning: Create a waterfall braid on each side of your head. Begin at the temples and braid towards the back of your head, where both braids will meet.
Enhancing the Braid
Use Products for Hold and Shine: Apply Sexy Hair’s “Smooth & Seal” to combat frizz and add shine, and “So Touchable” hairspray to maintain the hold without stiffness.
Incorporate Neon Streaks: Attach neon-colored streaks into your braid using Duo lash glue for a bold, vibrant effect that stands out.
Styling and Accessorizing
Versatile Styling: This braid works beautifully with waves, curls, or straight hair, making it adaptable for any event, from casual gatherings to more formal occasions.
Add Embellishments: For an extra touch of flair, weave in small flowers, jeweled pins, or barrettes along the braid.
Practice Makes Perfect
Initially, the waterfall braid technique might seem challenging, but with regular practice, it becomes an easy and quick style to master, offering a stunning and intricate look each time.
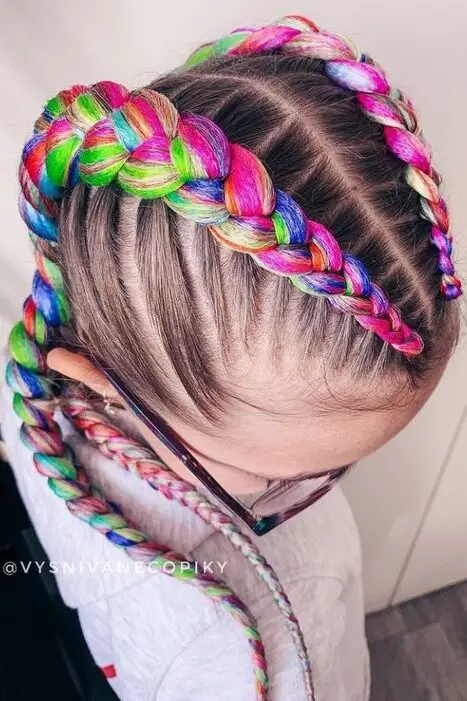
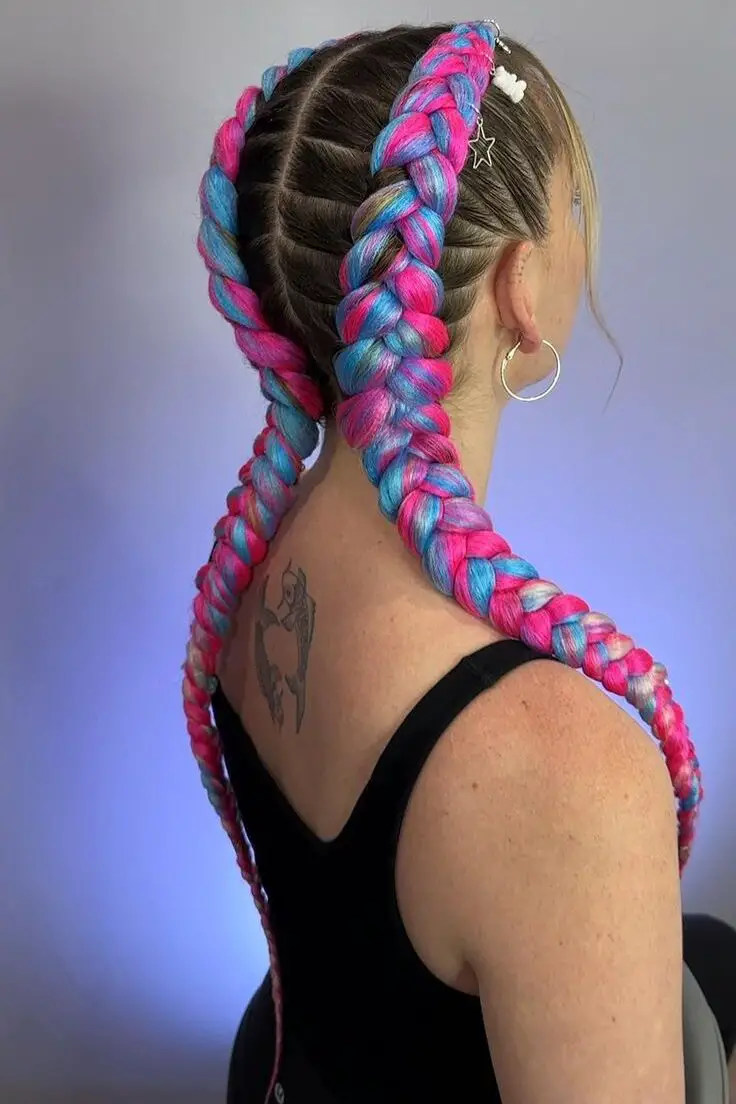
6. Boxer Braids with Rainbow Hair Extensions
Starting Your Boxer Braids
Prepare Your Hair: Begin by sectioning your hair into two equal parts. Use a light wax spray to tame any flyaways, ensuring a sleek base for your braids.
Attach the Extensions: Secure rainbow jumbo braid hair extensions at the base of each section using small elastics. Ensure the extensions are tight and evenly placed for a vibrant pop of color.
Braiding Technique
Begin Braiding: Start a Dutch braid on one side by taking small sections from the front and adding them under to the center, incorporating the hair extension as you go to showcase the colors.
Secure the Braid: Once you reach the nape of your neck, continue braiding the length of the hair and secure with an elastic. Repeat on the other side.
Personalizing Your Look
Adjust for Fullness: Tease out the braids slightly to make the colorful extensions more visible and to add volume to the braids.
Add Finishing Touches: For an extra secure fit, consider adding a second elastic or colorful ribbons at the ends of the braids.
This method not only ensures your boxer braids are vibrant and eye-catching but also keeps them neat and in place throughout any summer festival activities.
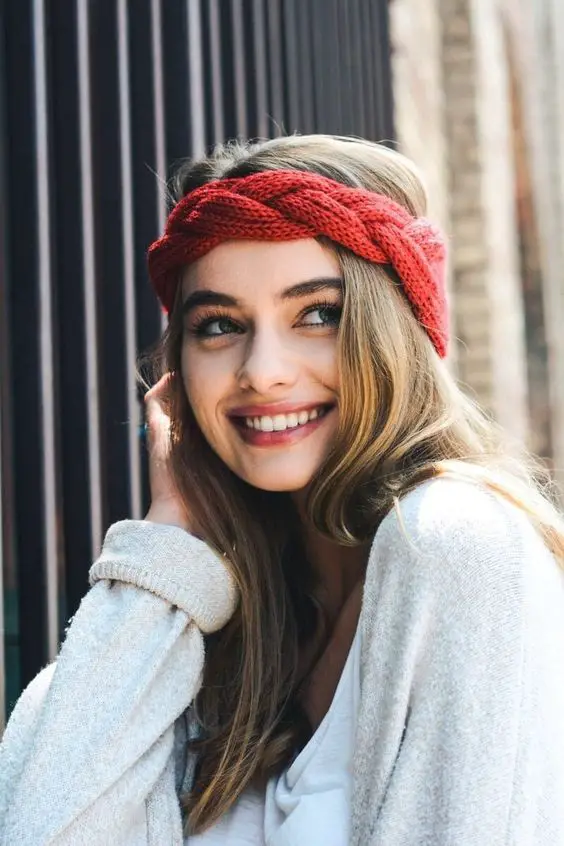
7. Headband Braid with Bright Yarn
Starting Your Headband Braid
Measure Your Head: Begin by measuring the circumference of your head to determine how much Brazilian wool you’ll need for the braid.
Braid the Wool: Start braiding the Brazilian wool. Once your braid is ready, attach an elastic at the ends to ensure it fits securely around your head.
Alternative Methods and Materials
Yarn Choices: Depending on how many braids you want in your headband, choose your yarn accordingly. For two, four, or six braids, specific types of yarn are recommended to achieve the best look.
Braiding Techniques: Follow detailed tutorials for different braiding styles, such as the 5-strand braid using 2ply cotton yarn, which offers a unique texture and appearance.
Crafting the Headband
Knitting and Braiding: Some tutorials suggest knitting an i-cord, then braiding these cords together to form the headband. This method provides a soft, stretchable band that’s comfortable to wear.
Securing the Headband: Attach the braided or knitted band to hair ties at each end to keep the headband secure and ensure it stays in place, even during active festival days.
Personalization and Style
Add Bright Yarn: Integrate bright, colorful yarn into your braids to make them stand out. This not only adds a pop of color but also enhances the festive feel of your hairstyle.
Custom Fit: While the standard measurements are provided, the inclusion of elastic in the design allows for some variation in size, ensuring a perfect fit for different head sizes.
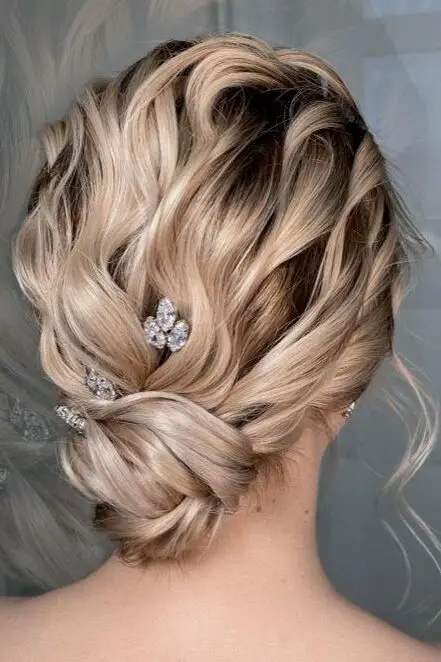
8. Loose Bun with Sparkly Bobby Pins
Starting Your Loose Bun
Prepare Your Hair: Start by gently brushing your hair to remove any tangles. This ensures a smooth base for your bun.
Create a Side Part: Opt for a side part to add an asymmetrical allure to the hairstyle. Tuck the shallower side behind your ear for a sleek look.
Styling the Bun
Form the Bun: Gather your hair into a low, loose bun at the nape of your neck. Secure it with a soft hair tie.
Loosen Up: Gently pull out small sections of hair around your face and the bun to create a relaxed, natural appearance.
Adding Sparkly Bobby Pins
Choose Your Style: Decide between various pinning styles such as horizontal placement, sunburst, staggered line, crisscross half-updo, or a simple bun overlay.
Insert Bobby Pins: Carefully place rhinestone bobby pins according to the chosen style. For a sunburst effect, arrange pins around the ear; for a staggered look, place them on the deeper side of the part.
Securing the Style
The Sewing Method: For a durable hold, especially in messy buns, sew through the base of the bun with a bobby pin, catching both bun and scalp hair.
Angled Placement: Insert a bobby pin at an angle into the bun, push down to the scalp, turn slightly, and push the rest of the way for thick hair.
Customizing Your Look
Pattern and Placement: Adjust the placement and pattern of the sparkly bobby pins to suit your personal style or the specific event.
Purchase Options: Sparkly bobby pins can be sourced from various outlets, including Amazon Prime or Justine Marjan’s collection with Kitsch, offering a range of styles to enhance your look.
9. Milkmaid Braid with Colored Flowers
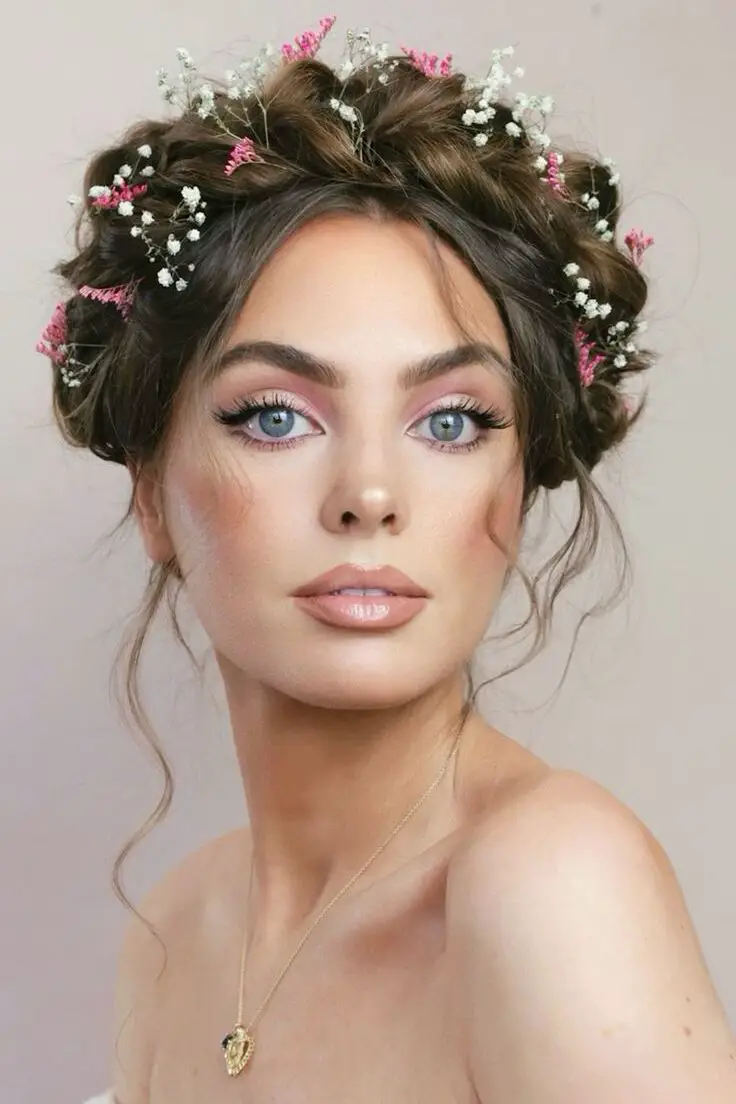
Step-by-Step Tutorial: Milkmaid Braid with Colored Flowers
1. Preparation and Hair Sectioning
Part Your Hair: Depending on your comfort, opt for a center or side part.
Create Pigtails: Divide your hair evenly into two sections and secure them into pigtails at each side.
2. Braiding and Setting
Braid Each Section: Turn each pigtail into a tight braid, securing the ends with small elastics.
Flip and Pin: Flip each braid up over your head and secure with bobby pins, ensuring they are hidden within the hair to maintain a clean look.
3. Adding Extensions and Volume
Attach Extensions: For added length and volume, attach hair extensions at the base of the braids.
Tease for Volume: Use a texturizing powder to tease the hair gently, starting from the bottom layers up to the front.
4. Securing and Embellishing the Crown
Form the Crown: Lay the braids across the top of your head, tucking the ends behind the opposite braid.
Add Flowers: Intersperse small, colorful flowers along the braid, pinning them securely.
5. Final Touches
Secure with Elastic: Use a small elastic band to tie the top layers below the extensions discreetly.
Adjust and Set: Make any final adjustments to ensure the braid sits comfortably and symmetrically. Use hairspray for extra hold.
This hairstyle, inspired by 60s tiara crowns and bohemian chic, not only offers a picturesque look but also incorporates vibrant colors through flowers, making it ideal for any summer festival or event.
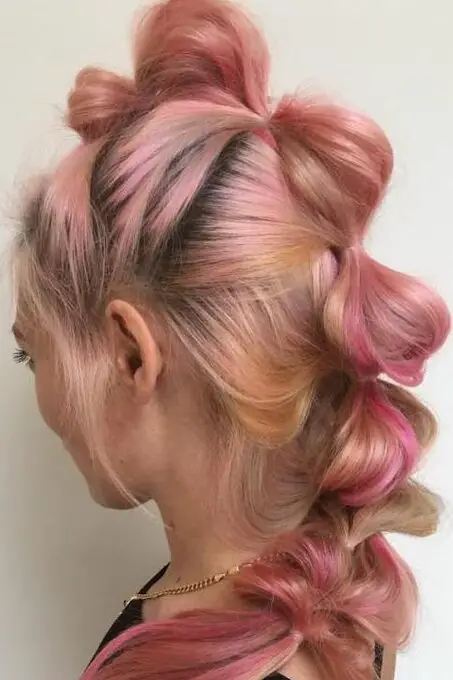
10. Bubble Braid with Neon Hair Mascara
Creating Your Bubble Braid
Section Your Hair: Start by dividing your hair into multiple parts. This will help in applying the neon hair mascara evenly.
Apply Neon Hair Mascara: Generously apply UV neon hair gels by Pink Glow to each section. This will not only color your hair but also help in forming the bubbles later.
Create Bubbles: Gently pull apart each section to form bubbles. Use small rubber bands to secure these bubbles. Wrap a small piece of hair around each band to conceal it for a cleaner look.
Enhancing the Style
Use UV Light: To make your neon colors truly pop, use a UV light bulb. This enhances the UV color in your hair, making it glow in the dark.
Add Hair Extensions: For fuller bubbles, consider adding hair extensions. This adds volume and makes each bubble more pronounced.
Styling Tips
Eye Makeup: Complement your bubble braid with rainbow eyeshadow, starting from the outer corner up to the eyebrow, and define your eyes with Rimmel exaggerate eyeliner.
Lip Color: Choose between a neutral shade like Collection lip butter in cappuccino 2 or a bright color such as Bobbi Brown neon pink to balance the vibrant hair.
Final Look
Secure and Set: Ensure each bubble is secured tightly with the bands, and apply a final spritz of hairspray to hold the style in place.
Personalize Your Look: Feel free to add additional neon streaks or use different colors of hair mascara to create a unique pattern within your bubbles.
This hairstyle is perfect for festivals or any event where you want to stand out. It’s not only eye-catching but also fun to create and wear.
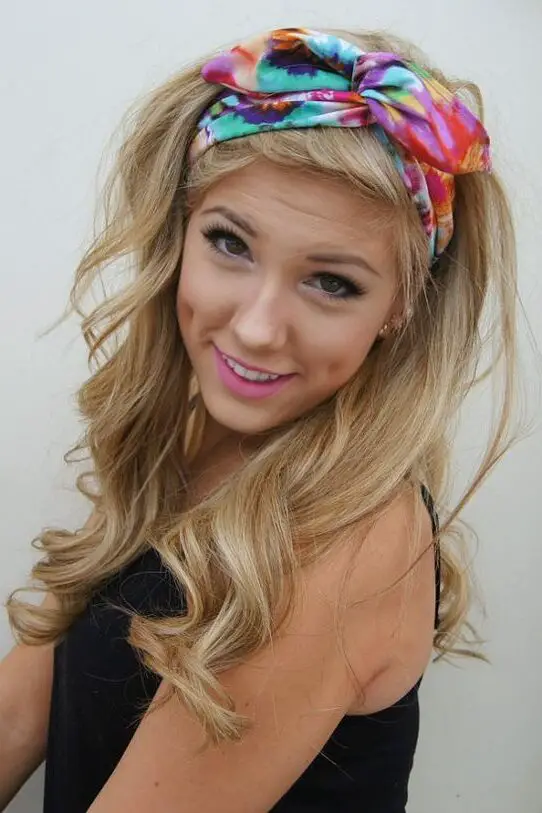
11. Half-Up Twist with Tie-Dye Scarf
Preparing Your Tie-Dye Scarf
Stitch the Edges: Start by using a zig-zag stitch along the raw edge of your scarf with cotton thread to prevent fraying.
Fold and Twist: Fold the scarf crosswise twice to form a smaller rectangle, then twist it firmly to create a zebra stripe effect.
Dye Application: Place the twisted scarf in a dyeing pan, cover it with ice cubes, and sprinkle with Procyon fiber reactive dyes: Dances with Raisins in the center, Wedgewood Blue and Wasabi on the ends.
Set the Dye: Allow the scarf to sit overnight, letting the ice melt and the dye to set for vibrant coloration.
Styling Your Hair
Curl and Part: Curl your hair using a wand and part it down the middle for a loose, romantic effect.
Twist and Secure: Take the front section of hair, split it in half, and loosely twist the strands. Continue smoothing and twisting to the side, securing with a bobby pin.
Repeat on Both Sides: Perform the same twisting on the other side, ensuring both twists tuck underneath each other for a layered look.
Finalizing the Hairstyle
Rinse and Dry Scarf: After dyeing, rinse the scarf under cold water until clear, then wash in hot water with textile detergent and a splash of dye fixative.
Iron and Wrap: Dry and press the scarf with a hot iron. Wrap it around your head, either tying at the back or using it to enhance your half-up twist.
Secure with Pins: Use bobby pins to keep the scarf in place, ensuring it complements the twisted hair sections.
This hairstyle blends the casual elegance of a half-up twist with the vibrant flair of a tie-dye scarf, perfect for adding a pop of color and sophistication to your summer festival look.
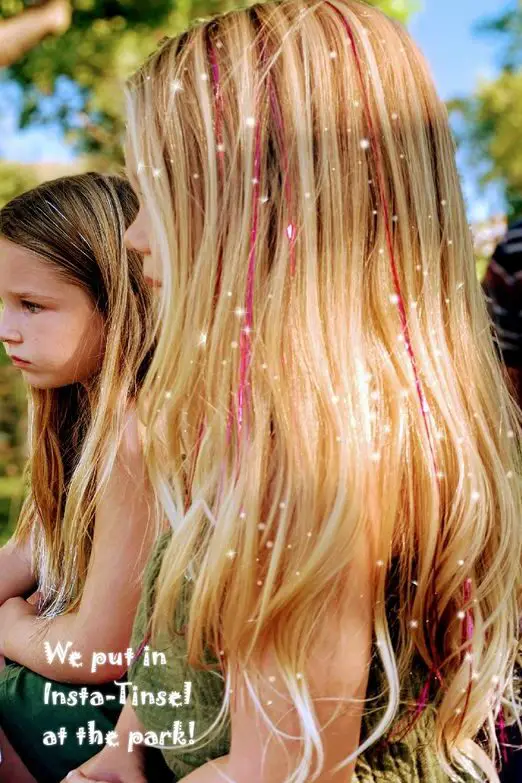
12. Beachy Waves with Neon Hair Tinsel
Starting Your Beachy Waves
Condition Your Hair: Apply a leave-in conditioner to ensure your hair remains hydrated and protected throughout the styling process.
Dry Your Hair: Use a blow dryer to achieve a smooth base before you start curling.
Section Your Hair: Divide your hair into four sections for more manageable styling, or work one side at a time for precision.
Curling Technique
Choose the Right Tool: Use a one-inch titanium-plated curling iron with a clip, specifically one with a thumb toggle feature to better control the curl.
Curling Process: Start the curl about halfway down the length of your hair. Clamp the hair and rotate the iron while keeping the thumb toggle open; this technique ensures waves with straighter ends.
Heat Settings: Set the curling iron to 365 Fahrenheit to prevent hair damage while ensuring effective styling.
Timing: Hold each curl for three to four seconds to set the wave without overheating the hair.
Enhancing and Setting the Waves
Shake and Adjust: After curling, shake out the curls to let them fall into natural-looking waves. If any sections appear flat, re-curl them briefly.
Apply Styling Products: Use a texturizing spray for added volume and a light hold hairspray to maintain the waves without stiffness.
Add Shine: Finish by applying a small amount of hair oil to give your waves a glossy look and to nourish your hair.
Personalizing Your Style
Incorporate Neon Tinsel: For a festival-ready look, weave neon hair tinsel into your waves, securing them at the root. This adds a playful sparkle and color to your hairstyle.
Volume and Texture: Use dry shampoo at the roots to absorb excess oil and add volume, enhancing the overall body of your beachy waves.
13. Face-Framing Braids with Pastel Highlights
Starting Your Face-Framing Braids
Prepare Your Hair: Begin by applying a smoothing serum to damp hair and blow-drying it straight. This provides a sleek, manageable base for braiding.
Section Your Hair: Create a center or deep side part depending on your preference. From here, section off the front pieces of hair that will be braided.
Braiding Technique
Begin Braiding: Start a small French braid at the hairline on one side, adding small sections as you work down, keeping the braid close to the face.
Secure the Braid: Once you reach just below the ear, secure the braid with a transparent elastic band. Repeat the same on the other side of the part.
Adding Pastel Highlights
Choose Your Colors: Select temporary pastel hair colors in shades like lavender, mint, or soft pink. These can be in the form of chalks, sprays, or even clip-in extensions.
Apply Color: If using sprays or chalks, apply these directly to the strands in the braid, focusing on the mid-lengths to ends for a subtle gradient effect.
Finishing Touches
Set Your Style: Use a light hold hairspray to set the braids in place, ensuring they frame the face beautifully throughout the day.
Accessorize: Optionally, add small floral or pearl pins along the braid for a decorative touch, perfect for festival season.
This hairstyle not only highlights your facial features but also incorporates playful pastel tones, making it ideal for both festival goers and those looking to add a touch of summer flair to their look.
14. Flower Crown with Rainbow Yarn
Creating a Vine Headpiece
Materials Needed: Gather Silk Ribbon Yarn and Banana Fiber Yarn in various colors.
Constructing the Vine: Start by intertwining the Silk Ribbon Yarn and Banana Fiber Yarn to create a strong, colorful vine base.
Crafting Puffy Flowers
Yarn Selection: Use Banana Fiber Yarn for its texture and durability.
Flower Creation: Follow specific instructions to crochet puffy flowers, ensuring they are plush and vibrant.
Attaching Flowers to the Vine
Assembly: Securely attach each flower to the vine headpiece, spacing them evenly for a balanced look.
Crochet Pattern for Flower Crown
Tools Required: Use worsted weight yarn with a 4mm crochet hook.
Flower Techniques: Employ single crochet stitches and Bobble Stitch to create distinct, textured flowers.
Customizing Your Flower Crown
Yarn and Hook Adjustment: Adjust the size of the yarn and hook as needed for different effects.
Colorful Design: Incorporate a rainbow of puff balls for a lively, colorful crown.
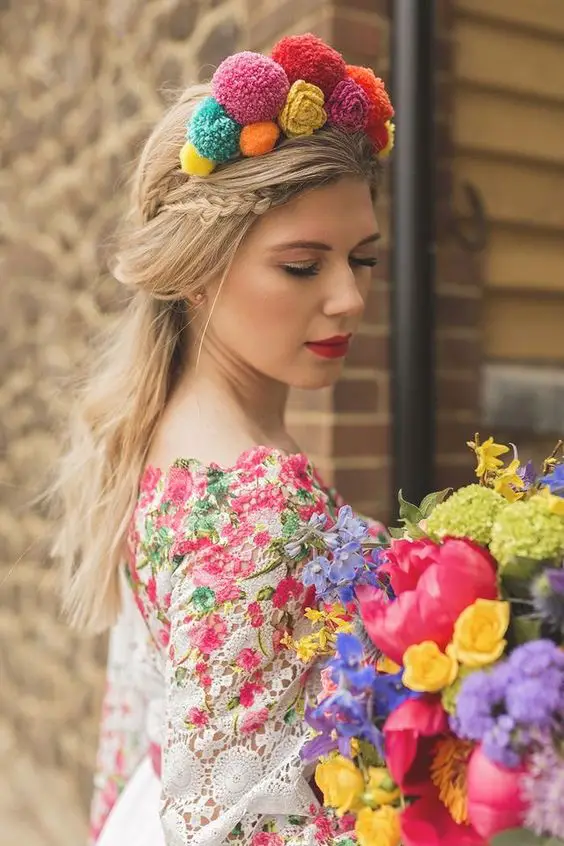
Pom Pom Crown as a Floral Head-Dress
Making Pom Poms: Utilize a pom pom maker or handmade cardboard rings to create uniform pom poms.
Arrangement: Arrange the pom poms in a floral pattern and attach them to an Alice band for easy wearing.
General Approach to Flower Crown Creation
Materials: Prepare rainbow yarn, wire, and glue.
Yarn Flower Techniques: Create flowers using looping or wrapping methods for varied textures.
Crown Assembly: Attach the yarn flowers onto the wire base, securing them with glue for durability.
This methodical approach allows you to design a bespoke flower crown that stands out at any summer festival, blending creativity with personal style.
15. Bandana Twist with Mermaid Hair
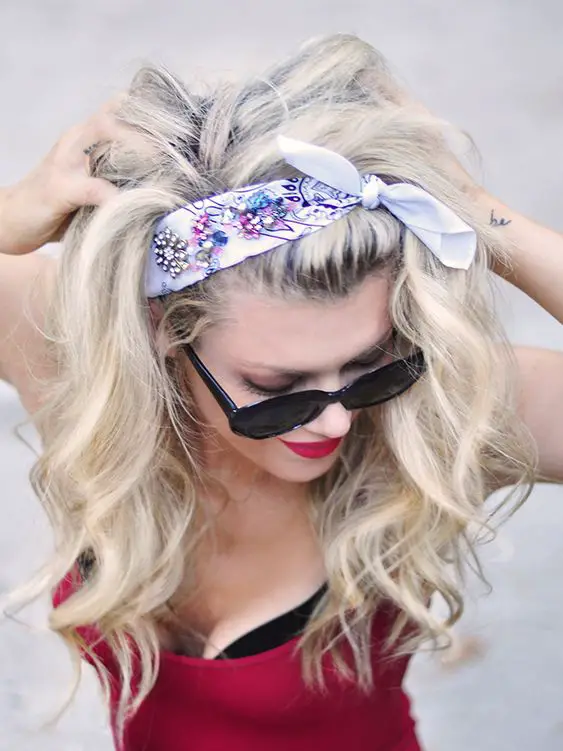
Creating the Bandana Twist Mermaid Hairstyle
Prepare the Bandana: Fold your bandana in half and roll it up lengthwise. This will be used to wrap around your hair sections.
Section and Wrap: Divide damp hair into three sections for optimal curliness. Wrap each section around the bandana in a figure eight or infinity pattern.
Set the Style: Leave the bandana-wrapped hair overnight. This no-heat method ensures curls set without damaging the hair.
Styling and Personalizing
Remove Bandana: In the morning, carefully unwrap the bandana from each section to reveal your beachy waves.
Add a Headband: For a complete look, use a headband at the front. This adds an extra flair and helps manage any loose strands.
Twist and Pin: Optionally, twist the front pieces of your hair into a half ponytail, securing them with bobby pins for a chic, pulled-back style.
Mermaid Braid Integration
Braid Your Hair: Following the Mermaid Braid Hair Tutorial, start with a French braid and transition into a mermaid braid. This style is particularly suited for long, side-swept hair.
Incorporate the Bandana: Weave the bandana through the braid for a colorful, festive look, enhancing the mermaid theme.
Special Occasion Variation: 4th of July Themed Braid
Mermaid Cage Type Braid: Integrate a bandana into your braid as demonstrated by Alicia Hill in her popular tutorial, perfect for thematic events like the 4th of July.
This hairstyle is not only stylish and suitable for various occasions but also gentle on your hair, minimizing the risk of breakage while sleeping.
16. Space Buns with Colored Ribbons
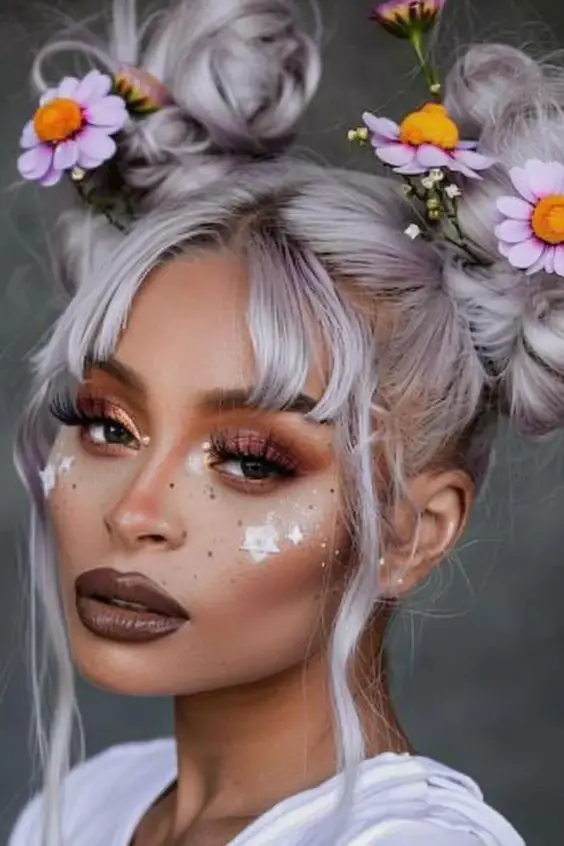
Space buns are a delightful and playful hairstyle that has maintained popularity due to their versatility and fun appeal. Whether you’re attending a festival or just want to add a quirky touch to your everyday look, space buns can be easily adapted to fit your style. Here’s how to create this trendy updo with a colorful twist using ribbons.
Classic Space Buns
Prepare Your Hair: Start by applying dry shampoo to give your hair more texture. This helps in managing and styling, especially if you have fine hair.
Create Pigtails: Divide your hair into two equally parted pigtails at your desired height.
Form the Buns: Tease each pigtail slightly, twist them into a rope, and coil around the base to form your buns. Secure with bobby pins or hair ties.
Half-Up Space Buns
Section Your Hair: For a softer look, opt for half-up space buns. Pull half of your hair up into a loose bun or pigtail.
Twist and Secure: Twist the ponytail into a rope and wrap it into a bun. Secure with pins, ensuring it blends seamlessly with the rest of your hair.
Braided Space Buns
Braid Each Pigtail: Instead of twisting, braid each pigtail tightly.
Wrap the Braid: Coil the braids around the base to form neat buns and pin them securely.
Incorporating Colored Ribbons
Weave Ribbons: Choose four strips of your favorite colored ribbons. Begin weaving them from the bottom of each pigtail, adjusting the loops to tighten as you progress upward.
Secure the Ends: Once you reach the top, secure the ends of the ribbons with a small dab of glue and cover with a decorative flower or button for a neat finish.
Attach the Clip: Fix a clip to the back of the decorative element to hold the bun securely in place.
This hairstyle not only stands out but also adds a vibrant and festive touch to your look, perfect for any summer gathering or festival.
17. Glitter Roots with Neon Dutch Braid Crown
Creating Glitter Roots
Choose Your Glitter and Gel: Start by selecting a hair gel and loose glitter. Opt for glitter colors that complement your hair and outfit for the event.
Mix Glitter with Gel: In a small bowl, mix a sufficient amount of loose glitter with hair gel to create a sparkly paste.
Apply to Roots: Using a dye brush, carefully apply the glitter-gel mixture directly onto your hair roots. Work in sections to ensure even coverage.
Crafting the Dutch Braid Crown
Section Your Hair: Divide a small section of your hair at the front into three equal parts.
Start the Braid: Begin the Dutch braid by crossing the right strand under the middle strand, then the left strand under the middle, adding small new sections of hair each time you cross.
Continue Around the Head: As you braid around your head, keep adding small sections until you reach the opposite side.
Finish the Braid: Once you run out of new hair to add, angle the braid across the top of your head and secure the end with a clear elastic or bobby pins.
Combining the Styles
Integrate Glitter Roots with Braid: After applying glitter to the roots, start braiding as the gel sets to ensure everything stays in place.
Enhance Volume: Gently pull at the edges of the braid to make it fuller and more prominent.
Set with Hairspray: Use a light hold hairspray to secure both the glitter roots and the braid, ensuring your style holds throughout the event.
This combination not only highlights the vibrant and playful aspect of festival fashion but also ensures your hairstyle stands out in the crowd.
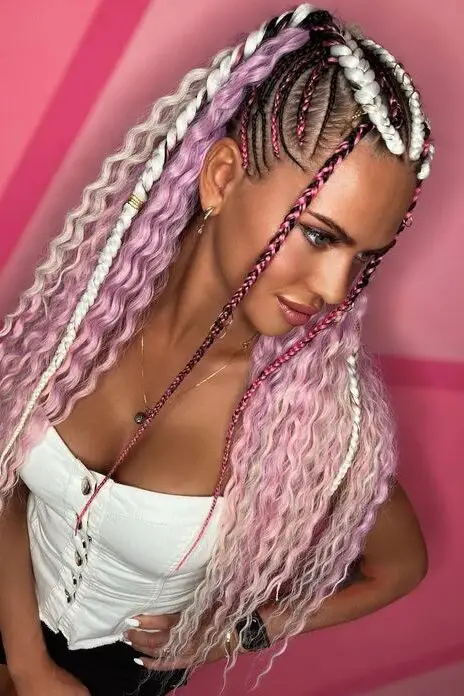
18. Split-Dyed Hair with Boxer Braids
Preparing Your Hair and Dye Application
Wash and Dry: Start with clean, dry hair to ensure even absorption of the dye.
Mix Dyes: Combine teal and emerald green dyes for one half of your hair, and blend fuchsia with hot pink for the other half.
Braiding Process
Section Hair: Use a rat tail comb to create a straight middle part, dividing your hair into two sections for the split dye.
Apply Dye: Carefully apply your mixed dyes to each section, ensuring full coverage.
Braid Each Side: Using a latch hook crochet needle and a detangler brush, tightly braid each section starting close to the scalp.
Adding Textures and Colors
Weave Integration: Loop three colors of weave around natural hair strands before braiding to introduce a silvery blonde effect.
Secure and Style: Finish the braiding process by securing the ends and dipping them in boiling water for a wavy appearance.
Final Touches
Trim and Shine: Trim any excess weave and apply a light oil spray to give your braids a glossy finish.
Accessorize: Embellish your braids with vibrant jewelry for a festive look.
This method ensures that your split-dyed hair with boxer braids is not only striking in color but also neatly styled, making it a perfect choice for any summer event.
Conclusion
Throughout this exploration of cute and colorful summer hairstyles, we’ve ventured through a kaleidoscope of vivid hues and innovative styles, perfect for amplifying the festival season’s exuberance.
From the dynamic playfulness of rainbow beach waves to the intricate elegance of Dutch braid crowns accented with pastel highlights, each style has been designed not just to captivate but also to inspire personal expression and creativity.
These 18 trendy looks serve as a canvas for your individuality, blending timeless appeal with contemporary flair to make your festival ensemble unforgettable.


You May Also Like
9 Cute Hairstyle Ideas for Bad Hair Days

12 Best Unique Hairstyles For Woman With Round Faces