Hey fall fashionistas! Crisp air, cozy sweaters, and pumpkin spice lattes – autumn is finally here! But let’s be honest, with the changing seasons, our hair care routines need a bit of a refresh too.
This post shows you 16 outstanding, long-hair hairstyle ideas that are perfect for embracing the fall vibes. Get ready to add some autumnal flair to your long locks and turn heads wherever you go!
Busy? Save this pin for later.
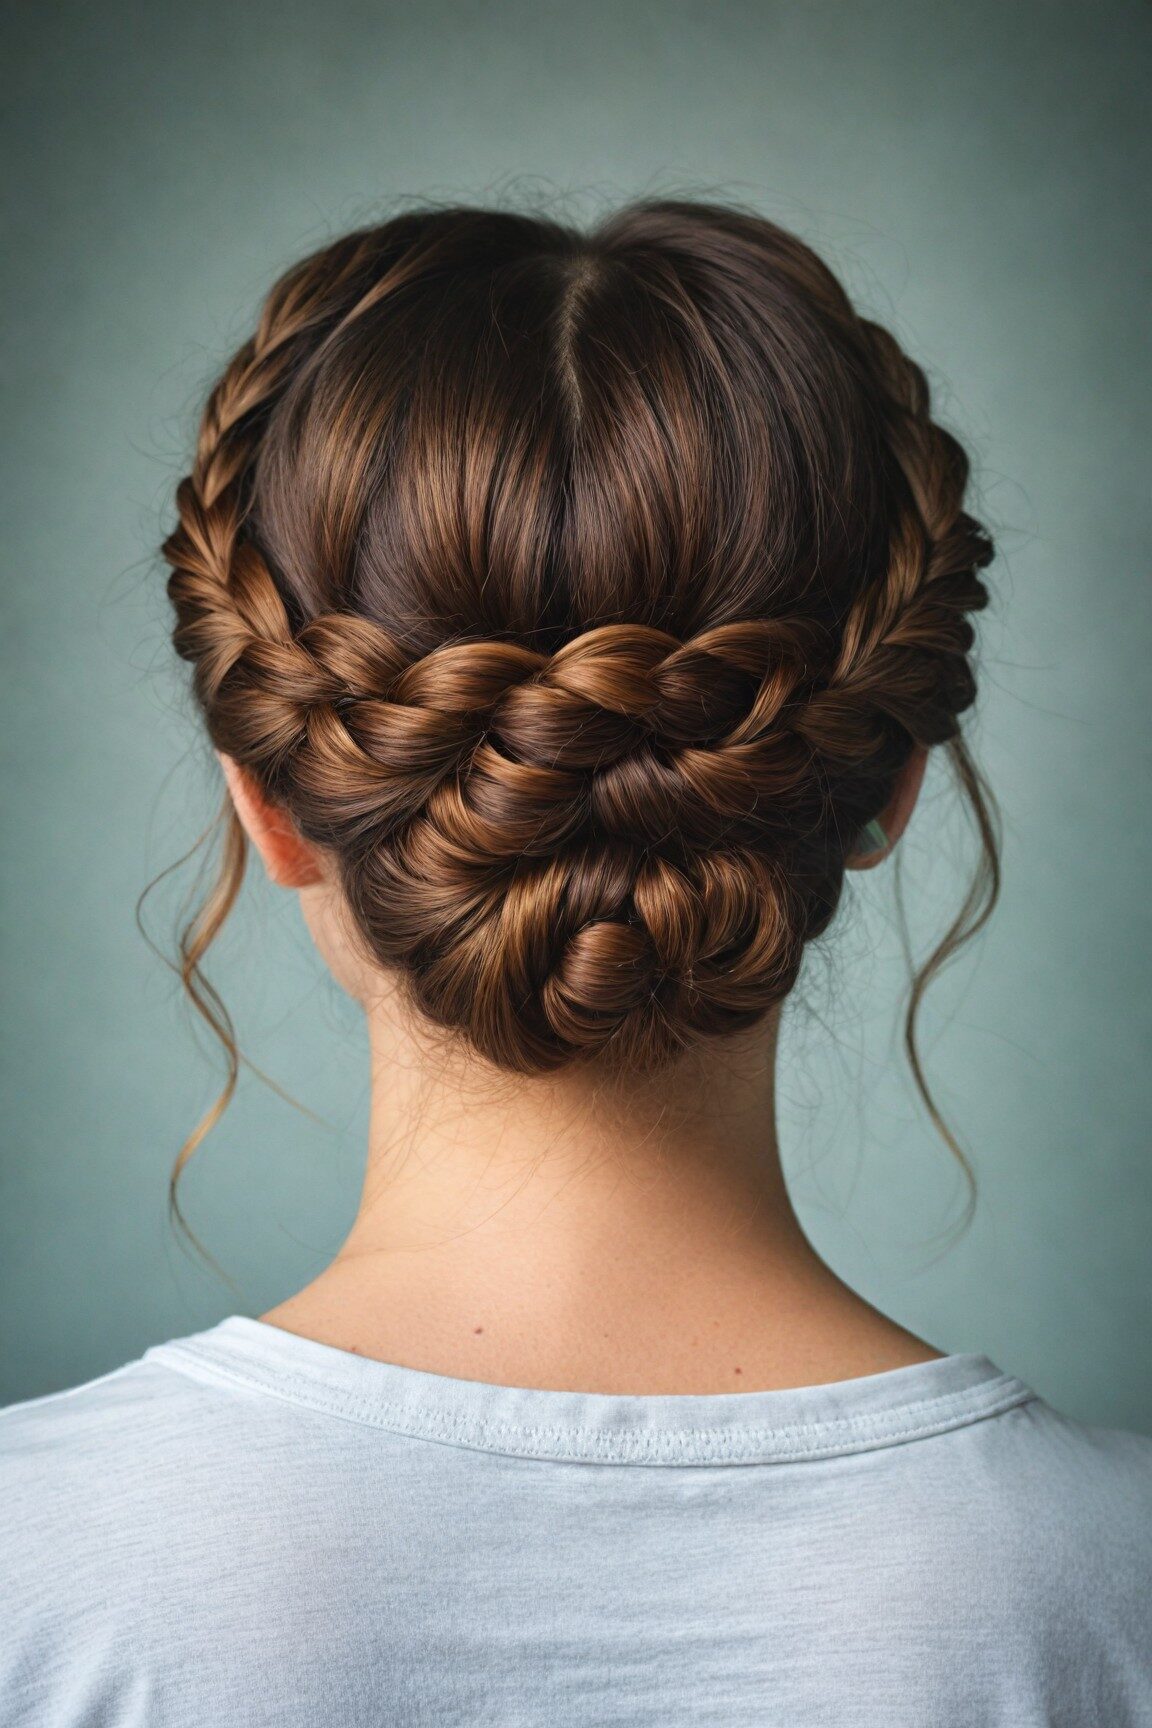
1. Infinity Braid
The Infinity Braid, often referred to as the lemniscate braid, is a captivating style that mirrors the infinity symbol (∞).
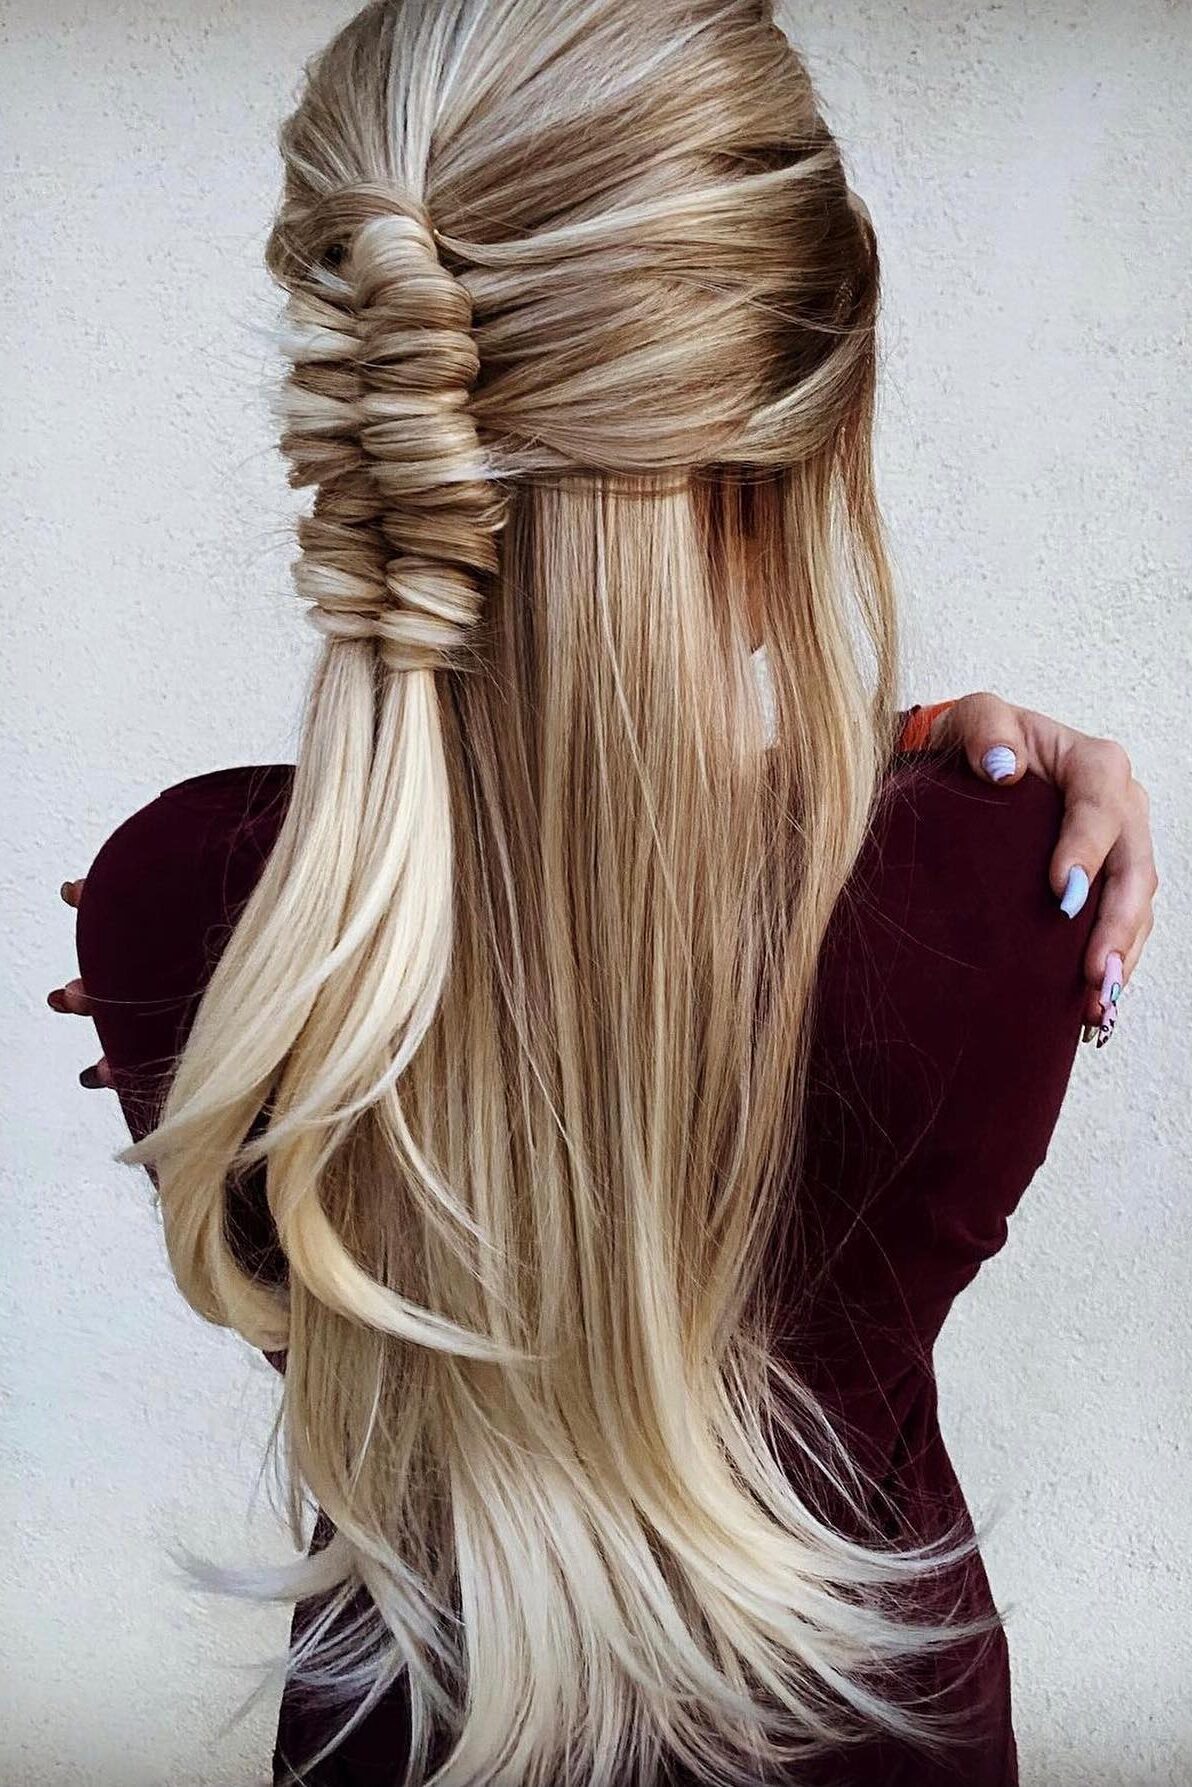
This braid weaves your hair into a continuous loop, creating a seamless and endless pattern that’s both eye-catching and unique.
Perfect for those who love to add a twist to traditional braiding techniques, the infinity braid stands out due to its intricate looping, resembling a figure-eight.
To achieve this look, you’ll start by splitting your hair into two main sections. The process involves a specific technique where you cross strands over and under each other in a consistent, looping motion, essentially crafting the figure-eight pattern that defines the infinity braid.
This can be initiated from either the top of your head or from the nape of your neck, depending on the desired effect and how you want the braid to lay.
While the braid might look complex, it’s all about the rhythm and handling of the hair. You’ll take a small piece of hair from the back of one section and continuously wrap it around the two main sections in the infinity pattern.
The key is to add small sections of hair into the wrap as you go, which helps to maintain the thickness and continuity of the braid.
Securing the braid properly is crucial as it prevents unraveling and helps maintain the intricate detailing. Small elastic bands or pins can be used to hold the braid in place once completed.
2. Pumpkin Spice Braid
Inspired by the cozy, aromatic allure of autumn, the Pumpkin Spice Braid weaves together the essence of the season with a dash of playful creativity in your hairstyle.
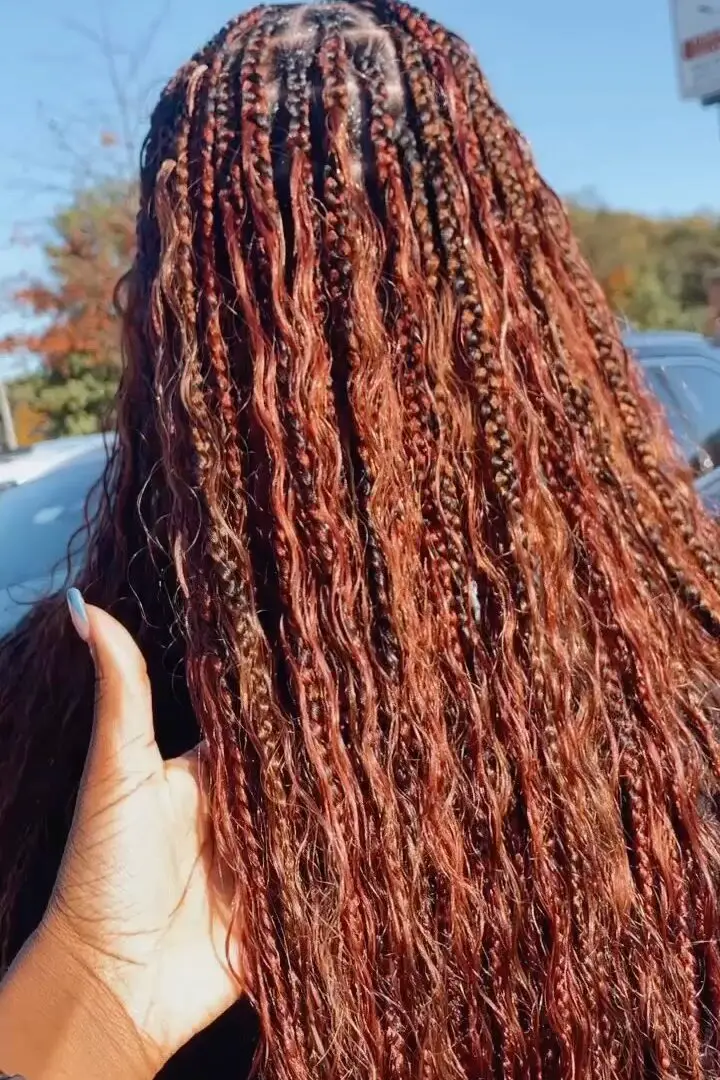
Imagine the warmth of pumpkin spice colors intertwined in a braid that’s perfect for any autumn gathering or just a casual day out.
To embark on creating this festive hairstyle, you’ll want to start with textured hair to hold the braid better.
If your hair is naturally straight, a quick way to add texture is by using a curling iron or some texturizing spray. Once your hair is prepped, begin by sectioning it as you would for a basic three-strand braid.
The charm of the Pumpkin Spice Braid comes from its ability to blend different shades that mimic the rich colors of autumn.
If you’re adventurous with hair color, incorporating strands of copper, auburn, or golden hues can elevate the look. However, even without color, the styling technique itself is enough to turn heads.
As you braid, consider weaving in a cinnamon stick or clipping in a small, decorative pumpkin charm to truly embrace the theme.
Once your braid is complete, securing it with a fabric scrunchie in a matching autumn color can add both functionality and style. This hairstyle isn’t just about the visual appeal; it’s about making a statement that celebrates the season.
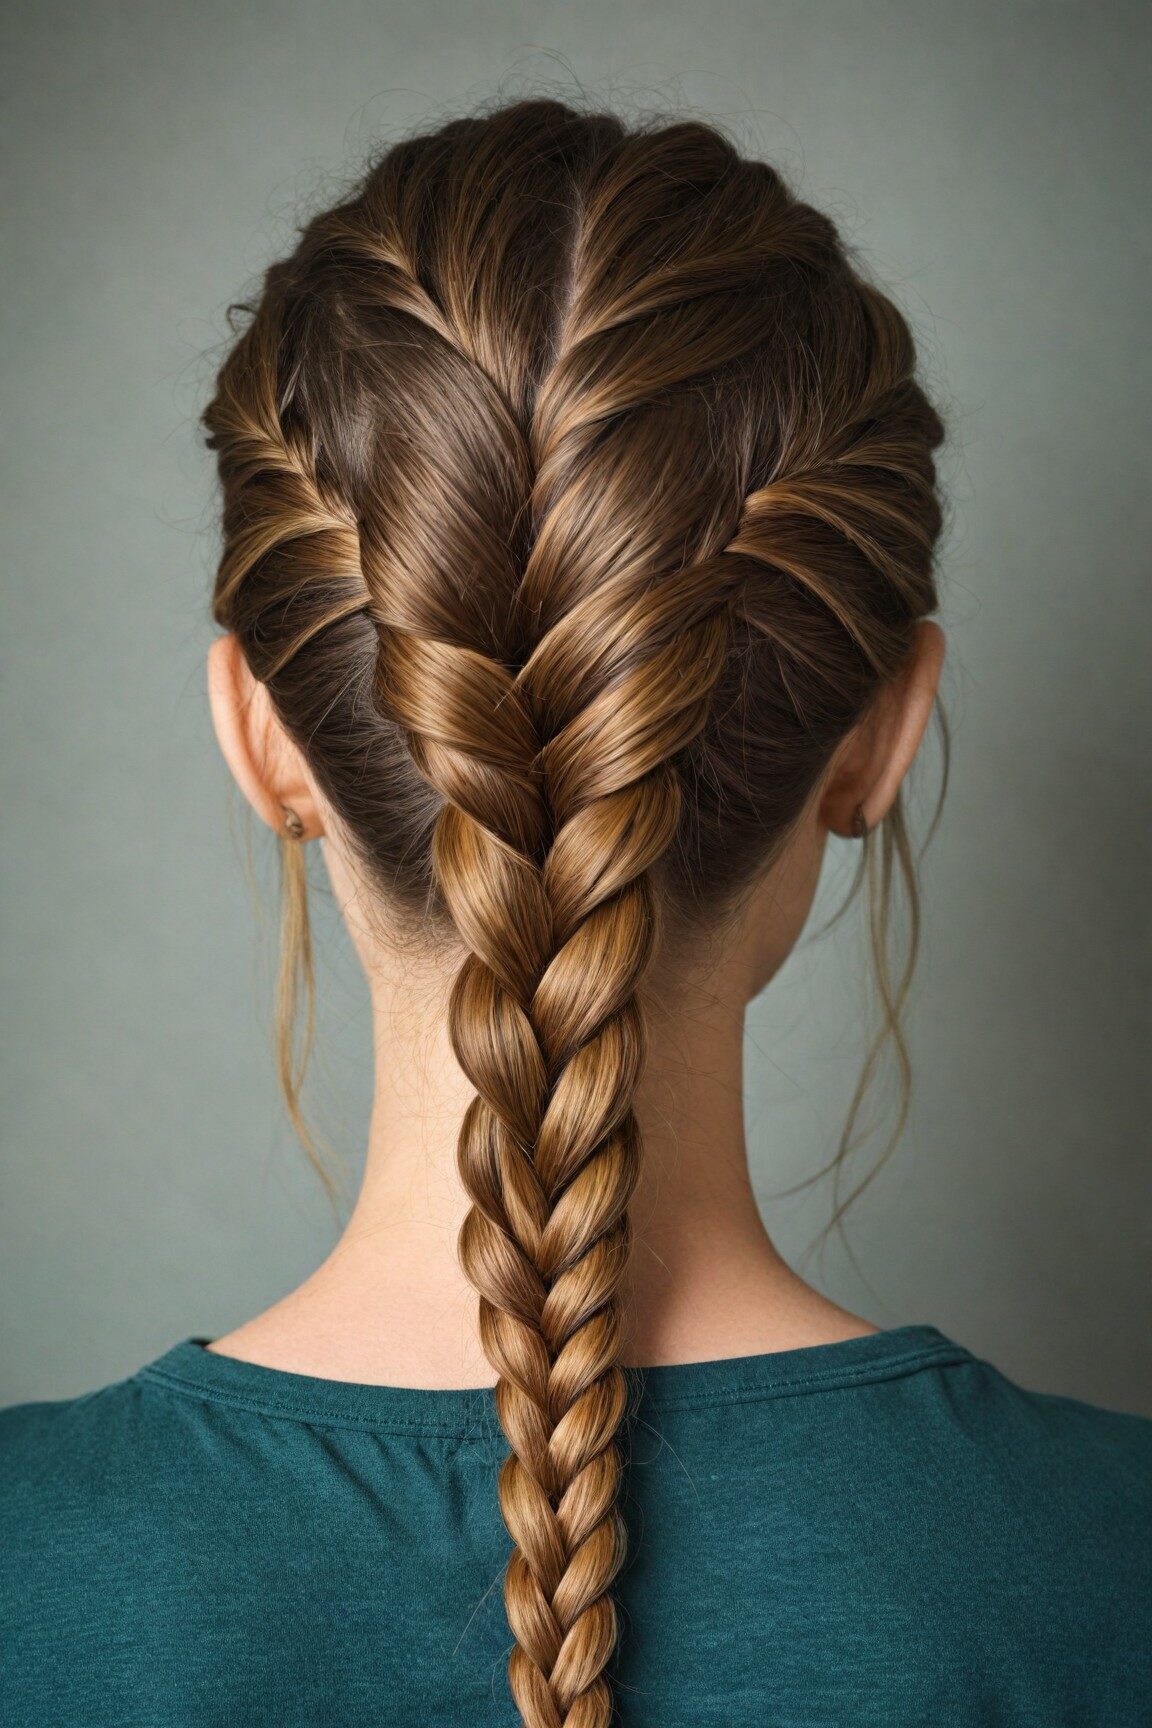
3. French Braid
The French Braid is a classic hairstyle that elegantly captures the essence of sophistication and simplicity. It’s a wonderful choice if you’re looking for a versatile and stylish look this autumn.
Starting with a section of hair from the top of your head, you’ll divide it into three equal parts. This is where the fun begins!
As you braid, you’ll cross the right strand over the middle, followed by the left strand. The unique aspect of a French braid is adding new sections of hair into the braid as you go.
Each time you cross a strand over to the middle, you’ll incorporate a new piece of hair from the side of your head, gradually building a braid that integrates all of your hair.
This method continues seamlessly, where you can choose to either add the new section of hair before crossing the strand over or after, depending on what feels more comfortable for you.
The beauty of the French braid is in its adaptability and the neat, woven appearance it creates.
Once you reach the nape of your neck and there are no more sections to add, the braid transitions into a traditional three-strand braid.
Secure the end with an elastic band, and voilà, you have crafted a beautiful French Braid. For a more casual, relaxed look, gently tug at the edges of the braid to loosen it slightly, giving it a fuller appearance.
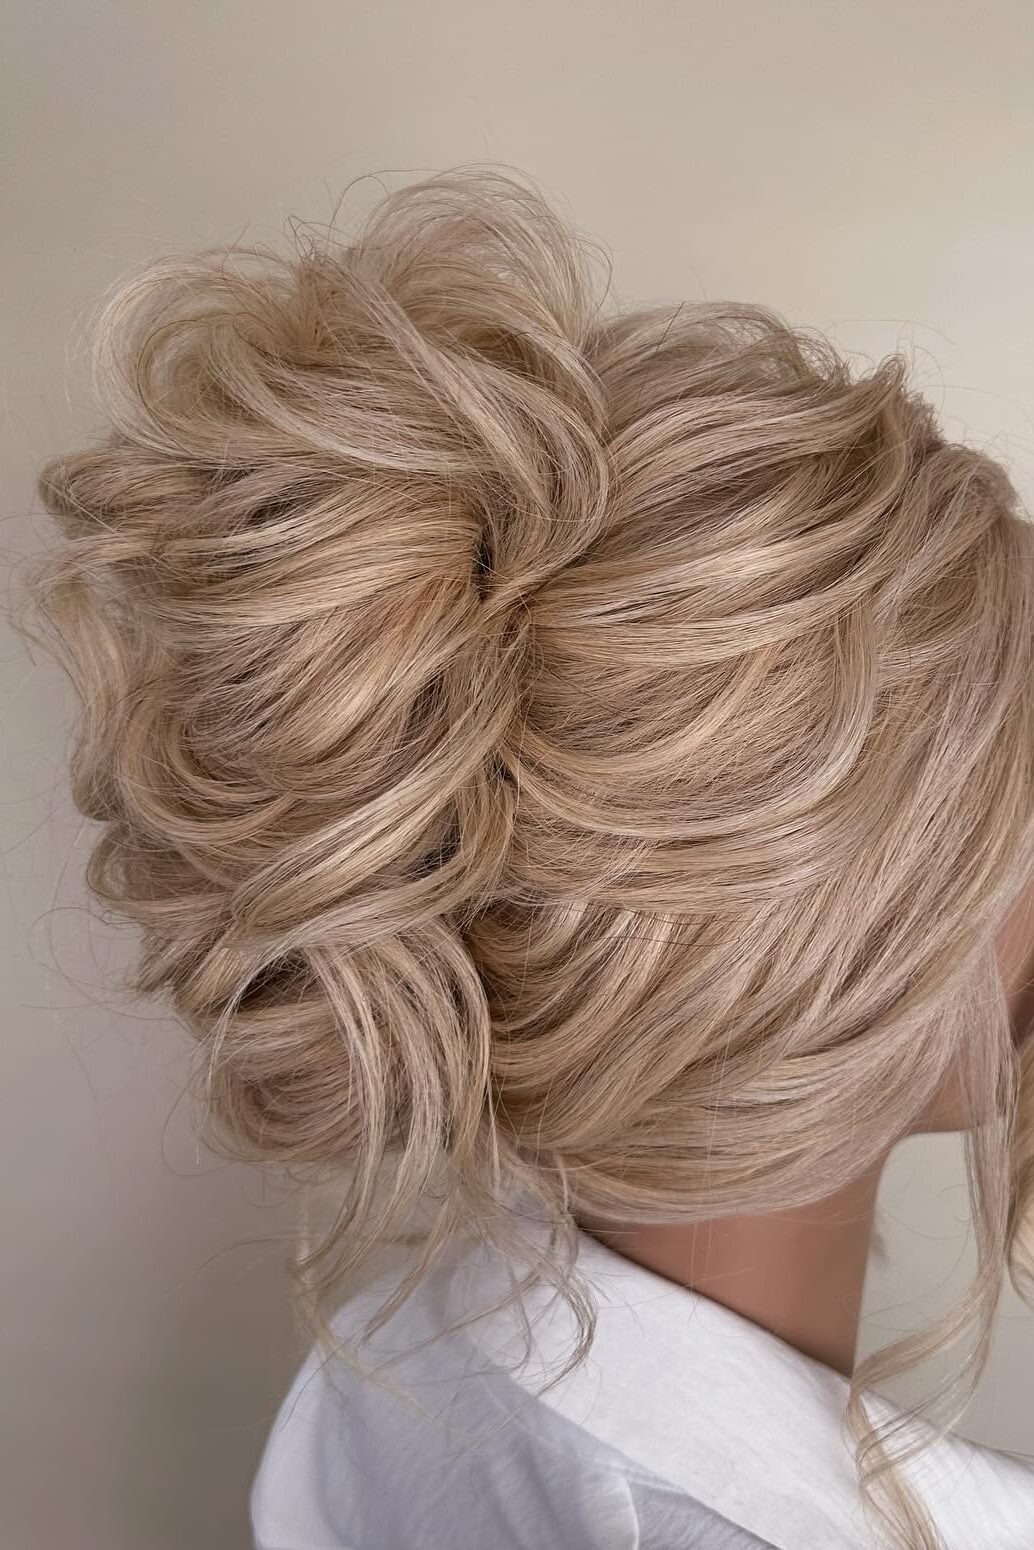
4. Messy Bun with Face-Framing Layers
For a voluminous base, place your thumbs in front of your ears and trace upwards to the top of your head. Now, hold your hair where you want your bun to sit.
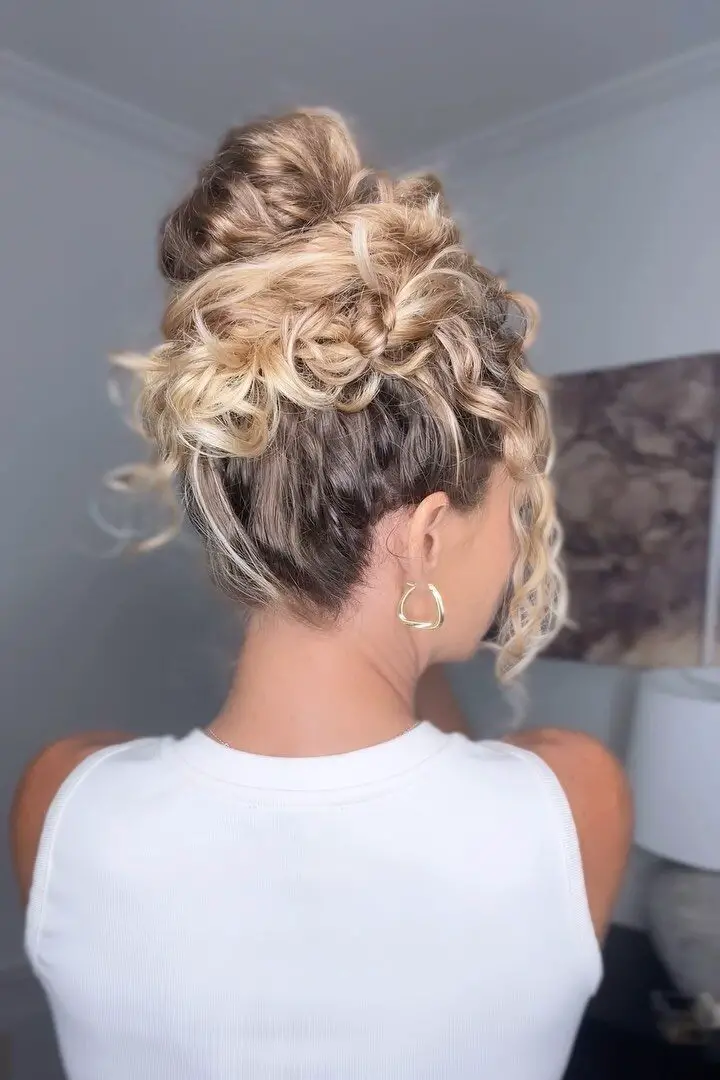
Aligning it with your cheekbones can be very flattering. Next, pull out your face-framing pieces and then scoop up the remainder of your hair, joining it into that previous section, and then secure it into a tight ponytail.
For the bun, bring your ponytail to your left side and hold the base of it with your right hand. Then take a second hair tie—mine is on my right hand’s wrist—and with your left hand pull your elastic over the top of your ponytail.
Then stick your left hand down and through it to the front like this. Now flip your left hand down behind your ponytail and grab onto the base, and with your left hand bring your elastic over the top and voila, you have yourself a messy bun.
Next, wrap your ends around the base and pin or tuck them out of the way. Then pull on your bun until it’s the size and shape you like.
Spraying a load of dry shampoo into it can add that extra bit of grit and texture needed for styling. Don’t worry if it’s not perfect because the charm is in that messy look.
Just twist up the base and then twist the hair while wrapping it around itself. When it gets tight, just push back a little bit to loosen it up.
Get your hands on the bottom, wrap the hair band around the base of the bun, and it’s okay if it looks messy because you will pin it all into place.
Just get some bobby pins—three or four should do—and pin down any stray hairs, always ensuring it’s quite big and voluminous.
To finish, just pull some little bits of hair around to make it a little bit more full. This messy bun with face-framing layers is your go-to for a quick yet stylish autumn hairdo.
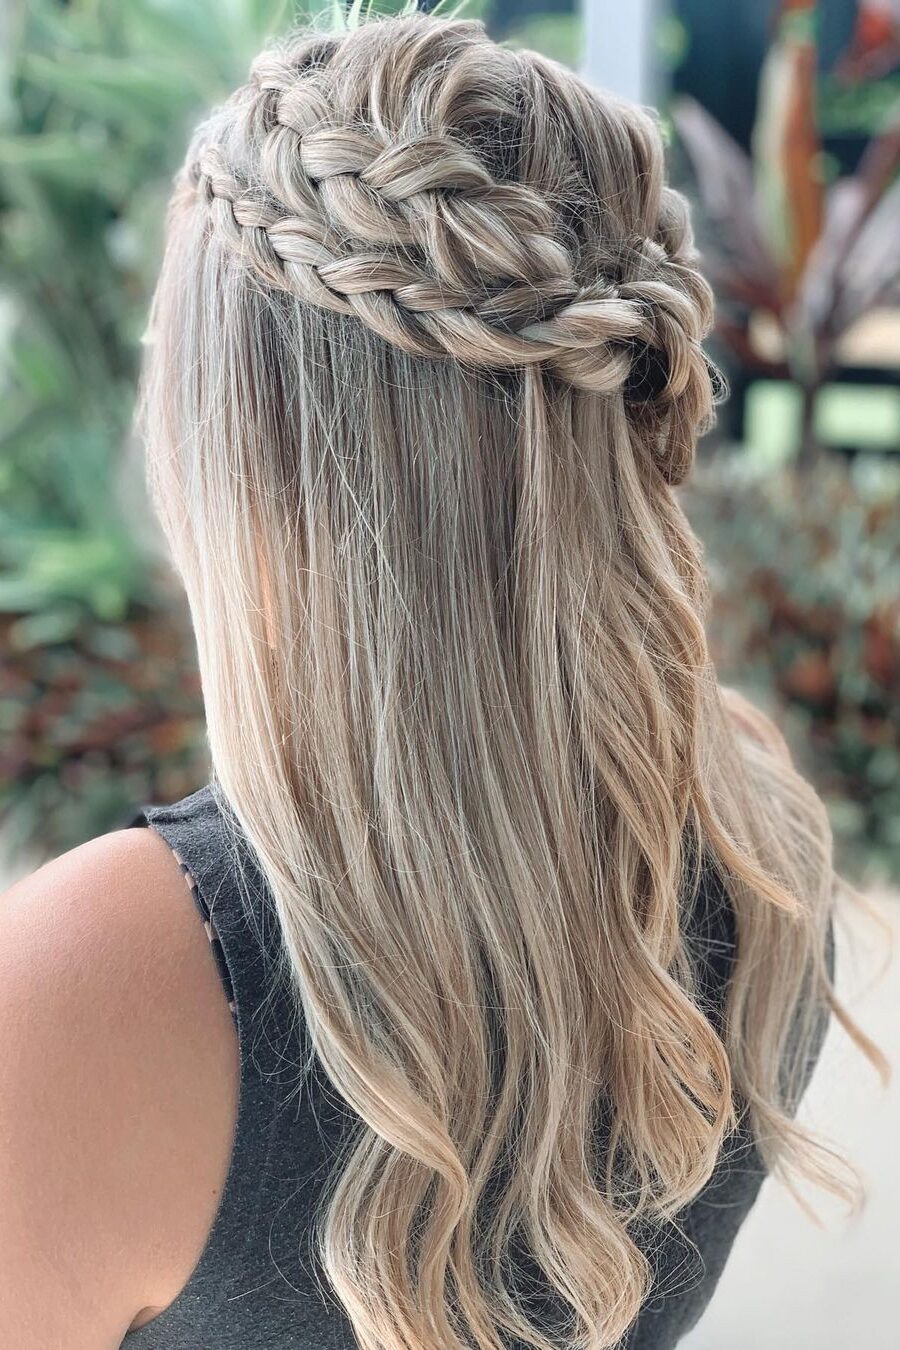
5. Braided Headband
The Braided Headband is a charming and practical addition to your autumn hairstyle repertoire. This style not only keeps your hair neatly out of your face but also adds a touch of elegance to any outfit, making it perfect for both casual and formal occasions.
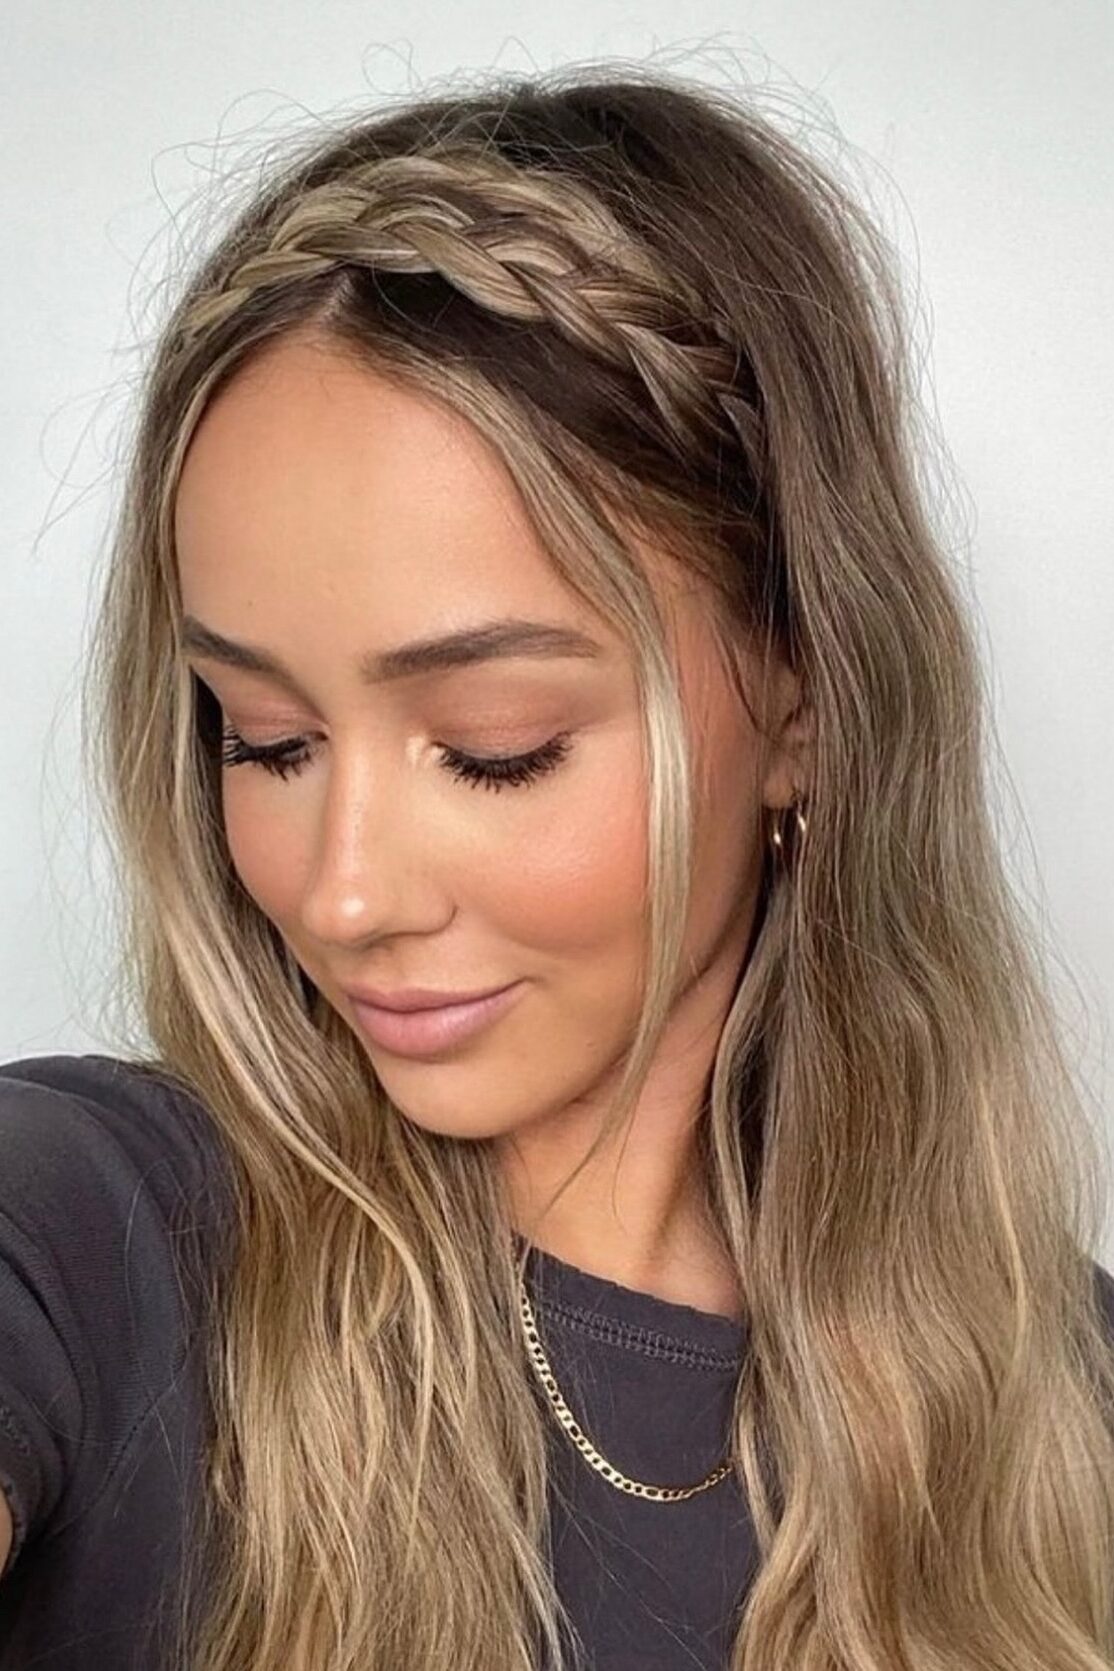
To start, you’ll want to select a section of hair, ideally from just behind your ear. This piece should be thick enough to create a visible braid but not so thick that it detracts from the rest of your hair.
Once you’ve chosen the right section, divide it into three equal parts and begin to braid. A basic three-strand braid works well for this style, but you can also opt for a more intricate fishtail or Dutch braid if you’re feeling adventurous.
As you braid, remember to keep the tension consistent to ensure that the braid is tight and neat. When you reach the end, secure the braid with a small elastic band.
Next, gently pull apart the braid to make it appear fuller and more pronounced. This technique, often called pancaking, enhances the braid’s texture and volume, giving it a more impactful presence as a headband.
Now, take your braided section and carefully lay it across the top of your head like a headband. Secure the end of the braid behind your opposite ear with bobby pins. Make sure the pins are tucked under the braid to conceal them, maintaining a seamless look.
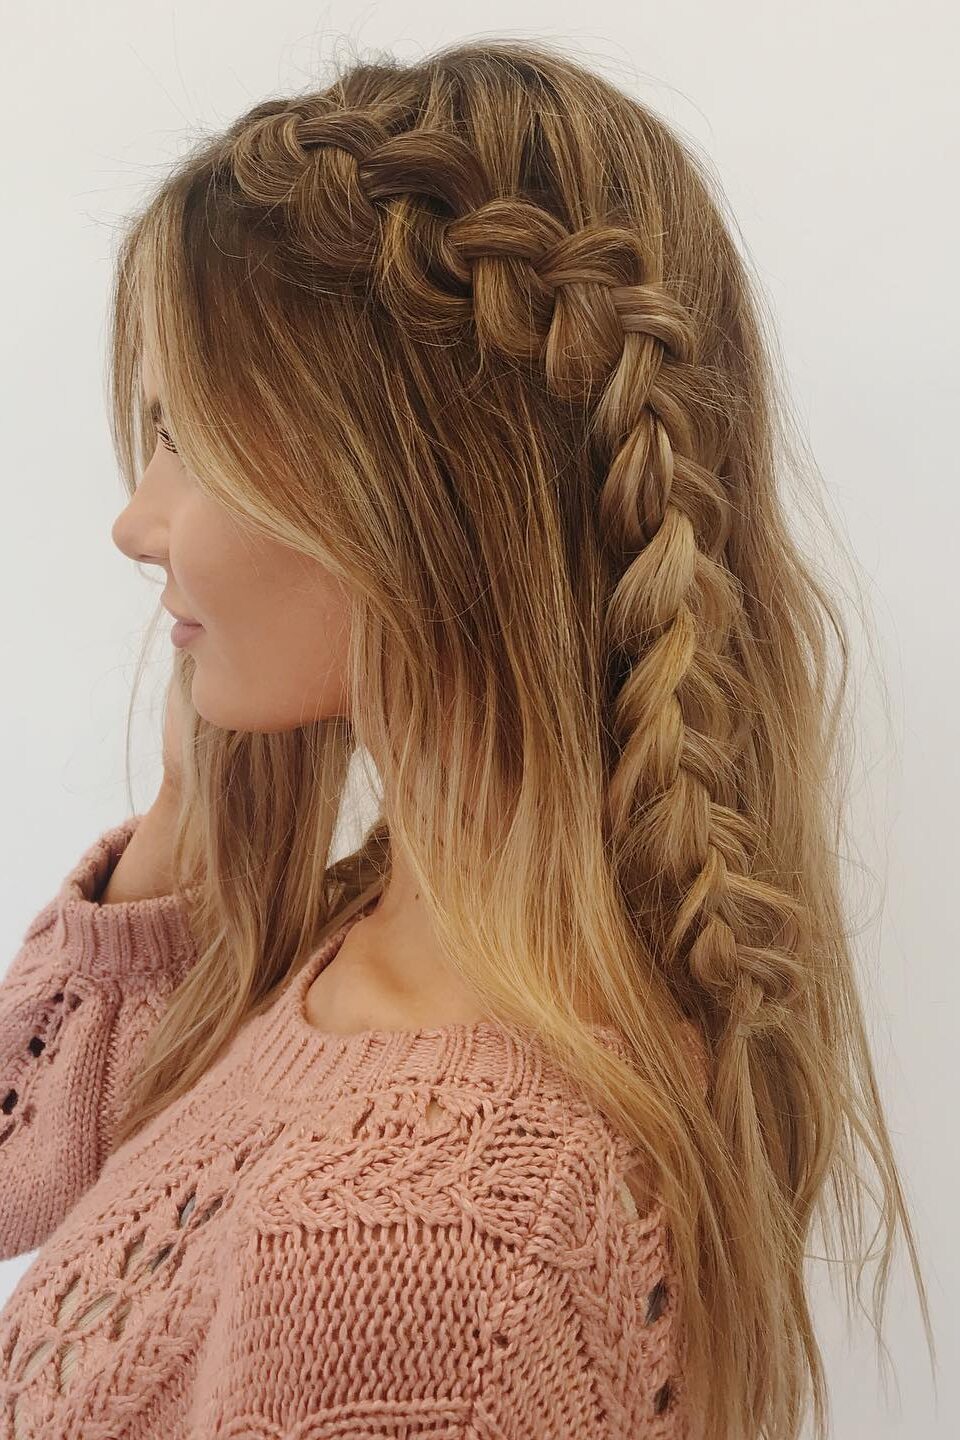
6. Fishtail Braid
The Fishtail Braid is a beautifully intricate style that looks elaborate yet is surprisingly easy once you get the hang of it.
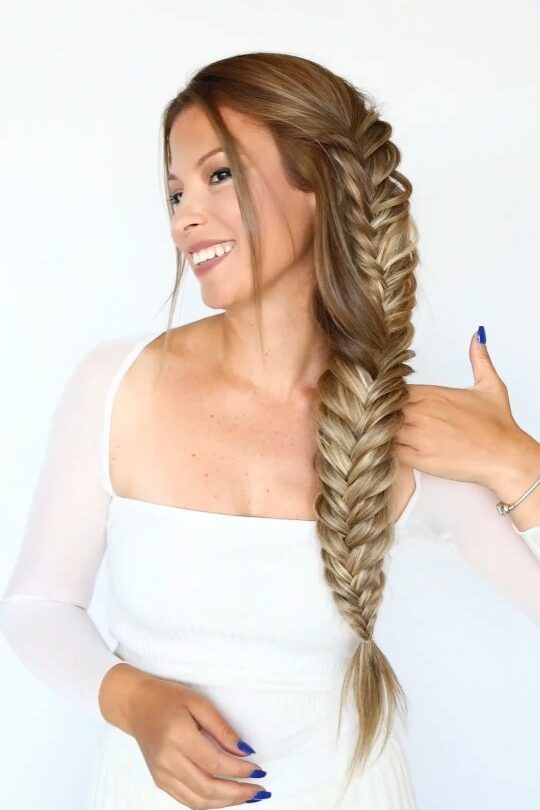
Perfect for autumn, this braid adds a touch of elegance to your long hair, making it ideal for both casual outings and special events.
To start your fishtail braid, you’ll first need to split your hair into two equal sections. This is the foundation of the braid and ensures that it looks balanced and neat.
Once you have your sections ready, take a small piece of hair from the outside of the right section and cross it over to the inside of the left section.
Then, repeat this step on the other side, taking a small piece from the outside of the left section and crossing it over to the inside of the right section.
Continue this pattern, alternating sides and crossing small pieces over to the opposite section. The key to a stunning fishtail braid is to keep the sections small and even, which creates the detailed, zipper-like effect that fishtails are known for.
As you braid, use your index finger and thumb to pinch and hold the hair at the crossing points. This technique helps in managing the braid more effectively, allowing you to maintain a good grip while you add more hair to each section.
As you approach the end of your hair, you may choose to tie off the braid with a clear elastic band. This keeps the braid secure and allows it to drape beautifully down your back or over your shoulder.
7. Low Ponytail with Silk Scarf
Even the most ordinary ponytail can be transformed into a striking autumn look with the simple addition of a silk scarf.
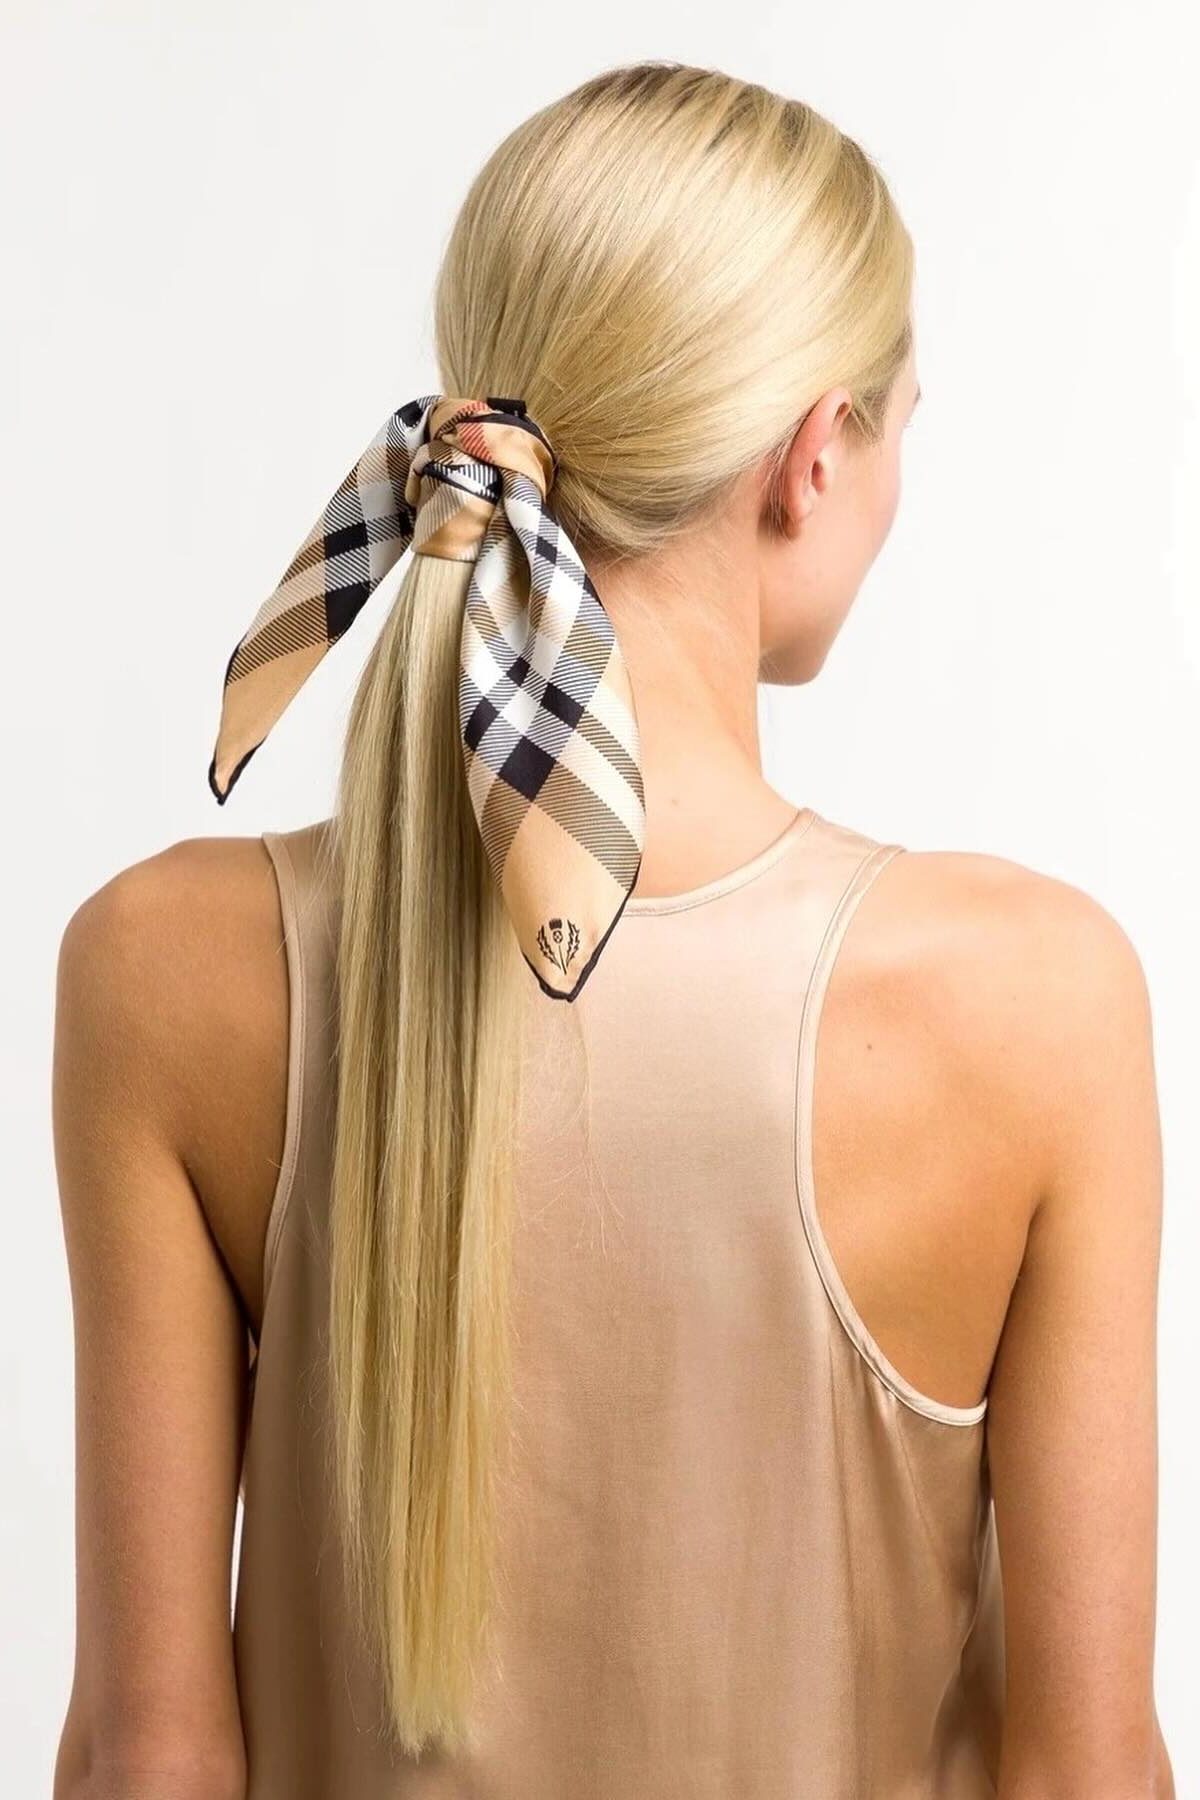
This trend has become a hit in the fall, combining both function and fashion in a hairstyle that’s as easy to execute as it is stylish.
To start, you’ll want to gather your hair into a middle ponytail, ensuring everything is smooth but leaving the ends slightly tousled for a more relaxed and untidy appearance. This bit of casual flair is key to mastering the look.
Using a scarf in lieu of a traditional hairband is a chic way to elevate your ponytail. Begin by selecting a scarf that complements your outfit, ideally one that brings out the rich hues of autumn.
If you’re using a large square scarf, fold it into a triangle and then continue folding until you have a long, thin strip.
Place the center of the scarf underneath your ponytail, tying it at the top to secure your hair.
You can then bring the ends of the scarf down, crisscross them under your ponytail, and tie a knot, letting the tips gracefully fall along your back.
8. Braided Crown with A Twist
Starting off with a triangle section of hair near your part, you’ll want to leave some hair down near the face to frame it beautifully. Divide this section into two parts.
Begin by twisting the front piece over the back piece, then add a new section of hair to both sides before twisting again. It’s handy to use your free hand to hold the tails loosely, making it easier to incorporate new pieces seamlessly.
As you create these twists, the fun part begins. Take one of the twists and use your thumb and index finger to push through one of the gaps.
Then, pull the other twist through this gap or hole. This simple yet clever maneuver starts forming the crown shape around your head, giving it that regal twist.
To secure your creation, slide a couple of bobby pins into the twist on each side. Try to get them to cross in the center for added strength.
These aren’t just any bobby pins, but the kind that holds up without bending — crucial for keeping your style intact throughout the day.
Once everything is in place, remove the elastics and add an extra bobby pin or two for good measure.
9. Dutch Braid Updo
Braided hairstyles are timeless and versatile, making them perfect for the enchanting fall season. From intricate updos to casual bohemian styles, braids add a touch of elegance and charm to any look.
The Dutch Braid Updo is a beautiful and elegant hairstyle that combines the classic Dutch braid with an updo, perfect for special occasions, weddings, or anytime you want to add a touch of sophistication to your look.
To create a Dutch Braid Updo, you’ll start by braiding your hair in a Dutch braid, which involves crossing the strands under instead of over.
Once the braid is complete, you’ll then gather the rest of your hair and secure it into an updo, such as a bun or chignon.
10. Waterfall Braid
The Waterfall Braid is a stunning choice for your autumn hairstyle, blending the classic charm of braids with a whimsical, flowing effect.
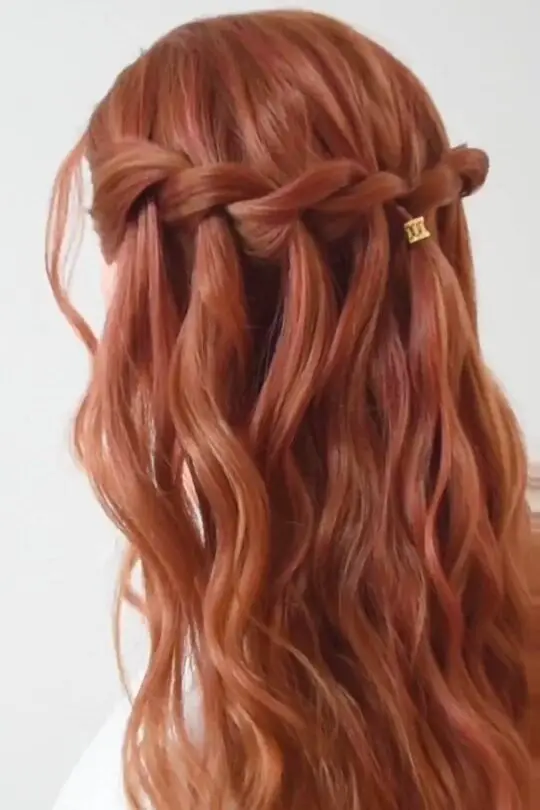
It’s perfect for both casual and formal settings, adding a touch of elegance to your long hair.
To start, you’ll take a small section of hair at the front from your eyebrow to your middle part and split this into three equal sections. You’ll have a top strand, a middle strand, and a bottom strand.
Begin by crossing the top strand over into the middle, followed by the bottom strand also crossing over into the middle.
It’s helpful to hold all of the strands in one hand, organizing them by finger – the bottom strand with your pinky, the middle strand with your middle finger, and the top strand with your thumb and index finger.
With your free hand, pick up a new small section of hair and add this to the top strand. Simply place the new hair between your thumb and index finger to integrate it into the top strand.
Then, cross this top strand over into the middle. At this point, you’ll let go of the bottom strand (some people prefer to place this strand in their mouth to keep it out of the way while braiding their own hair).
Continue by picking up a new piece of hair right next to where the bottom strand was dropped. This new hair becomes your new bottom strand.
Cross this over and into the middle and repeat the process – adding new hair to the top strand, crossing it over, and letting go of the bottom strand.
11. Half-Up, Half-Down
The half-up, half-down hairstyle is a wonderfully versatile and stylish option that beautifully marries the elegance of an updo with the casual allure of loose, flowing hair.
This style is incredibly adaptable, making it a fantastic choice for everything from formal events to everyday wear.
To create this look, you’ll begin by gathering the top section of your hair. This can be as much or as little hair as you prefer, depending on the level of formality or casualness you’re aiming for.
Secure this section with a hair tie or clip, ensuring that it’s tight enough to hold but not so tight that it causes discomfort. The remaining bottom section should be left loose, cascading beautifully down your shoulders.
12. Braided Crown (With Flowing Locks)
The Braided Crown hairstyle is a stunning and timeless choice that can elevate your autumn look with a touch of elegance.
This style is particularly appealing because it beautifully frames your face while keeping your hair neatly arranged.
Whether you’re attending a formal event or simply enjoying a day out, the braided crown is versatile enough to complement any occasion.
To create this enchanting hairstyle, begin by making a deep side part and then pick up a section of hair near the part. Divide this section into three equal parts.
Start the braiding process by crossing the upper strand under and into the middle, followed by the bottom strand.
As you continue, add in loose hair from above the braid to the upper strand before crossing it under and into the middle.
Repeat this process on the bottom strand as well. It’s important to keep the braid tight and neat as you angle it around your head.
13. Twisted Low Bun
The Twisted Low Bun is a chic and elegant hairstyle that’s perfect for autumn occasions, from casual outings to more formal events.
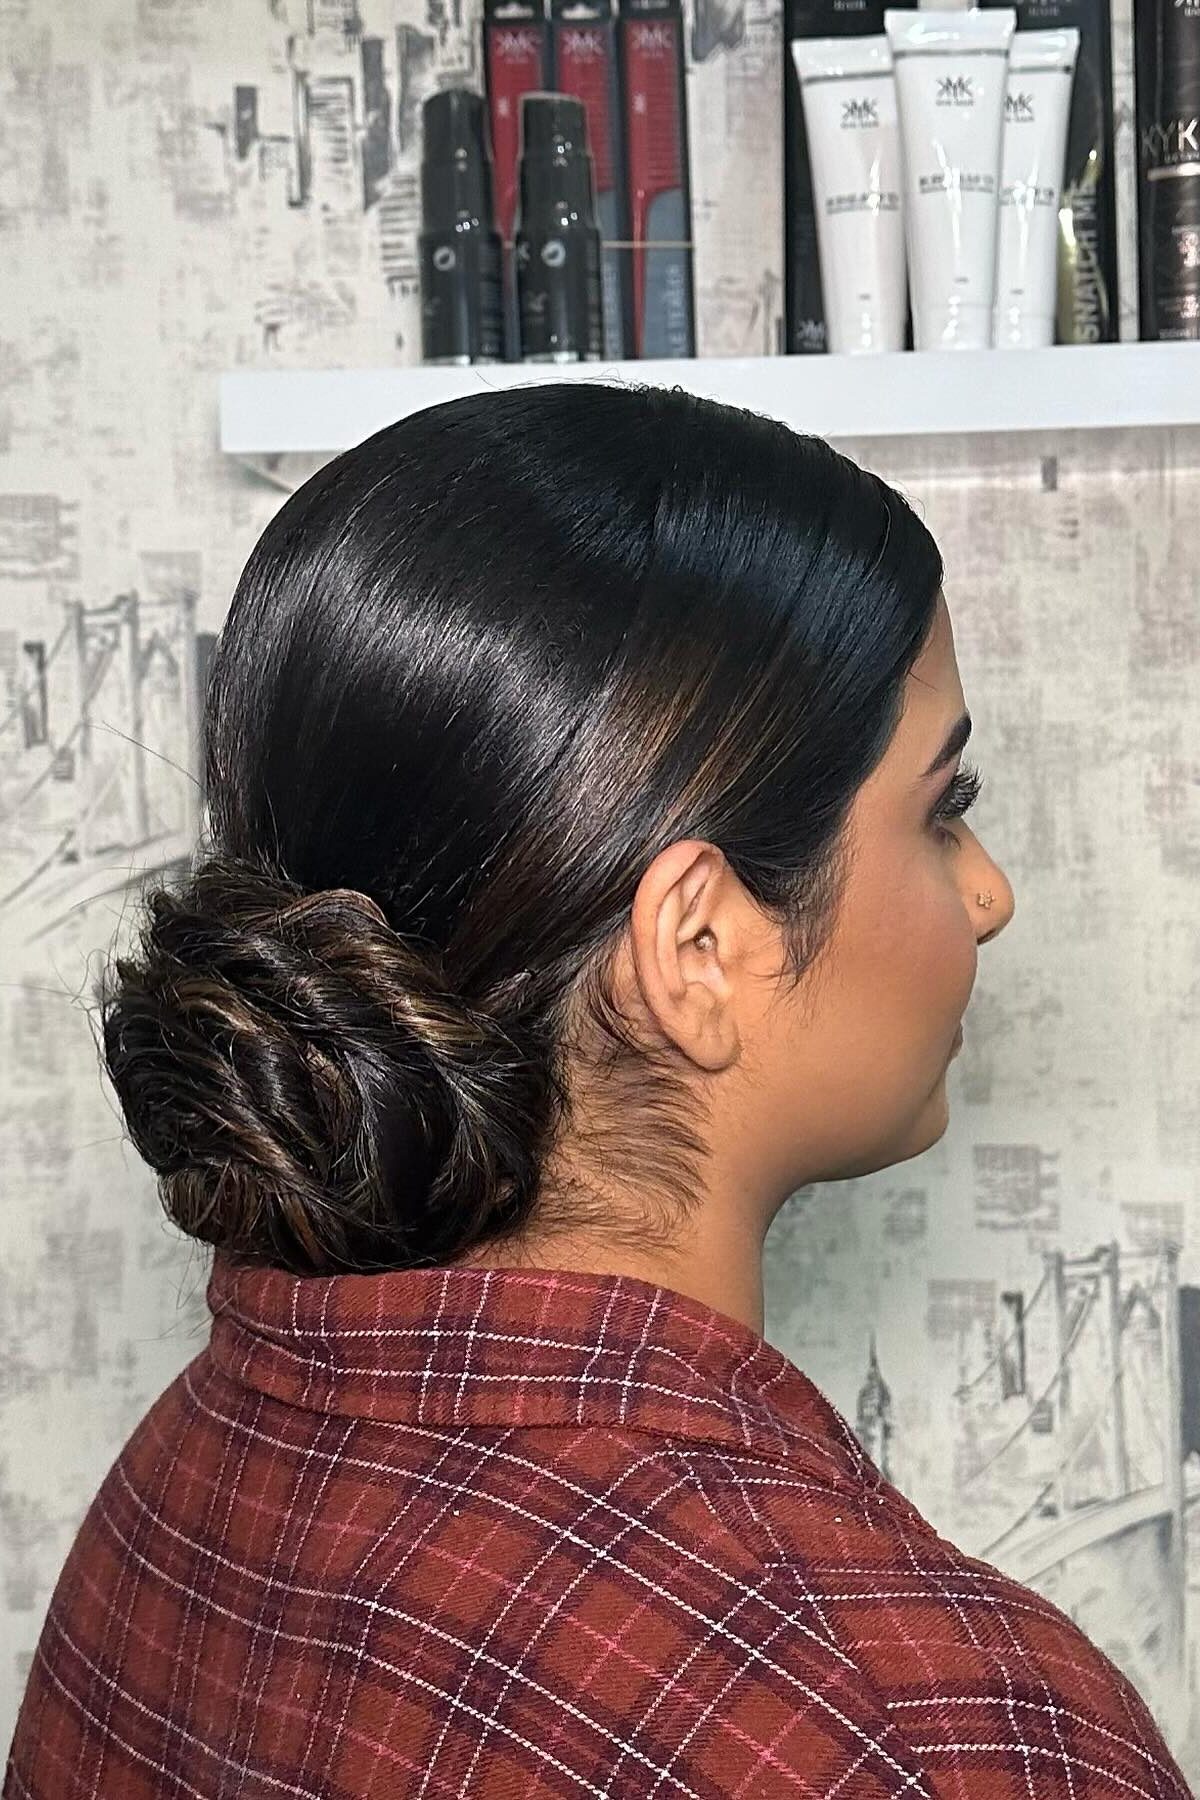
To start, you’ll want to create a side parting and leave some hair out to frame your face, enhancing the softness of this look.
Next, divide your hair from the top of your head to just behind your ears and clip these sections out of the way for later use.
Begin by bringing each side section back towards the middle of your head and secure it off with a clear elastic band.
Create a hole just above the band with your fingers, then pull the tail of the ponytail through this hole to create a twist.
Apply some texture spray to give the twist a bit of messy volume. Next, bring the two twists together at the back of your head and secure them with another clear elastic band.
Apply more texture spray to the top of your head and pinch and pull at the twist to add even more volume. This step is crucial for achieving that perfectly undone look that’s both sophisticated and relaxed.
Now, with the remaining hair, split it in half and create a chunky fishtail braid. Begin by taking a large chunk of hair from the left-hand strand, cross it over and join it to the right-hand strand, and then do the same from the right to the left.
Continue this process until you reach the end of the hair and secure it with an elastic band.
To finish, apply some more texture spray to the braid and use your fingers to pinch and pull the braid apart for added volume.
Then, take the end of the braid and roll it up until it meets the nape of the neck. Hold it against the head and secure it around the outside of the bun with as many bobby pins as needed.
This creates a beautiful low bun that looks intricate but is surprisingly simple to execute.
14. Voluminous Side Braid
To create a Voluminous Side Braid that’s not only glamorous but also perfect for any festive occasion, start by prepping your hair to achieve maximum volume.
Before blow drying, apply a thickening tonic to your freshly washed, towel-dried hair. This product is great because it not only smells wonderful but also thickens your hair almost instantly.
While blow drying, use a wooden paddle brush to help smooth out your hair, and for even more volume, especially at the roots, try flipping your head upside down.
This allows gravity and the blow dryer to work together, giving your roots a significant lift.
Next, to add texture and further volume, use a curling wand to curl your hair into loose curls. Divide your hair into two sections and start curling.
Angle the barrel downwards to get a good grip on your hair, making the lower curls a bit looser to maintain some length, while the upper curls can be slightly tighter to stand out more in the braid.
Once your curls are set, gather all your hair to the side opposite your part. Begin braiding right by where your chin is, ensuring it’s loose enough to adjust later.
As you braid, periodically pull at some of the pieces to boost the volume, creating that full, glamorous look. To keep it from looking too messy, take any stray hairs and twist and pin them neatly into the braid.
15. Messy French Twist
The Messy French Twist is a delightful blend of effortless charm and semi-sophistication, making it a fantastic choice whether you’re aiming for a casual day out or a more formal event.
This style is especially great for those days when you want to transform a bad hair day into a chic, carefree updo.
To start, you’ll need your hair to have some texture. If your hair is freshly washed, a quick spritz of dry shampoo or texturizing spray will do the trick. Gently scrunch your hair to boost volume and give it the grip needed for a successful twist.
Begin by pulling back one side of your hair with a long bobby pin, ensuring it’s smooth and sleek.
Gather the rest of your hair as if you’re about to tie it into a ponytail, but instead of pulling it back horizontally, start twisting it vertically from the nape of your neck upwards. Keep the tension loose to maintain the messy and relaxed vibe.
Once your hair is twisted up the back of your head, embrace the messy aesthetic. Don’t worry about bumps or imperfections; they add character and charm.
Secure the twist with regular-sized bobby pins, adjusting the level of ‘messiness’ to suit your style.
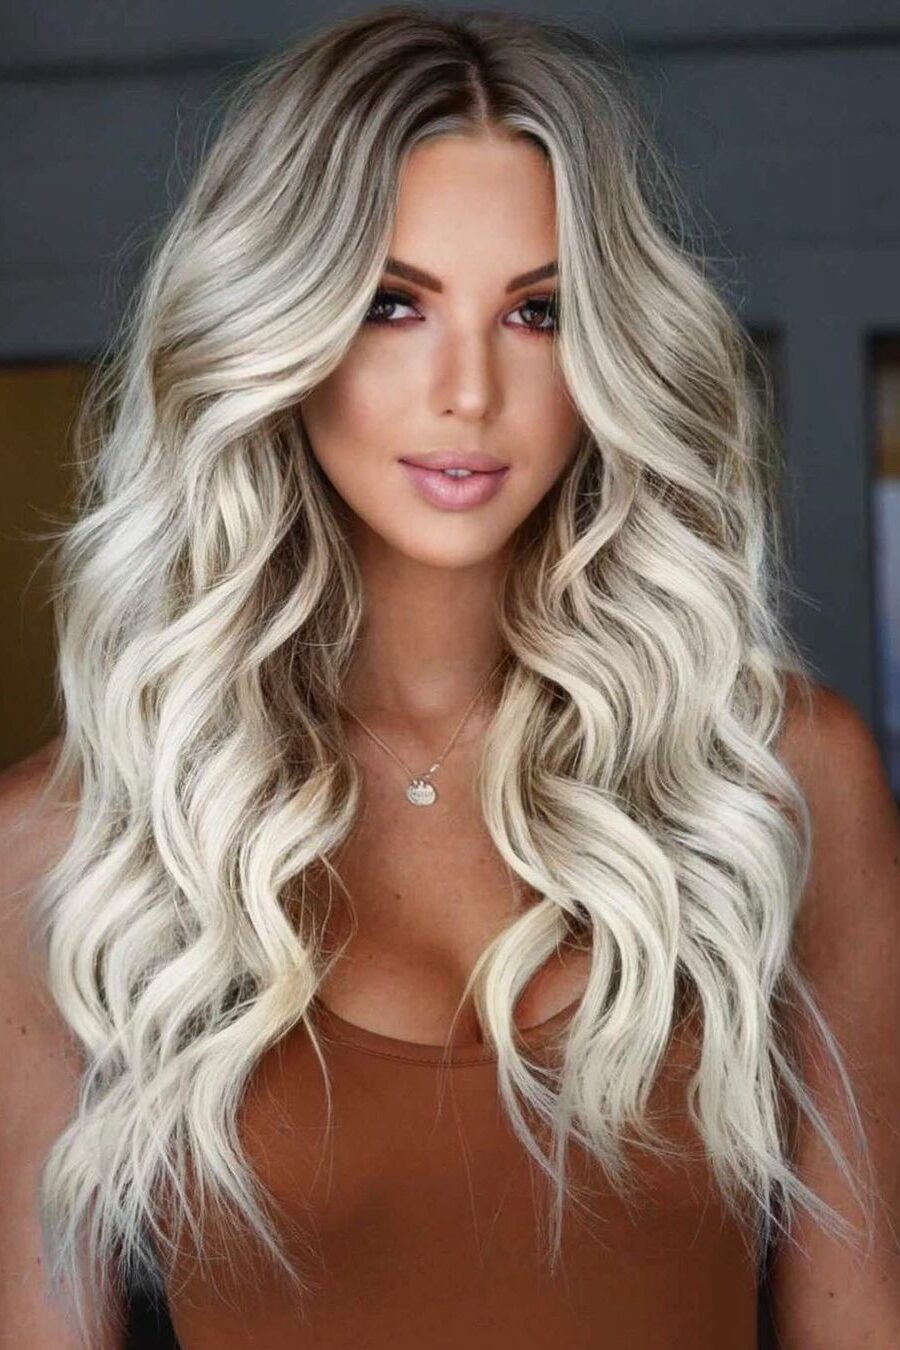
16. Loose Curls
Creating the perfect loose curls can transform your look into something effortlessly chic and fun, ideal for any autumn occasion.
Let’s dive into how you can achieve this beloved hairstyle that lasts for days, making it not only beautiful but also incredibly practical for your busy schedule.
Start with clean hair to ensure your curls hold well and look vibrant. If possible, allow your hair to air dry overnight.
This not only saves time but also adds a natural texture to your hair, which is great for curling. Before you begin curling, apply a heat protecting mist to safeguard your hair from heat damage while adding a subtle sheen that enhances the overall look.
Divide your hair into two parts for easier management. When you begin curling, take sections of about 1.5 to 2 inches.
The size of the section will influence the size of your curls – larger sections for bigger, looser curls. Curl your hair away from your face using a 1.25 inch curling iron.
This technique helps create natural-looking, voluminous curls that frame your face beautifully.
After curling each section, let the curl cool in your hand for a moment. This simple step is crucial as it sets the curl, helping it last longer.
If you have a bit more time, you might want to clip up each curl individually and let them set while you complete your makeup or other morning routines.
Once all your hair is curled and cooled, take down any clips if used and use a teasing comb for added volume at the roots.
For a soft, tousled look, run a small amount of hair oil through the ends of your hair.
Final Thoughts
Through this guide, we have explored a variety of hairstyles that perfectly blend with the autumn vibe, ranging from the intricate Infinity Braid to the elegant Dutch Braid Updo and the fun yet sophisticated Loose Curls.
Each style is designed to add a touch of elegance and flair to your long hair, showcasing the versatility and creativity that the season inspires.
Reflecting on these hairstyles, it’s clear that autumn offers the perfect opportunity to experiment with your hair, embracing both new trends and timeless classics.
Leave a Reply
You must be logged in to post a comment.