This summer, transform your nails into your canvas and let them speak the vibrant tales of the season with our collection of 50 summer nail ideas that will truly make you stand out!
Dive into the world of trendy summer nails, from the understated elegance of Transparent French manicures to the bold vibrancy of Go Green shades.
Ready your nails to flaunt everything from the whimsical to the sublime, as we guide you through making the most of this season’s trends, ensuring your nails are nothing short of spectacular.
Busy? Save this pin for later.
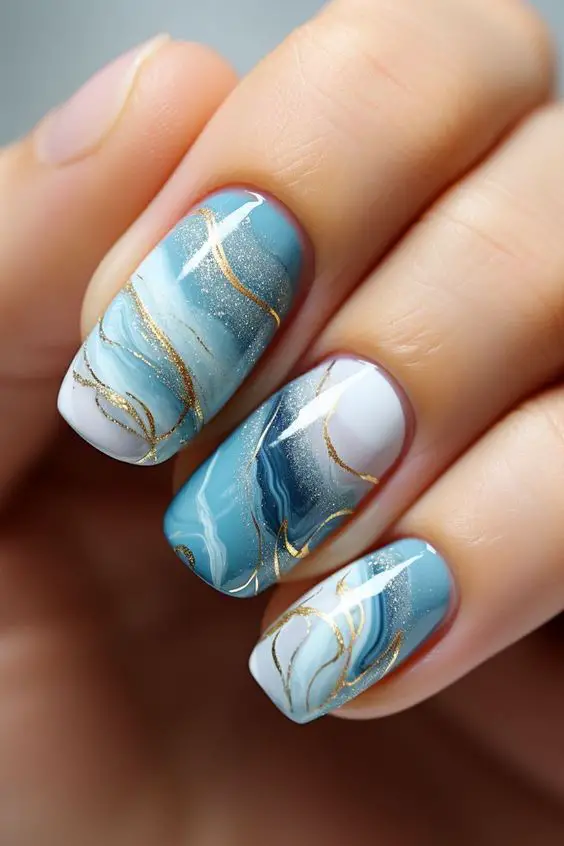
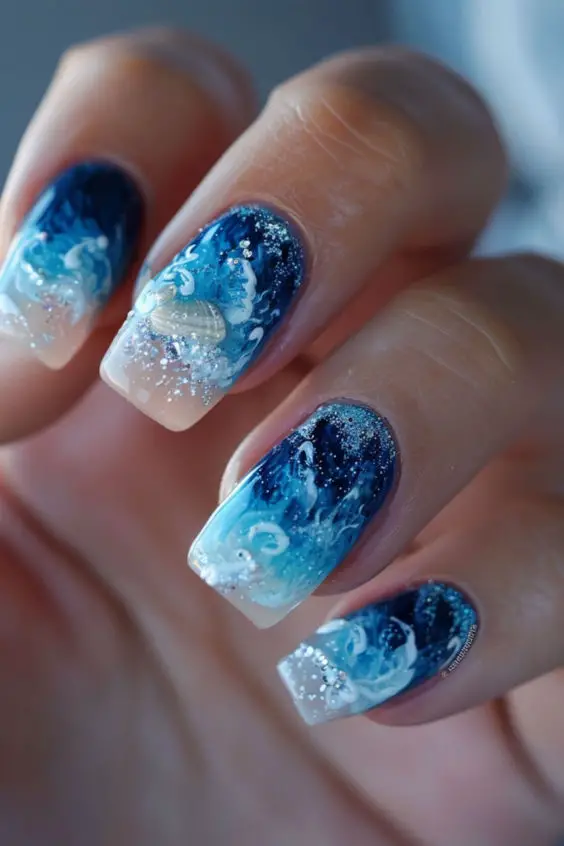
1. Classic Beach Gradient (blue to white)
Step-by-Step Guide to Classic Beach Gradient Nails
Preparation and Base Application
Start with a clear base coat to protect your nails.
Apply a white polish as the base color on all nails except the ring finger. This white base will make the colors pop and ensure the gradient is vibrant.
Creating the Gradient
Use a cosmetic wedge or sponge. Begin by dampening the sponge slightly with water to prevent excessive polish absorption.
Apply your chosen shades of blue and white polish directly onto the sponge, layering them slightly to aid the blending process.
Gently roll and dab the sponge onto your nails, starting from the base and moving upwards to create a smooth gradient effect from blue (representing the ocean) to white (depicting the sky).
Detailing and Finishing Touches
For an added beachy effect, consider using a thin brush to add subtle wave designs or a glittery top coat to mimic the sparkling sea.
Once you’re satisfied with the design, apply a fast-drying top coat to seal in your artwork and add a glossy finish.
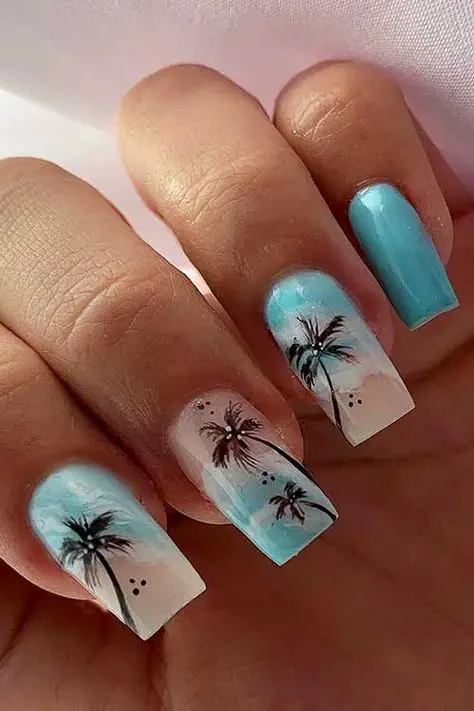
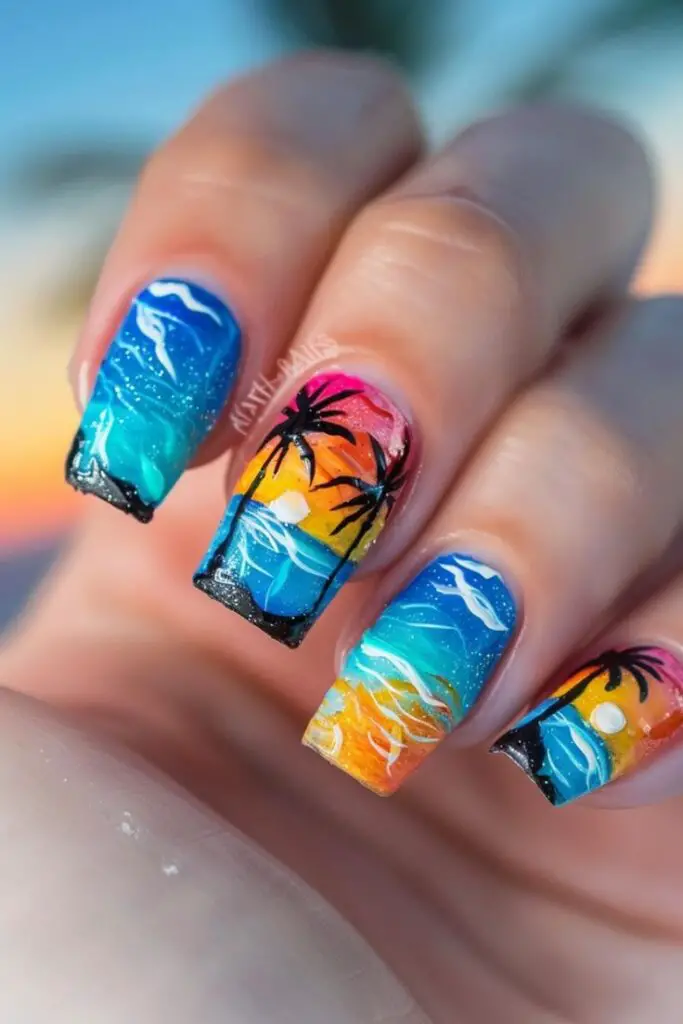
2. Palm Tree Paradise
To kick off your Palm Tree Paradise nail design, start with a clean base by applying two coats of white nail polish.
This will help the colors stand out and provide a good canvas for the intricate details of the palm trees. Once dry, apply your favorite base coat to protect your nails and prevent staining.
Next, create a stunning sunset gradient as the backdrop for your palm trees. Use a makeup sponge and apply bright colors like blue, pink, mustard yellow, and daisy yellow directly onto the sponge, overlapping them slightly to ensure a smooth blend.
Dab the sponge onto your nails while the polish is still wet, repeating the process until you achieve the desired opacity.
Remove any polish from around your nails with a clean-up brush dipped in acetone for a neat finish.
Now, for the highlight of your design—the palm trees. Using a thin brush and black acrylic paint, draw a curved line for the trunk on each nail, adding five or six branches.
For the leaves, use a light green polish to add detail and dimension, painting falling lines onto the branches.
If you’re feeling adventurous, add tiny coconuts using brown polish or create a small silhouette of birds in the distance with black polish.
Finish off by sealing your artwork with a fast-drying top coat to protect your design and add a glossy sheen. For a more subdued look, you might opt for a matte top coat instead.
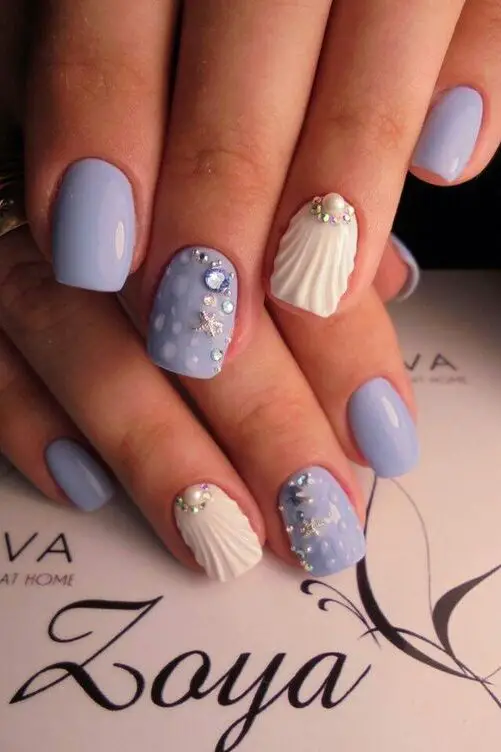
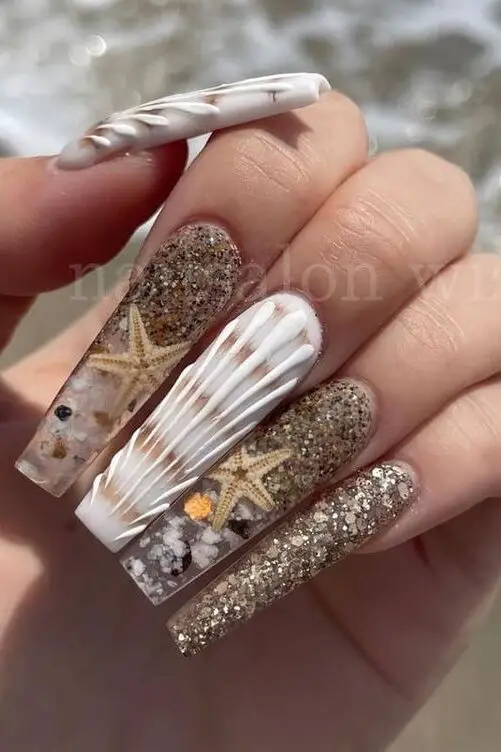
3. Seashell Accents
To achieve a mesmerizing Seashell Accents look, start by applying a light purple polish as your base. This soft hue sets a perfect oceanic backdrop for the intricate designs to come.
Follow up with a layer of bubblegum pink gel, giving your nails a vibrant pop of color that resembles the inner part of a seashell.
Step-by-Step Seashell Texture Creation
3D Texture Application: Using a synthetic hair nail art brush, carefully apply gel to create a raised seashell pattern. This technique adds a tactile element to your nail art, making the seashells look and feel realistic.
Line Straightening: Once the gel starts to set, gently straighten the lines with a file and clean up any excess using rubbing alcohol. This step ensures that each seashell design has a neat and precise finish.
Enhancing Shine and Texture: Apply a no-rub top coat over your design. While the top coat is still tacky, dust on white pearl powder to achieve a lustrous, pearlescent effect that mimics the sheen of actual seashells.
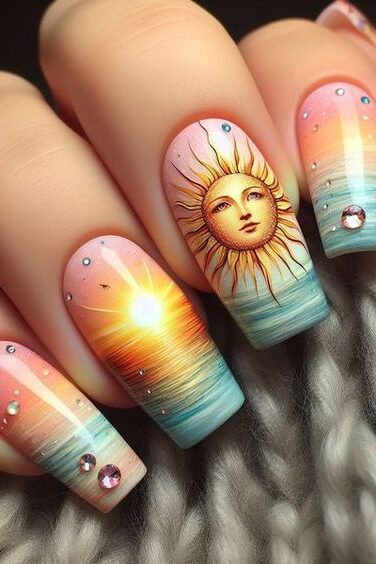
4. Sunburst Nails
Sunburst nail art is a vibrant and dynamic choice for those summer days when you want your nails to pop with color and energy. Here’s how you can create this eye-catching design:
Step-by-Step Guide to Sunburst Nail Art
Base Preparation
Begin by applying a clear base coat to protect your nails.
Choose bright colored polishes for the sunburst effect. Apply two coats of each color in vertical stripes on each nail.
Creating the Sunburst
Using a toothpick, gently drag the pink stripe across to the opposite side of the nail. Repeat this action a few times on each nail to mimic the rays of the sun.
Topcoat Application
Seal your design by applying a topcoat horizontally across the nail, followed by a vertical sweep to ensure all areas are covered.
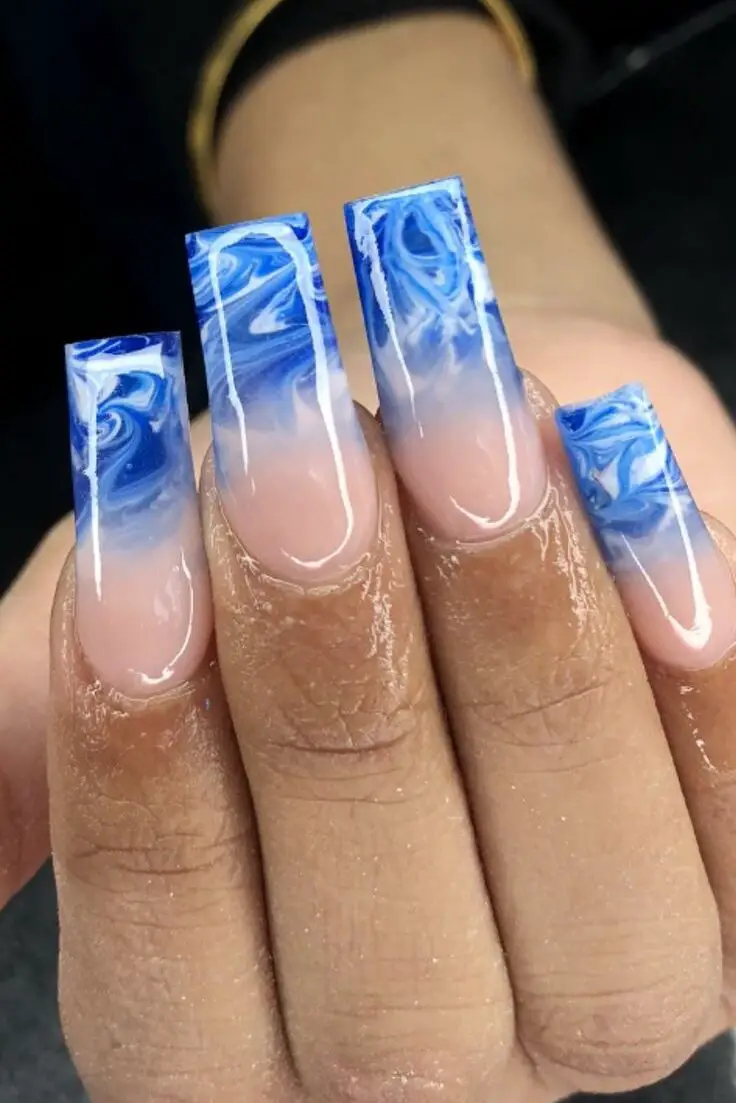
Water Marbling Technique
Setup and Base Coat
Apply a base coat followed by a coat of white polish to make the colors stand out.
Protect the skin around your nails with tape to ease cleanup.
Creating the Design
Drop bright colored polishes into a cup of room temperature filtered water to form a bull’s eye pattern.
Carefully position your finger over the pattern you like and dunk it into the water.
Cleanup
Use a fork to remove excess polish from the water before pulling your finger out.
Clean up any polish on the skin with a brush dipped in polish remover.
5. Neon French Manicure
Step-by-Step Guide to Creating a Neon French Manicure
Preparation and Base Application
Start with a clean, dry nail and apply a clear base coat to protect your nails.
Choose a neutral base color to serve as the backdrop for the neon tips. Popular choices include nude or light pink, which help the neon colors stand out.
Applying the Neon French Tip
Use a bright neon polish for the tips. You can apply this freehand for a casual look or use French tip guides for precision.
For a twist on the traditional French manicure, consider using a stamping polish or a gold polish to create unique French tips.
Finishing Touches
Seal your design with a high-gloss top coat to enhance the neon’s vibrancy and ensure longevity.
For those seeking a more luxurious look, consider adding a glitter outline or opting for a textured glitter nail art on one or two accent nails.
Variations and Trends in Neon French Manicures
Lime Edges: This style focuses the bright neon color on just one edge of each nail, creating a modern and minimalist look.
Neon French with Flowers: For a more decorative style, add small floral designs over the neon tips using nail stamps or hand-painting.
Dual-Finish Manicure: Combine matte and glossy finishes within the same manicure for a sophisticated contrast.
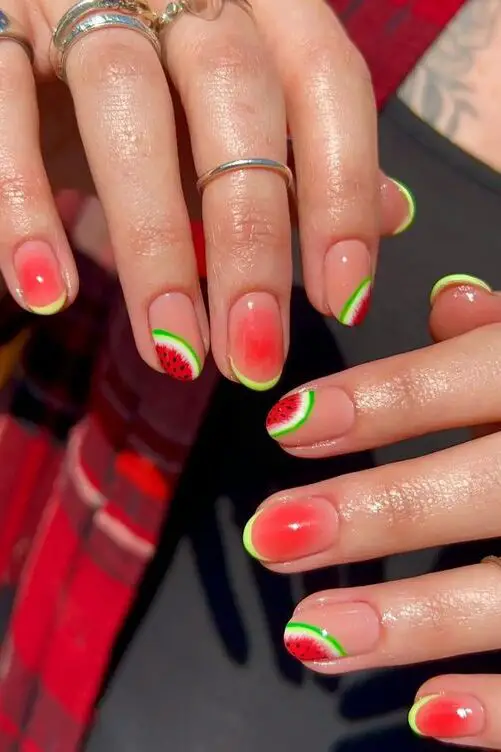
6. Watermelon Slices
To create the delightful Watermelon Slices nail art, follow these detailed steps to ensure your nails are summer-ready with a playful and colorful design:
Step-by-Step Guide to Watermelon Slices Nail Art
Base Coat Application
Begin by applying a clear base coat to protect your natural nails and enhance the longevity of your nail art.
Creating the Watermelon Flesh
Apply a layer of white nail polish to create a gradient effect, mimicking the lighter part of the watermelon flesh near the rind.
Over the white, layer red nail polish in multiple applications until you achieve a vibrant, juicy red typical of a ripe watermelon.
Detailing the Watermelon Rind
Use a thin brush to paint a stripe of green gel polish at the tip of your nails, representing the watermelon rind.
For added detail, apply a thinner line of a slightly darker green to give more depth to the rind.
Adding Watermelon Seeds
With a liner brush and black acrylic paint, create small teardrop shapes across the red area to represent the seeds. Space them evenly for a realistic look.
Finishing Touches
Complete your watermelon design by applying a denim matte top coat. This unique finish not only protects your nail art but also gives an interesting texture that enhances the overall appearance of the slices.
Tips for Perfect Watermelon Slices
Ensure each layer of polish is dry before applying the next to prevent smudging and to keep the lines crisp and clean.
Use a dotting tool or the tip of a pin for smaller, more precise seed details if you find a brush too cumbersome.
For a fun variation, consider adding tiny specs of white to mimic the light reflecting off the watermelon seeds.
7. Popsicle Colors
Popsicle nails are the epitome of summer fun, capturing the essence of the season with their glossy, translucent finish reminiscent of ’90s jelly nails.
To achieve this look, you can use any sheer nail polish color or mix a vibrant shade with a clear, high-shine topcoat for that quintessential popsicle effect.
Longevity of Popsicle Nails: With proper maintenance, including the application of a sturdy base and top coat, popsicle nails can last up to two weeks. It’s crucial to avoid activities that could potentially damage the nails to maintain their pristine condition.
8. Rainbow Ombre
Step-by-Step Guide to Rainbow Ombre Nail Art
Base Preparation
Start with a clear base coat to protect your nails.
Apply a white base coat to enhance the colors of the rainbow ombre.
Applying Colors
Select vibrant colors such as yellow, purple, blue, and a blend of pink and yellow to create orange. Green can be added as a drop to introduce an additional hue.
Use a dense sponge to dab different colors onto the nail, starting with lighter shades at the base and progressing to darker shades towards the tip to maintain a balanced look.
Blending for the Ombre Effect
Carefully blend the colors using a flat brush or sponge, ensuring the transitions between colors are smooth but distinct.
Avoid mixing incompatible colors directly next to each other to prevent muddy results.
Techniques and Products for Enhanced Durability
Encapsulating the Design: After achieving the desired ombre effect, apply an encapsulating clear coat to protect the nail art and enhance its longevity.
Product Recommendations: For those looking to recreate this design at home, consider using DipWell’s range of products, including their Base & Finish, Dip Nail Powder, and Activator.
Application Tips: Apply DipWell’s Step 1 Bond, followed by Step 2 Base. Dip the nails into the chosen Dip Color Powders, focusing on applying different colors to the left half of each nail for a dynamic ombre look.
Additional Tips for a Perfect Rainbow Ombre
Using Liquid Latex: Apply liquid latex around the nails to protect the skin and make cleanup easier.
Final Touches: Once the ombre is complete, remove the liquid latex and clean up any stray nail polish with a q-tip dipped in acetone.
Top Coat Application: Finish with a high-gloss top coat to seal in the design and add a vibrant shine.
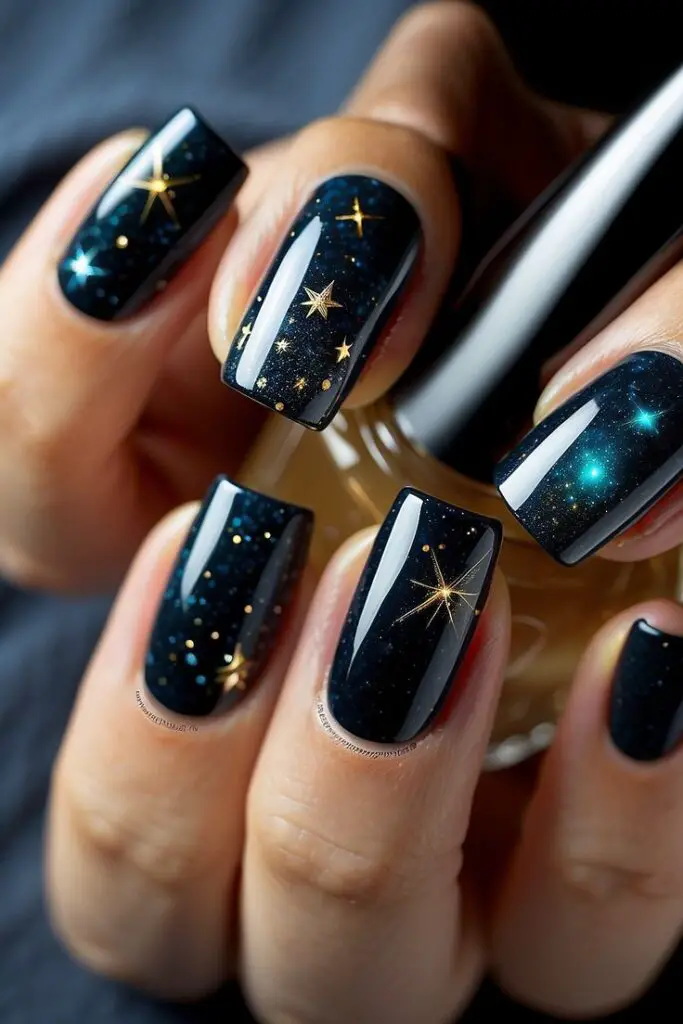
9. Starry Night Sky
Step-by-Step Guide to Starry Night Sky Nail Art
Base Coat and Color Application
Start by applying a base coat to protect your nails.
Paint your nails with a dark blue polish to set the perfect night sky backdrop.
Creating Star Patterns
Dip a detailing brush in white nail polish to dot small stars across your nails.
Add yellow accents to some stars to bring diversity and a twinkling effect.
Swirling Galaxy Patterns
Using a thin brush, swirl various shades of blue and white polish around the stars to mimic the galaxy’s dynamic movements.
Tools and Techniques for Perfect Starry Night Sky Nails
Detailing Brushes: Essential for fine lines and intricate star patterns.
Gradient Techniques: Blend multiple shades of blue to achieve a deep celestial effect.
Holographic Powders: Apply over designs to create a shimmering 3D star effect.
Maintaining Your Starry Night Sky Design
Top Coat Application: Seal your artwork with a high-gloss or matte top coat to ensure durability.
Regular Care: Use hand cream and cuticle oil to maintain the nails’ health and appearance.
Touch-Ups: Keep white and yellow polish handy for quick fixes to keep your stars shining bright.
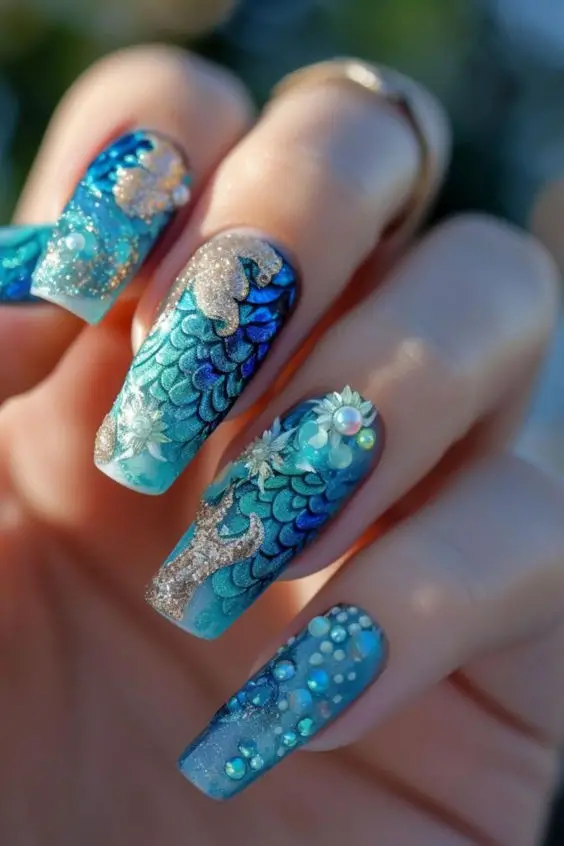
10. Glittery Mermaid Scales
Dive into the enchanting world of mermaid-inspired nail art with the Glittery Mermaid Scales design, a trend that captures the mystical allure of the ocean’s legendary creatures.
This style is perfect for anyone looking to add a touch of fantasy and shimmer to their summer look.
Step-by-Step Guide to Glittery Mermaid Scales Nail Art
Select Your Colors and Materials
Start with a base coat of pastel or sea-inspired colors. Popular choices include shades of teal, soft blue, or lavender.
Gather your materials: nail polish in various colors, nail stencils shaped like fish scales, a soft sponge, Q-tips for cleanup, and a quick-drying top coat. Don’t forget the star of the show—solvent resistant bubble glitter.
Creating the Scale Effect
Apply a light color as the base coat and let it dry completely.
Place the scale stencil over the nail and apply a darker shade over the top to create the scale effect.
While the polish is still tacky, carefully remove the stencil to reveal the scale pattern.
For added sparkle, apply a thin layer of glitter over the scales. Mermaid Chrome and Mermaid Sparkles are excellent choices for achieving that iridescent look.
Finishing Touches
Once your design has dried, seal it with a quick-drying top coat to enhance the durability and shine of your nail art.
For a more dramatic look, consider adding tiny pearls or metallic accents around the edges of the nails.
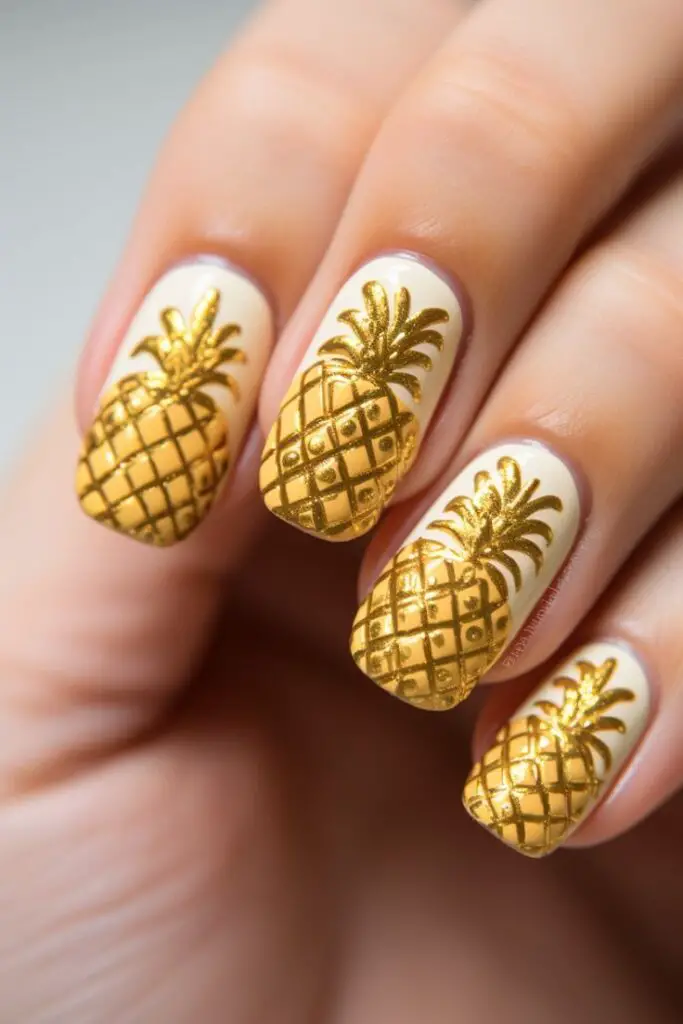
11. Pineapple Print
Pineapple Print nails are a delightful way to bring a touch of tropical flair to your summer style. Here’s how you can achieve this playful look:
Step-by-Step Guide to Pineapple Print Nail Art
Base Preparation
Apply a clear base coat, followed by two coats of white nail polish on the middle and ring fingers to set a clean canvas.
Creating Pineapple Base
Use a dotting tool dipped in yellow nail polish to create oval shapes on your nails. These will form the base of your pineapple fruits.
Adding Pineapple Details
With a thin brush and green nail polish, paint a straight line from the center of each yellow oval upwards.
Add two leaves on each side of this central line to form the pineapple crown.
For the pineapple texture, use gold polish to paint a cross-hatch pattern inside each yellow oval, creating a diamond shape that mimics the texture of a pineapple’s skin.
Finishing Touches
Quickly apply a top coat to seal in your design and prevent any smudging.
Tips for Perfect Pineapple Print
Ensure that the yellow ovals do not line up side by side to give a more natural, staggered look.
Add leaves to all yellow ovals, even those partially hidden, to enhance the three-dimensional appearance of your pineapples.
Consider using a stamping plate for more uniform pineapple designs, filling in the details with green and yellow polish through reverse stamping techniques.
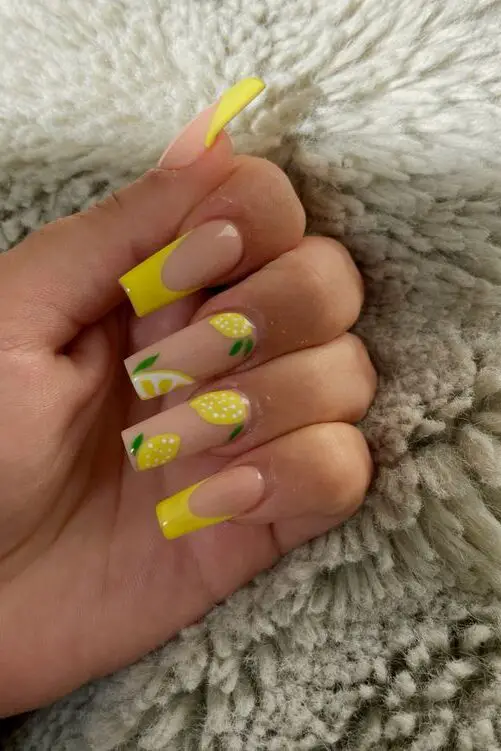
12. Lemon Wedges
Lemon Wedges nail art brings a zesty twist to your summer style, perfect for those who love a splash of citrus.
This design is inspired by the fresh and vibrant look of a lemon wedge, making it a standout choice for warm-weather festivities.
How to Create Lemon Wedge Nail Art
Base Preparation:
Start by applying a clear dip powder base to protect your nails and ensure a smooth application.
Paint all nails except the ring finger with a white semi-circle at the base to represent the lemon pulp.
Adding Details:
Using thin nailer brushes, draw thin lines from the edge of the semi-circle towards the center of the nail base, mimicking the segments of a lemon.
For the ring finger, apply a base of ‘Strawberry Fields’ by China Glaze to create a contrasting strawberry effect.
Finishing Touches:
Cure the design under a UV lamp to set the details.
Paint a semi-circle with ‘Watermelon Rind’ by China Glaze overlapping the white to depict the rind of the lemon.
Fill in the segments with Beatles gel liners in yellow, and finish with a gel top coat for a glossy look.
Alternative Method Using Nail Polish Strips
Creating Nail Polish Strips:
Apply a base of white polish and let it dry slightly.
Paint your lemon wedge design on a silicon mat using yellow and green polishes.
Once dry, peel off and apply the strips to the nails, trimming to fit and cleaning up the edges.
Detailing and Top Coat:
Draw leaves on the stripes using a green polish and a fine nail art brush.
Seal your design with a top coat to ensure a smooth, durable finish.
13. Tropical Flower Art
Step-by-Step Guide to Tropical Flower Nail Art
Preparation and Base Color
Begin by applying a base coat named ‘Clearly Frisky’ to protect your nails and add shine.
Paint your nails with three coats of ‘Lovey-Dovey’ for a bright and opaque base, perfect for making the colors of the tropical flowers pop.
Creating the Flower Base
Using a pencil, draw the outline of the tropical flower starting from a slightly curved line at the corner of the nail.
Draw straight lines outward from the curved line to create a flower-like shape, connecting the ends with curved lines to complete the petals.
Adding Details and Colors
Fill in the base of the flower with a pastel yellow color, made by mixing orange, yellow, and white. Do not cure in the lamp yet.
Blend the colors using a gel base to create a smooth transition. Add darker shades to the leaves and blend again with the base gel and white paint without dispersion.
Use ‘Raven’s Kiss’ for the flowers and add final details using black paint without dispersion for sharp and clear outlines.
Additional Design Elements
Ombre Effect: On two nails, create an ombre effect using pink, purple, and blue polish to complement the tropical theme.
Accent Nail: Paint the middle nail gold to serve as an accent nail, enhancing the overall tropical vibe.
Dotting Tool Designs
Polka Dots: Use a dotting tool or the balled end of a bobby pin to make small white polka dots in the filled-in area above the flower-like shape, up to the cuticle, adding a playful touch to the design.
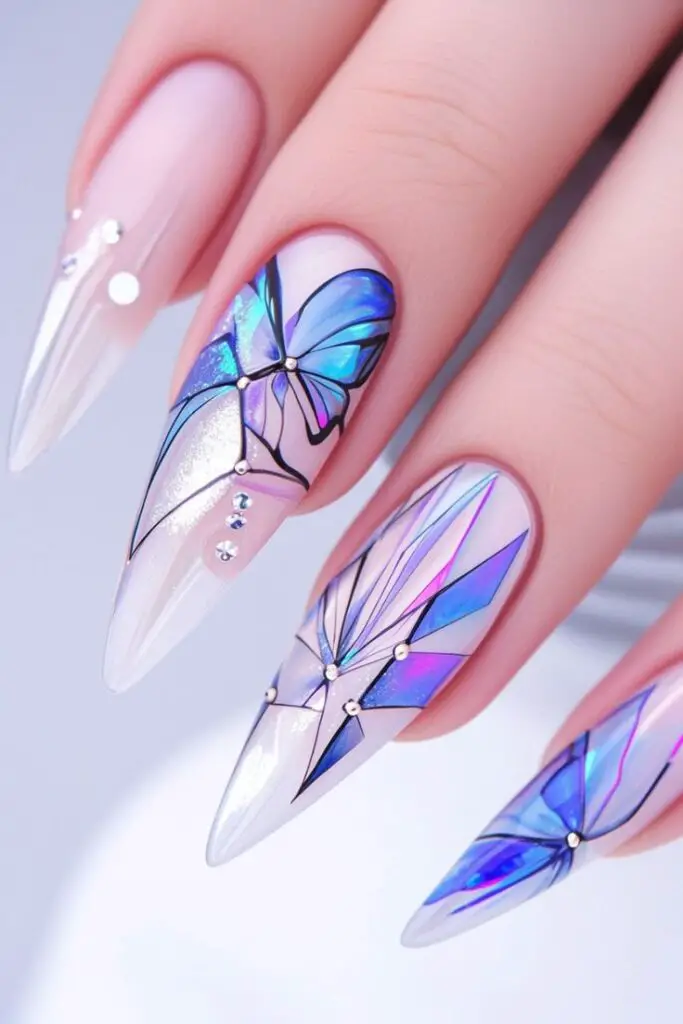
14. Butterfly Wings
To create an enchanting Butterfly Wings nail art design, follow these steps for a look that captures the delicate beauty of butterflies. This design is perfect for adding a whimsical touch to your summer nail ensemble.
Step-by-Step Guide to Butterfly Wings Nail Art
Base Coat and Gradient Preparation
Start by applying a clear base coat to protect your nails.
For the gradient background, use a makeup sponge to blend Essie’s Lala Land, Sally Hansen’s Royal Hue, and Color Club’s ‘Choose Happiness’. Ensure the colors overlap slightly on the sponge for seamless blending.
Creating the Butterfly Effect
Once the gradient base is dry, apply Holo Taco’s Aurora Unicorn Skin to add iridescent flakes that mimic the delicate shimmer of butterfly wings.
Use a striping brush to draw long, sweeping lines from the nail’s base to the tip, flicking outwards at the ends to create the wings. Outline these wings with a medium-thick line using black acrylic paint for definition.
Adding Details and Finishing Touches
Fill the lower part of the nail with solid black to contrast against the colorful gradient.
Add small white dots using white acrylic paint along the black area to simulate the spotted pattern often seen on butterfly wings.
For a holographic touch, apply pastel-colored polish over the white dots. Finish with a layer of thick glossy top coat for shine and a matte top coat for a subdued yet stunning effect.
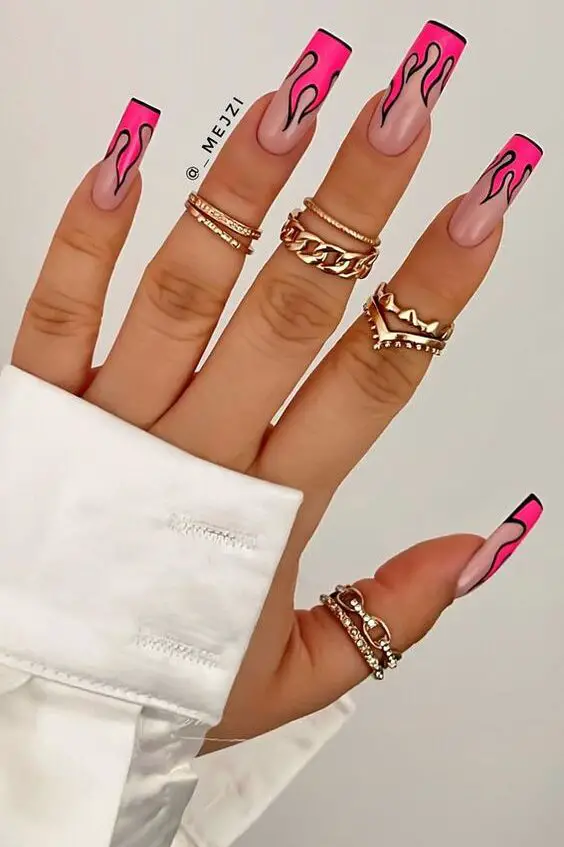
15. Flaming Hot Pink
Flaming Hot Pink nails are all the rage, offering a bold and vibrant choice that stands out beautifully against the summer sun.
Unique Hot Pink Designs
Hot Pink Zebra Design: Unleash your wild side with stripes that combine the fierceness of zebra patterns with the boldness of hot pink.
Pink Cowboy-Hat Mani: Embrace a playful, themed look with tiny cowboy hats adorning a hot pink base.
Strawberry Glazed Donut Baby Pink Chrome Mani: Indulge in the sweetness of this design that pairs a softer baby pink chrome with a delicious donut-inspired style.
Hot Pink with a Twist
Hot Pink with Flames and 3D Elements: Add some heat to your nails with flaming hot pink designs, complemented by 3D elements like gold stars and glass bubbles for an eye-catching look.
Barbie Hot Pink Nails: Channel your inner Barbie with nails as vibrant as they are playful, perfect for any fashion-forward event.
Pink Heart Nails: Ideal for romantic evenings or just spreading some love, these nails feature adorable pink hearts on a hot pink base.
Soft and Subtle Variations
Angel Pink Nails with Glitter: Soft angelic pink meets sparkling glitter, creating a look that’s both subtle and striking.
Soft Pink Cotton Nails with Gems and Glitter: For a touch of luxury, opt for soft pink nails adorned with gems and a sprinkle of glitter.
Coral Pink Ombre Nails with Chrome Flakes: Experience the gradient magic with coral pink ombre nails, elevated with shiny chrome flakes for a mesmerizing finish.
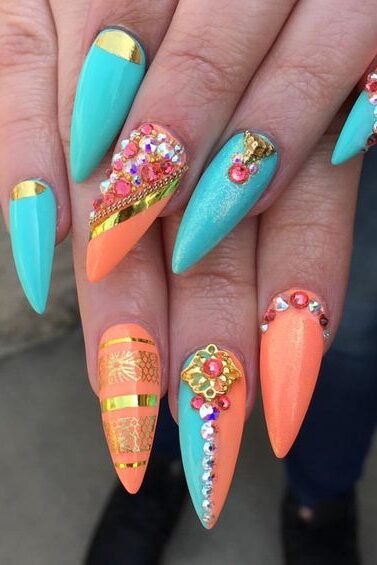
16. Coral and Teal Mix
Dive into the vibrant world of Coral and Teal nail art, a popular choice that combines two striking colors to create statement designs that are eye-catching yet not overwhelmingly loud.
This Soak Off Gel Nail Colour features a patented LED formula, ensuring a high gloss finish that impressively lasts up to 21 days.
Popular Coral and Teal Nail Designs
Pressed Petals and Gold Leaf: Incorporate natural elements like pressed petals with shimmering gold leaf for a luxurious look.
Marble Accents: Achieve a sophisticated style with marble accents that blend coral and teal seamlessly.
3D Flowers: Add dimension to your nails with 3D flowers, creating a tactile and visually engaging design.
Color Block and Fade Effects: For a modern twist, try color blocking or gradient fades that transition smoothly between coral and teal.
Step-by-Step Application Techniques
Base Coat: Start with a coral base coat to set a vibrant foundation.
Teal Details: Apply teal triangles at the tips of your nails for a geometric contrast.
Accent Details: Add white dots randomly across the nails to enhance the design.
Top Coat: Seal your design with a clear top coat to ensure durability and gloss, maintaining the look for up to a week without significant wear.
17. Marbleized Effect
Creating a marbleized effect on your nails can add a sophisticated and artistic touch to your summer nail designs. Here’s how you can achieve this stunning look using different techniques and materials:
Gel Polish Marble Effect
Base Preparation: Start by applying a milky white gel polish as your base and cure it under a UV or LED lamp.
Color Application: On a palette, mix three gel colors of your choice. Popular summer choices include shades of blue, pink, and white. Slightly swirl these colors together with a gel brush.
Creating the Marble Design: Use the gel brush to scoop up the mixed colors and apply them to your nail in a zigzag motion. Blend the edges by gently tapping with the corner of the brush to create a natural marble effect.
Adding Details: For a touch of elegance, add gold glitter using a liner brush along the veins of your marble design.
Curing and Top Coat: Cure the design under the lamp and finish with a glossy top coat to enhance the depth and shine of your marbleized nails.
Water Marble Technique
Setup: Apply a base coat and once dry, protect the skin around your nails with scotch tape.
Creating the Water Marble: Add drops of your chosen polishes into a cup of room temperature filtered water. Use a toothpick to drag through the polish creating a bullseye pattern.
Dipping Your Nails: Dip your finger into the desired part of the design on the water surface. Carefully remove the scotch tape and clean up any excess polish around your nails.
Finishing Touches: Apply a top coat to seal in the design and add a beautiful shine to your water marble nails.
Alcohol Ink Marble Effect
Base Color Application: Apply a base coat or a light-colored polish and let it cure. Then, use alcohol ink to add drops randomly on the nail.
Blending the Ink: Allow the ink to bloom or blend outwards naturally. Use 99% alcohol and a small pointed brush to soften and blend the edges of the alcohol ink.
Creating Veins: Drag a clean brush through the gel to mimic the fine lines and intricate patterns of marble.
Final Touches: Finish with a protective top coat to ensure the longevity and brilliance of your marbleized nail art.
18. Metallic Accents
Metallic nail designs are not just about adding a touch of sparkle; they encapsulate a range of techniques and styles that can transform your nails into a statement piece.
Popular Metallic Nail Styles and Techniques
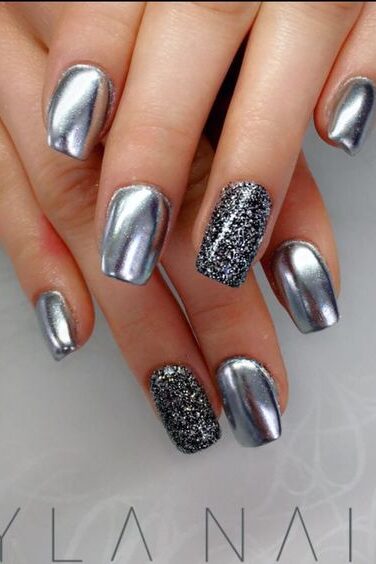
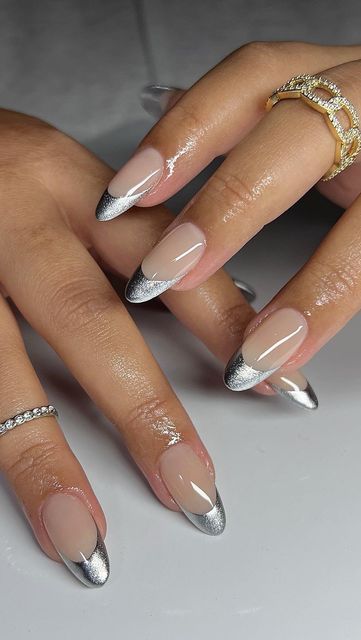
Metallic French Tips: Apply a classic French tip using a metallic silver or gold polish for a chic, refined look.
Chrome Dip Nails: Use chrome powder to achieve a mirror-like finish that’s sure to catch the eye.
Metallic Ombré: Blend two metallic shades, like silver and gold, to create a seamless gradient effect.
Accent Designs: Incorporate metallic stripes or dots into your nail art for added flair.
DIY Metallic Nail Art Ideas
Celestial Patterns: Use stencils to add stars and moons in gold or silver.
Mixed Metals: Combine different metallic shades on various nails for a trendy, eclectic look.
Simple Accents: Even a single metallic stripe on a matte base can make a bold statement.
19. Mismatched Summer Colors
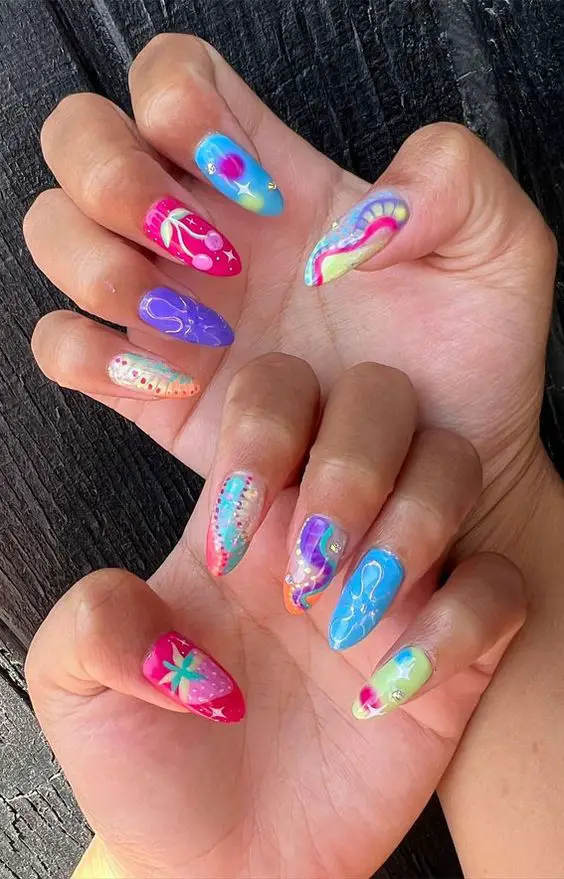
Embrace the vibrant trend of mismatched summer colors, where each nail serves as a unique canvas showcasing individual creativity.
Popular Mismatched Designs
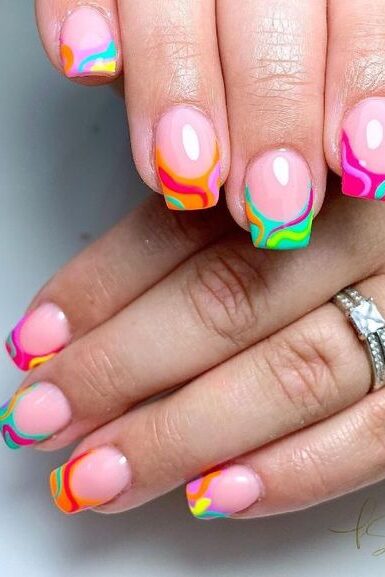
Neon Ombre and Glitter: Combine neon ombre nails with glitter accents for a striking look.
Pastel and Metallic Mix: Pair soft pastels with bold metallics for a sophisticated yet playful vibe.
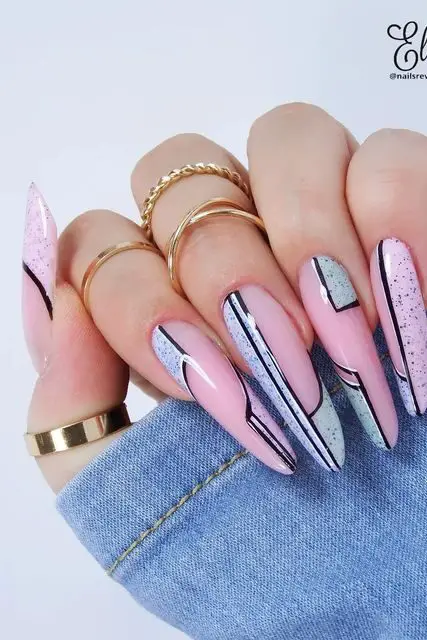
Abstract and Geometric Patterns: Mix abstract swiggles with geometric shapes like checker nails or outline nails for a dynamic appearance.
This trend not only allows for endless creativity but also adapts to various styles, from the subtle elegance of neutral and nude tones to the boldness of neon coral.
Tools and Resources for DIY Mismatched Manicures
Nail Art Pens and Stickers: Utilize tools like Nails.Inc’s Mani Marker Nail Art Pens and Inked by Dani Nail Art stickers to add precise designs and playful stickers.
Digital Apps: Explore apps like YouCam Nails for a virtual preview of your designs, helping you mix and match colors and patterns with ease.
20. Negative Space Designs
To embark on your journey into the chic world of Negative Space nail designs, begin by applying a protective base coat.
This not only shields your nails from potential staining but also ensures a smoother application of the subsequent layers.
Step-by-Step Creation of Negative Space Designs
Base Coat Application:
Start with a clear base coat to protect and prep your nails.
Designing with Tape:
For precise and clean lines, use striping tape or blue painter’s tape. Place the tape in patterns or shapes on your nail, exposing parts you want to remain color-free.
Color Application:
Apply your choice of bold contrasting polish over the tape. Black and white are popular for their striking visual impact, but feel free to experiment with vibrant colors.
Tape Removal:
Carefully remove the tape when the polish is not completely dry but past the tacky stage, to ensure sharp lines.
Detailing:
Enhance designs like heart shapes or moons using a thin brush with white polish or a stamping plate for more intricate patterns.
Cleanup and Finish:
Use an eyeliner brush dipped in acetone to clean up any polish outside the lines. Finish with a glossy top coat to protect your design and add a beautiful shine.
Tips for Mastering Negative Space Art
V-Shaped Stickers: Utilize V-shaped stickers or tape to expose the moon of the nail, applying polish only to the outer edges for a modern look.
Minimalist Approach: For a subtler take, opt for mismatched colors paired with negative space, maintaining a minimal yet stylish effect.
21. Geometric Shapes
Geometric nail art is a dynamic trend that blends art and precision to create eye-catching designs. From the minimalist to the extravagant, geometric patterns can be tailored to fit any personality or occasion.
Popular Techniques and Designs
Mixed Media Applications: Incorporate a variety of materials such as holo, holographic elements, glitter, and nail decorations to enhance the visual appeal.
For example, the Holo Stamping technique, as shown in designs by Nailsgerous, uses a holographic stamp over a base color to create a mesmerizing effect.
Abstract and Complex Patterns: Abstract designs like the Summer Purple Nail Art feature sunset-inspired backgrounds with overlapping geometric shapes, offering a more artistic approach.
Additionally, using acrylics or gel, like in the Smokey Quartz design by Cheyene367, provides a durable and vivid canvas for intricate patterns.
Embellishments: Adding embellishments such as crystals and caviar beads can elevate the design. The strategic placement of rose gold crystals and caviar beads in designs from D Pala International not only enhances the aesthetic but also adds texture and depth to the artwork.
22. Dotted Accents
Dotted accents on nails can transform a simple manicure into a playful and intricate design. Here’s how you can achieve various looks with dots, from subtle enhancements to bold statements.
Step-by-Step Guide to Creating Dotted Nail Art
Base Preparation:
Begin by applying a protective base coat to shield your natural nails.
Paint your nails with a solid base color and allow it to dry completely. For a classic look, opt for a crisp white or a deep black as your base.
Adding Dots:
Dip a dotting tool or the rounded end of a bobby pin into your chosen nail polish color.
Gently press the tool onto your nail to create a dot.
For a cohesive look, create a single dot at the base of each nail. For something more dynamic, scatter dots across the entire nail surface.
Creating Patterns:
To make a gradient effect, start with larger dots at the base of the nail and gradually use smaller dots as you move toward the tip.
For a fun twist, use multiple colors to add vibrant dots over a neutral base.
Finishing Touches:
Once all dots are in place and the polish has dried, seal your design with a quick-drying top coat. This not only adds a beautiful shine but also extends the longevity of your manicure.
Tips for Perfect Dots
Consistency is Key: Ensure that the amount of polish on the dotting tool is consistent to avoid uneven dots.
Spacing: Space the dots evenly to maintain symmetry, or intentionally place them asymmetrically for a more avant-garde look.
Color Choices: Experiment with contrasting colors for the dots to make them pop against the base color. For a subtler look, use shades that are close to the base color.
23. Wavy Lines
To achieve the mesmerizing Wavy Lines nail art, start by ensuring your nails are prepped for a flawless application.
Begin with a base coat to improve polish adherence and protect your nails from staining. Here’s a step-by-step guide to creating this dynamic look:
Base Color Application:
Apply a light green polish as your base color, setting a vibrant backdrop for the wavy designs.
Creating the Waves:
Use a thin brush and a dark green shade to draw the first “S” shape down the nail.
Connect this with another “S” shape in the center, then fill in the middle area to enhance the wave effect.
Continue adding wavy lines with progressively lighter shades of green, layering each new wave slightly over the previous one to create depth.
Detailing and Finishing Touches:
For the final touches, reapply the dark green shade, allowing it to slightly overlap the previous layers, integrating the base color into your wavy design.
Once all the shades are applied, finish off by applying the colors in sequence along the rest of the nail.
Seal your design with a top coat for a gel-like finish and added shine, ensuring your wavy lines stay vibrant and intact.
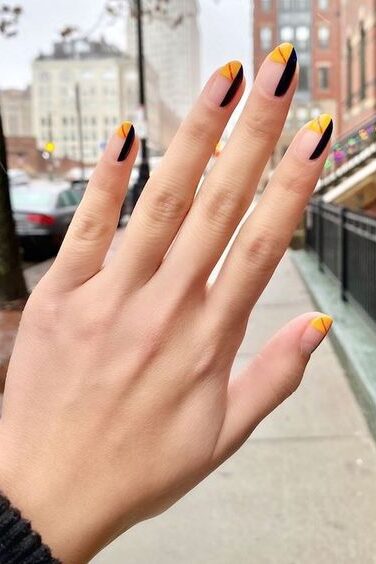
24. French Tip with a Pop of Color
French tip nails have evolved far beyond the classic white tips, becoming a canvas for creative expressions with a variety of colors and patterns.
Colorful and Creative French Tips
Color Combinations: Experiment with vibrant color combinations like blue and orange or different shades of green to add a unique twist to your nails.
Using techniques like the ‘flat French’ or creating arcs on each side can help achieve a precise and appealing look.
Patterned Designs: For those who love intricate details, consider adding patterns such as watercolor, fleur-de-lis, or even a sequin effect. These designs can be adapted to various nail shapes and lengths, making them versatile for everyone.
Occasion-based Styles: Adapt your French tips for different occasions. For instance, adding hearts or flowers for Valentine’s Day or bright, mismatched colors for summer festivities can make your nails stand out.
DIY Techniques for French Tips
Starting Simple: If you’re new to DIY French tips, begin by painting a small dash at the tip of your nail and slowly make arcs on each side to form the classic French tip shape.
Adding Details: Once you’re comfortable, incorporate elements like 3D shiny white gel lines on a matte base to create a seashell-inspired look, perfect for a beach-themed event.
Mismatched French Tip Ideas
Bright Angles: Try baby blue nails with a hot pink stripe for a playful and eye-catching design.
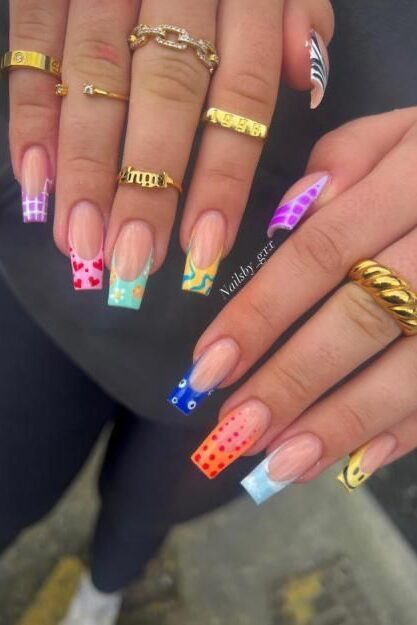
10 Different Colors: For those who love variety, paint each nail with a different colored French tip. This mismatched design approach is not only trendy but also allows for personal creativity and expression.
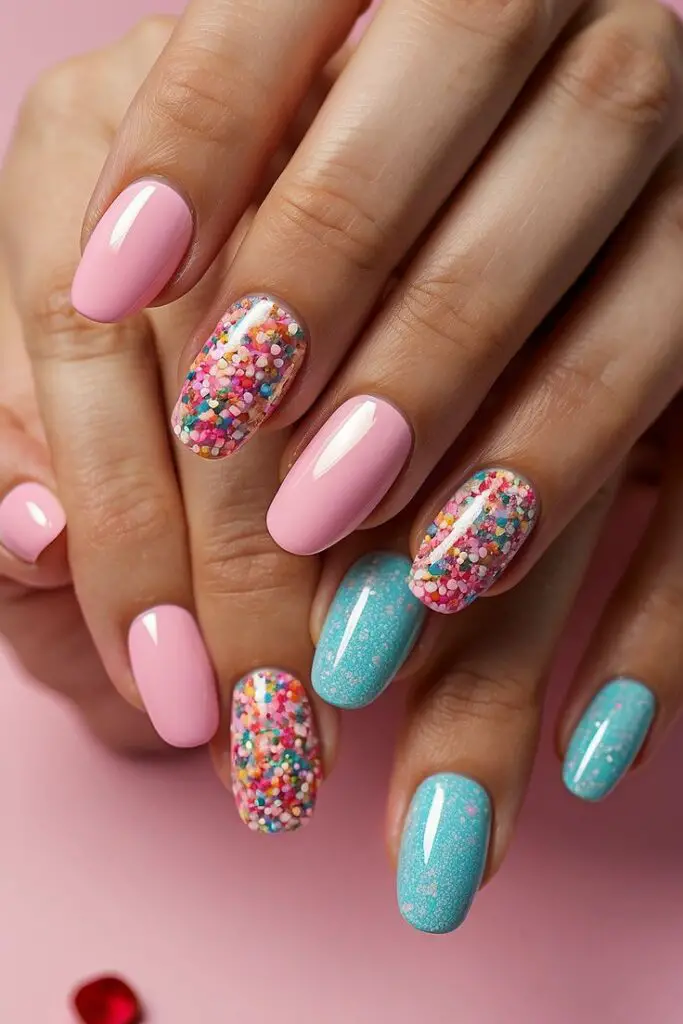
25. Confetti Nails
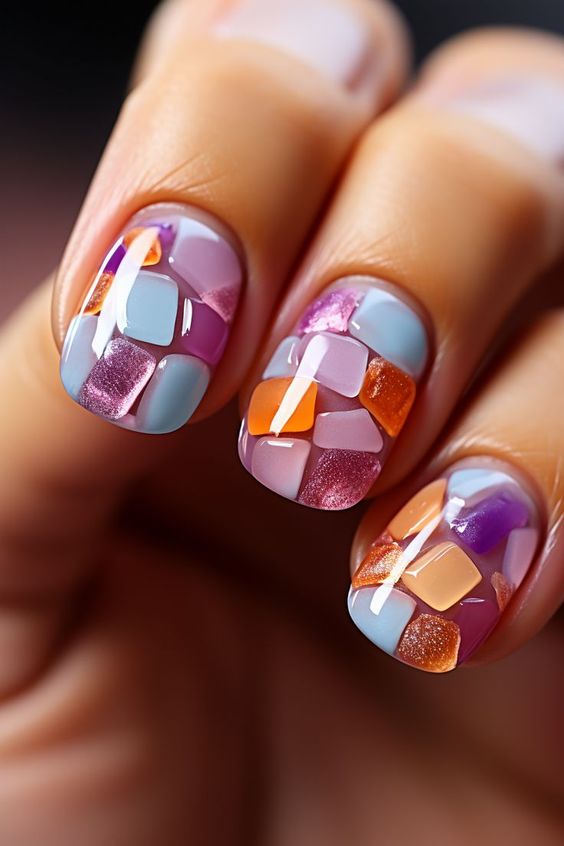
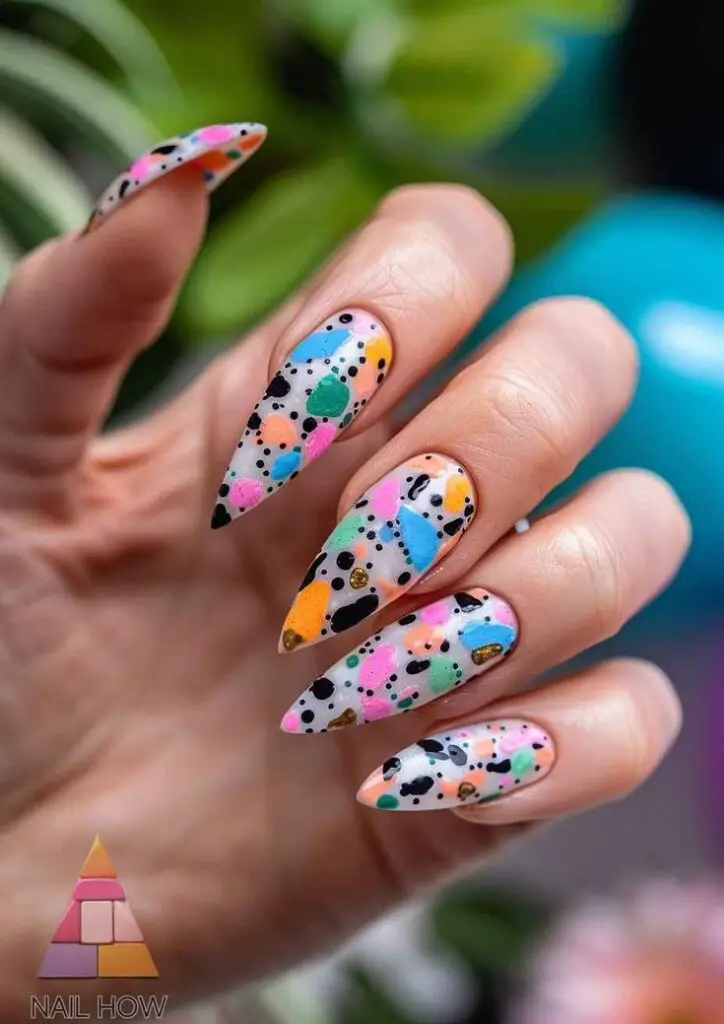
Confetti nail art is a delightful way to sprinkle a dash of fun and color onto your nails. This style incorporates small, colorful specks or shapes that resemble confetti, instantly elevating your manicure with a festive touch.
From elegant French manicures to edgy stiletto nails, the versatility of confetti designs knows no bounds.
Popular Styles and Customizations
Nail Shapes: Confetti can be applied to various nail shapes including round, square, almond, and more, making it a versatile choice for everyone.
Custom Looks: For a personalized touch, consider adding bling or glow effects. Black, white, silver, and gold confetti are particularly popular as they complement most outfits and other nail art designs.
DIY at Home: With the right tools like a detail brush and a selection of glitter or confetti specks, you can easily create this look at home. Brands like Zoo Nail Art offer products such as ‘Chameleon’ Confetti and Confetti Giraffes in different colors to help achieve your desired look.
Techniques and Trends
Subtle to Bold: For a subtle effect, opt for a sheer sprinkling of colorful hearts and stars. If you prefer something more striking, try glitter suspended in gel tips or a dense layer of silver stars on a neutral base.
Texture Play: Experimenting with different textures such as holographic or iridescent finishes can elevate the visual appeal of your confetti nails. Incorporating elements like flowers, hearts, and stars can add complexity and intrigue to your design.
26. Textured Nail Art
Textured nail art offers a creative way to add depth and intrigue to your manicure, with a variety of techniques and designs to explore.
For those who enjoy a DIY approach, products like EZ Dip Gel Powder from Oceans of Beauty provide a user-friendly solution that lasts 2-3 weeks.
This type of dip powder nails does not require a lamp and can be applied at home with ease. To achieve a textured look, you can also use a thick structure gel or 3D gel, available in both clear and colored varieties.
Popular Textured Designs and Techniques
Sweater Nails: Mimic the cozy feel of knitwear with sweater nails, perfect for colder seasons. Use gel nail polish combined with a fine nail art brush or dotting tool, loose acrylic powder, and alcohol. Finish with a matte top coat to enhance the textured effect.
Sugar and Sand Textures: For a granular appearance, sprinkle loose powder polish or sugar over wet polish and seal it with a top coat, but only on the top to preserve the textured effect below.
Embossed and 3D Designs: Utilize 3D art gel or builder gels to create raised designs like gem & rhinestones, embossed floral details, and more. These can be further embellished with elements such as glass pearls or fairy swirled patterns.
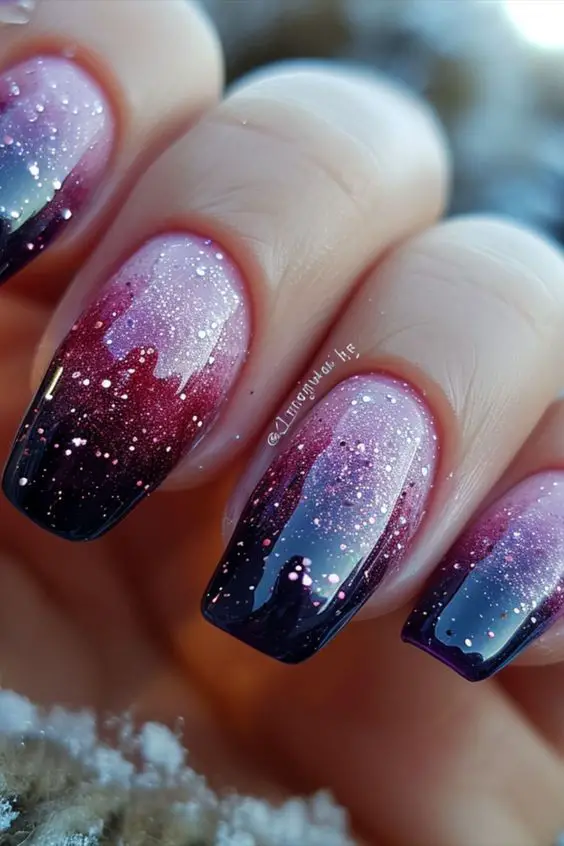
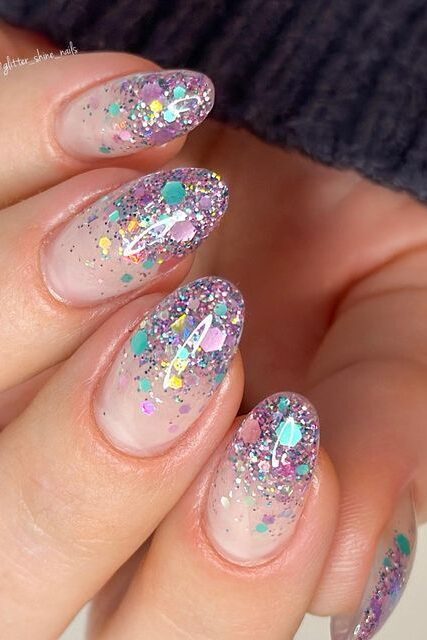
27. Ombré with Glitter Fade
To create a stunning Ombré with Glitter Fade effect on your nails, start by prepping your nails with a base coat to ensure a smooth and long-lasting finish.
Choose a base color that complements the glitter you plan to use. After applying the base color and allowing it to dry completely, follow these detailed steps to achieve the perfect gradient glitter fade.
Step-by-Step Guide to Ombré with Glitter Fade
Apply Glitter Polish to the Tips
Begin by applying a glitter nail polish to the tips of your nails. Use the brush to lightly drag the glitter down towards the middle of the nail, decreasing the amount of glitter as you move downward to create a fading effect.
Enhance the Gradient
For a more pronounced gradient, use a small sponge or an eyeshadow brush. Dip it lightly into the same glitter polish and dab it over the area where the glitter thins out. This technique helps blend the glitter seamlessly into the base color.
Add Individual Glitters for Detail
To intensify the sparkle and add depth, use a toothpick or a fine dotting tool to place individual glitters strategically along the gradient. Focus on areas where the transition occurs to emphasize the fade effect.
Seal with a Top Coat
Once you are satisfied with your glitter placement and the overall look, apply a clear top coat. This not only seals in your design but also adds a glossy finish that enhances the sparkle of the glitter.
Tips for a Flawless Finish
Let Each Layer Dry: Ensure that each layer of polish dries completely before applying the next. This prevents dragging and smudging, which can ruin the gradient effect.
Use a Barrier: Apply a liquid latex barrier around your nails before starting. This makes cleanup easier and prevents glitter from sticking to your skin.
Experiment with Colors: Don’t hesitate to experiment with different base colors and types of glitter. Each combination can create a unique and eye-catching result.
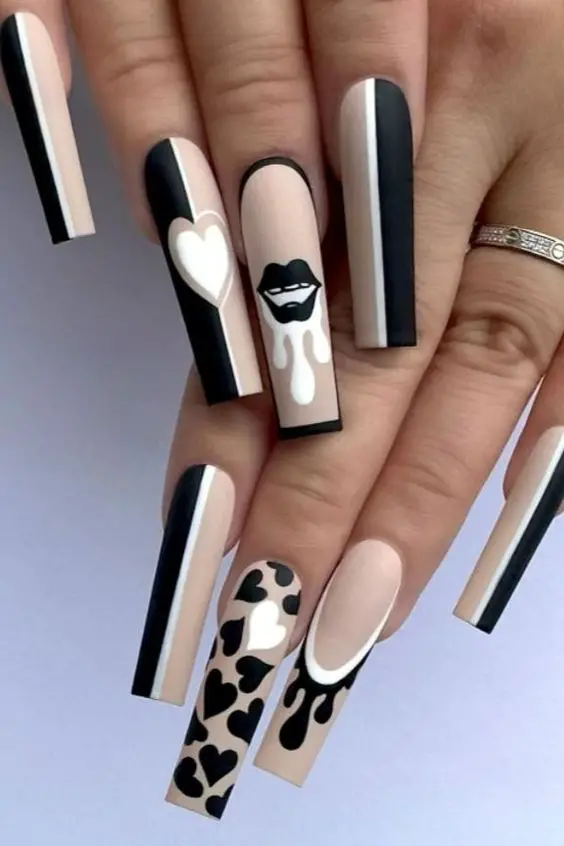
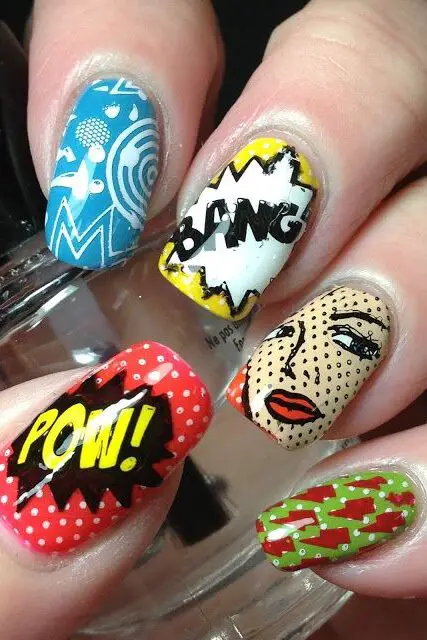
28. Comic Book Inspired Nails
Comic book nail design captures the vibrant and dynamic essence of comic book art, making it a popular trend for those looking to add a playful and bold touch to their manicure.
The designs typically feature exaggerated forms, bold lines, and dynamic shapes that mimic the pages of a comic book.
These designs range from simple and minimal to bold and animated, catering to a variety of tastes and preferences.
Each nail acts as a mini canvas, featuring detailed painted-on lines around the perimeters that emulate the iconic look of comic book illustrations.
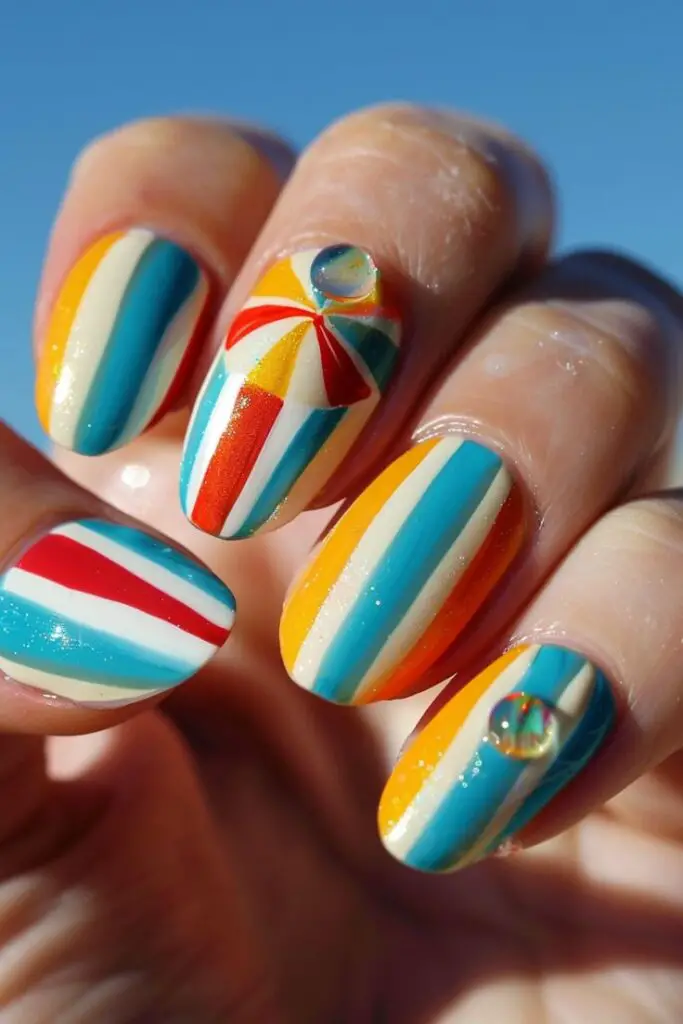
29. Beach Ball Design
This design cleverly uses a large circle at the base of the nail, adorned with three colorful triangles in red, blue, and yellow, mimicking the classic beach ball look.
A tiny white circle, representing the air valve, adds an authentic touch to the design. Praised for its simplicity and neatness, this nail art has received glowing comments from enthusiasts who appreciate both its aesthetic appeal and easy-to-follow method.
For those eager to recreate this sunny look, here’s a step-by-step guide using recommended products:
Base Preparation: Start with PRO Nail Systems Base Coat for a smooth foundation.
Color Application: Apply Illamasqua Noble as the base color. Once dry, use Sticky Nails Guides to help paint the beach ball design.
Detailing the Beach Ball: Paint the large circle using China Glaze polish. For the triangles, use OPI My Boyfriend Scales Walls for white, Barry M Gelly Blue Grape for blue, OPI Over & Over A-Gwen for red, and OPI I Just Can’t Cope-acabana for yellow.
Outlining: To define the shapes and add depth, outline the design with OPI Black Onyx.
Top Coat: Seal your design with a top coat to ensure durability and enhance the shine.
30. Seashell and Sand Art
Creating a serene Seashell and Sand Art design on your nails can transport you straight to the beach, no matter where you are.
This particular nail art uses the shimmer of glittery gold polish to craft beautiful lines in the sand and a charming heart shape, perfect for a romantic summer evening or a day out by the sea.
Step-by-Step Guide to Crafting Your Seashell and Sand Art
Base Color Application:
Start with a nude or light beige polish to mimic the sandy beach. Apply two coats for full coverage, ensuring each layer is dry before proceeding to the next.
Creating Sand Textures:
Take a fine brush and your glittery gold polish. Carefully draw thin, wavy lines across each nail, simulating the natural patterns left by waves on sand. The key is to keep the lines delicate and somewhat irregular to capture the authentic look of sand ripples.
Adding the Heart:
Choose a focal nail, typically the ring finger, for a standout design. Using the same glittery gold polish, draw a small heart shape. Fill in the heart with a solid coat of the polish to make it pop against the sandy background.
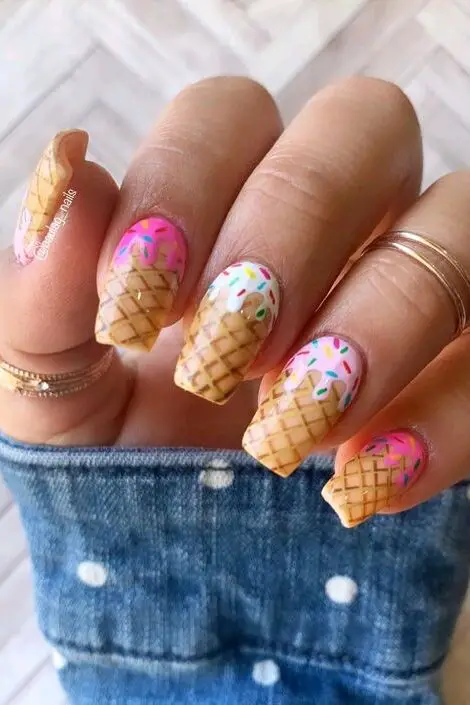
31. Ice Cream Cone Design
To craft a delightful Ice Cream Cone nail design, you can explore a range of techniques and products that bring this sweet treat to life on your nails. Here’s how you can achieve this playful look:
Step-by-Step Guide to Creating Ice Cream Cone Nail Art
Choosing Your Style and Base
Opt for acrylic nails in fun shapes like coffin or long square styles. Begin by applying a base coat of light brown polish to mimic the cone.
Adding the Ice Cream Scoop
Use a bobby pin stretched out to dab on dots of your chosen ice cream colors—think purple, pink, or cream. For a more realistic scoop texture, employ a large dotting tool.
Detailing Your Design
With a thin brush, add lines to represent the cone’s texture and use various smaller dotting tools or the tip of a pin for sprinkles. Consider decals for a sharp cone outline or to add specific features like a cherry on top.
Enhancing Your Design with Special Techniques and Products
Bling and Sparkle: Incorporate elements like glitter or small rhinestones to mimic the look of sprinkles or to add a glamorous touch to your ice cream.
Flavor Variations: Paint different flavors on each nail, such as mint chip, strawberry, or a decadent hot fudge sundae cone, using EZ Dip Gel Powder for a glossy finish.
Melted Effect: For a fun twist, create a melted ice cream look by allowing the colors to drip slightly down the nail, adding a touch of whimsy to your design.
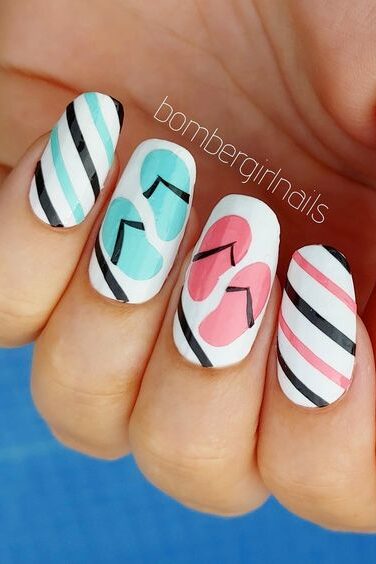
32. Flip Flop Nail Art
To bring a playful and beachy vibe to your nails this summer, try the Flip Flop Nail Art. This design is perfect for vacations or just to add a fun, summery touch to your everyday look. Here’s how you can achieve this adorable manicure:
Step-by-Step Guide to Creating Flip Flop Nail Art
Base Coat Application:
Start by applying a base coat like Essie Ridge Filling Base to ensure a smooth surface.
Color Foundation:
Paint your nails with two coats of Essie San Tropez, a lovely nude beige that mimics the sandy beaches.
Drawing the Ocean:
Outline and fill in a wavy ocean pattern at the tip of your nails using Essie Bikini So Teeny. Use a detail brush to fill in any sparse areas and add depth with Essie Find Me An Oasis by stippling it lightly for a frothy wave effect.
Creating Flip Flops:
With a white polish, outline and then fill in the shape of a flip flop on each nail. Use a detail brush for precision and correct any mistakes to sharpen the outlines.
Adding Details:
Decorate the flip flops with stripes using a vibrant color like Essie Butler Please, and draw the straps with a contrasting shade such as Essie’s Flowerista.
Top Coat for Protection:
Finish off by applying a generous layer of top coat to set and protect your design.
33. Sunset Gradient
To achieve the captivating Sunset Gradient nail art, follow this detailed guide that blends vibrant hues reminiscent of a sunset sky. This design not only adds a pop of color but also brings a touch of evening elegance to your summer nail collection.
Step-by-Step Guide to Sunset Gradient Nail Art
Base Coat and Color Preparation
Begin by applying a clear base coat to protect your nails and ensure a smooth finish.
Paint your nails with a white base color to make the colors of the sunset pop.
Creating the Gradient
On a flat surface, place a makeup sponge and apply stripes of nail polish in colors of a sunset—dark blue, purple, light pink, and orange, overlapping each slightly.
Dab the sponge gently onto your nails, starting from the cuticle and moving upwards to blend the colors seamlessly. Repeat this step until you achieve the desired intensity, allowing the polish to dry for about a minute between layers.
Adding Sparkle and Finishing Touches
Once your gradient is perfect, enhance the blue area with a holographic glitter polish to mimic the sparkling sky. Lightly drag some glitter down into the other colors to integrate the shimmer throughout.
Finish with a glossy top coat to protect your design and add a beautiful shine, making your nails ready for any summer adventure.
Tools and Materials
Base Coat: Orly Bonder or a similar product
Top Coat: Sèche Vite Dry Fast Top Coat for a durable finish
Nail Polishes: Choose vibrant sunset colors like purple (Nina Ultra Pro Passion Pink), pink (China Glaze Shocking Pink), orange (Sally Girl Amped), and a dark blue for the base of the gradient.
Glitter Polish: A holographic glitter polish to add sparkle
Other Supplies: Makeup sponges, nail polish remover, Q-tips for cleanup
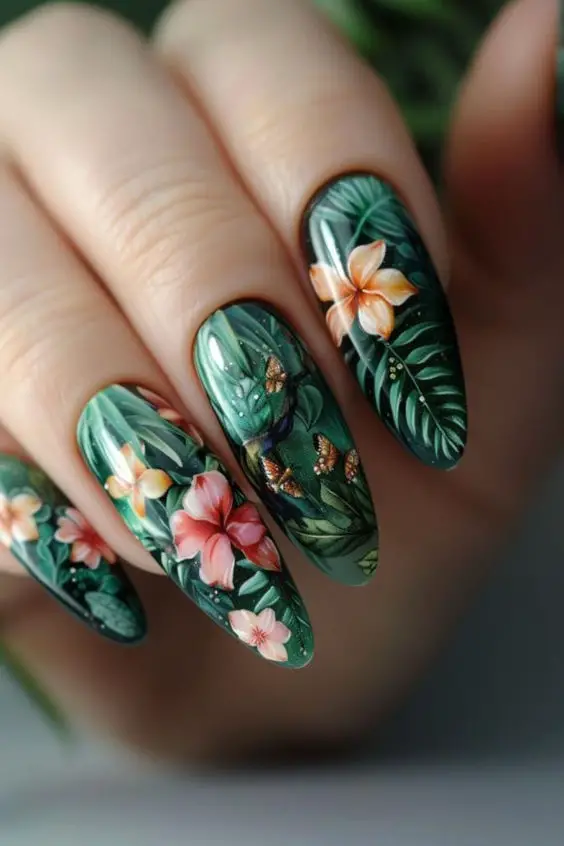
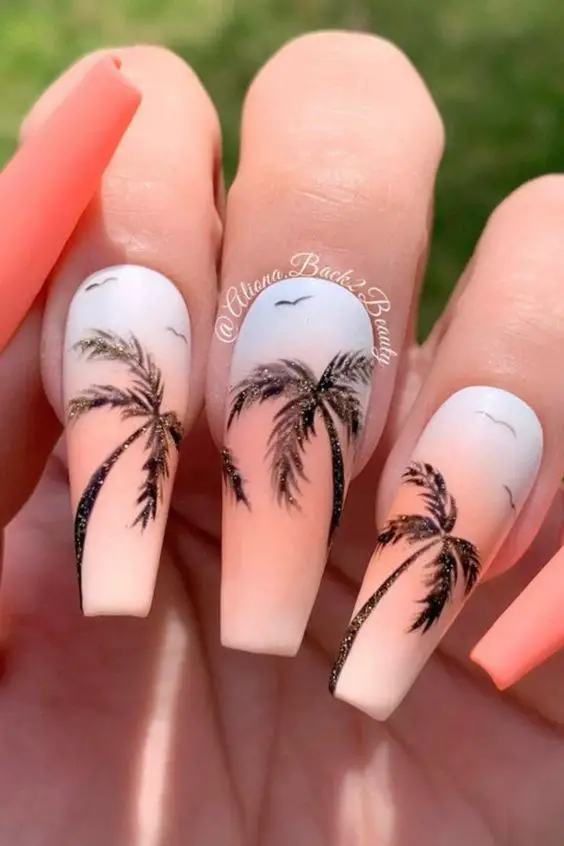
34. Palm Frond Design
To create the Palm Frond nail design, which perfectly captures the essence of tropical elegance, you’ll need a steady hand and a few specific shades of green. Here’s a simple guide to achieve this lush, leafy look on your nails:
Base Preparation:
Begin by applying a clear base coat to protect your nails and ensure a smooth canvas for your art.
Painting the Base:
Choose a light green polish as your base color to represent the lighter part of the palm fronds. Apply two coats for opaque coverage, allowing each coat to dry thoroughly.
Drawing the Fronds:
Using a darker green shade, take a thin brush to paint the frond designs. Start from the nail’s base, drawing upward in a slightly curved, feathered manner to mimic the natural shape of palm leaves.
Adding Details:
To add depth and realism to your design, use a fine brush dipped in a darker shade of green or black to outline the fronds and add the midrib and vein details.
Finishing Touches:
Once your design is complete and dry, seal it with a glossy top coat to protect your artwork and add a vibrant shine that enhances the green hues.
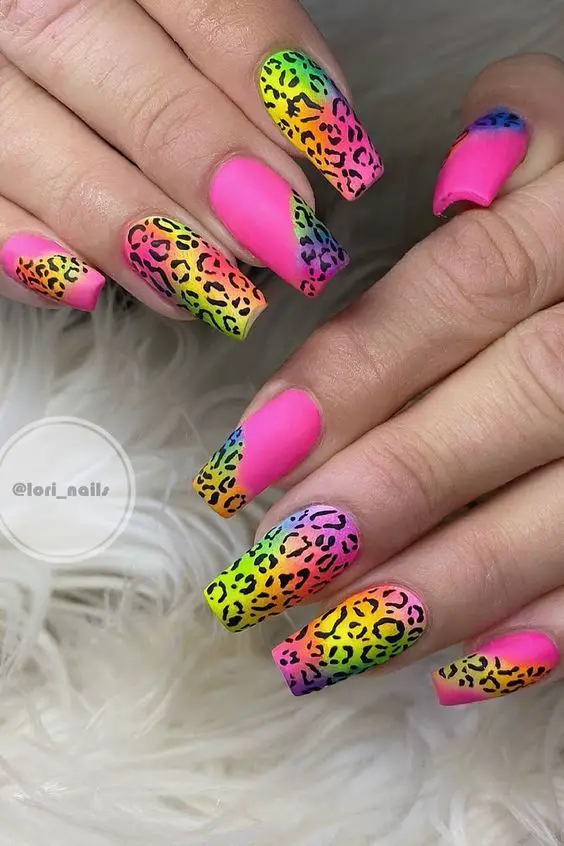
35. Neon Animal Print
Neon animal print nail design is a vibrant and eye-catching choice that merges the wild patterns of the animal kingdom with the boldness of neon colors.
Perfect for those who love to make a statement with their nails, this design incorporates patterns like cheetah, leopard, zebra, or snake skin.
You can choose from a variety of application methods including acrylics, gel nail, or traditional polish, making it versatile for any preference.
How to Create Neon Animal Print Nail Art
Select Your Base: Start with a bright neon base color such as pink, green, yellow, or orange to make the animal prints pop.
Apply Animal Patterns: Using a thin brush or a stamping kit, apply your chosen animal print design over the neon base. Popular choices include jagged leopard print edges or zebra stripes.
Seal the Design: Finish with a no-wipe top coat to protect your design and add a glossy finish. This step is crucial for ensuring your vibrant nails stay flawless for up to two weeks.
Customizing Your Neon Animal Print
Mix and Match: Combine different animal prints on each nail for a dynamic and eclectic look.
Ombre Effect: Blend two neon colors in a vertical ombre style before applying the animal print for a unique twist.
Tools and Techniques: Utilize an old makeup brush to softly apply the pigments for a more blended look, or opt for fiber gel tip extensions with cameo fiber gel for a durable and professional finish.
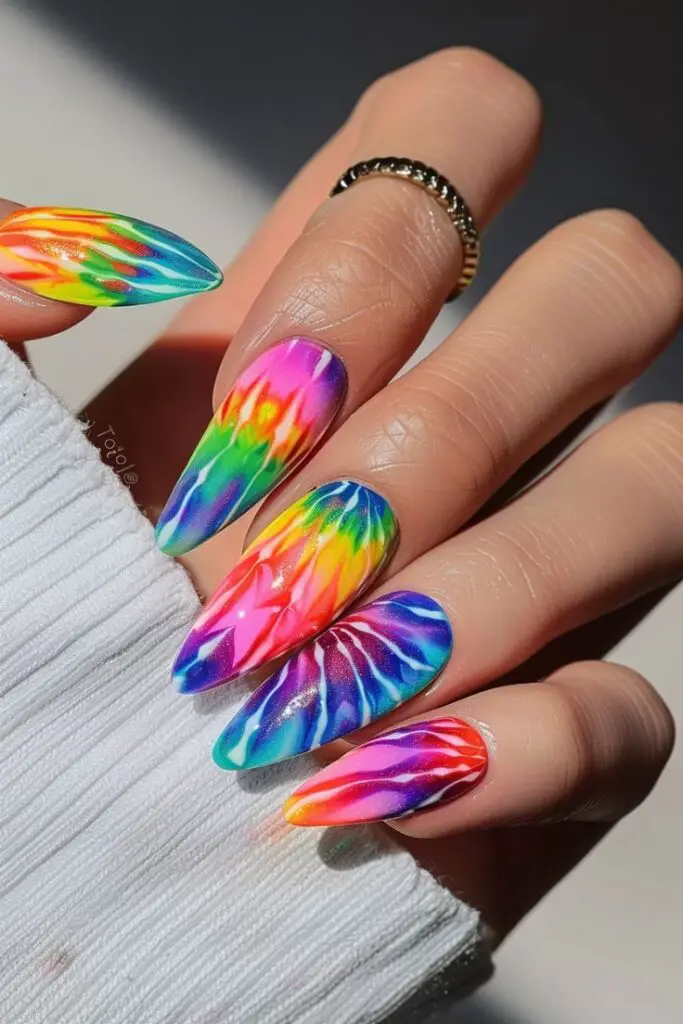
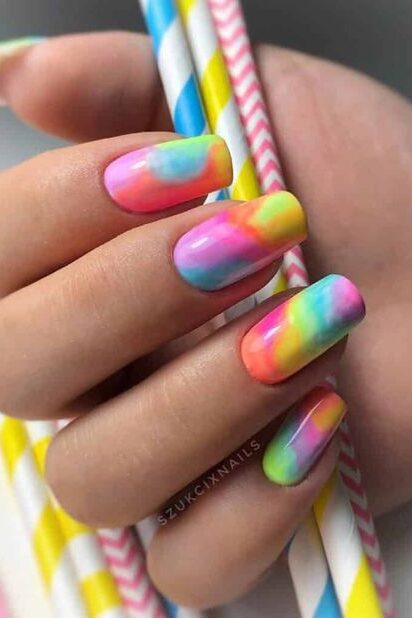
36. Tie-Dye Nails
Tie-dye nails are the perfect way to inject some fun and color into your summer style. To start, apply two coats of Snow White gel polish on your nails and cure them under a gel lamp.
Once cured, wipe over the gel polish with a gel residue wipe-off solution to prepare for the tie-dye effect.
Step-by-Step Tie-Dye Nail Art
Color Application: Select gel polish colors like Amethyst Fall, Looking Glass, Icy Blizzard, Trixie, and Hawaiian Lei. Apply each color in sections on the nail.
Creating the Design: Using a dotting tool or a fine brush, pull down each color section and then drag back up in between each color to blend them together. For different variations, pull the colors towards the center or in different directions to create a unique watercolor effect.
Curing and Sealing: After applying all colors, cure the design under a gel lamp. Finish by applying a top coat and cure it again to seal in your vibrant tie-dye design.
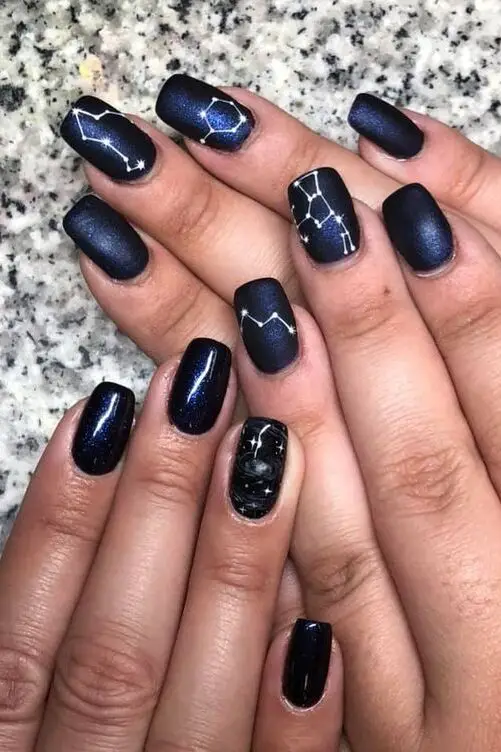
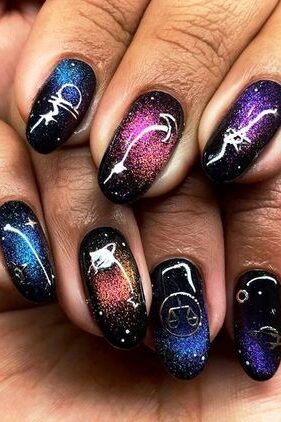
37. Starry Night with Constellations
To create an enchanting Starry Night with Constellations nail art, you can explore a variety of styles and techniques that capture the majestic beauty of the night sky. Here’s how you can achieve this celestial look:
Getting Started with “Starry Sky” Nail Polish Wraps
For those seeking a straightforward approach, “Starry Sky” nail polish wraps from Embrace Your Style Nails offer a convenient option.
These real nail polish wraps come in hundreds of styles, including ones perfect for a starry night theme.
They’re particularly user-friendly and ideal for first-time users, who can take advantage of a special discount code.
Creating Constellations with Starry Night Charms
If you prefer a more hands-on approach, consider using Starry Night Charms. These come in a mix of metallic stars, lines, and rhinestone nail art decorations in both gold and silver.
Start by applying a base layer, place the charms to form constellations like Orion, and secure them with a top coat. For precise placement, use a What a Stud Pickup Tool.
Detailed Tutorial for Starry Night Constellations Nail Art
For nail art enthusiasts who enjoy painting their designs, follow this detailed tutorial:
Base Coat: Start with Essie “Here to Stay” Base Coat for a long-lasting finish.
Main Color: Apply a coat of a discontinued but beloved shade, Essie “Reflection Perfection”, or a similar deep blue or black polish.
Drawing Constellations: Using a stripping brush and a dotting tool or toothpick, draw constellations. You can highlight the constellation Orion, known for its distinctive three-star belt.
Top Coat: Finish with Essie “Gel-Setter” Top Coat for a glossy and protective overlay.
38. Under the Sea with Fish
Dive into the enchanting depths of the ocean with the “Under the Sea with Fish” nail design, perfect for adding a splash of marine life to your summer style.
Using the Bundle Monster Sun Kissed Collection (BM-501 and BM-504), you can create detailed and vibrant underwater scenes right on your nails.
Begin with a base color of Isadora Poseidon, a bright green crème that sets the perfect underwater backdrop.
Creating Your Underwater Masterpiece
Base and Color Application:
Apply Isadora Poseidon as the base.
Add depth with additional polishes such as Handy Blue and Handy Lilac for the water, and Mundo de Unas Neon Orange and Avocado for marine life accents.
Detailing with Gel Polish and Hand Painting:
Use gel polish for a long-lasting finish and hand paint intricate details like clownfish, blue tangs, and seahorses.
Incorporate elements like coral reefs and seaweed to enhance the underwater effect.
Final Touches:
Sprinkle in some iridescent shimmer to mimic the sunlight filtering through water.
Seal your artwork with Barry M Matte Top Coat for a smooth finish.
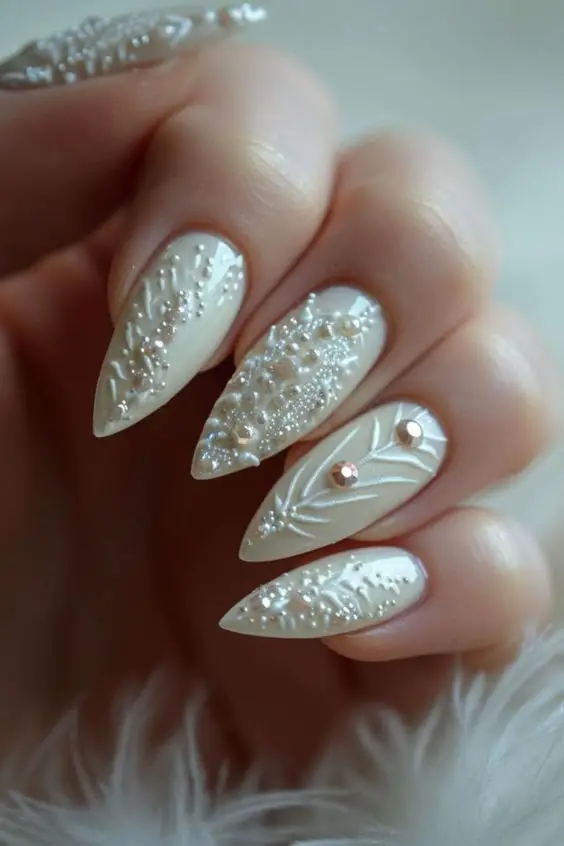
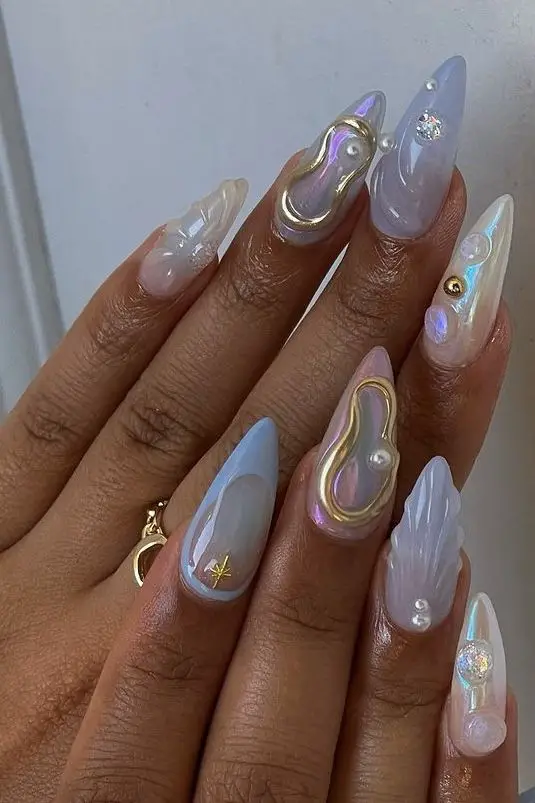
39. Seashell and Pearl Accents
For a subtle yet enchanting summer nail design, consider incorporating seashell and pearl accents into your manicure. This approach offers a nod to the ocean’s treasures without overwhelming your overall look. Here’s a simple way to achieve this elegant style:
Choose Your Accent Nails:
Decide on one or two nails on each hand that will feature the seashell and pearl accents. Typically, the ring fingers or thumbs are popular choices for accent nails as they tend to catch the eye more easily.
Apply a Base Color:
Paint your nails with a base color that evokes the feel of the beach. Soft pastel shades like sandy beige, pale blue, or seafoam green are perfect for this. Allow the base color to dry completely.
Adding Seashell and Pearl Details:
For the seashell accents, you can use small 3D nail art shells or you can paint a seashell design using a fine brush and white or off-white polish.
Add pearl accents by placing tiny adhesive pearls near the cuticle or on top of your seashell design. These can be arranged in a clustered or singular fashion depending on your preference.
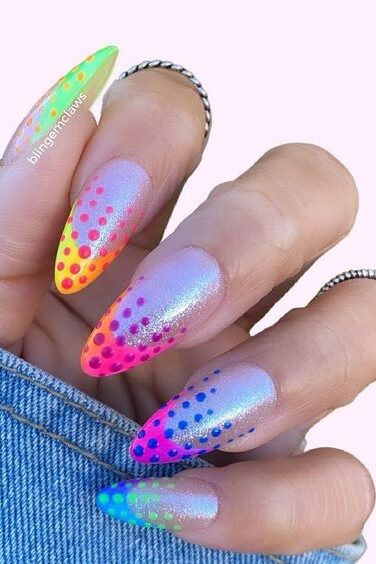
40. Neon Polka Dots
Neon polka dot nail designs are a fun and vibrant choice for anyone looking to add a playful touch to their manicure.
These designs fall under the broad categories of manicures and nail arts, making them a versatile option for both adults and kids alike.
Products and Application
One of the standout products for creating neon polka dot designs is the Fun Zone Neon Polka Dot Clear Base Nail Polish. This polish features a clear base packed with six bright neon colors and bright turquoise blue hex glitter, available in two different sizes of polka dots.
The application process is straightforward: shake the bottle upside down between every few nails, apply one to two coats, and finish with a thick top coat for durability and shine.
Notably, this polish is 5-free, meaning it does not contain Dibutyl Phthalate (DBP), Formaldehyde, Toluene, Camphor, or Formaldehyde Resin, making it a safer choice for nail art enthusiasts.
41. Glitter Dipped Tips
Glitter dipped tips offer a sparkling finish that’s perfect for enhancing your summer look with a touch of glamour. Here’s how you can achieve this trendy nail art design using a combination of a solid color base and glitter.
Step-by-Step Guide to Creating Glitter Dipped Tips
Base Preparation:
Start by applying a clear base coat to protect your nails and ensure a smooth application of colors.
Choose a vibrant or neutral solid color as your base and apply it over the entire nail. Let it dry completely.
Applying the Glitter:
For the glitter dipped effect, you will need a contrasting glitter polish or loose glitter. If using loose glitter, pour some into a small container for easy access.
Dip an eyeshadow brush into the glitter. If you’re focusing on the tips, point your finger skywards and gently tap the brush to release glitter onto the nail tip.
For an inverse look with glitter near the cuticle, point your finger downwards and apply similarly.
Sealing the Design:
Once you are satisfied with the amount of glitter, apply a layer of clear dip powder over the glitter to seal it in place. This step helps prevent the glitter from flaking off and maintains the shine.
Finish with a gel topcoat for a glossy look that enhances the sparkle of the glitter. This not only seals in your design but also provides a durable finish that can withstand summer activities.
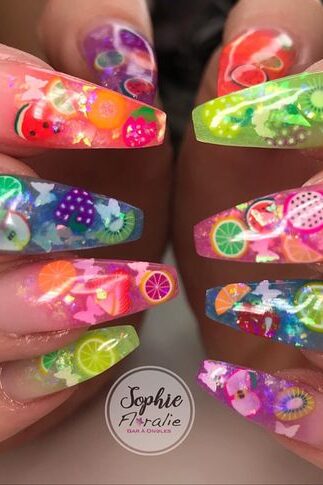
42. Fruit Salad Nails (mix of fruits)
Fruit salad nail art designs are a delightful way to bring a splash of color and whimsy to your summer look.
Start by painting all your nails with a white base coat to make the colors of the fruits pop. Using nail art brushes, begin sketching the basic outlines of various fruits like strawberries, oranges, and kiwis.
The vibrant and colorful nature of these designs is achieved by filling in these outlines with shades like brown for kiwi seeds, green for lime, orange for the juicy segments of an orange, and yellow for bananas.
To create more intricate fruit designs, you can employ the leadlighting technique. This method involves using a thin, translucent polish over a detailed stamped or hand-painted design, which allows for the intricate details of the fruit designs to shine through beautifully.
43. Comic Book Speech Bubble Design
Creating a comic book speech bubble nail art design infuses a playful and unique twist to your nails, perfect for showcasing your love for comics and graphic novels. Here’s a straightforward guide to achieving this look:
Materials and Preparation
Base Coat: Start by applying a clear base coat to protect your nails and provide a smooth surface for painting.
Contrasting Colors: Choose a bright color for the speech bubble outline and a lighter shade for the bubble fill. These colors should contrast with your base coat to make the design pop.
Top Coat: Have a clear top coat ready to seal and protect your design once completed.
Step-by-Step Application
Apply the Base Coat: Ensure your nails are clean, then apply the base coat and let it dry completely.
Draw the Outline: Using a fine brush, draw the outline of the speech bubble on each nail. This step requires precision for a clean, sharp look.
Fill the Speech Bubble: Fill in the speech bubble with your chosen lighter shade. Allow it to dry before proceeding to the next step.
Seal the Design: Apply a top coat to protect your artwork and add a glossy finish, enhancing the comic book effect.
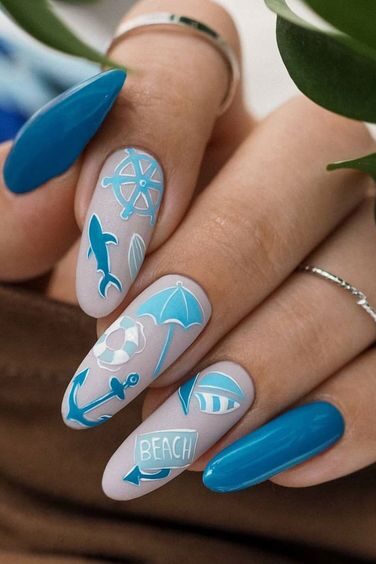
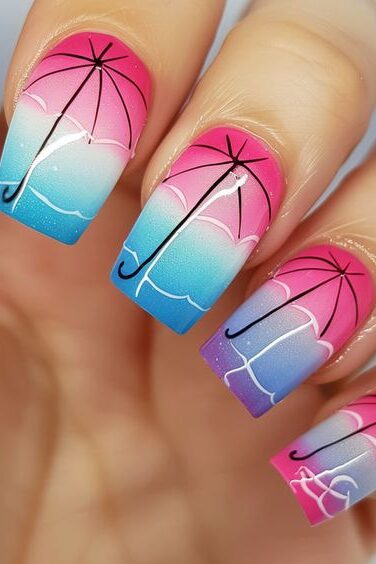
44. Beach Umbrella Design
To create a vibrant and summery Beach Umbrella nail art design, follow this detailed guide inspired by the scenic “Paros Yellow Umbrellas” print by Gray Malin.
This design captures the essence of a perfect beach day, completed at the renowned Olive & June nail salon.
Step-by-Step Guide to Beach Umbrella Nail Art
Preparation and Base Colors:
Start by applying a base coat to protect your nails.
Use ‘Mindy Apple’ by Essie as the primary color for the beach umbrella base.
For the beach setting, apply a light blue polish to represent the water and a tan color for the sand. Add a frothy effect with white polish to simulate waves lapping onto the shore.
Creating the Umbrella:
Paint the umbrella’s pole using brown acrylic paint with a thin brush from the Winstonia or Glisten & Glow sets.
For the umbrella, draw a triangle for the top and create a scalloped edge at the bottom using a light yellow paint. Fill in every other scallop with a darker yellow to achieve a two-tone effect, adding depth and interest to your design.
Finishing Touches:
Add a dark pink polish to draw a starfish beside the umbrella, enhancing the beach theme.
Seal your artwork with a quick-dry top coat to ensure durability and shine, keeping your nails looking great whether you’re hitting the beach or just daydreaming about sunny days.
45. Seascape Painting (waves and horizon)
Embark on a creative journey to capture the serene beauty of the ocean with a seascape nail art design.
Begin this artistic endeavor by applying a base coat like Sally Hansen’s Hard as Nails to protect your natural nails. This ensures a smooth canvas for your seascape creation.
Step-by-Step Creation of Seascape Nail Art
Sky and Ocean Base: Start with two coats of light blue polish, such as Putting on Airs by Wet and Wild, to depict the expansive sky.
Gradient Ocean Effect: For the water, skillfully blend dark and light blue acrylic paints directly on the nail, creating a gradient effect that mimics the depth of the ocean.
Seaweed and Marine Life: Add a touch of light green acrylic paint at the nail’s base to represent seaweed swaying in the current. Try stamping a seahorse using coral-colored polish to add an enchanting marine element.
Finishing Touches and Decoration
Star Studs: Enhance your seascape with star studs scattered across the nail, symbolizing a starry night sky above the ocean.
Protective Topcoat: Seal your artwork with a topcoat, like Big Matte Topcoat by Sally Hansen, to ensure durability and a beautiful matte finish.
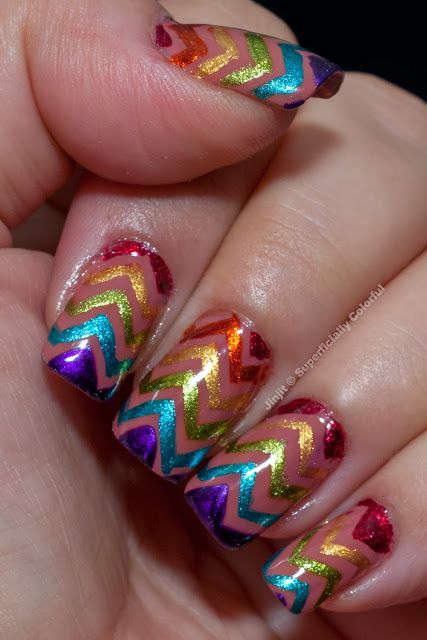
46. Neon Chevron Stripes
Creating the vibrant Neon Chevron Stripes nail design is a fun way to add a splash of color and geometric flair to your nails. This design is particularly striking due to its use of neon colors and the sharp, precise patterns of chevrons.
Essential Products and Tools
To get started, you’ll need specific products and tools:
Nail Polishes:
Cult Nails ‘Nevermore’ for a deep black creme, Color Club ‘French Tip’ for a stark white, and colors from Maybelline Color Show ‘Bleached Neon’s’ limited edition collection for that neon pop.
Nail Vinyls:
Utilize nail vinyls for creating perfect chevrons without the hassle of free-hand drawing.
Brushes:
A striping brush from the Winstonia ‘Something Blue’ brush set is essential for adding fine details and neon stripes.
Step-by-Step Application
Preparation:
Start with clean, filed, and buffed nails. Apply a base coat to protect your nails and enhance the polish adherence.
Base Color Application:
Apply ‘French Tip’ as the base color to make the neon colors stand out.
Chevron Creation:
Place nail vinyls in a zigzag pattern across each nail. Paint over these with ‘Nevermore’ and carefully peel off the vinyls while the polish is still wet.
Adding Neon Stripes:
Using the striping brush, add neon stripes parallel to the chevrons. Let each layer dry to prevent smudging.
Top Coat: Seal everything with a top coat to add shine and prolong the design’s life.
Tips for Maintenance and Removal
Longevity: To maintain the look, avoid soaking your hands in water for prolonged periods and use gloves when doing household chores.
Removal: When you’re ready to change your design, soak your nails in acetone for about 10-15 minutes to ease the removal process.
47. Textured Glitter Nails
Textured glitter nails are a fabulous way to add some sparkle and dimension to your summer nail art. They’re not only eye-catching but also quite simple to create at home. Here’s how you can achieve this dazzling look:
Step-by-Step Guide to Creating Textured Glitter Nails
Base Coat Application:
Begin by applying a clear base coat to protect your nails and ensure a smooth surface.
Color Base:
Choose a vibrant or neutral polish as your base color and apply it to your nails. Allow it to dry completely.
Applying the Glitter:
Once your base color is dry, apply a layer of glitter polish. For a more textured look, opt for chunkier glitter or glitter mixed with beads or small sequins.
Building the Texture:
While the glitter polish is still tacky, sprinkle loose glitter over your nails for added texture. You can use a fan brush to gently dust off excess glitter.
Sealing the Design:
Apply a top coat to seal in the glitter. If you prefer a more textured finish, skip the smooth top coat and opt for a matte finish instead.
Tips for Maintaining Your Textured Glitter Nails
Touch-Ups: Since textured nails can catch on fabrics, carry a small brush and your glitter polish for quick touch-ups.
Gentle Removal: Use a quality nail polish remover and allow the nails to soak for a few minutes to ease the removal process, as textured glitter can be more challenging to remove.
48. Metallic French Manicure
Preparing Your Nails
Start with a Clean Slate: Ensure that any old nail polish is completely removed. This is crucial for a clean and professional-looking manicure.
Shape and Prep: File your nails to your desired shape, making sure the edges are smooth and even. Push back your cuticles and buff the nail surface to create a rough texture which helps in better adhesion of the nail products.
Applying the Base and French Tips
Base Application:
Apply a coat of Inel Couture Base Gel (B159) and cure it under a UV light for 30 seconds. This base coat is essential for a long-lasting manicure.
Color and Design:
Apply two coats of a blushy nude polish as your base color, curing for 30 seconds between each coat. Use a French tip guide to create a precise division for applying the metallic French tip.
Metallic Touch:
Apply a metallic silver polish to the designated tip area. For a more detailed application, use a liner brush or a metallic polish with a thin applicator to ensure clean and sharp lines.
Sealing and Finishing Touches
Chrome Powder Enhancement:
After removing the inhibition layer with acetone, apply chrome powder to the area with the black gel polish to give a sparkling metallic finish.
Mix some chrome powder with the top coat to create a glitter liner effect along the smile line of the French manicure.
Final Cure and Seal:
Apply Inel Couture Top Coat over the entire nail, cure for another 30 seconds, and then clean up any excess gel around the nails. This not only seals in your design but also adds a brilliant shine that enhances the metallic elements.
49. Mismatched Neon Ombre
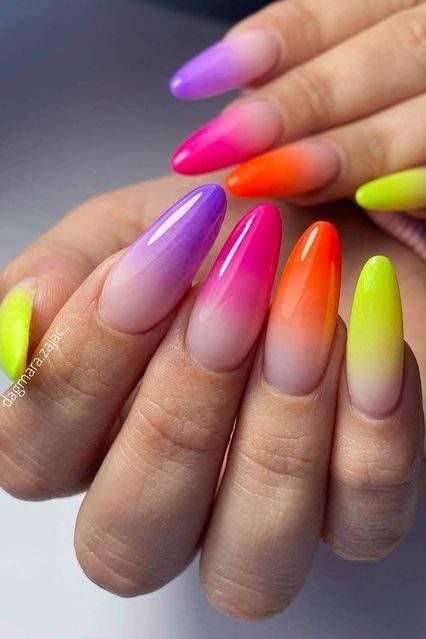
Neon ombre nails are the epitome of summer fun, combining vivid colors with a seamless gradient effect that’s perfect for sunny days and vibrant nights.
To create your own mismatched neon ombre nails, start with selecting two neon shades that contrast yet complement each other well. Popular combinations include electric blue and neon pink or lime green and bright orange.
Step-by-Step Guide to Creating Neon Ombre Nails
Prepare Your Nails:
Begin by applying a clear base coat to protect your nails and ensure an even surface for the polish.
Apply a Black Base:
For a striking neon effect, paint your nails with a black polish. This serves as a dark canvas that will make the neon colors pop.
Creating the Gradient:
Take a disposable makeup sponge and apply the two chosen neon polishes in lines next to each other. Dab the sponge lightly onto your nails, starting from the base and moving towards the tip, to blend the colors into a smooth gradient.
Add Embellishments:
Enhance your design by applying small crystals or glitter. Use a base gel to adhere these embellishments securely to your nails, ensuring they last as long as your polish.
50. Constellation Nail Art (different on each nail)
Step-by-Step Guide to Constellation Nail Art Base Coat Application:
Begin by applying a clear base coat to protect your nails and create a smooth surface for the nail art.
Choose Your Constellations: Select the constellations you want to depict on each nail. Popular choices include the Big Dipper, Orion, Cassiopeia, and Leo.
Creating the Constellations:
Using a fine nail art brush or a dotting tool, dip it into white nail polish or acrylic paint to start outlining the stars of each constellation.
Referencing a picture of the chosen constellation, carefully dot the stars onto each nail, ensuring they match the pattern and spacing accurately.
Connecting the Stars:
Once the stars are dotted onto the nail, use the same white polish or acrylic paint to connect them with thin lines, following the constellation’s shape.
Adding Detail:
For added authenticity, you can include smaller stars and fainter connections to mimic the celestial appearance of the real constellations.
Finishing Touches:
Once the constellation designs are complete and dry, apply a top coat to seal in the artwork and add shine to your nails.
Repeat this process for each nail, showcasing a different constellation on each finger to create a captivating and unique look.
Practice on a piece of paper or a nail wheel beforehand to perfect your constellation designs and get comfortable with the nail art tools.
Conclusion
As we wrap up this vibrant journey through a kaleidoscope of summer nail ideas, it’s clear that this season is all about bold colors, intricate designs, and playful themes.
From the sparkling textures of glitter-dipped tips to the serene beauty of seascape paintings, each nail art idea offers a unique way to express personal style while embracing the joyful essence of summer.
These designs not only serve as a testament to the creativity and diversity within nail art but also encourage us to explore our artistic boundaries and experiment with new looks.


Leave a Reply
You must be logged in to post a comment.