Finding the perfect nails to complement your style can be a real challenge, especially when working with short nails. However, chic nails aren’t reserved for those with long canvases; gorgeous nails, short nails cute, and even short nails summer designs are plentiful and ideal for those looking for fancy nails on a smaller scale.
In this post, we’re diving into 33 unique short nail ideas that you’ll absolutely love, from classic French tips that give a timeless elegance to your fingertips, to matte black with metallic accents that add a touch of glamour.
Expect to explore a spectrum of styles including minimalist geometric designs, vivid floral patterns, and even galaxy-inspired nails that transport your manicure to cosmic heights.
Alongside, there will be insights into nail art techniques that elevate simple designs to polished marble nails and constellation nail art, sure to inspire your next salon visit or DIY nail session at home.
Busy? Save this pin for later.
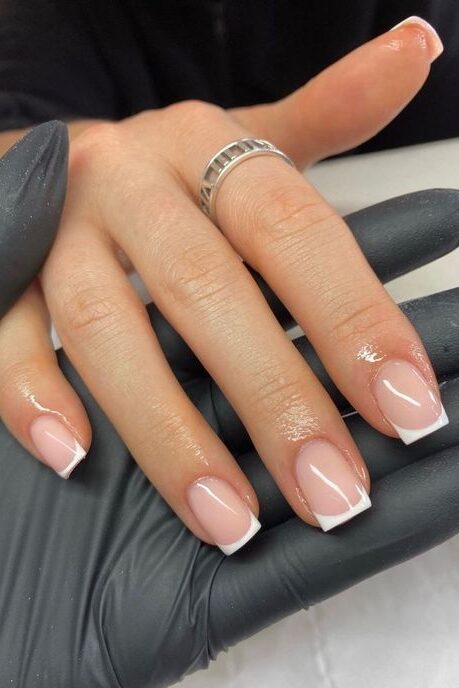
1. Classic French tips
Classic French tips remain a quintessential choice for those who adore timeless elegance in their nail art.
Here’s how you can achieve this chic look on your short nails:
Preparation and Base Application:
Start by applying a dehydrator and a pH Bond to ensure that your nails are ready for the polish. This helps in adhesion and longevity of the manicure.
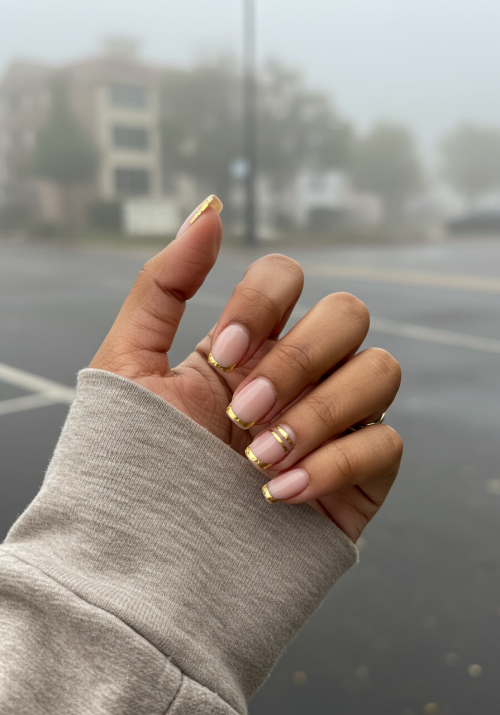
Use a 240 grit file to gently shape your nails, paying attention to removing any shine for better polish adherence.
Apply a base coat named “Baby, Take a Vow” by OPI. This will require three thin coats, with each coat cured under an LED lamp for 45 seconds.
Creating the Classic French Tip:
After the base coat, use nail guides or tape to achieve a precise, clean line for the French tip. This is crucial for that iconic look.
Paint the tips with a white polish, ensuring a smooth, curved line that complements the shape of your nails. For a twist, you can try nude nails with black and white tips, creating a half-and-half design for a modern take.
For those looking for a subtler or more personalized touch, consider softer white tips or even experimenting with different colors.
Finishing Touches:
Remove the guides and clean up any excess polish using a skinny brush dipped in polish remover for sharp, clean edges.
Apply a top coat, such as the Rubber Top by InHeights, ensuring to cap the free edge of the nail. Cure it under an LED lamp for 45 seconds to seal in the design.
Finish with a nourishing cuticle oil to hydrate and give your nails a healthy shine.
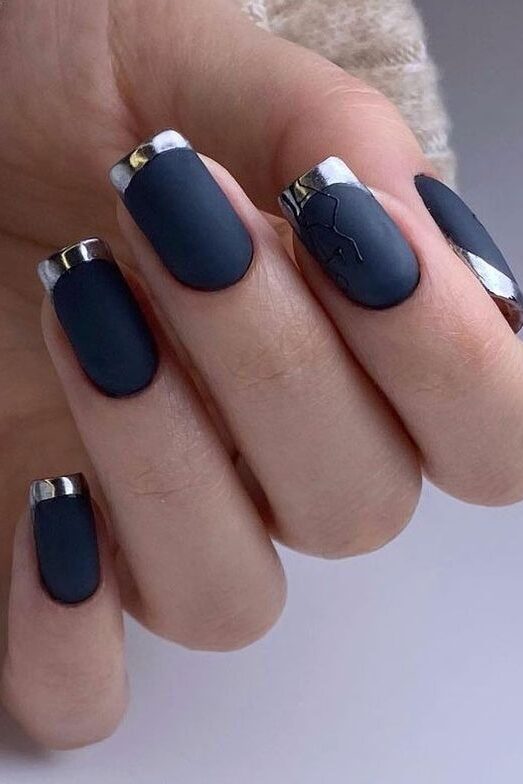
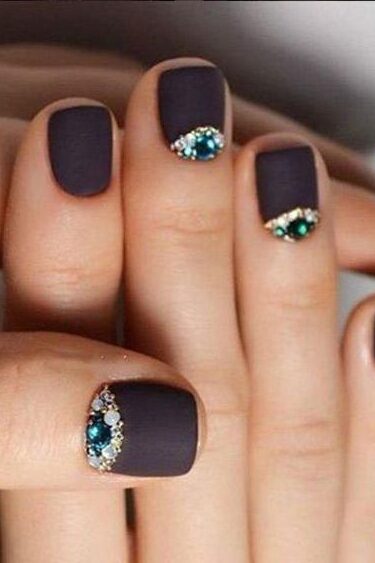
2. Matte black with metallic accents
Matte black nails with metallic accents offer a striking contrast that can elevate your short nail designs to a level of sophistication and glamour.
Here’s how you can achieve this trendy look:
Base Preparation:
Begin by applying a matte black polish as your base. Ensure the nails are clean and filed to your desired shape, providing a smooth canvas for the polish.
Allow the base coat to dry completely before moving on to the accents to prevent smudging.
Adding Metallic Accents:
Choose metallic accents like gold glitter or metallic stars. These can be applied using a thin brush or by placing pre-designed nail art stickers.
For a subtle yet glamorous effect, consider adding thin metallic stripes or tips. Use a striping tape for precision and apply a metallic polish over the selected areas.
Another option is to use a dotting tool or a small brush to add metallic dots or small brush strokes randomly across the nail, creating a starry effect.
Sealing the Design:
Once your design elements are in place and dry, apply a clear top coat to seal in the design. This not only protects your nail art but also enhances the matte and metallic contrast.
For those who prefer an extra touch of creativity, mix matte and glossy finishes by applying a glossy top coat over the metallic parts only, leaving the matte black untouched.
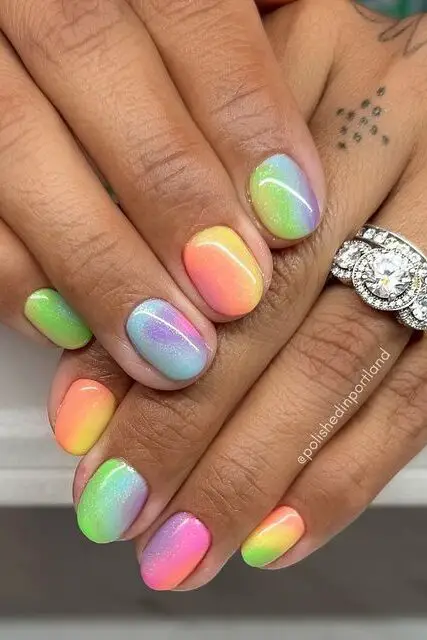
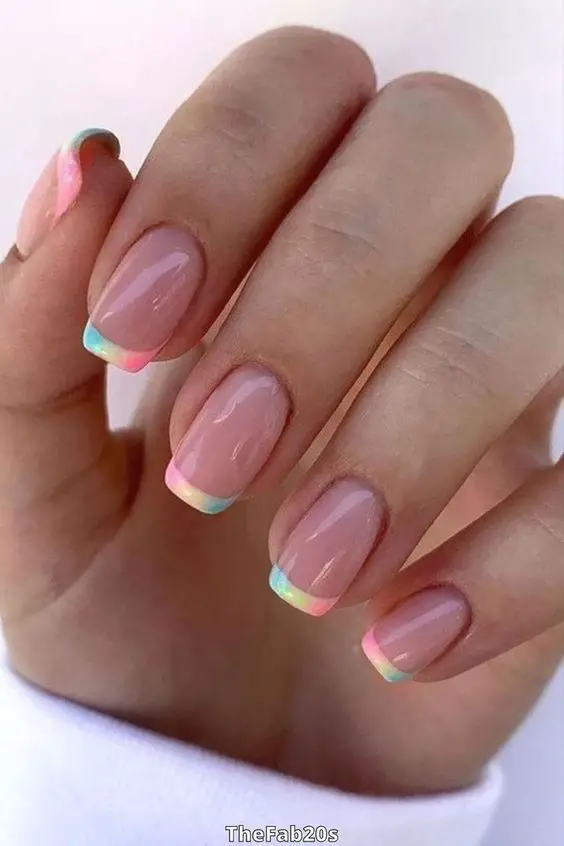
3. Pastel rainbow ombre
Pastel rainbow ombre nails are a delightful choice for those who love a splash of color while maintaining a soft, ethereal aesthetic.
Here’s a straightforward guide to achieving this look, perfect for spring or any cheerful occasion:
Materials Needed:
Base Coat: Start with a clear base coat to protect your nails.
Pastel Polishes: You will need pastel shades of yellow, blue, and pink. Recommended polishes include Shocking Pink and Lemon Fizz by China Glaze, and Mint Candy Apple by Essie.
Top Coat: A clear top coat to seal in your design.
Sponges: For the ombre effect, a small piece of sponge is used to dab the polish onto the nail.
Step-by-Step Application:
Prepare Your Nails:
Clean and file your nails to the desired shape.
Apply a base coat and let it dry completely.
Apply Pastel Colors:
Paint your nails with a light base color (preferably white or a very light pastel) to help the colors pop.
On a flat surface, apply stripes of your pastel polishes side by side on a sponge. Ensure the edges slightly overlap.
Dab the sponge gently onto your nails, repeating until you achieve the desired intensity of color. Each nail can be a canvas for a gradient of all three pastel shades, blending seamlessly into one another.
Finish Your Manicure:
Once the ombre effect is dry, apply a clear top coat to enhance the durability and shine of your manicure. Clean up any polish on your cuticles or skin with a small brush dipped in nail polish remover.
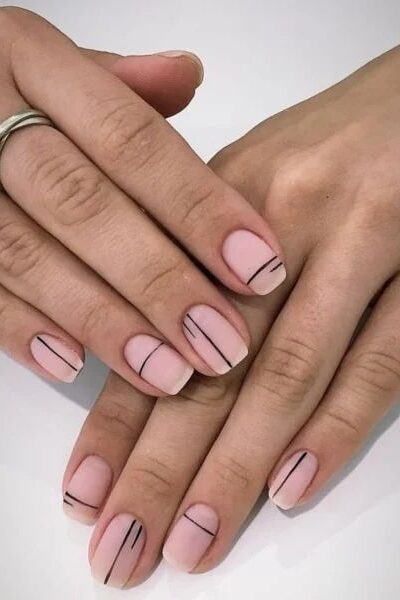
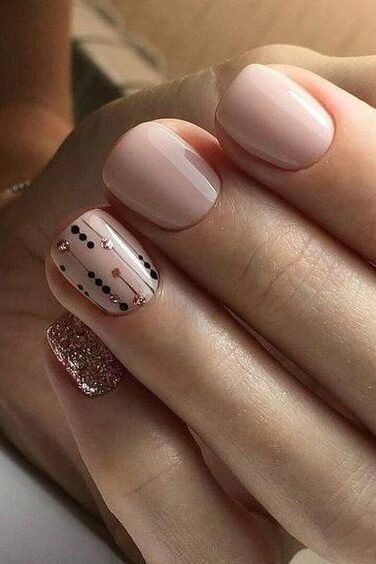
4. Minimalist geometric designs
Minimalist geometric designs on short nails are a significant trend, showcasing how simplicity can lead to sophistication.
Here’s how you can achieve a minimalist geometric manicure that’s both chic and modern:
Key Features of Minimalist Geometric Designs:
Design Varieties: Popular designs include negative space shapes, monochrome themes, and angular patterns like triangles and hexagons.
Color Schemes: The trend is versatile in color, working well with both monochrome and vibrant palettes.
Step-by-Step Guide to Creating Minimalist Geometric Nails:
Preparation:
Start with a clean, filed nail and apply a base coat. For a minimalist look, use a sheer or nude polish as the base.
Design Application:
Use a thin nail art brush or a toothpick for precise lines and shapes. Dip the tool in a contrasting polish color and gently draw geometric patterns such as lines, dots, or triangles.
For a negative space design, apply tape in geometric shapes on the nail, paint over it, and remove the tape before the polish dries completely.
Finishing Touches:
Apply a top coat to seal in your design. For an added minimalist effect, leave parts of the nail bare or use matte top coat on glossy designs to create texture contrast.
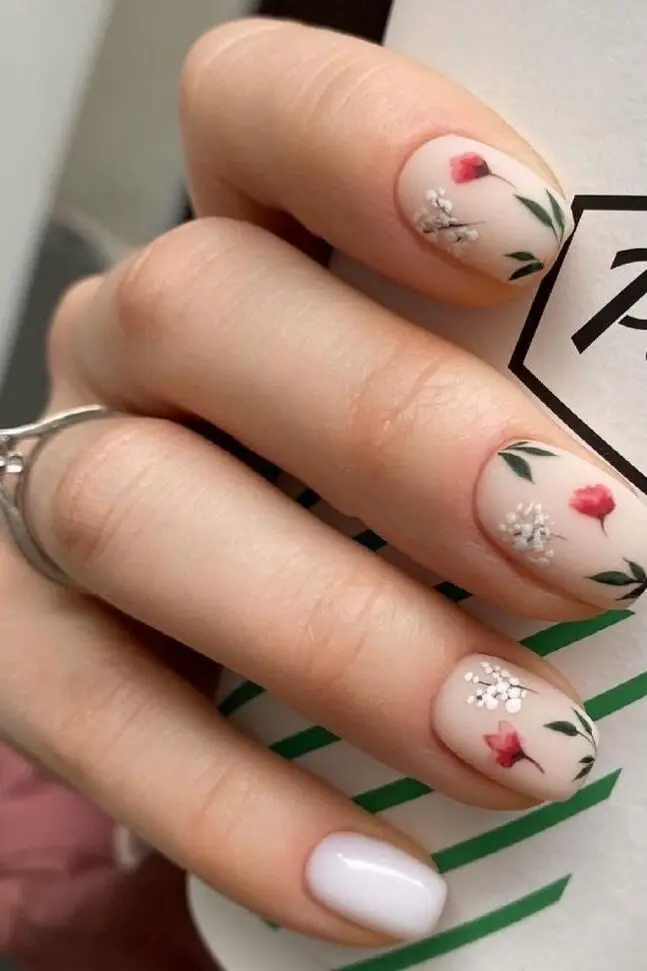
5. Floral patterns
Floral patterns on short nails offer an enchanting variety that can transform your manicure into a miniature garden of art.
Here’s a guide to some popular floral designs that are perfect for adding a touch of nature to your nails:
Popular Floral Nail Art Designs:
Negative-Space Blooms: Utilize the natural color of your nail as the background for intricate floral patterns.
Cuticle Blooms: Position small flowers along the cuticle line for a subtle yet stunning effect.
Dainty Daisies and Picturesque Poppies: These classic flowers create a fresh and cheerful look.
Flourishing Borders: Frame the edges of your nails with tiny floral motifs for a sophisticated finish.
Sunny Motifs: Bright sunflower designs bring a vibrant, energetic touch to your manicure.
Techniques and Tips for Floral Designs:
Encapsulated Dried Flowers: Incorporate real dried flowers into your nail art with a clear gel overlay for a truly unique look.
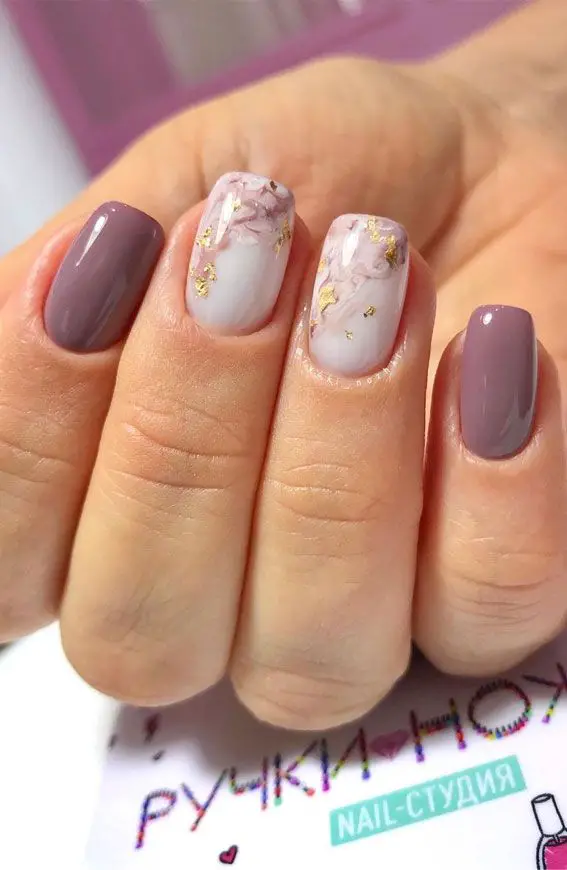
Gold Foil Combo: Add bits of gold foil to floral patterns for a luxurious accent.
Stickers and Decals: For those who prefer a DIY approach at home, floral stickers can be a quick and easy option to achieve detailed designs without intricate painting.
Examples of Trendy Floral Nail Art:
Matte Orange Background with Flower Art: Offers a bold, yet earthy base that makes white or yellow flowers pop.
Cherry Blossom Designs on Blue Background: Perfect for spring, these designs add a delicate and romantic touch to your nails.
Hibiscus Floral Art on Creamy Matte Nails: Tropical vibes are guaranteed with bright hibiscus patterns, ideal for summer.
Polka Dot Flowers Nail Design: Combines fun polka dots with floral elements for a playful, whimsical look.
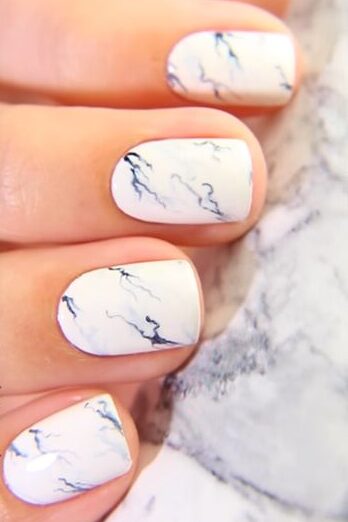
6. Marble effect nails
Marble effect nails are a stunning and sophisticated choice for those who love intricate and unique nail designs.
Here’s how you can achieve this elegant look:
Materials Needed:
Gel Polish: Choose a base color and several other shades for the marble effect.
Dotting Tool: For swirling the colors.
Alcohol Ink or Transfer Foil Gel: For more detailed designs.
Top Coat: To seal and protect your nail art.
Step-by-Step Guide:
Prepare Your Nails:
Start by applying a base coat to protect your nails and ensure a smooth application of colors.
Choose a light color like white or a soft grey as the base to make other colors stand out.
Creating the Marble Effect:
Apply drops of different colored gel polishes on the nail. Use a dotting tool to swirl these colors gently to create a marble-like pattern.
For a more realistic effect, you can add a drop of alcohol ink and swirl it into the design. This technique can mimic the natural veining in marble.
Alternatively, apply a clear gel over the base coat and then place gold transfer foil on the tacky surface to create a striking metallic veining effect.
Finishing Touches:
Once you are satisfied with your marble design, apply a top coat to seal in the artwork and add a glossy finish. Cure under an LED lamp as per the gel polish instructions to ensure durability.
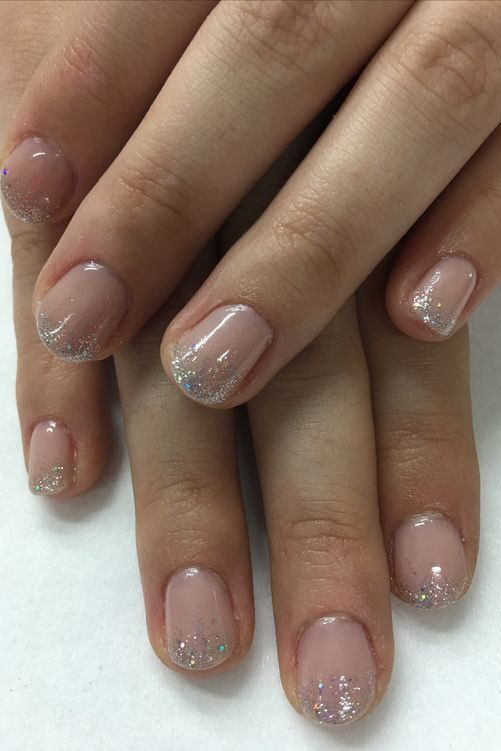
7. Glitter gradient
Glitter gradient nails are a dazzling choice for anyone looking to add a touch of sparkle to their manicure without overwhelming their look.
Here’s a straightforward guide to achieving this glittery, gradient effect on your short nails:
Materials Needed:
Base Coat: Essential for protecting your nails and ensuring a smooth polish application.
Glitter Nail Polish: Choose from a range of glitter types such as fine shimmer or chunky flakes.
Top Coat: To seal in your design and add a glossy finish.
Optional: Toothpicks, Makeup Sponge
Step-by-Step Application:
Prepare Your Nails:
Start by applying a base coat to clean, filed nails. Let it dry completely.
Paint your nails with a chosen base color. Light or neutral colors work best to make the glitter stand out.
Apply Glitter:
Once the base color is dry, apply glitter nail polish starting from the tip of your nail. Use the brush to lightly drag the glitter down towards the middle of the nail, decreasing the density as you move downward to create a fading effect.
For a more concentrated sparkle, use a toothpick to place individual glitter pieces precisely where you want them.
Enhance the Gradient:
If the glitter appears too sparse, take a small makeup sponge, apply a bit of glitter polish to it, and dab gently starting from the tip. This technique helps in concentrating the glitter towards the tip with a nice fade as you move down.
Remove any stray glitter from your skin with a clean brush dipped in nail polish remover.
Finishing Touches:
Apply a top coat to seal the glitter gradient and add a smooth, finished look to your nails. This step also helps in prolonging the durability of your manicure.
8. Negative space nail art
Negative space nail art is a trend that plays with the uncolored parts of your nails to create unique, eye-catching designs.
This style can range from minimalist to maximalist, depending on your preference, and incorporates various materials and techniques to achieve stunning effects.
Here’s how you can explore this trend:
Materials and Techniques:
Base Materials: Commonly used materials include gel-polish, acrylic, and traditional polish, providing a versatile foundation for any design.
Finishes and Effects: Enhance your designs by adding matte finishes, glitter, or chrome effects, which can significantly elevate the overall look.
Popular Negative Space Nail Art Designs:
Egyptian Gold and Flower Nail Art: Combine metallic accents with floral designs, leaving parts of the nail unpainted for a striking contrast.
Bright Colors and Broken Glass: Use vibrant colors alongside patterns that mimic broken glass for a modern, edgy look.
Embellished Embedded Glitter: Integrate glitter into selective areas of your nails, focusing on creating patterns around the negative spaces.
Art Deco and Starry Night Themes: Incorporate themes like Art Deco or celestial patterns, using techniques like glitter gradients and 3D rhinestones to complement the negative space.
Customization and Personal Touch:
Zodiac and Hobby-Inspired Designs: Tailor your nail art to represent personal interests such as zodiac signs or hobbies, making your manicure truly one-of-a-kind.
Subtle and Bold Options: For a subtle take, use clear or nude base coats with minimalist designs. For something more daring, opt for bold colors and intricate patterns, ensuring the negative spaces are well-integrated and enhance the design’s dynamism.
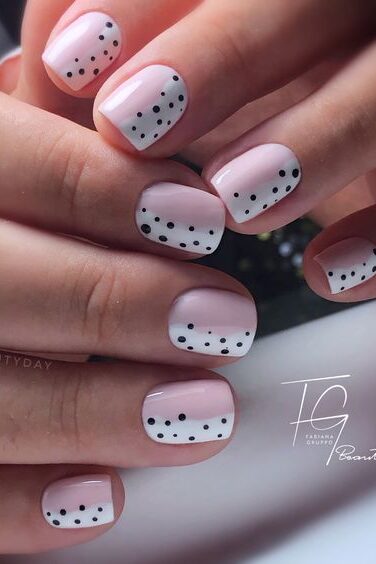
9. Polka dots
Polka dot nails are a perennial favorite, offering a playful yet sophisticated look that’s easy to achieve on short nails.
Here’s a breakdown of some creative polka dot designs you can try:
Popular Polka Dot Designs:
Polka Dot Nude Nail Art Design: Start with a nude base and add contrasting black or white dots for a chic, minimalist look.
Pink and White Polka Dot Nail Art Design: Alternate between pink and white bases with opposite colored dots for a sweet, romantic vibe.
Light Green Polka Dot Nail Art Design: Perfect for spring, use a light green base with white dots to bring a fresh feel to your nails.
Disney Polka Dot Nail Art Design: Incorporate classic Disney colors like red, black, and yellow with Mickey Mouse silhouettes in the dots.
Ombre Polka Dot Nail Art Design: Blend colors using the ombre technique as a base and add dots in a single color for a trendy effect.
3 Color Polka Dot Nail Art Design: Use three complementary colors in a repeating pattern for a bold, dynamic look.
Half Polka Dot Nail Art Design: Apply dots to only half of each nail for a modern, artistic flair.
Tools and Techniques:
Dotting Tools: Essential for creating perfect dots. You can also use the end of a bobby pin or a toothpick if you don’t have a dotting tool.
Essie Forget Me Nots: This specific nail lacquer is recommended for creating vibrant, long-lasting dots.
Sequins and Glitter: For a festive touch, add polka dot sequins or a layer of glitter over your dots.
Creative Tips:
Mix Sizes: Combine different dot sizes for a more dynamic design. The Lights Lacquer Dotting Tool Kit is perfect for this technique.
Metallic Dots: Use metallic polishes like gold or silver for the dots to add a luxurious element to your design.
Themed Designs: Adapt the polka dot pattern to fit different themes, such as floral by turning dots into tiny flowers or seasonal by using colors and motifs relevant to upcoming holidays.
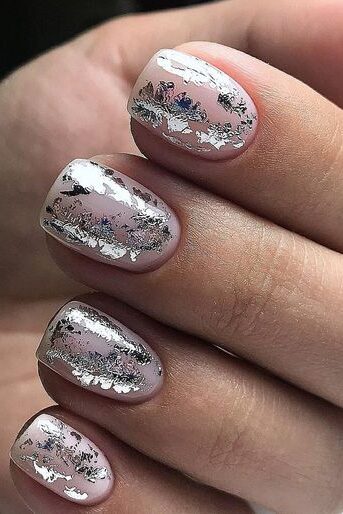
10. Metallic foil accents
Metallic foil accents in nail art are a brilliant way to add a touch of luxury and eye-catching detail to your manicure, especially on short nails.
Here’s how you can incorporate these shimmering details into your nail designs:
Key Varieties of Metallic Foil Accents:
Gold Foil Accents: Popular for their rich and warm hue, gold foil can be used in numerous designs such as the ‘Gold Foil Lip Gloss Nails’ for a mega-shiny finish or a ‘Milky-White With Foil Accents’ design that combines elegance with a touch of sparkle.
Silver and Colored Foil: Silver foil offers a sleek, futuristic look, often used in designs like ‘Black tips with gold foil details’ inspired by high-fashion runways. For something more playful, rainbow foil tips add a pop of color.
Custom Designs: Foil accents are not limited to gold and silver; they can span a variety of colors and are often used in custom designs like ‘Purple Marbled Foil’ or the vibrant ‘Metallic Rainbow Nails’.
Techniques for Applying Metallic Foil:
Preparation: Start with a base coat to protect your nails and apply a base color if desired. Ensure it’s completely dry before applying foil.
Foil Application: Cut small pieces of foil that will fit your nail or a portion of it. Apply a special foil adhesive to the area where you want the foil to stick. Press the foil firmly onto the nail and gently peel off the backing.
Sealing the Design: Apply a top coat to protect the foil and enhance the metallic shine. This also prevents the foil from peeling or chipping.
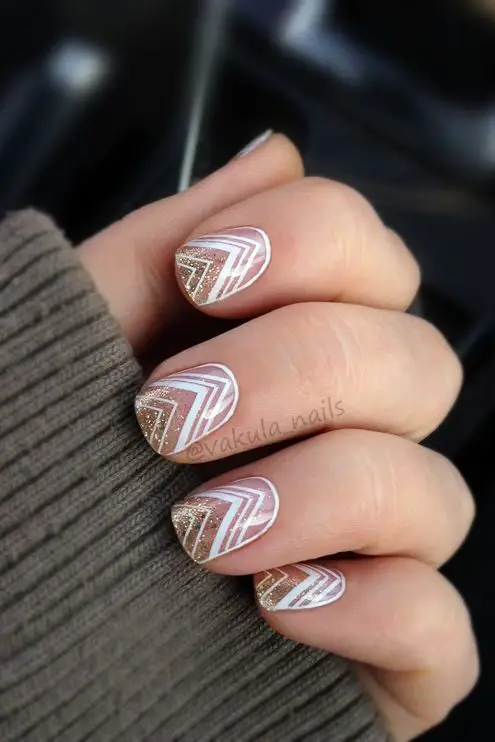
11. Chevron stripes
Chevron stripes have surged in popularity within the modern fashion realm, finding their place not only in clothing and home decor but also as a standout trend in nail art.
Perfectly suited for short nails, chevron designs add an intriguing visual appeal that can be customized to fit any style or occasion.
Here’s how you can achieve this dynamic look:
Creating Basic Chevron Stripes:
Base Preparation:
Begin by applying a base coat followed by two coats of a nude polish. This creates a smooth, neutral background that makes any color pop.
Stripe Formation:
Using a striping brush, dip into purple nail polish and paint zigzag stripes across each nail. Ensure that the peaks and troughs of the zigzags are evenly spaced.
Follow up with a gold polish, applying it in the same zigzag pattern either adjacent to or on top of the purple for a luxurious touch.
Finishing Up:
Allow the design to dry completely before applying a clear top coat. This not only seals in your art but also provides a glossy finish that enhances the overall look.
Alternative Technique with Nail Polish Strips:
Preparation of Strips:
Paint two coats of black nail polish onto a zip lock bag and allow it to dry thoroughly.
Once dry, use tweezers to peel off the nail polish film.
Application:
Cut the dried polish into thin strips. These can be straight or zigzagged depending on the desired final look.
Carefully place the strips on your painted and dried nails, arranging them to create the chevron pattern.
Sealing the Design:
Apply a top coat to secure the strips in place and add a professional finish.
Customization Options:
Chevron nails can be tailored to match any outfit or occasion, making them a versatile choice for nail art enthusiasts. Here are a few ideas to inspire your next manicure:
Chevron Glitter Nails: Add a strip of glitter polish along the chevron lines for a sparkling effect.
Mismatched Chevron Nails: Use different colors on each nail for a fun, eclectic look.
Chevron and Flower Designs: Incorporate small floral decals along the chevron patterns for a feminine touch.
Double V French Nails: Combine the classic French tip with a chevron design at the tip for a modern twist.
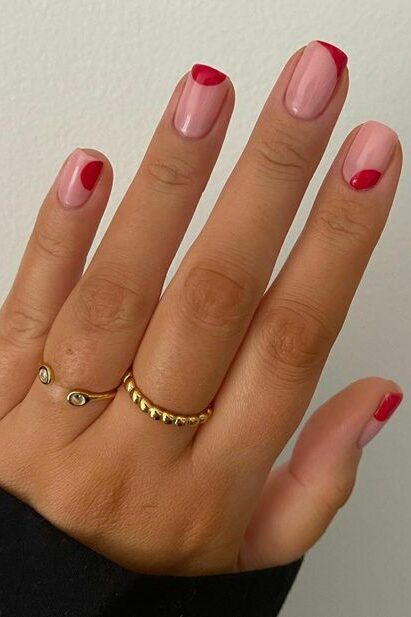
12. Nude nails with a pop of color
Nude nails with a pop of color are a refined yet vibrant choice for anyone looking to enhance their manicure subtly.
This style merges the understated elegance of nude nails with exciting bursts of color, creating a unique and eye-catching design.
Here are various ways to incorporate a pop of color into your nude nail designs:
Simple Color Accents:
Edge Pops: Paint the tips or the base of your nails with a bold color such as red, blue, or even neon shades. This method is straightforward and requires a steady hand or the use of tape to ensure clean lines.
Colorful Lines: Use a thin brush to add minimalist colorful lines over a base of nude polish. Designs can range from straight lines across the nail to more intricate patterns like waves or zigzags.
Enhanced Designs with Textures and Embellishments:
Glitter Stars and Stripes: Incorporate small glitter stars or a stripe of sparkling polish on one finger, such as the ring finger, to maintain simplicity while adding a glamorous touch.
Celestial Stickers and Pearls: Apply delicate stickers or tiny pearls over a sheer nude base to achieve an ethereal look. This design is perfect for special occasions or everyday elegance.
Oil Slick Striping: For a DIY approach, place a piece of holographic striping tape down the center of each nail. The tape not only adds a pop of color but also introduces an interesting texture contrast against the matte or glossy nude background.
Combination with Fashionable Nail Shapes:
Pastel and Nude on Short Square Nails: Pairing pastel pops with nude bases on trendy short square nails can add a soft yet colorful dimension to your manicure, suitable for spring and summer.
Half and Half Designs: These designs feature a clear divide, with one half of the nail painted in a vivid color and the other half left nude, creating a striking and modern look.
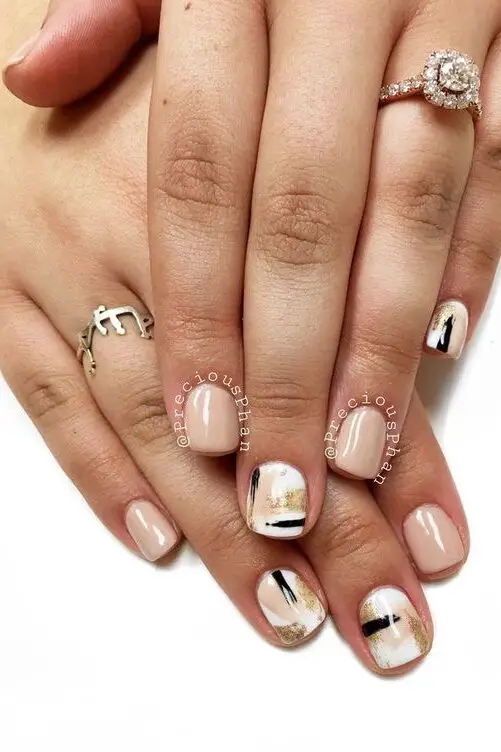
13. Abstract brushstroke designs
Abstract brushstroke nail art is a versatile and easy-to-create design suitable for short nails, offering a way to express creativity through your manicure.
Here’s how you can achieve this stylish look:
Materials Needed:
Variety of Nail Polishes: Choose colors that contrast well for a more striking effect or complementary shades for a subtle look.
Thin Brush or Old Eyeliner Brush: For creating the brushstrokes.
Top Coat: To seal in your design and add a glossy finish.
Step-by-Step Guide:
Prepare Your Nails:
Start with a clean, filed nail and apply a base coat. Choose a light color as the base to make the brushstrokes stand out.
Creating the Brushstrokes:
Dip your thin brush into a polish color and lightly drag it across your nail in no uniform direction. The key is to use minimal pressure to create a stroke effect rather than a solid line.
Overlap different colors, allowing each to dry slightly before applying the next. This creates depth and definition in your design.
Adding Details:
For a touch of elegance, add small details like dots, gold flakes, or tiny rhinestones. These elements can glam up the brushstroke look for special occasions.
Finish with a top coat to protect your design and add a beautiful shine.
Tips for Personalization:
Seasonal Colors: Adapt the colors to fit the season; use pastels for spring, bright tones for summer, warm shades for fall, and icy colors for winter.
Themed Variations: For an artsy fall look, use neutral shades like brown, white, black, and beige. For a bolder statement, opt for deep reds, purples, greens, and black.
Celebrity Inspiration: Take inspiration from celebrities like Lana Condor, who showcased a stunning brushstroke manicure by Thuy Nguyen during New York Fashion Week.
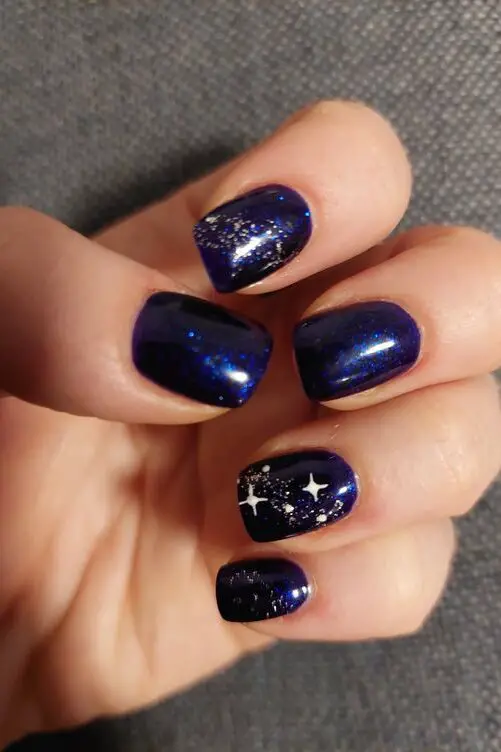
14. Galaxy-inspired nails
Galaxy-inspired nails transport your manicure beyond the stratosphere, combining deep celestial hues and sparkling accents to mimic the vast night sky.
Here’s a simple guide to achieving this stellar look:
Materials Needed:
Base Coat: Essential for nail protection and polish adhesion.
Dark Polishes: Black, deep blue, or purple as the base.
Brighter Colors: White, silver, or pastel shades for contrast.
Top Coat: For a glossy finish and extended wear.
Tools: Makeup sponge, toothpicks, and optional glitter or rhinestones.
Step-by-Step Application:
Prepare Your Nails:
Apply a base coat to clean, filed nails. Let it dry completely.
Paint your nails with a dark base color. Black or navy blue creates a perfect night sky effect.
Creating the Galaxy Effect:
Lightly dab a sponge with small amounts of white, blue, and purple polish. Press the sponge onto your nails, creating a blurred, nebulous effect. Repeat until you achieve a layered, galaxy-like appearance.
Use a toothpick dipped in white polish to dot tiny stars across your nails. For added sparkle, substitute some stars with tiny rhinestones or a sprinkle of glitter.
Finishing Touches:
Once your galaxy design has dried, apply a clear top coat to seal in your artwork and add a smooth, glossy finish. This step also protects your design from chipping and extends the wear time.
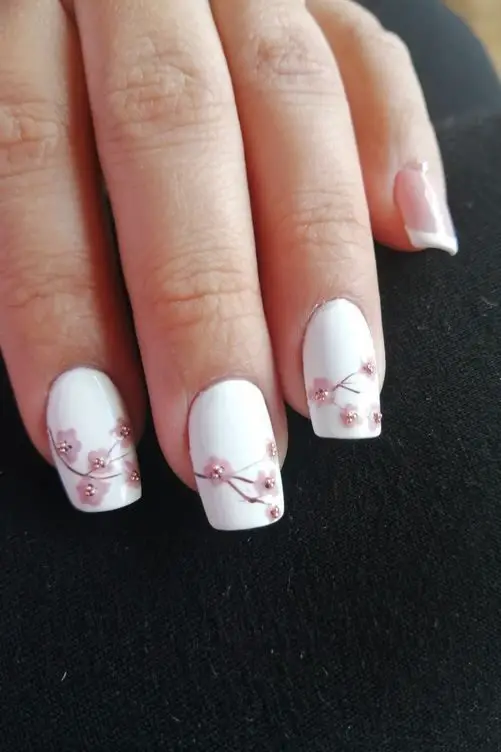
15. Cherry blossom nail art
Cherry blossom nail art is celebrated for its delicate beauty and is especially popular during the spring season.
Here’s how you can achieve this elegant look:
Essential Materials:
Base Coat: Start with a clear base coat to protect your nails.
Sheer Polish: Choose a light pink or cream as your base color to mimic the soft hues of cherry blossoms.
Liner Brush: Needed for detailed petal designs.
Polish Colors: Pink, white, and brown are essential for creating cherry blossoms and branches.
Top Coat: A fast-drying top coat to seal in your design.
Popular Cherry Blossom Designs:
Cherry Blossom French: A modern twist on the classic French tip, featuring cherry blossoms at the tip of the nail.
Gilded Florets: Highlight the petals with gold polish outlines for a luxurious touch.
Watercolor Blossoms: Use a blending technique with pink and white polishes to achieve a soft, watercolor effect.
Pressed Floral: Incorporate real dried flowers for a 3D cherry blossom look, sealed under a clear top coat.
Step-by-Step Application:
Prepare Your Nails:
Apply the base coat and let it dry.
Follow with a sheer polish as the background color.
Painting the Blossoms:
Dip your liner brush in pink polish to draw small blossoms. Add a tiny dot of white in the center of each flower for depth.
Use a darker polish, like brown, to draw thin branches connecting the blossoms.
Finishing Touches:
Once your design has dried, carefully apply a top coat to avoid smudging the delicate details.
For an added touch of elegance, consider a matte top coat to give your cherry blossom nails a unique finish.
16. Neon color block nails
Neon color block nails are a vibrant and eye-catching choice for anyone looking to make a bold statement with their manicure.
This style can be customized in various ways to suit personal tastes or seasonal trends.
Here are some popular designs and techniques to consider:
Popular Neon Color Block Designs:
Glow in the Dark Neon Stripes: Ideal for nighttime events, these nails use special glow-in-the-dark polish, typically applied by a skilled nail technician to ensure the perfect glow.
Multiple Neon Nail Colors: Each nail painted in a different neon shade creates a fun and eclectic look. This design is simple yet striking, perfect for summer festivals or adding a pop of color to your everyday style.
Neon Skittle Dot Nails: Utilize a dotting tool, toothpick, or Q-tip to dot neon colors across each nail. This design is playful and can be easily customized with different dot sizes and neon hues.
Neon Ombre Nails: A set of 10 luxury made-to-order nails featuring a gradient of neon colors blending seamlessly into one another, offering a sophisticated yet bold neon effect.
Techniques for Creating Neon Color Block Nails:
Preparation: Start with a base coat to protect your nails and ensure a smooth application.
Color Blocking:
Two-Tone French by The Hang Edit: Use Nails.Inc polish in contrasting neon shades like Knightrider’s Street and Wellness In Wimbledon for a modern take on French tips.
Neon Stripe Nails: Apply Orly Half Moon Guides for crisp, clean lines, then paint with vibrant neon colors.
Finishing Touches:
Seal your design with a high-gloss top coat to enhance the neon colors’ vibrancy and longevity.
For a matte finish, opt for a matte top coat which can add a contemporary twist to the glossy neon.
Customization Tips:
Accent Nails: Instead of doing all ten nails, consider neon accents on just one or two to keep the look subtle yet trendy.
Mix Textures: Combine glossy and matte finishes to add depth and interest to your neon manicure.
Incorporate Patterns: Use metallic foils or striping tape to add geometric patterns or abstract shapes, enhancing the visual appeal of your neon color block nails.
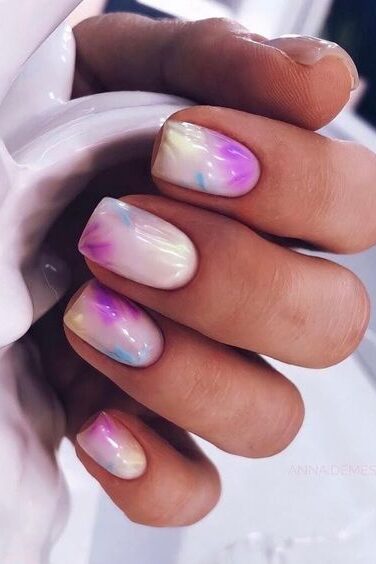
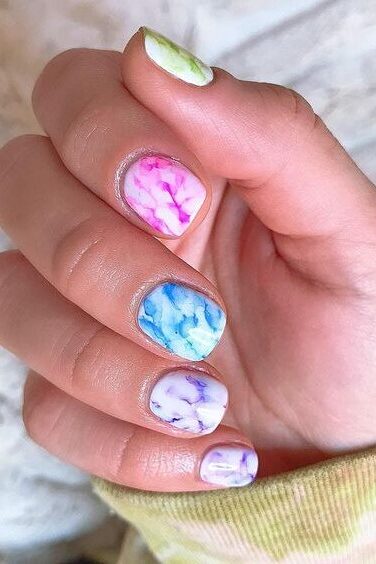
17. Watercolor nails
Watercolor nails offer a delicate and artistic touch to your manicure, resembling a soft watercolor painting with colors that seamlessly blend and bleed into each other.
This style is perfect for those who appreciate a subtle yet striking nail art design.
Here’s how you can achieve the watercolor nail look:
Materials and Supplies:
Thin Liner Brush or Dotting Tool: For precise application and blending of colors.
Diluted Polish: Mix nail polish with nail polish remover or alcohol to achieve the watercolor effect.
Base Coat and Top Coat: To protect your nails and seal in your design.
Essie’s Feel the Fizzle Collection: Recommended for its range of pastel colors that work beautifully together.
Jelly Finish Polishes: For a sheer, dreamy vibe that enhances the watercolor effect.
DIY Watercolor Nail Art Method:
Prepare Your Nails:
Apply a neutral base color and let it dry completely. This will be the canvas for your watercolor art.
Applying the Watercolor:
Dip your brush or dotting tool into the diluted polish and gently apply it to your nails. Start with one color, allowing it to spread and blur slightly.
Introduce other colors, blending them on the nail while still wet to create a fluid, watercolor effect. You can use a mix of shades from the same palette or contrasting colors for more vibrancy.
Finishing Touches:
Once you are satisfied with your watercolor design, let it dry completely.
Seal your artwork with a shiny top coat to enhance the colors and ensure longevity.
Alternative Professional Method:
Salon Airbrush Technique:
For a more refined and seamless watercolor effect, some salons use airbrush machines. This method offers a smooth gradient and can incorporate multiple colors for a complex, layered look.
At home, mimic this technique using a makeup sponge to softly dab and blend colors on the nail.
Customization and Enhancement:
Add Accents: Incorporate elements like gold foil for a luxurious touch or tiny 3D charms for added texture.
Seasonal Themes: Opt for spring and summer colors like light pinks, greens, and blues to reflect the season’s palette.
Floral Designs: Combine watercolor with floral patterns such as the Lavender & White Floral Nails for a nature-inspired look.
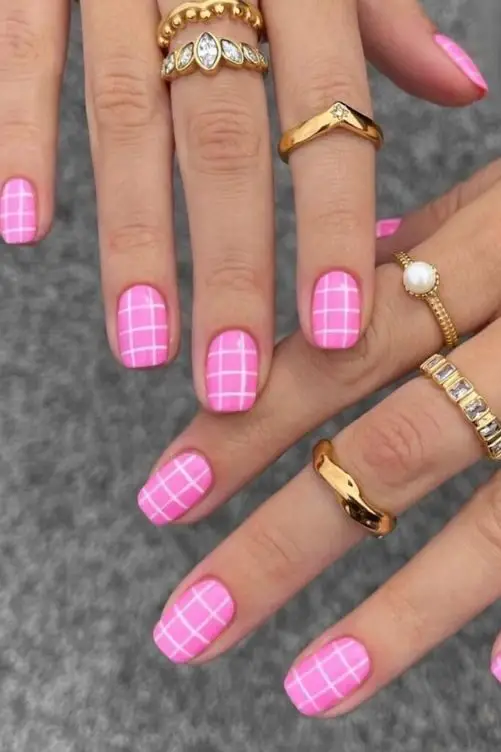
18. Gingham pattern
Gingham pattern nails are a charming and playful design that brings a classic fabric pattern right to your fingertips.
Ideal for short nails, this style is both eye-catching and versatile, allowing for various color combinations and techniques.
Here’s a practical guide to achieving the gingham look on your short nails:
Materials and Preparation:
Base Coat: Essential for protecting the natural nail and ensuring polish adhesion.
Solid Color Nail Polish: Typically, gingham patterns use a white base with another color like pink or blue.
Thin Nail Art Brush or Tape: For creating precise lines.
Top Coat: To seal the design and add a glossy finish.
Steps to Create Gingham Pattern:
Apply the Base Coat:
Start by applying a base coat to clean, filed nails. This step protects your nails and helps the polish adhere better.
Solid Color Base:
Once the base coat is dry, apply two coats of your chosen solid color. This color will act as the background for your gingham pattern.
Drawing the Lines:
Using a thin nail art brush or tape for precision, draw vertical lines across each nail, spacing them evenly.
Next, draw horizontal lines to intersect the vertical ones, creating the classic gingham check pattern.
Finishing Touches:
After completing the pattern, apply a top coat to seal your design and add a beautiful shine. This also helps the manicure last longer without chipping.
Tips for Enhancing Your Gingham Nails:
Color Variations: Feel free to experiment with different colors. For a subtle look, use light and dark shades of the same color.
Add Embellishments: Enhance your design with small rhinestones or other nail art decorations to make your gingham nails stand out.
Dry Time: Ensure each layer of polish is completely dry before applying the next to avoid smudging and to achieve clean, crisp lines.
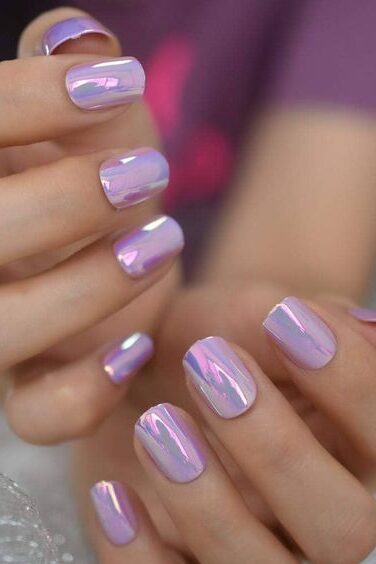
19. Holographic nails
Holographic nails are a dazzling trend that captures the light and eyes of anyone looking for a futuristic and vibrant manicure.
Here’s a closer look at some top products and styles that can help you achieve this stunning effect on your short nails:
Styling Tips for Holographic Nails:
Mix and Match: Combine holographic nails with other styles such as matte or glitter to create unique designs.
Customization: Many holographic nails allow reshaping and customization, providing a perfect fit and personalized look.
Accent Nails: Use holographic designs as accent nails while keeping others in solid colors to balance the sparkle.
Holographic nails offer a spectacular blend of color and shine, making them perfect for those who want to add a modern twist to their manicure.
With products ranging from press-ons to professional-grade polishes, achieving a salon-quality holographic look at home has never been easier.
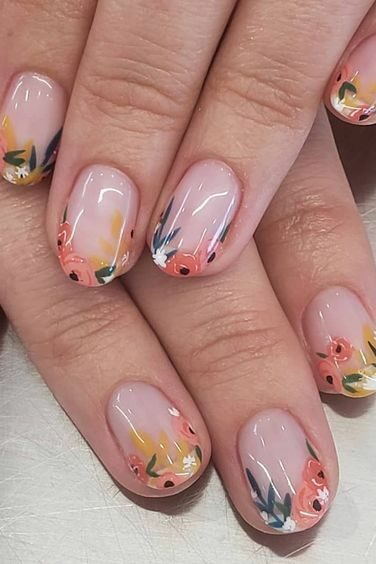
20. Dainty floral French tips
Dainty floral French tips elegantly combine the classic charm of French manicures with the intricate beauty of floral designs, making them a perfect choice for those who appreciate subtle yet detailed nail art.
Here’s a straightforward guide to achieving this sophisticated look on your short nails:
Materials Needed:
Base Coat: To protect and prep your nails.
Light Color Nail Polish: Preferably white or pastel for the French tip.
Thin Brush or Dotting Tool: For detailed floral designs.
Contrasting Nail Polishes: For the flowers.
Top Coat: To seal and enhance the design.
Steps to Create Dainty Floral French Tips:
Nail Preparation:
Start by cleaning and filing your nails to the desired shape.
Apply a base coat to ensure a smooth application and longevity of your manicure.
Applying the French Tip:
Paint the tips of your nails with a light color like white or a soft pastel. This serves as the backdrop for your floral design.
Allow the tip to dry completely before proceeding to the floral patterns.
Adding Floral Designs:
Using a thin brush or a dotting tool, gently draw small flowers along the edge of the French tip. Popular choices include daisies or tiny roses.
Fill in the floral designs with contrasting colors to make them stand out against the light background.
Optionally, add small leaves or dots around the flowers for a more intricate look.
Finishing Touches:
Once your floral designs have dried, apply a top coat to protect your nails and give them a glossy finish.
For enhanced durability, consider using a long-wearing top coat.
Customization Tips:
Color Choices: Experiment with different colors for the flowers to match your outfit or season. Soft pinks or vibrant yellows can make the floral designs pop.
Minimalist Options: For a more subtle look, opt for tiny, single-color flowers along one side of the French tip.
Use of Stickers: If hand-painting is too challenging, consider using floral nail stickers or press-ons to achieve a similar effect with less effort.
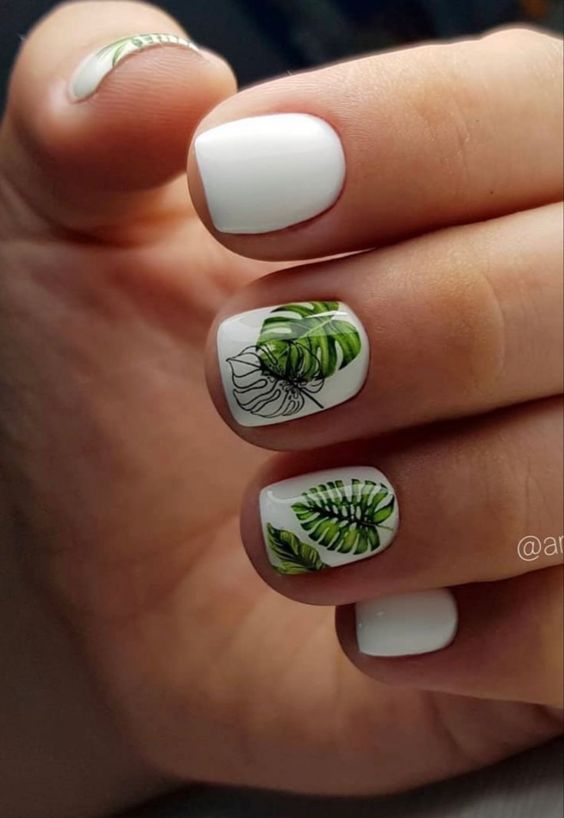
21. Tropical palm leaf designs
Tropical palm leaf designs on short nails bring a slice of paradise right to your fingertips, ideal for those who adore vibrant, nature-inspired aesthetics.
Here’s how to achieve this lush look:
Materials Needed:
Base Coat: Essential for protecting your nails.
Green Nail Polishes: Various shades to create the palm leaves.
Thin Brush or Nail Art Pen: For detailed leaf designs.
Top Coat: To seal in your artwork.
Step-by-Step Application:
Prepare Your Nails:
Begin by applying a base coat to ensure a smooth polish application and to protect your nails from staining.
Opt for a light blue or sandy beige base color to represent the sky or beach, creating a perfect backdrop for your palm leaves.
Painting the Palm Leaves:
Use a thin brush or a nail art pen to draw palm fronds. Start from the nail bed and sweep out towards the tip, mimicking the natural curve of palm leaves.
Employ various shades of green to add depth and realism to your design. You can highlight the edges with a lighter green or even a touch of yellow to simulate sunlight catching the leaves.
Finishing Touches:
Once your palm leaf design has dried, apply a clear top coat to protect your design and add a glossy finish, enhancing the vibrant colors.
Design Variations and Tips:
Accent Nails: Instead of painting palm leaves on every nail, choose one or two nails as accents for a subtler look, keeping the other nails in a solid color.
Glitter or Metallic Effects: Add a touch of glitter or use metallic green polish for the tips of the leaves to give them a dewy morning look.
Seasonal Adaptation: Though typically seen as a summer design, adapt the colors to darker greens and browns for an autumnal feel or bright, bold greens for a tropical summer vibe.
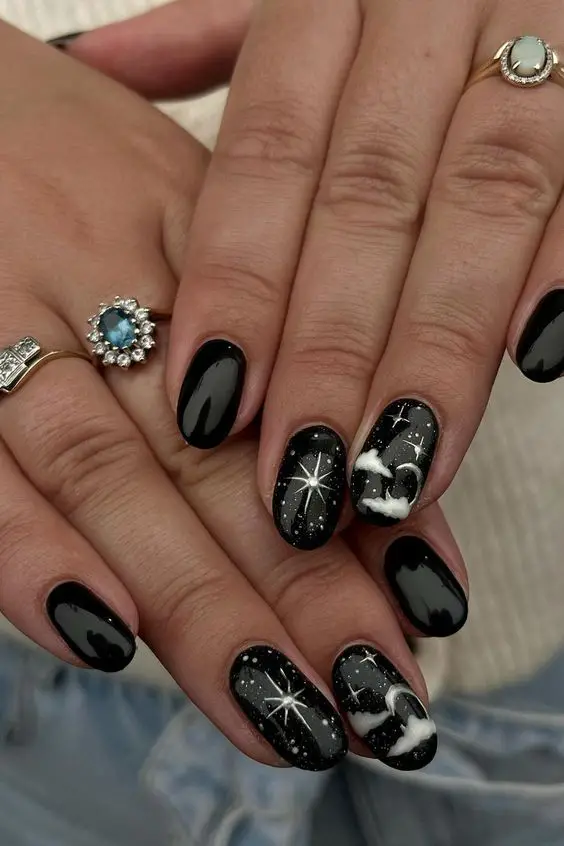
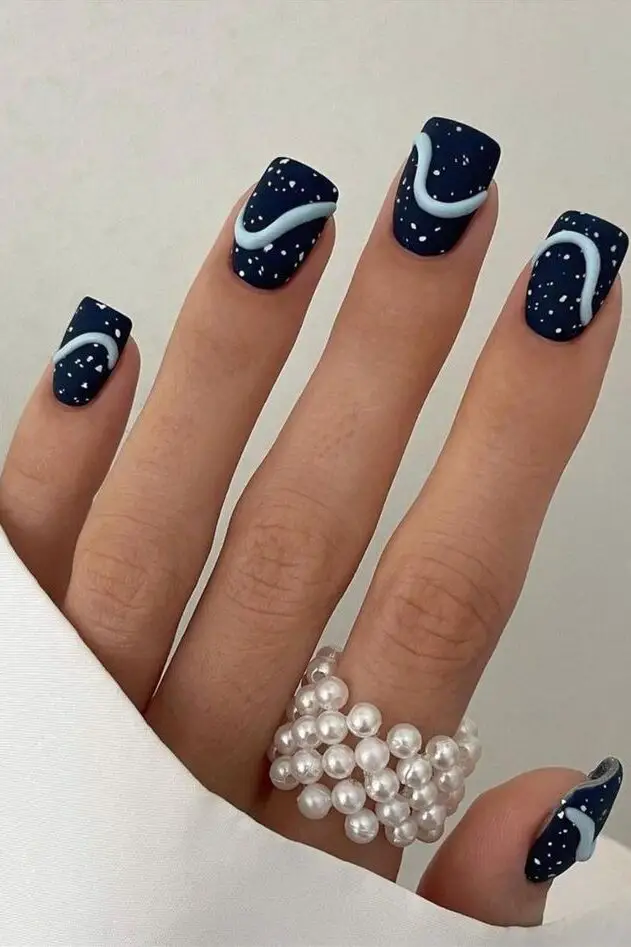
22. Starry night sky nails
Starry night sky nails are a mesmerizing choice for those enchanted by the celestial beauty of the night sky. This design captures the allure of a starlit sky on your fingertips, making it a popular trend among nail art enthusiasts.
Here’s how you can achieve this look:
Materials Needed:
Dark Base Polish: Preferably in shades of deep blue or black.
Glitter Top Coat: To mimic the sparkle of stars.
Dotting Tools: For creating stars and constellations.
Fine Brush: For detailed designs like connecting stars.
Step-by-Step Guide:
Base Preparation:
Start by applying a base coat to protect your nails and ensure a smooth application.
Paint your nails with a dark base polish. Black or navy blue works well as it represents the night sky.
Creating Stars and Constellations:
Dip your dotting tool into white or silver polish to dot small stars across your nails. You can create larger stars by allowing more polish on the tool or by layering several dots on top of each other.
Use a fine brush to draw thin lines connecting some stars, forming constellations. Popular constellations include Orion and the Big Dipper, but feel free to create your own designs.
Adding Sparkle:
Once your stars and constellations are in place, apply a glitter top coat to give the effect of a twinkling night sky. This step not only seals your design but also adds the magical sparkle that characterizes starry nights.
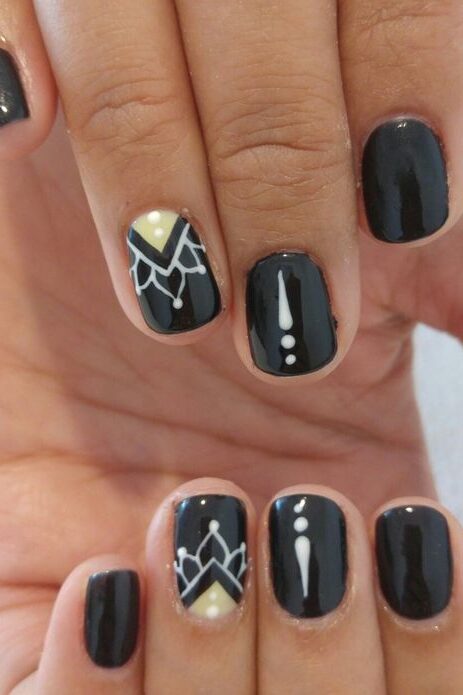
23. Tribal-inspired nail art
Tribal-inspired nail art is a captivating choice for those looking to add a bold and cultural touch to their manicure.
This style incorporates a variety of designs and techniques that reflect traditional tribal motifs, making each nail a piece of art.
Here’s how you can achieve this distinctive look:
Essential Elements of Tribal-Inspired Nail Art:
Designs: Popular choices include arrow-shaped patterns, geometric shapes in contrasting colors, and intricate line and dot work. Designs like Tribal by nailedbydeshea and Aztech by maravillacrispi showcase these elements beautifully.
Colors: Earthy tones dominate the palette, but you can also incorporate bright colors for a modern twist. Use shades like terracotta, ochre, black, and white to maintain authenticity.
Techniques: Hand-painting is preferred for its precision in creating fine details. Nail vinyls offer an alternative for those seeking quicker application without compromising on the aesthetic.
Recommended Products:
Polishes: Opt for high-pigment polishes in earthy or bold colors. Brands like OPI and Essie offer ranges suitable for these designs.
Tools: Detailing brushes and nail vinyls are essential for achieving clean lines and intricate patterns. A dotting tool will also be handy for perfect dot work.
Step-by-Step Guide to Creating a Tribal Design:
Base Preparation:
Start with a base coat to protect your nails and ensure a smoother polish application.
Apply a neutral or earth-toned polish as the base color and let it dry completely.
Design Application:
Using a thin brush, start by sketching out geometric shapes or lines. For a cohesive look, consider one central design like a large triangle or a series of smaller, interconnected shapes.
Add details within these shapes using contrasting colors. Incorporate dots, lines, or other tribal motifs to fill the spaces.
If using nail vinyls, place them firmly on the nail after the base coat has dried, apply the polish, and carefully remove them before the polish dries.
Finishing Touches:
Once your design is complete, apply a top coat to seal in your artwork and add a glossy finish, enhancing the depth and detail of your tribal patterns.
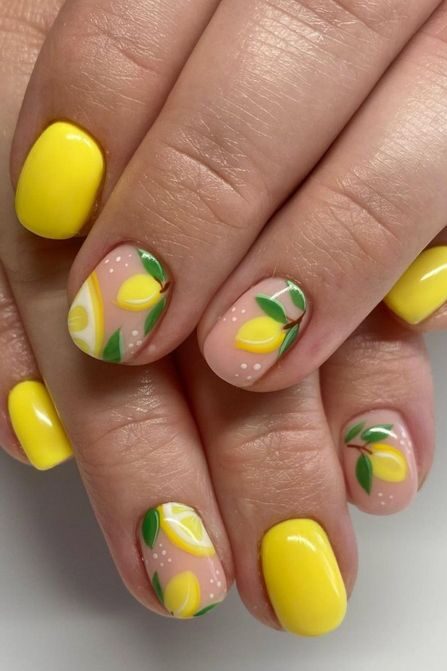
24. Fruit-themed nails
Fruit-themed nails are a delightful trend, especially popular during the summer months, offering a vibrant and playful touch to your manicure.
Here’s how you can embrace this juicy trend:
Popular Fruit-Themed Designs:
Strawberry Patch Design: Features adorable red strawberries with tiny green leaves, perfect for a picnic day.
Chic Cut-Open Kiwis: Showcases slices of kiwi with their characteristic green hue and tiny black seeds.
Jazzy Juicy Watermelons: Captures the essence of summer with bright red and green, accented with black seeds.
Pretty Pink Grapefruits: Offers a subtler fruit-inspired look with a blend of pink and white.
Techniques and Tips:
Leadlighting Technique: This method is perfect for creating vibrant, translucent fruit designs that mimic the look of stained glass.
Using Ruby Red Dip Powder: For a cherry manicure design, this technique gives a deep, vibrant color, making your nails look like actual cherries.
Combining Techniques: Mix different methods like painting and decals for a dynamic and textured look. For example, pair hand-painted lemons with strawberry decals for a “Fruit Salad” nail design.
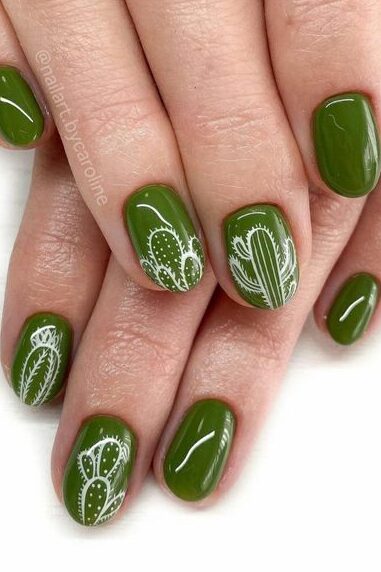
25. Cactus designs
Cactus nail designs for short nails are a playful and trendy way to bring a bit of the desert’s charm to your manicure.
Here’s a breakdown of how you can achieve and customize these designs:
Types and Techniques:
Styles Available: Choose from a variety of styles like ombré, funky, dipped, and cute gel nails. Each style offers a unique expression of the cactus theme, making it versatile for various occasions and tastes.
Creation Methods: You can create these designs using gel nails, acrylics, or even simpler press-on nails, depending on your preference and skill level.
Color Schemes: Opt for vibrant colors such as pink, turquoise, or traditional green shades to bring your cactus designs to life. These colors can make the designs pop and add a playful touch to your overall look.
Additional Elements and Themes:
Combining Themes: Cactus designs can be beautifully combined with other motifs such as Easter or western themes, providing a rich narrative to your nail art.
Decorative Additions: Enhance your cactus designs with additional elements like flowers, miniature trucks, or cow patterns. These additions can provide a unique twist and personalize your manicure.
Tools and Accessories:
DIY Tools: Use stencils, which are available for purchase online, to accurately depict cactus shapes and intricate details on your nails at home.
Nail Art Accessories: Consider using cactus stickers, decals, and wraps for an easy application. For a more dimensional look, gold cactus charms can be added to the design.
Specialty Products: Utilize products like Cactus Blossom dip powder or Cactus Jelly – Jelly green nail polish to achieve specific textures and finishes that enhance the thematic depth of your nail art.
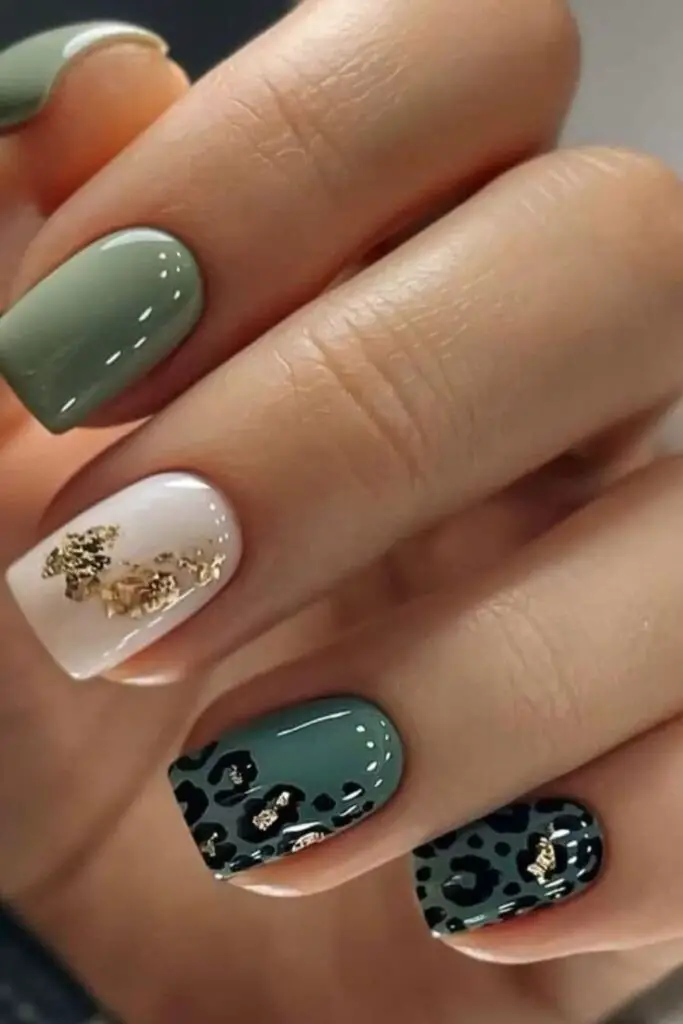
26. Animal print accent nails
Animal print accent nails are a daring and versatile option that can transform your manicure into a striking statement piece.
Here’s a breakdown of popular animal print styles and tips on how to achieve these looks:
Types of Animal Print Designs:
Zebra Print: Known for its bold stripes, zebra print can be easily achieved with nail stickers, offering a quick and fun option.
Cow Print: For a more unexpected look, try cow print in an unconventional color like deep green, adding a unique twist to your nails.
Cheetah Print: With over 30 unique cheetah print designs available, this style remains a top choice for those who love a classic look with a bit of edge.
Leopard Print: Available in various materials like shellac, leopard print can be found in colors ranging from burnt orange to neutral tan, providing plenty of options for customization.
Snake Skin, Tiger, and More: Other exciting options include snake skin and tiger prints, each offering a distinct vibe to your manicure.
How to Apply Animal Print Accent Nails:
Preparation:
Start with a clean, dry nail surface. Apply a base coat to protect your nails and ensure a smooth application.
Base Color:
Choose a light or neutral shade as the base color for classic prints like leopard or a bold color for a modern twist.
Applying the Print:
Use a thin brush or a dotting tool to create the animal patterns. For leopard spots, dip the tool in black polish and dot irregular shapes onto the nail.
For a metallic leopard print, add metallic accents using a sheer base color.
Zebra and tiger prints require steady hand stripes, which can be freehanded or guided with striping tape for precision.
Tips for Enhancing Your Animal Print Nails:
Colorful Leopard Print: Introduce vibrant contrasting colors for the spots, such as pink nails with blue leopard spots, to make your manicure pop.
Subtle and Neutral Designs: Opt for a subtle leopard print with a neutral shade if you prefer a more understated look.
Accent Nails: Rather than doing all ten nails, consider applying the animal print to only one or two accent nails. This technique draws attention without overwhelming your overall style.
27. Vintage-inspired nail art
Vintage-inspired nail art brings a touch of timeless elegance and nostalgia to your manicure, perfect for those who appreciate the charm of past decades.
Here are some classic designs and tips to achieve that retro look on your short nails:
Key Vintage-Inspired Designs:
Moon Nails Design: Originating from the 1920s, this style features a painted base in a lighter color while leaving a half-moon shape at the nail’s base unpainted. For a double moon manicure, add another crescent on the tip.
Half & Half Nails: A twist on the French manicure, using two contrasting polish colors to divide the nail into two distinct halves.
Lace Patterns: Reminiscent of the Victorian era, intricate lace designs can be recreated with a thin brush for a delicate and sophisticated appearance.
Ombre Nails: Popularized in the 1960s, this design involves a gradual color transition, blending vintage hues for a classic yet dynamic look.
Techniques and Products:
Sparkle & Co. Dip Gel Powder: Ideal for DIY enthusiasts, this product allows for easy at-home application without the need for lamps and lasts 2-3 weeks. Use it to achieve a polished, durable finish for any of the vintage designs.
Using a Fine Brush or Tape: For designs like retro stripes or detailed lace patterns, utilize a fine brush for precision or tape to ensure clean, sharp lines.
Color Combinations: Select colors that reflect specific eras; for instance, pastel shades for a 1950s vibe or bold, contrasting colors for 1960s-inspired ombre nails.
Special Occasion Designs:
Lovers Heart Nails: Perfect for Valentine’s Day, use Portrait Pink and Bésame Red Nail Polish to create sweet, heart-shaped designs.
Plaid Manicure: Inspired by classic tartan, this design features cross-hatched patterns in shades of blue with striking black and white accents, ideal for a statement look at any gathering.
28. Nautical-themed nails
Nautical-themed nails are a splendid way to bring a touch of the ocean’s majesty to your manicure, especially during the summer or for beach-themed events.
Here’s how you can achieve an elegant nautical look on your short nails:
Key Elements of Nautical-Themed Nail Art:
- Primary Colors: Navy blue is a staple in nautical themes, often complemented by red, white, and touches of gold. These colors reflect the classic maritime style.
- Iconic Symbols: Anchors, ropes, and stripes are synonymous with nautical designs. Incorporating these elements can instantly give your nails a sailor-inspired look.
- Additional Motifs: For a playful twist, add designs like starfish, compasses, or even a small wheel to complete the nautical theme.
Step-by-Step Guide to Creating Nautical Nails:
-
Base Preparation:
- Start with a clean, shaped nail and apply a base coat. Opt for a navy blue or crisp white polish as the base color to set the nautical tone.
-
Design Application:
- Stripes: Use striping tape to create clean, horizontal or vertical lines. Alternate between white and navy blue for a classic sailor shirt effect.
- Anchor Detail: On the ring finger, paint a small anchor using a thin brush or a stamping tool. You can choose a contrasting color like gold or red for the anchor to stand out.
- Accent Features: Consider a design like a tiny compass on the thumb or a cute wave pattern on the pinky to add variety and depth to your nautical theme.
-
Finishing Touches:
- Seal your design with a top coat to ensure durability and a glossy finish. For a summer-ready look, a matte top coat can also be a chic alternative.
Tips for Enhancing Your Nautical Nails:
- Mix Finishes: Combine matte and glossy finishes within your nail art to add an intriguing contrast.
- Glitter Accents: A touch of glitter on the tips or as part of the water elements can mimic the sparkling sea under the sun.
- Customization: Personalize your nails by adding initials or small dates in a subtle area, perfect for commemorating special occasions like a cruise trip or a seaside wedding.
29. Tie-dye nails
Tie-dye nails are a stunning choice for those who love vibrant, watercolor-like effects on their nails. This style captures the essence of the tie-dye fabric trend, transforming it into an eye-catching nail art design that glows with an array of colors.
Here’s how you can create tie-dye nails using various techniques, each suitable for short nails:
Techniques to Create Tie-Dye Nails:
Plastic Bag Method:
Preparation: Start with a base layer of matte white nail polish.
Application: Randomly dot your nails with two to three different polish colors.
Blending: Place a plastic bag over the nail and gently tap to blend the colors together.
Finishing Touches: Seal the design with a shiny top coat for a smooth, glossy finish.
Blooming Gel Method:
Base: Apply two coats of white gel polish and cure under a gel lamp.
Design: Apply a thin layer of blooming gel, then add soft strokes of color on top.
Curing: Cure the design under the lamp and finish with a gel top coat for durability and shine.
Water Marbling Method:
Setup: Paint each nail with a neutral white polish and apply liquid latex around the nails for easy cleanup.
Marbling: Drop small drops of polish into a cup of water and use a dotting tool to draw patterns.
Dipping: Dip each nail into the water to transfer the design.
Cleanup and Sealing: Clean up the edges and seal the design with a clear, fast-drying top coat.
Products and Preparation for Tie-Dye Nails:
Products Used: For creating tie-dye effects, products like Prophecy gel polish collection, fiber gel tips, and bubble gum elixir oil are essential.
Nail Preparation: Begin by sizing and attaching fiber gel tips with glue, dehydrating the natural nail, and applying a base coat.
Application of Fiber Gel: Apply two coats of cameo fiber gel for a smooth transition between the natural nail and the tip, focusing extra product on the apex area to strengthen it.
Customizing Your Tie-Dye Nails:
Design Application: Apply the tie-dye design diagonally across the nails, using a variety of colors from the Prophecy selection to ensure the design isn’t too thick.
Curing and Sealing: After completing the design, apply a no-wipe top coat and cure the nails in a lamp to seal in the vibrant tie-dye effect.
30. Polished marble nails
Marble effect nails are a stunning and sophisticated choice for those who love intricate and unique nail designs.
Here’s how you can achieve this elegant look:
Materials Needed:
Gel Polish: Choose a base color and several other shades for the marble effect.
Dotting Tool: For swirling the colors.
Alcohol Ink or Transfer Foil Gel: For more detailed designs.
Top Coat: To seal and protect your nail art.
Step-by-Step Guide:
Prepare Your Nails:
Start by applying a base coat to protect your nails and ensure a smooth application of colors.
Choose a light color like white or a soft grey as the base to make other colors stand out.
Creating the Marble Effect:
Apply drops of different colored gel polishes on the nail. Use a dotting tool to swirl these colors gently to create a marble-like pattern.
For a more realistic effect, you can add a drop of alcohol ink and swirl it into the design. This technique can mimic the natural veining in marble.
Alternatively, apply a clear gel over the base coat and then place gold transfer foil on the tacky surface to create a striking metallic veining effect.
Finishing Touches:
Once you are satisfied with your marble design, apply a top coat to seal in the artwork and add a glossy finish.
Cure under an LED lamp as per the gel polish instructions to ensure durability.
Tips for Enhancement:
Color Choices: Experiment with different color combinations like classic white and grey, or vibrant hues like pink and green for a more modern twist.
Add Textures: Incorporate elements like gold flakes or silver leaf to add a luxurious feel to your marble nails.
Use of Tools: A fine brush can be used for detailed veining, while sponges might help in creating a softer, more blended look.
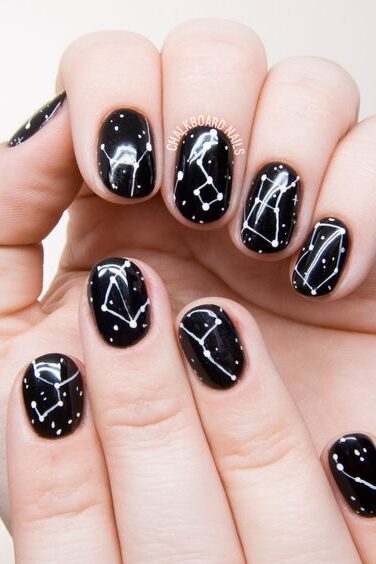
31. Constellation nail art
Constellation nail art has taken the beauty world by storm, originating from the innovative trends of South Korea and rapidly gaining traction in the United States.
This stellar design not only captivates the eye but also allows wearers to connect with celestial wonders right at their fingertips.
Here’s a concise guide to achieving this cosmic look:
Application Tips:
Base Preparation:
Start with a clean, buffed nail surface. Apply a dark base coat, preferably navy blue, to mimic the night sky. This serves as the perfect backdrop for your constellation appliqués or hand-painted stars.
Applying Constellation Designs:
If using appliqués: Simply peel off the design and place it carefully on the nail. Smooth it out to avoid air bubbles and seal with a top coat for durability.
For hand-painting: Use a fine-tip brush or a toothpick dipped in gold or silver polish to dot tiny stars and connect them with thin lines, creating various zodiac signs or random star patterns.
Sealing the Design:
Whether using appliqués or hand-painting, always finish with a clear top coat. This not only protects your design but also adds a glossy finish that enhances the overall appearance of your constellation nails.
Special Considerations:
Product Returns: Note that JINsoon products, often used for detailed nail art, are non-returnable due to sanitary standards. However, defective products will be replaced or credited, ensuring customer satisfaction.
Inspirational Ideas: For a touch of elegance, consider the design by Jennifer Petersen, which features zodiac signs in gold against a deep navy background, achieved using durable gel polishes for a lasting finish.
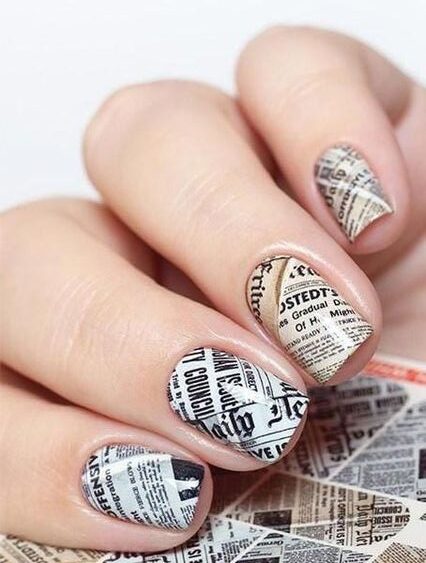
32. Newspaper print nails
Newspaper print nails offer a chic and vintage-inspired look that’s surprisingly easy to achieve.
Here’s a step-by-step guide to creating this unique manicure:
Materials Required:
Base Coat: Opt for a pale or clear base to protect your natural nails.
Light Color Nail Polish: Light grey, nude, or light pink are ideal for ensuring the newspaper print stands out.
Rubbing Alcohol or Water: Needed to transfer the ink from the newspaper to your nails.
Newspaper: Choose pieces with clear, crisp print.
Top Coat: A clear top coat to seal the design and add a glossy finish.
Cotton Swabs and Nail Polish Remover: For cleanup around the nails.
Steps to Create Newspaper Print Nails:
Preparation:
Wash your hands with mild soap and dry thoroughly.
Apply a base coat to protect your nails and let it dry completely.
Apply Base Color:
Paint your nails with your chosen light color. Apply two coats for optimal opacity and let them dry thoroughly.
Transfer the Print:
Cut the newspaper into small squares, slightly larger than your nail size.
Pour rubbing alcohol into a small container or cap. Dip each nail into the alcohol for about 5 seconds.
Press a piece of newspaper firmly onto the nail. Hold it in place for about 15 seconds to ensure the ink transfers onto the nail.
Carefully peel off the newspaper. The text should now be imprinted on your nail.
Finishing Touches:
Use a cotton swab dipped in nail polish remover to clean up any excess ink around the nails.
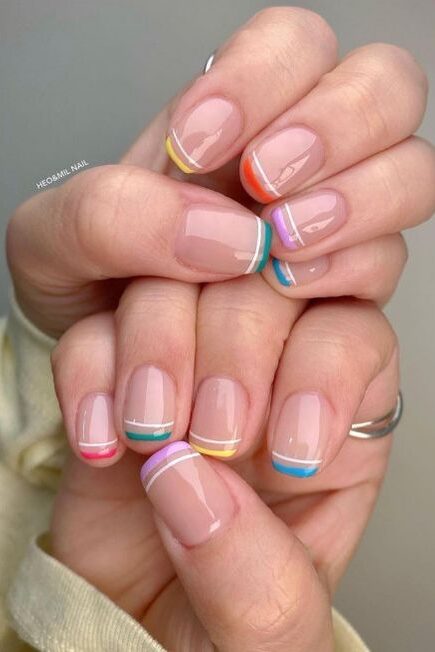
33. Rainbow gradient French tips
Rainbow gradient French tips bring a vibrant and playful twist to the classic French manicure, perfect for adding a splash of color to your look.
Here’s how you can achieve this eye-catching style on your short nails:
Materials You’ll Need:
Base Coat: To protect your natural nails and ensure a smooth application.
White or Nude Polish: As a base color to make the rainbow colors pop.
Rainbow Colored Polishes: Choose colors that represent the spectrum such as red, orange, yellow, green, blue, indigo, and violet.
Top Coat: For sealing in your design and adding a glossy finish.
Nail Striping Tape: To achieve precise and clean lines for your French tips.
Step-by-Step Guide:
Prepare Your Nails:
Start by applying a base coat to protect your nails and create a smooth surface.
Once dry, apply a white or nude polish as the base color and let it dry completely.
Creating the Rainbow Tips:
Place striping tape slightly below the tip of your nail to define the area for the rainbow gradient.
Paint the tips of your nails with the colors of the rainbow. You can either apply one color per nail or create a gradient effect on each nail by blending adjacent colors.
Carefully remove the striping tape while the polish is still slightly wet to ensure clean lines.
Finishing Touches:
Once the rainbow tips are dry, apply a clear top coat to protect your design and add a glossy finish.
For an extra touch of sparkle, consider a glitter topcoat over the rainbow tips.
Customization Options:
Color Variations: Feel free to experiment with different color schemes such as pastels, neons, or even a monochromatic gradient using different shades of the same color.
Embellishments: Add small rhinestones or decals at the base of your nails for an enhanced decorative look.
Occasional Themes: Adapt the colors to fit special occasions like using red and green for Christmas or spooky colors for Halloween.
Conclusion
Throughout this exploration of nail art designs, we’ve journeyed through a variety of creative landscapes, from the timeless elegance of Classic French tips to the innovative and vibrant realm of Rainbow gradient French tips.
Each design offers a unique way to express personal style, mood, or even celebrate specific occasions with a splash of color, texture, and intricacy.


Leave a Reply
You must be logged in to post a comment.