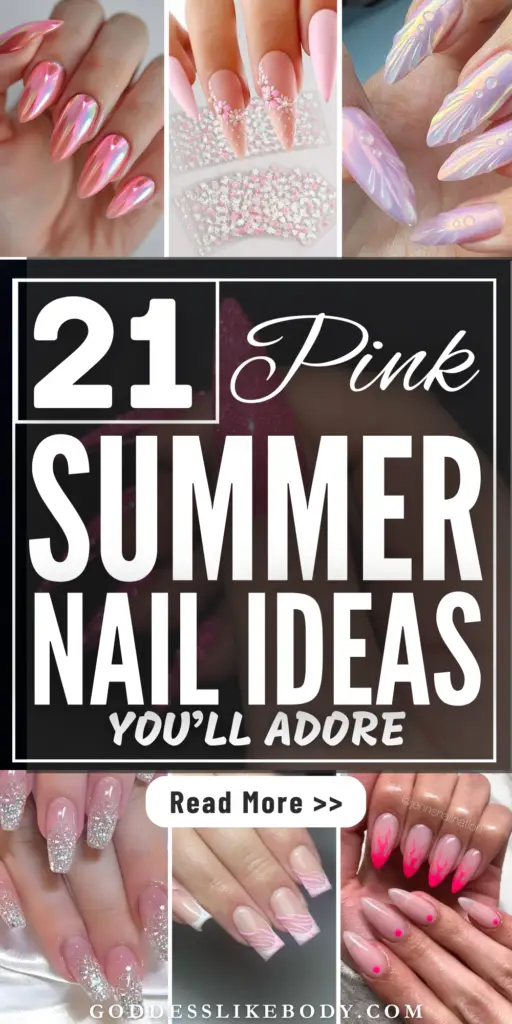
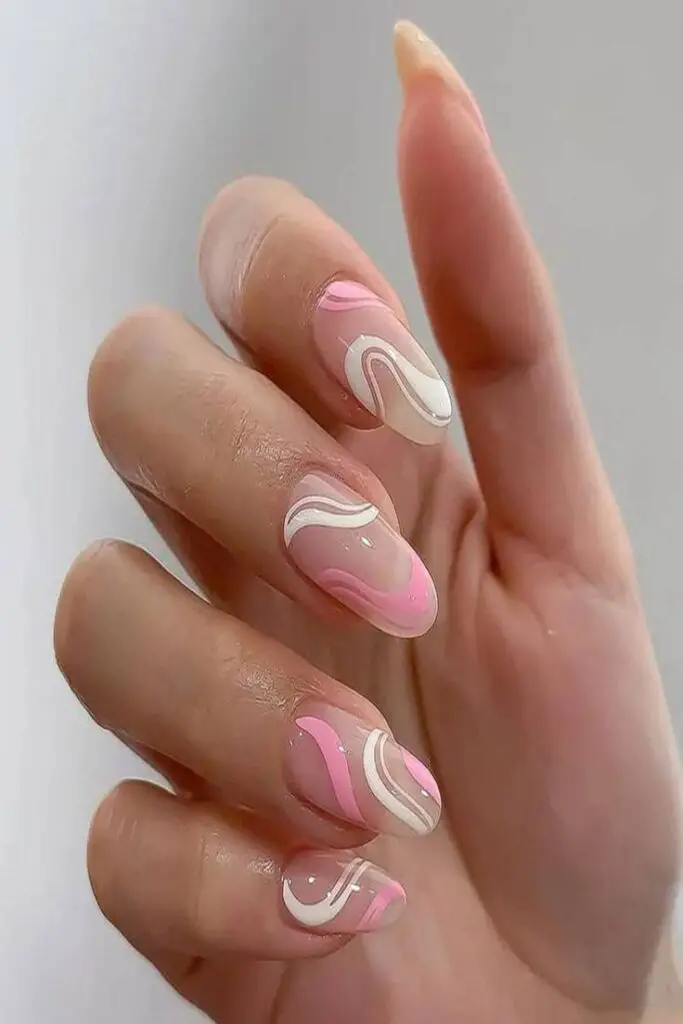
Summer is the perfect season to refresh your manicure with vibrant and playful hues, making pink summer nail ideas a must-try for anyone looking to add a pop of color to their look.
The designs incorporate various nail art techniques, including ombré, glitter, and even fancy French tips, ensuring there’s something for every style.
Embark on a creative journey through 21 stunning pink summer nail designs that promise to elevate your nail game.
Get ready to discover a treasure trove of nail art ideas ranging from holographic effects to chic gingham patterns, all designed to inspire your next manicure adventure this summer.
Busy? Save this pin for later.
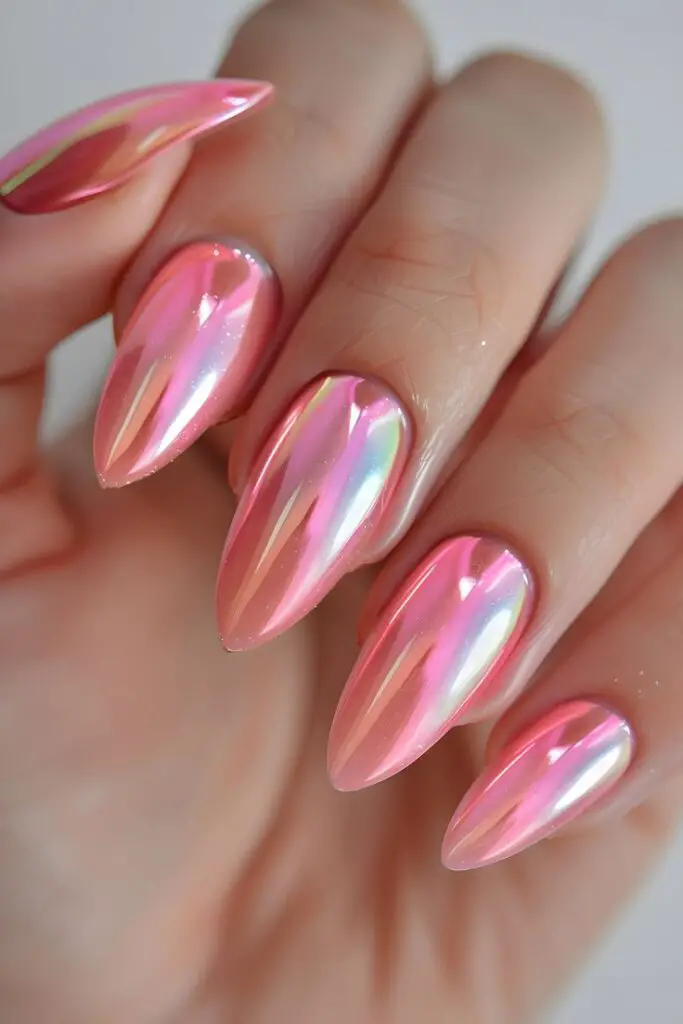
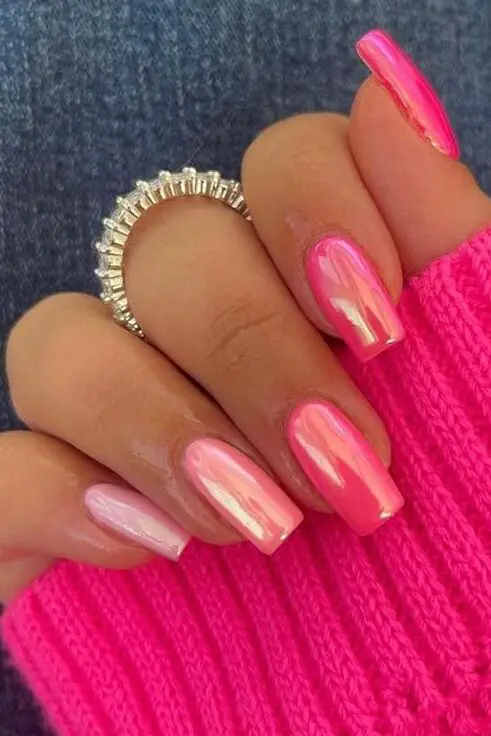
1. Bubblegum Pink & Chrome
Bubblegum pink nails are instantly recognizable by their bright and playful hue, making them a perfect choice for anyone seeking a fun and approachable look.
This summer, combining bubblegum pink with chrome accents not only adds a touch of glamour but also elevates your manicure to a chic new level.
Ideal for various occasions, from casual outings to prom nights, bubblegum pink chrome nails are versatile and stylish.
Key Features of Bubblegum Pink & Chrome Nails
Base Color Options: Start with a solid base of bubblegum pink. For those preferring a softer look, Essie’s “PEAK SHOW” is a great baby pink option that serves as an excellent foundation for chrome effects.
Chrome Accents: Apply iridescent chrome powder over the pink base to achieve that coveted shiny finish. This can be done using chrome nail polish or chrome powder along with a special activating top coat to ensure longevity.
Design Variations: Customize your nails by adding chrome accents in various designs such as stripes, dots, or half-moon shapes. For a more elaborate look, consider two-tone manicures with bubblegum and hot pink, or chrome pink tips adorned with silver studs and star motifs.
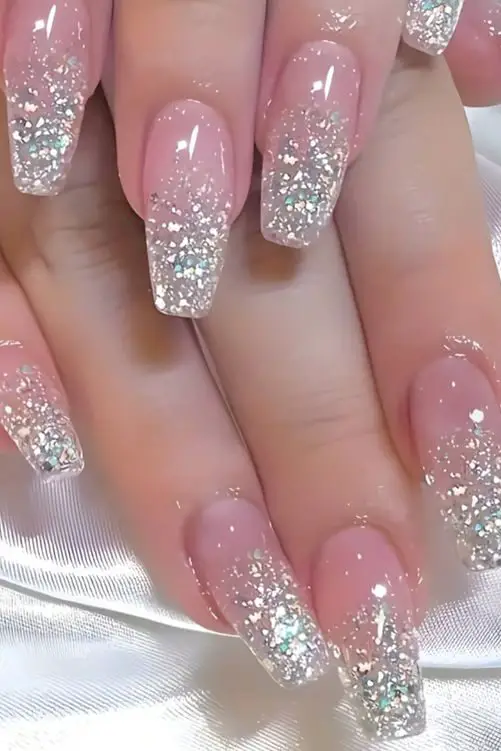
2. Frosted Pink Glitter Tips
Frosted Pink Glitter Tips offer a shimmering twist to the classic French manicure, blending pale pink bases with sparkling tips.
Design and Customization
Base Coat: Start with a pale pink base using a high-quality polish like Mia Secret Frosted Pink Acrylic Powder, known for its non-yellowing and self-leveling properties.
Glitter Tips: Apply Frosted Pink Nail Art Glitter to the tips. This fine, iridescent glitter with violet sparkle adds a luxurious touch to your nails.
Additional Embellishments: For those wanting a bit more flair, additional embellishments such as tiny rhinestones or metallic strips can be added for an extra fee.
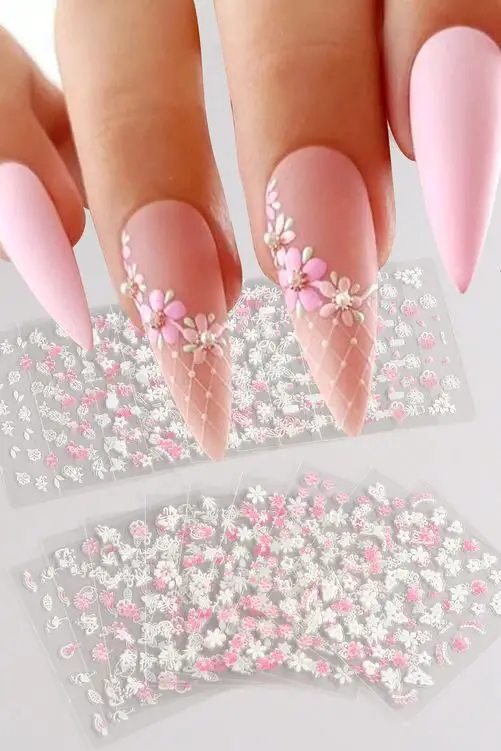
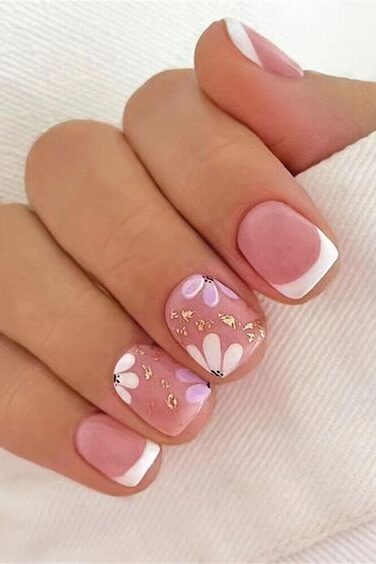
3. Cherry Blossom Floral Stamp
Cherry blossom nail art designs, inspired by the delicate and beautiful Sakura blossoms, are a popular choice for spring and summer manicures.
These designs offer a refreshing and elegant touch, ideal for those who appreciate floral aesthetics. Here’s how you can create your own Cherry Blossom Floral Stamp manicure:
Step-by-Step Creation Process
Base Preparation: Begin with a base coat to protect your natural nails, ensuring a smooth surface for the polish.
Sheer Polish Application: Apply two coats of a sheer polish, such as China Glaze “Innocence” or L’Oreal “Wishful Thinking,” to create a subtle and soft background.
Branch Creation: Using a liner brush, draw thin branches from the outer edges of the nail towards the center. This forms the foundation of your cherry blossom branches.
Leaf Details: With a smaller brush dipped in green polish, add tiny leaves along the branches to bring the design to life.
Flower Petals: Create the cherry blossoms by painting small petals around the branches using the lightest pink polish. Enhance the petals by shading the inside with a slightly darker pink.
Center Details: Add a tiny red dot in the center of each flower using a detail brush to mimic the look of real cherry blossoms.
Top Coat Application: Seal your artwork with a fast-drying top coat to protect and add a glossy finish.
Tools and Materials
Base Coat: Essential for nail protection.
Sheer Polishes: China Glaze “Innocence” or L’Oreal “Wishful Thinking”.
Liner and Detail Brushes: For precise application of branches and flower details.
Green and Pink Polishes: For leaves and blossoms.
Red Polish: For the centers of the flowers.
Top Coat: To seal in the design.
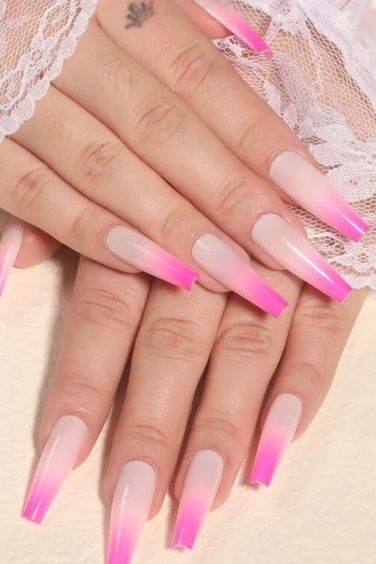
4. Neon Pink Ombre (white base)
Neon pink ombre nails are a vibrant and modern twist on the traditional French manicure, perfect for adding a splash of color to your summer style.
This design starts with a crisp white base and transitions into a vivid neon pink, creating a stunning gradient effect that’s sure to catch the eye. Here’s how you can achieve this trendy look:
Step-by-Step Guide to Creating Neon Pink Ombre Nails
Preparation and Base Color: Begin by applying a base coat to protect your nails and ensure a smooth application. Next, use a gel white polish such as She Mod’s gel white, and cure it under an LED gel light for 60 seconds to set the base.
Applying Neon Pink: Once the base is ready, lightly tap a neon pink pigment gel color over the white. This technique allows you to control the opacity and intensity of the neon pink, adjusting how it fades into the white base.
Creating the Gradient Effect: Experiment with the direction of your gradient—whether middle outward, upward, downward, or diagonal—to find the style that best suits your look.
Finishing Touches: Seal your design with a gel top coat to enhance durability and add a glossy finish. For an extra touch of magic, consider adding a layer of clear glow polish over the design for a glow-in-the-dark effect.
Customization Options
Neon pink ombre nails are not only eye-catching but also incredibly versatile. They serve beautifully as a standalone statement or as a vibrant background for further embellishments.
Consider adding hand-drawn designs, stamped images, or other nail art elements to personalize your manicure. Popular combinations include pairing hot pink and baby pink for a chic negative space French tip, or creating a cotton candy-inspired look with a blend of bold, ombre colors.
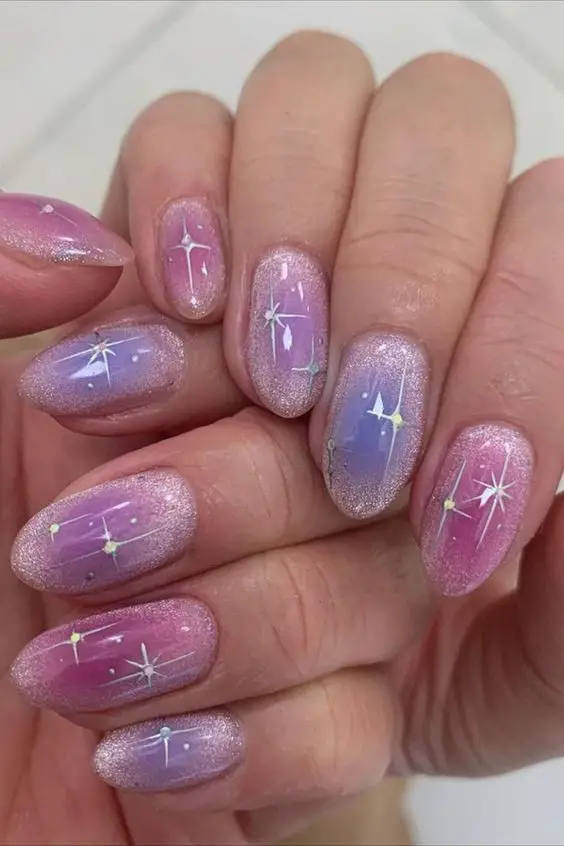
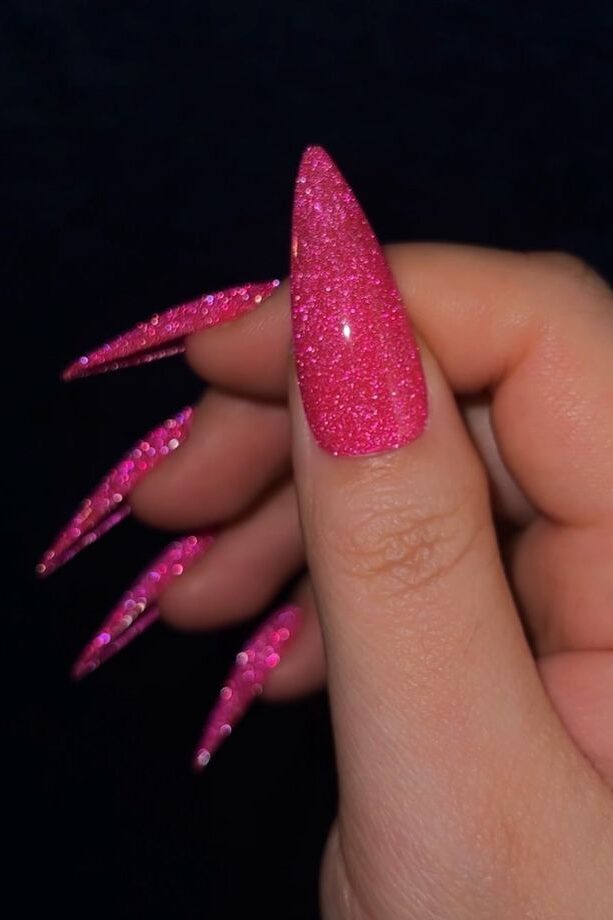
5. Holographic Pink Milky Way
Holographic Pink Milky Way nails create a mesmerizing celestial effect that’s perfect for summer nights or any festive occasion.
This design uses a combination of vibrant pinks and shimmering holographics to mimic the awe-inspiring beauty of a starry galaxy. Here’s a step-by-step guide to achieving this look, inspired by popular nail art tutorials.
Step-by-Step Guide to Creating Holographic Pink Milky Way Nails
Base Preparation: Start with two coats of Dance Legend Minerva as your base. This polish provides a deep, rich pink canvas that enhances the holographic elements.
Color Layering with Sponge: Use a makeup sponge to dab on Burry Me Jelly Polis in Grapefruit. This adds a lighter pink hue that starts to create the depth of your galactic design.
Adding White and Dark Accents: Apply white acrylic paint with the sponge next to the pink for a cloudy nebula effect. Follow this by sponging on a darker shade, enhancing the contrast and depth of your Milky Way.
Star Creation: With a small dotting tool, dot on white acrylic paint to form stars. Transform some dots into larger stars by dragging out points with a fine brush.
Enhancing with Glitter: Apply a layer of Renaissance Lacquer Intro Coz, a holographic glitter polish, to bring the sparkling galaxy to life.
Final Touches: Seal your design with a top coat for durability and shine. Add more small dots or stars if desired to fill out the galactic scene.
Tools and Materials Needed
Base Coat: Dance Legend Minerva
Colored Polishes: Burry Me Jelly Polis in Grapefruit, white acrylic paint, Renaissance Lacquer Intro Coz
Tools: Basic makeup sponge, dotting tool, small detailing brush
Top Coat: To protect and enhance the design
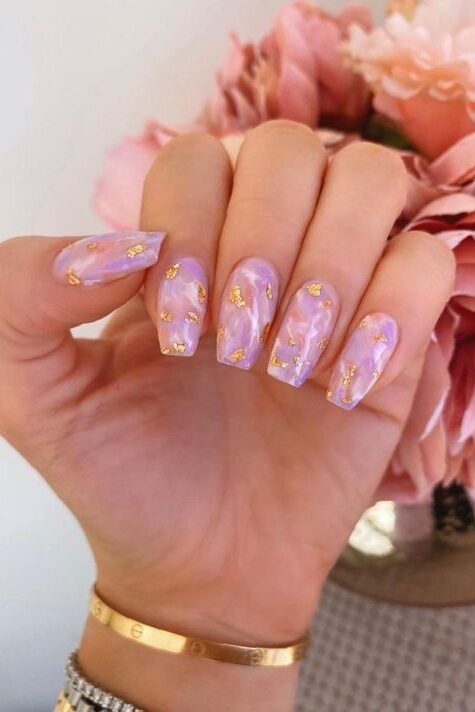
6. Pastel Pink Watercolor & Gold Flakes
Pastel Pink Watercolor & Gold Flakes nails are a stunning choice for those who love a soft, ethereal look with a touch of luxury.
How to Create Pastel Pink Watercolor & Gold Flakes Nails
Base Coat Application: Start by applying a pastel pink base coat. This serves as the perfect backdrop for the watercolor effect.
Watercolor Effect: Once the base is dry, use a Nail Art Ink Micro Pen or Daily Charme Watercolor Art Ink to add the watercolor effect. The key is to apply the ink sparingly and use a brush dipped in solvent to spread the ink gently, creating a soft, diffused look.
Adding Gold Flakes: While the watercolor ink is still tacky, use a toothpick or a fine brush to pick up small pieces of gold flakes. Gently press them onto the nail, focusing on areas where you want to highlight or add an accent.
Sealing the Design: Apply a clear top coat to seal in your design. This not only enhances the durability of your manicure but also gives it a glossy finish that makes the gold flakes pop.
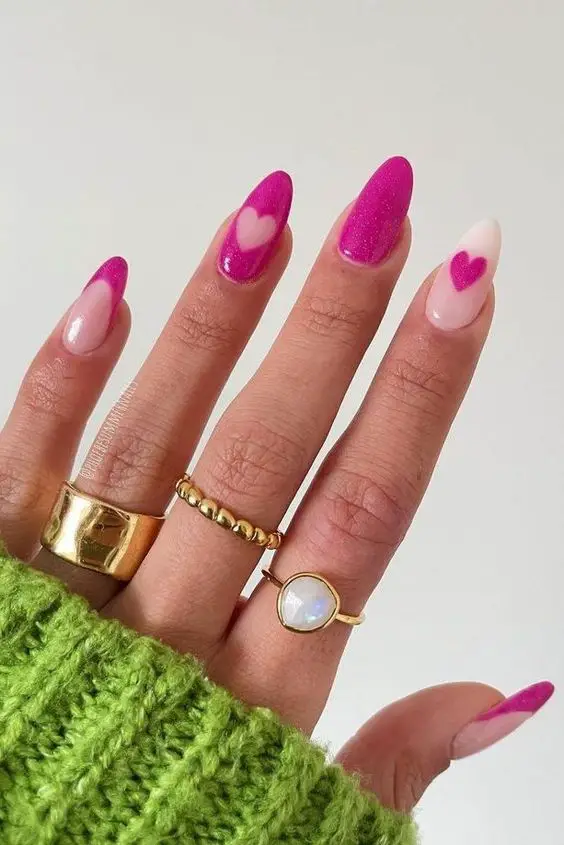
7. Hot Pink Negative Space Hearts
Hot pink negative space hearts are a captivating choice for those who love a blend of bold color and minimalist design.
This trendy nail art design leaves parts of the natural nail exposed, creating a striking contrast that is both modern and chic.
Step-by-Step Guide to Creating Hot Pink Negative Space Hearts
Base Preparation: Begin by applying a clear base coat to protect your nails and ensure a smooth canvas.
Tape Division: Use tape to create a clean line on each nail where the negative space will be. Paint the tip with a light pink nail polish, and carefully remove the tape immediately to maintain sharp lines.
Heart Decals: Place heart-shaped decals in the middle of the nail. Ensure they adhere well to the nail polish before moving to the next step.
Color Application: Fill in the exposed areas within the decals with a vibrant red nail polish to create the heart shapes. Allow the nails to dry completely.
Top Coat and Cleanup: Apply a top coat to seal in your design for a glossy finish and longer-lasting wear. Use a small brush dipped in nail polish remover to clean up any polish outside the lines for a neat appearance.
Additional Design Ideas and Tips
Gradient Hearts: For a more dynamic look, create a gradient effect using a baby pink gel polish as a base, followed by a stroke of white gold iridescent polish, and finishing with a neon pink pigment. Use a heart stamp from an Uber Chic palette to add the heart shapes.
Checkerboard and Seasonal Motifs: Experiment with a checkerboard motif interspersed with pink hearts for a playful, Valentine’s Day-inspired look. This design can be adapted with various motifs and colors depending on the season or occasion.
8. Matte Baby Pink Textured Stripes
Matte baby pink nails offer a soft, sophisticated look, perfect for those who prefer a subtle yet stylish manicure.
Incorporating textured stripes into this design can add a unique twist, making your nails stand out while maintaining an elegant appearance.
Step-by-Step Guide to Creating Matte Baby Pink Textured Stripes
Base Preparation: Start with a clean, buffed nail surface. Apply a base coat to protect your nails and ensure a smooth application of color.
Apply Matte Baby Pink Polish: Choose a high-quality matte baby pink nail polish as your base color. Apply two coats, allowing each coat to dry completely.
Creating Stripes: Using Matte Nail Art Striping Tape Lines by Vonrui, available in various colors including matte baby pink, place the tape on the nails to create your desired stripe patterns. For a contrasting look, consider using black striping tape to add more definition.
Add Texture: Once the stripes are in place, you can add texture by encapsulating fine glitter within the stripes using a clear gel topcoat. Cure under a UV or LED lamp to set.
Seal the Design: Finish with a matte top coat to enhance the texture and ensure the longevity of your manicure.
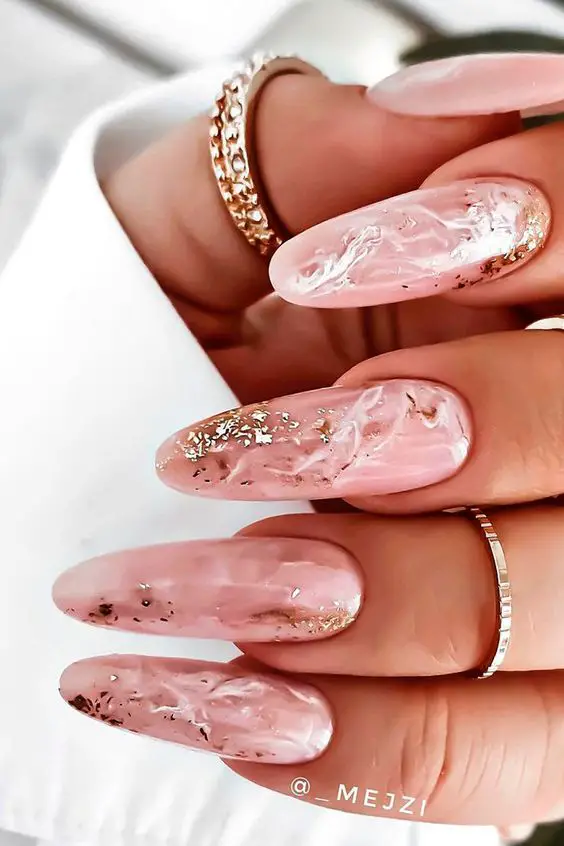
9. Pink Marble Rose Gold Glitter
The Pink Marble Rose Gold Glitter nail design is a sophisticated choice that combines the elegance of marble with the luxurious shimmer of rose gold.
This design is particularly popular among those who prefer a chic and timeless manicure. According to sources like chicpursuit.com, pink acrylic nails with marble designs are a favored trend, and the addition of rose gold glitter brings an extra touch of glamour.
Creating the Pink Marble Rose Gold Glitter Design
Nail Preparation: Start by preparing the natural nail with a thorough cleaning and shaping. Apply a base gel to ensure a smooth surface.
Marble Effect: Use Kiara Sky colors to paint the base pink color. Then, skillfully swirl a darker pink or white to create the marble effect.
Rose Gold Accents: While the marble design is still tacky, sprinkle Empress sprinkle on nail glitter for the rose gold effect. Add Moonstone rhinestones strategically for an enhanced 3D look.
Sealing the Design: Finish with a top coat to seal in the design, providing a glossy finish and additional protection.
This nail art design draws inspiration from various sources, including home decor and fashion elements. To ensure durability and resistance to lifting, it’s advisable to use gel polish and fiber gels.
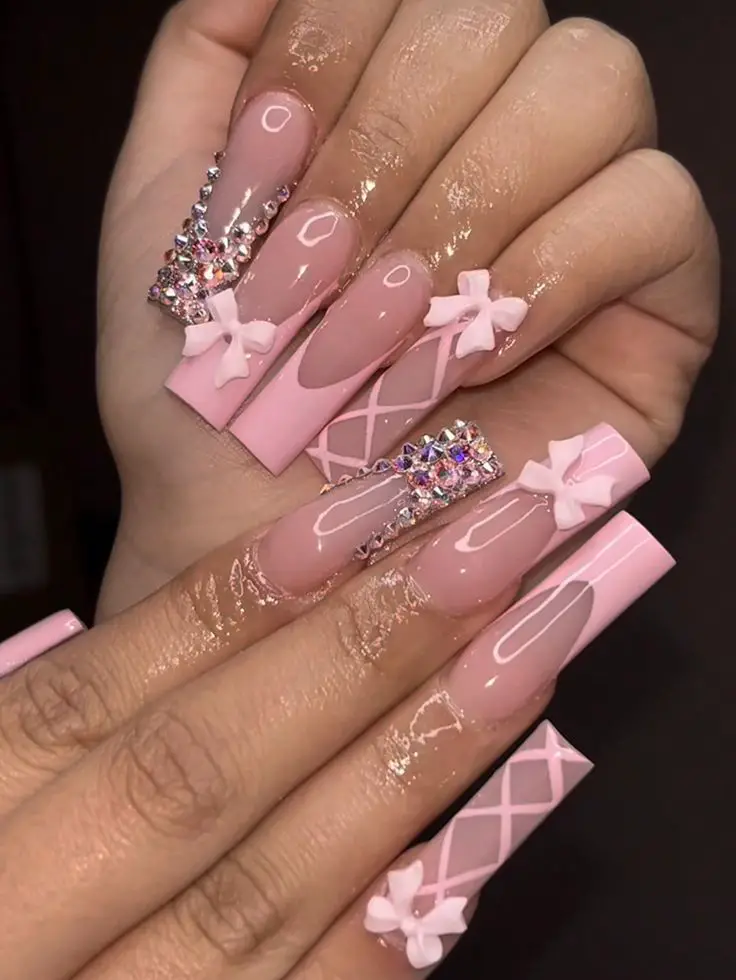
10. Candy Pink 3D Bow Accent
Candy Pink 3D Bow Accent nails are a delightful blend of playful charm and sophisticated style, perfect for those who love a touch of whimsy in their manicure.
Drawing inspiration from various sources, these designs incorporate everything from subtle gold bows to vibrant, oversized candy pink bows, making them versatile for both everyday wear and special occasions.
Design Inspirations and Techniques
Classic French with a Twist: Inspired by Fabonnyx Nail Studio, this design starts with a classic French tip and adds a striking 3D bow accent on one or more nails for a captivating look.
Variety of Bows: From the subtle elegance of a small, dainty gold bow to the bold statement of oversized red bows on each nail, the versatility in bow sizes and colors allows for personalization of the design.
Seasonal Themes: Incorporate seasonal elements like snowflakes or candy canes with bows for festive occasions, as showcased by designs.
Popular Styles and Decorative Techniques
Barbiecore Aesthetic: Embrace the Barbiecore trend with pink glitter polish and a prominent 3D bow, a style loved by celebrities and seen on @heygreatnails.
Coquette Bow Nail Art: The coquette aesthetic includes delicate details like balletcore-inspired ribbons and bows, making it a popular choice on social media platforms.
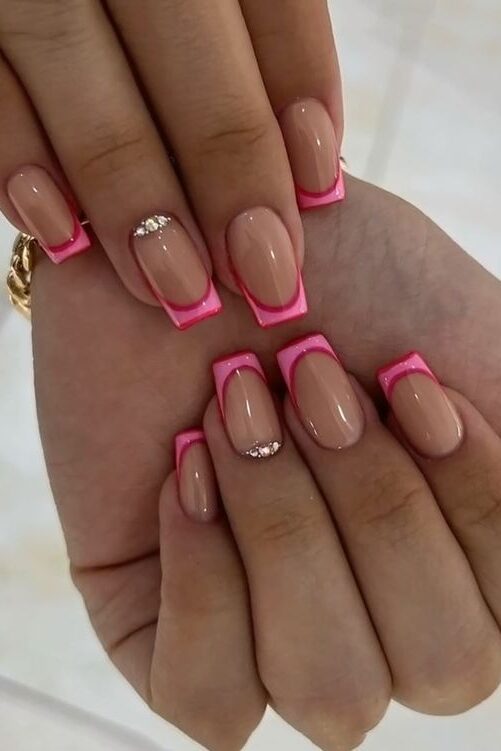
11. Soft Pink Neon Pink French
Soft Pink Neon Pink French manicures blend classic elegance with a playful twist, making them a superb choice for summer.
These manicures can range from subtle, featuring just a thin line of neon pink at the nail tips, to more elaborate designs incorporating vibrant pink nail art motifs. This versatility makes them suitable for both everyday wear and special occasions.
Key Features and Design Options
Base Variations: Start with a sheer or pastel beige-pink base to keep the look soft and understated.
Neon Pink Accents: Apply a thin line of neon pink, like CND Shellac in Hot Pop Pink, towards the tip of the nail to create the classic French tip with a bright twist.
Additional Artwork: For those wanting a bit more flair, add pink nail art motifs such as dots or small flowers using a dotting tool or fine brush.
Trending Combinations and Techniques
Aura Nails: Incorporate paranormal-inspired designs with neon hues to create a mystical aura effect.
Jelly Nails: Achieve a translucent look by adding a drop of neon polish to a clear top coat, offering a modern twist on the glossy finish.
Fruit-Inspired Designs: Combine neon French tips with dot nail art to mimic the appearance of fruits, perfect for playful summer vibes.
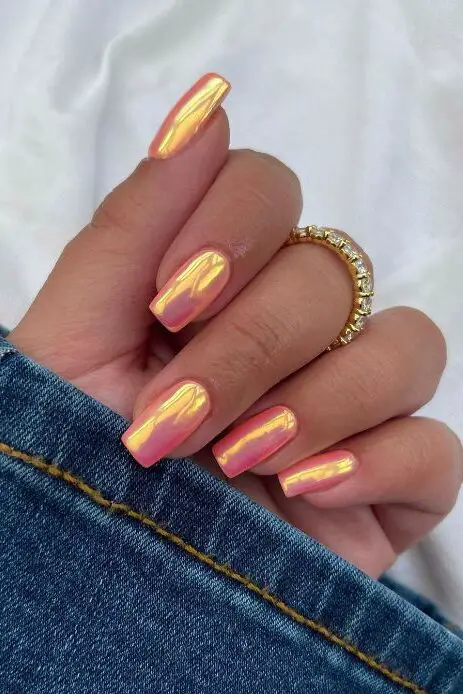
12. Pink Chrome Aurora Effect
The Pink Chrome Aurora Effect nail design captivates with its gradient of pink shades topped with a chrome finish, drawing inspiration from the mesmerizing Aurora Borealis.
This trending style in the nail art community is a favorite among artists and enthusiasts, often featured across various social media platforms.
Creating the Pink Chrome Aurora Effect
Base Preparation: Start with a clean, buffed nail surface. Apply a base coat to protect your nails and ensure a smooth application of color.
Gradient Sponge Technique: Use a makeup sponge to apply different shades of pink polish in a gradient pattern. Begin with the lightest shade at the base and gradually transition to darker shades towards the tip.
Chrome Finish: Once the gradient is dry, apply a chrome powder or use a chrome nail polish to give the nails that iridescent, metallic finish. Gently buff the chrome powder into the polish or layer the chrome polish, ensuring even coverage.
Top Coat Application: Seal your design with a no-wipe top coat for chrome effects. This step is crucial as it enhances the durability and the shiny, reflective quality of the chrome finish.
Tools and Materials
Gradient Sponge: Essential for creating smooth transitions between colors.
Chrome Powder/Polish: Holo Pink Chrome Nail Powder Polish Aurora Chameleon Rainbow Holographic Glitter Nail Art Chrome Shimmering Sequins Light Reflecting Shiny Nail Pigment Color Nail Decoration kit (S9) is highly recommended.
Top Coat: Use a super shiny top coat to enhance the reflective qualities of the chrome finish.
13. Barbie Pink Rhinestones
Barbie Pink Rhinestones nails offer a glamorous and eye-catching look, perfect for those who enjoy a bit of sparkle with their manicure.
The foundation of this design typically involves a vibrant Barbie pink base, with popular polish choices including OPI’s “Kiss Me on My Tulips” and Essie’s “Bachelorette Bash.”
Key Features and Customization Options
Base Polish: Start with a high-quality Barbie pink polish to ensure a vivid and long-lasting base.
Rhinestone Accents: Choose from a variety of shapes and sizes to add sparkle. Rhinestones can be strategically placed to enhance the design, such as along the nail bed or creating patterns over the nails.
Gel Finish: Opt for a gel finish like Barbie Pink Gel Nails for added durability and a glossy look.
14. Peach Pink Textured White Art
Peach pink nails with textured white art design are capturing the hearts of many, thanks to their versatility and elegant appearance.
This design is perfect for a variety of nail shapes including square, stiletto, and more, making it a flexible choice for different personal styles. The charm of peach pink combined with artistic white textures can be enhanced with silver and white stripes, heart shapes, or other creative textured patterns.
Techniques and Customization
Nail Type: Whether you prefer gel, acrylic, or press-on nails, this design is adaptable. Each type offers a unique finish that can be further beautified with nail polish colors and nail art stickers or decals.
Artistic Techniques: Incorporate advanced techniques like 3D art, ombre, or watercolor effects to elevate the basic peach pink base into a stunning piece of art.
Accessories: Personalize your nails with accessories such as rhinestones, pearls, or charms. These additions can transform your manicure into a custom, eye-catching accessory.
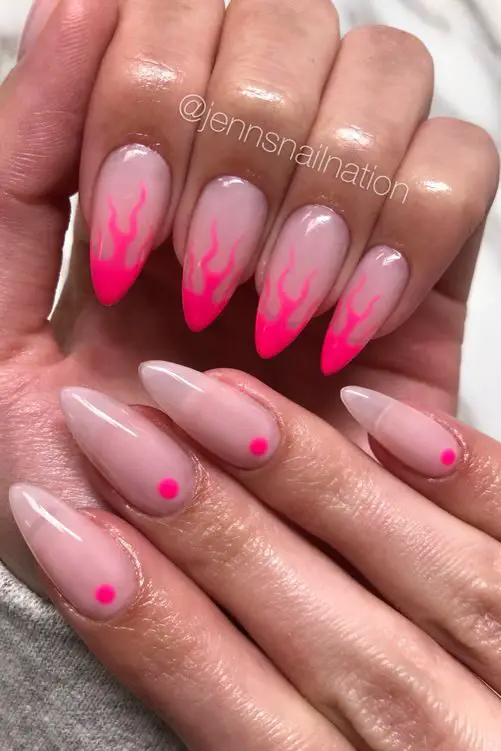
15. Neon Pink Flames (soft pink base)
Neon pink flames nail art with a soft pink base offers a striking contrast that’s both bold and playful, perfect for those looking to make a statement with their summer manicure.
This trendy design typically features vivid pink flames rising from a subtle pink backdrop, creating an eye-catching visual effect.
Customization and Durability
Base and Flame Colors: While the classic look involves a soft pink base with neon pink flames, you can customize the colors to include other vibrant options like hot pink, orange, or even yellow.
Additional Art Options: Enhance the flames by adding glitter or opting for a chrome finish. For a more intricate design, consider incorporating 3D nail art or jelly nails.
Maintenance: To keep your neon pink flames looking fresh, regular touch-ups might be necessary. With proper care, this nail art can last up to two weeks.
Trendy Combinations
Black French Tips: Pairing neon pink flames with black French tips adds an edgy touch to your nails.
Bling Acrylic Nails: For those special occasions, combine your neon pink flames with bling acrylic nails to dial up the glamour.
Abstract Patterns: Integrate abstract patterns with red accents or a yin and yang design with a tiny streak of silver for a unique twist.
16. Pink Scalloped French
The Pink Scalloped French manicure is a delightful twist on the traditional French tip, featuring a scalloped edge that adds a unique and elegant touch to your nails.
This design is perfect for adding a bit of flair to your manicure without being overly bold, making it suitable for both everyday wear and special occasions.
Creating the Pink Scalloped French Manicure
Prepare Your Nails: Start with a clean, shaped nail and apply a base coat of nude or pale pink polish.
Forming Scallops: Once your base coat is dry, use a pearl-topped pin or a fine brush to dot a white polish along the tips of your nails.
Connect these dots in a scalloped pattern, adjusting the spacing and size of the dots to create your desired scallop shape.
Customization Options: Enhance your design by choosing different shades of pink—from soft pastels to vibrant hues. For added glamour, incorporate embellishments like tiny pearls, crystals, or a dusting of glitter.
Tips for a Perfect Scalloped Edge
Tool Selection: For precise dots, a thin brush or a dotting tool is ideal. Ensure the tool is clean before use to avoid smudging.
Technique: Practice the scallop pattern on paper before applying it to your nails to ensure evenness and symmetry.
Top Coat: Seal your design with a clear top coat to protect your manicure and add a glossy finish.
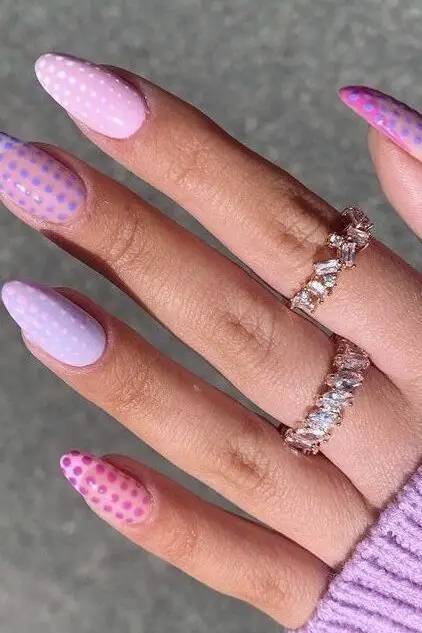
17. Fuchsia Pink Neon Polka Dots
Fuchsia Pink Neon Polka Dots nails bring a playful and vibrant touch to your summer style, inspired by the colorful and spirited 1980s cartoon character, Rainbow Bright.
This design is perfect for those who enjoy a bit of nostalgia mixed with modern flair.
Step-by-Step Guide to Creating Fuchsia Pink Neon Polka Dots
Base Preparation: Start with a clean, buffed nail surface. Apply a base coat to protect your nails and ensure a smooth application of color.
Pink Polish Application: Apply two coats of hot pink polish, allowing each coat to dry thoroughly. The Flawless bilux polish is recommended for its vibrant hue and smooth finish.
Polka Dot Creation: Using a dotting tool, add white polka dots over the dried pink base. Space the dots evenly to achieve a balanced look.
Top Coat Application: Seal your design with a top coat to enhance durability and add a glossy finish.
Additional Design Variations
Glitter Gradient Effect: For a sparkling touch, apply a base coat followed by two coats of fuchsia polish on your toes. While still tacky, sprinkle iridescent glitter dust and seal with a top coat for a glitter gradient effect.
French Tip Contrast: Add a subtle contrast with polka dot manicure on the French tips, or opt for gemstone-decked French tips for added elegance.
Enjoyable Process and Pricing
Creating this nail design is not only about achieving a cute and fun look but also enjoying the process. The application is filled with laughter, making it a delightful experience.
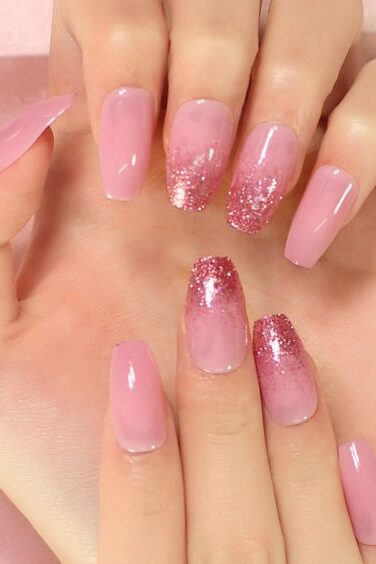
18. Ombre Pink Hidden Glitter Tip
Ombre Pink Hidden Glitter Tip nails are a stunning choice for those looking to add a subtle yet glamorous twist to their manicure. Here’s how you can achieve this eye-catching look:
Step-by-Step Guide to Creating Ombre Pink Hidden Glitter Tip Nails
Base Coat Application: Start by applying CGP Coconut Milk as a base coat to all your nails to ensure a smooth and even canvas.
White Tip Application: Carefully apply a white product to fill the tip area of each nail, leaving a slight gap around the cuticle to enhance the ombre effect.
Glitter Application: Using a fan brush, apply Birthday Suit glitter starting from the cuticle area and gently push it up towards the middle of the nail, creating a gradient effect. For a more pronounced sparkle, add a second layer of glitter.
Final Touches: Once the glitter is set, use a file to shape the nails. Buff over the nails to smooth the surface and apply a top coat. Cure the sealant under an LED lamp to ensure durability.
Tools and Materials
Base Coat: CGP Coconut Milk
White Polish: For creating the tip
Glitter: Birthday Suit for the base and Rose Gold Glitter from INGLITERATI for accents
Tools: Fan brush, file, buffer, and LED lamp
Top Coat: To seal and protect the design
Practical Tips and Maintenance
Even Application: Make sure to distribute the product evenly on both sides of the nail for a refined look.
Glitter Placement: Apply the glitter strategically to ensure it only shows when the nails are moved or under certain lighting.
Regular Maintenance: To maintain the look, apply a fresh top coat every few days to prevent chipping and to keep the glitter sparkling.
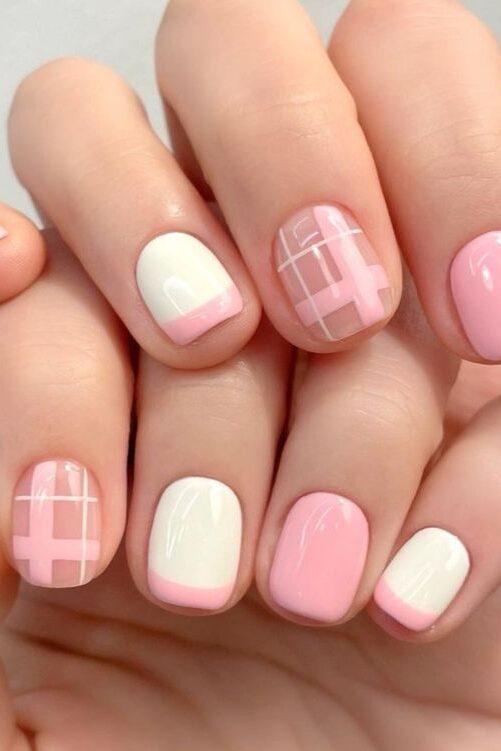
19. Pink & White Gingham
Pink & White Gingham nails exude a classic charm with a modern twist, perfect for those who appreciate a touch of vintage in their summer style.
This delightful design starts with a pristine white base coat, setting a clean canvas for the intricate gingham pattern. To create the iconic checkered design, paint vertical and horizontal pink lines using a fine brush or a striping tool.
The key is to ensure that the lines are evenly spaced and that you feather out the lines where they overlap to maintain a smooth surface without any bumps.
For a more playful and personalized touch, consider incorporating various shades of pink to enhance the gingham pattern.
Each layer should be fully cured before applying the next, ensuring the colors do not bleed into each other and the design remains crisp and clear.
This methodical approach not only preserves the integrity of the gingham pattern but also extends the wear of your manicure.
If you’re looking to add a whimsical element to your Pink & White Gingham nails, the ‘Pink Gingham and Berry Bliss Nail Design’ offers a delightful variation.
This design features the gingham pattern on three nails, while the remaining two boast a vibrant display of blueberries and strawberries set against a white background.
20. Rose Gold Mirror Pink Crystal
Rose Gold Mirror Pink Crystal nails are the epitome of elegance and luxury, perfect for those who desire a touch of sparkle and sophistication in their summer manicure.
For a complete rose gold mirror effect, the product should be applied following specific steps: starting with a non-acidic primer, then using Cool Top Gel or Sens Top Gel for a durable and glossy finish.
The design itself features a stunning combination of pink marble patterns with light pink and rose gold hues, beautifully adorned with glitter and pink crystal rhinestones.
To maintain the dazzling appearance of Rose Gold Mirror Pink Crystal nails, it’s important to handle them with care. Avoid harsh chemicals and abrasive materials that could damage the crystals.
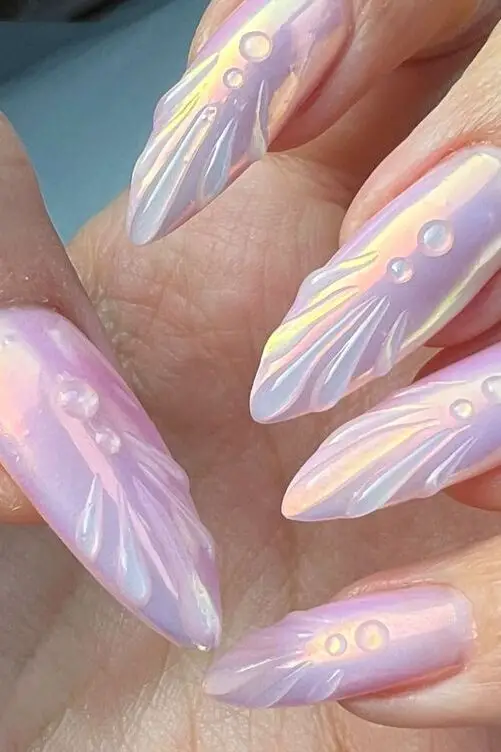
21. Gradient Pink Seashell Design
The Gradient Pink Seashell Design offers a stunning tribute to the enchanting undersea world, perfect for adding a magical touch to your summer look.
This design begins with a base of Face of Australia Calypso Bay frosted polishes, known for their durability and vibrant color payoff. The gradient effect is skillfully created using a simple blue and pink gradient, setting a dreamy underwater scene on your nails.
Step-by-Step Creation
Base Preparation: Apply a base coat to protect your nails and ensure a smooth polish application.
Gradient Application: Use a sponge to dab on the blue and pink polishes, blending them softly where they meet to create a seamless gradient effect.
Seashell and Starfish Details: Utilize white gel polish to build up ridges, mimicking the texture of a seashell. Adorn one or more nails with a gold starfish charm from Born Pretty store for a touch of oceanic charm.
Glitter and Embellishments: While the top coat is still tacky, dip each nail into pink iridescent glitter for a sparkly, textured finish. Add pearls and rhinestones for additional decoration, enhancing the 3D effect.
Conclusion
Throughout this exploration of 21 beautiful pink summer nail ideas, we’ve ventured from the playful allure of neon pink ombre to the delicate charm of pastel pink watercolor complemented by gold flakes, touching upon trends that promise to enrich our summer adventures with a dash of color and creativity.
As we bid farewell to this collection of summer nail creativity, remember that the realm of nail art is boundless, inviting each of us to experiment with colors, textures, and designs that resonate with our individuality.
The significance of these trends extends beyond mere aesthetics, serving as a canvas for self-expression and a reflection of the vibrant hues of summer.
So, as you prepare for your next manicure adventure, let these ideas inspire you to embrace the playful, elegant, or bold aspects of your personality, making every flick of your hand a statement of your unique flair and summertime joy.
Leave a Reply
You must be logged in to post a comment.