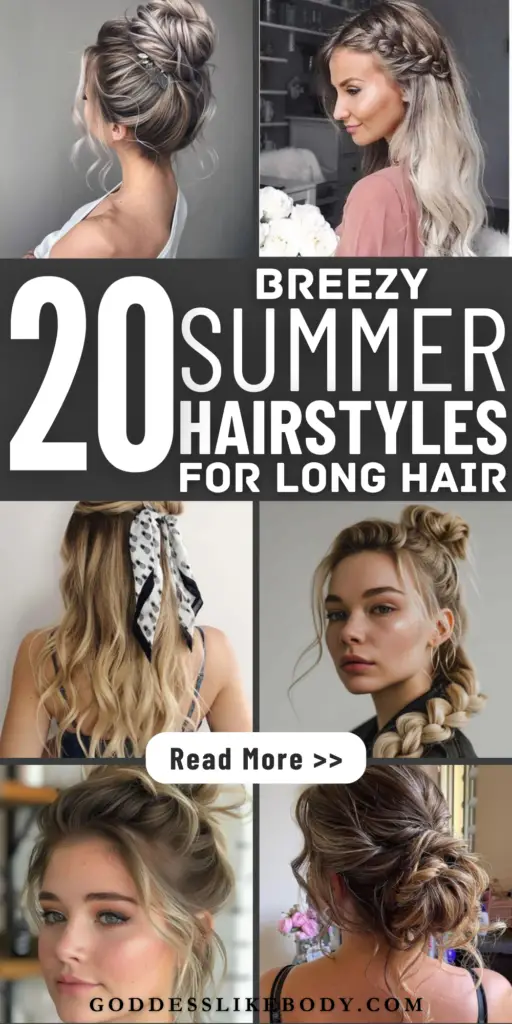
Summer is the perfect season to experiment with fresh hairstyle ideas for long hair. Given the hot and humid weather, having a repertoire of 20 breezy summer hairstyle ideas for long hair can transform discomfort into style and elegance.
This post provides detailed instructions for each hairstyle idea, ensuring that anyone can achieve a salon-quality look at home.
Whether it’s for an everyday look or special occasions, these hairstyles promise to enhance your summer experience, making you the epitome of summer chic.
Busy? Save this pin for later.
1. Beachy Waves
Beachy waves are a quintessential summer hairstyle for long hair, perfect for both casual outings and special occasions.
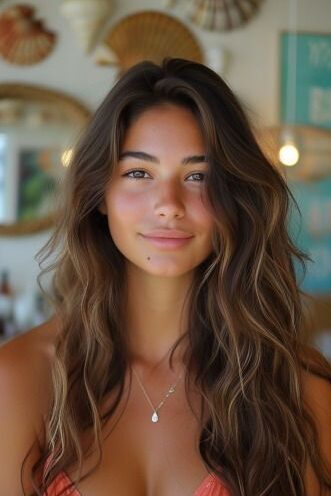
Achieving this look is straightforward and can be done in a few simple steps:
Preparation: Start with dry hair. For the best results, use a paddle brush to blow dry your hair straight, which forms a smooth base for your waves.
Curling:
Heat Protection: Always apply a heat protectant to shield your hair from damage.
Sectioning: Divide your hair into sections, starting from the neck and working your way up. This makes it easier to manage and ensures even curling.
Curling Technique: Use a 1 inch curling iron or wand. Keep the iron vertical and start curling from the back to the front. Leave an inch or two uncurled at the ends to get that beachy vibe.
Direction: Curl the front pieces away from your face. For the rest of your hair, alternate the curling direction to add more volume and texture.
Finishing Touches:
Loosening Waves: Once all your hair is curled, gently run your fingers through it to loosen the curls into soft waves.
Texturizing: Apply a dry texturizing spray to add volume and hold, focusing on the roots and mid-lengths.
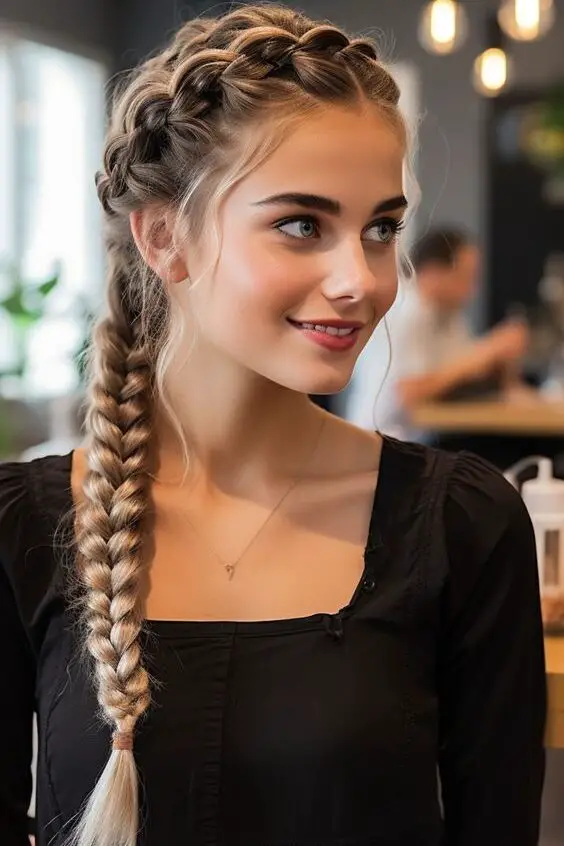
2. High Ponytail with Braid
To achieve a high ponytail with a braid, a popular hairstyle for long hair during the summer, follow these steps:
Preparation:
Begin by thoroughly brushing your hair to remove any tangles, ensuring a smooth base for styling.
Creating the Ponytail:
Gather all your hair and secure it with a hair tie at the top of your head. For added volume, apply dry shampoo to the roots.
Enhancing Shine and Manageability:
Apply a small amount of hair oil to your hands and gently smooth it over the ponytail. This helps in adding shine and reducing frizz, making the hair easier to manage and braid.
Braiding:
Section off a part of the ponytail to create a Dutch braid (also known as an inside-out French braid). If desired, hair extensions can be added to the ponytail for extra length and volume.
Concealing the Hair Tie:
Take a small section of hair and wrap it around the base of the ponytail to hide the hair tie, securing it with a bobby pin for a polished look.
Final Touches:
Use a strong hold hairspray to ensure the style stays in place throughout the day. Optionally, fluff the braid slightly to make it appear thicker and give it a more relaxed, summery feel.
3. Fishtail Braid
The Fishtail Braid, recommended as a stylish option for summer, offers a chic twist on traditional braiding.
Ideal for those days when your hair hasn’t been washed, this braid avoids the need for styling products, which can complicate the braiding process. Here’s how to achieve this look:
Divide and Conquer: Start by splitting your hair into two equal sections. This foundational step is crucial for a balanced braid.
Crossing Over: Take a small section of hair from the back side of one strand and cross it over to the opposite strand. This is the basic move you’ll repeat.
Alternate and Repeat: Perform the same action on the other side, maintaining a consistent thickness with the sections to ensure an even braid.
Incorporate New Hair: As you cross sections over, include new hair each time, which helps secure the braid closely to the head.
Secure the Braid: Once you reach the ends, secure the braid with a small elastic. For a fuller appearance, gently pull at the sides of the braid to fan it out and create volume.
Finishing Touches: Optionally, for a more relaxed and voluminous look, slightly loosen the braid by tugging gently at its sides.
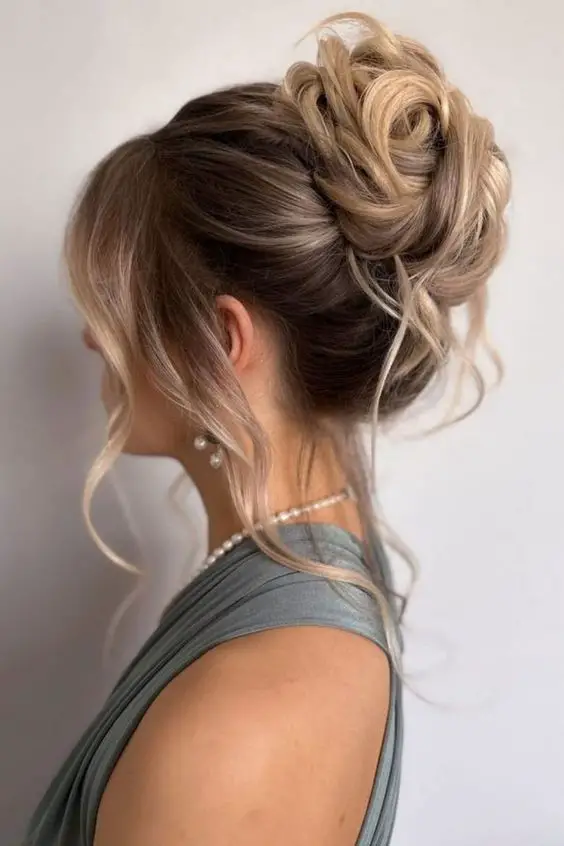
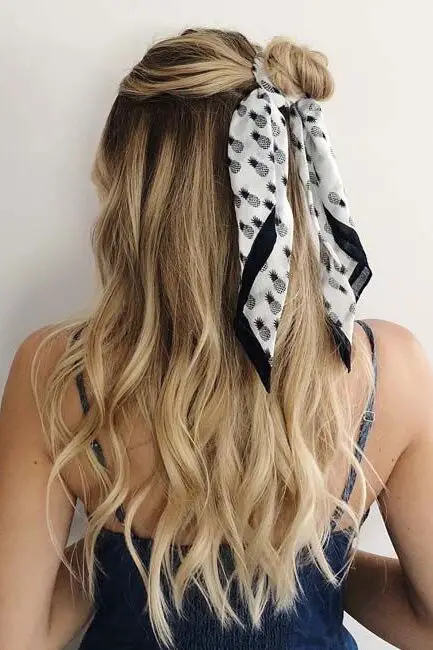
4. Half-Up, Half-Down with Headband
The Half-Up, Half-Down with Headband is a versatile and elegant hairstyle ideal for long hair, especially during summer weddings and special occasions.
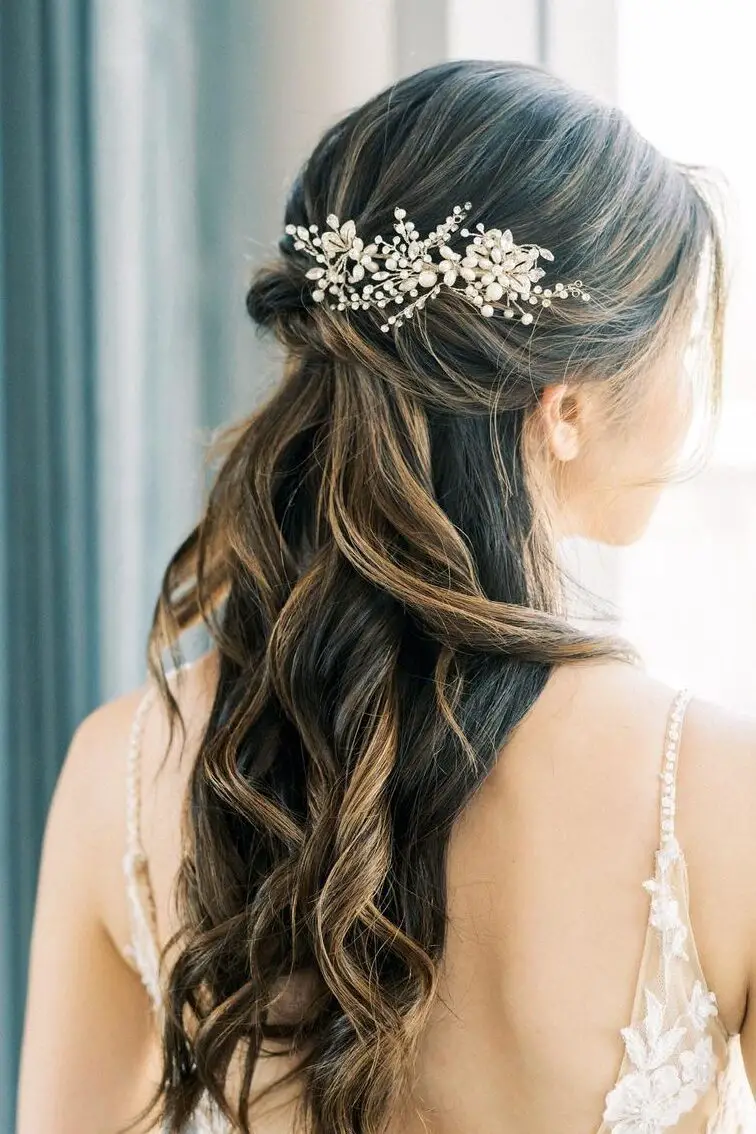
This style elegantly combines the comfort of having hair away from the face while still showcasing the length and volume. Here’s a straightforward guide on achieving this look:
Preparation:
Start by curling your hair to add texture and volume. This step is crucial as it provides the necessary body and wave for the half-up style.
Creating the Half-Up Style:
Gently tease the crown of your head to add volume.
Select strands from both sides of your face, pull them back, and secure them with pins at the back of your head. Ensure the top section looks voluminous and well-secured.
Placing the Headband:
Position your headband just before the bouffant. It should sit comfortably behind the ears. This not only adds a decorative touch but also helps in keeping any loose strands neatly in place.
Styling Variations:
Depending on the occasion, you can opt for a polished and sleek look by smoothing out all flyaways.
For a more voluminous effect, puff out the hair slightly at the crown.
For a relaxed vibe, pull out a few strands to frame the face, enhancing the casual elegance of the hairstyle.
DIY Headband Option:
For a unique touch, create your own headband using old necklaces. With some pliers and a glue gun, attach the necklace to a plain headband. This DIY approach allows for a personalized accessory that complements your outfit perfectly.
5. Dutch Braid Crown
To create an elegant Dutch Braid Crown, ideal for both casual outings and special occasions during the summer, follow these detailed steps:
Starting the Braid:
Create a deep side part.
Begin at the heavy side of the part, picking up a small section of hair and dividing it into three equal strands.
Braiding Technique:
Cross the right strand under the middle strand, then cross the left strand under the new middle strand.
Gradually add loose hair from above the braid to the right strand before crossing it under and into the middle.
Similarly, add loose hair to the left strand before crossing it under and into the middle.
Continuing the Braid:
Continue this pattern, angling the braid around the head to form the crown shape.
As you approach the opposite ear, incorporate all remaining loose hair into the braid.
Securing and Finishing:
Secure the braid with a small clear elastic once it reaches the end.
Lay the tail of the braid across the front of the head, just behind the start of the braid, and pin it down with bobby pins.
Tuck and hide the ends of the braid behind the Dutch braid to ensure a neat finish.
Adding Volume:
For added volume, gently tug on the edges of the braid, making it fuller and more pronounced.
Final Touches:
Spray the style with hairspray to hold everything in place and smooth down any flyaways.
6. Waterfall Braid
The Waterfall Braid, a captivating choice for summer, combines elegance with a playful twist and is perfect for both casual and special occasions.
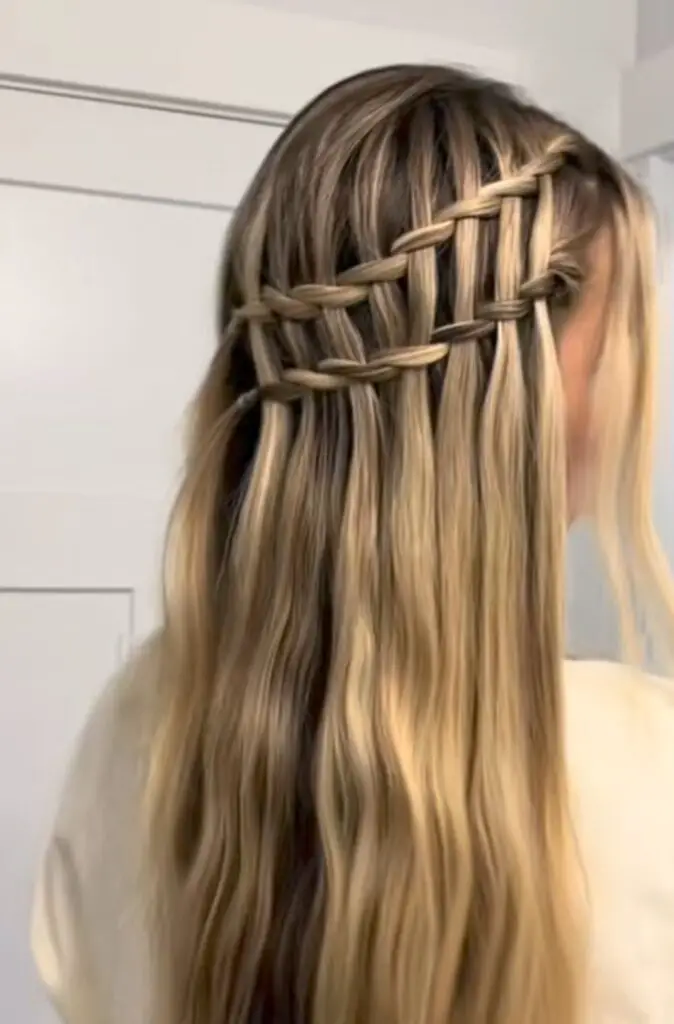
Here’s how to master this breezy hairstyle:
Preparation:
Begin with clean, detangled hair. A center part usually works best to enhance the waterfall effect.
Starting the Braid:
Take a small section from the front, about an inch back from the hairline, and divide it into three equal parts.
Braiding Process:
Start a traditional French braid by crossing the right strand over the middle, then the left strand over the middle.
Continue by adding a new small section of hair to the right strand each time before crossing it over the middle.
After crossing the left strand over the middle, let it drop freely, simulating the waterfall effect, and pick up a new section of hair from directly behind it to continue the braid.
Continuing the Style:
Repeat the process, alternating sides and letting the left strand fall each time, while continually adding new sections to the right strand.
Proceed with this technique until you reach the desired point at the back of your head.
Securing the Braid:
Once the braid reaches the back of your head, you can choose to secure it with a clear elastic band. Alternatively, continue into a basic three-strand braid and secure at the end.
Enhancing the Style:
For added volume and a more lived-in look, gently pull apart the braid and sprinkle a little texture powder over it.
A few discreet clip-in extensions can be added for thickness, particularly at the sides.
Finishing Touches:
Set your style with a flexible hold hairspray to ensure it holds throughout the day.
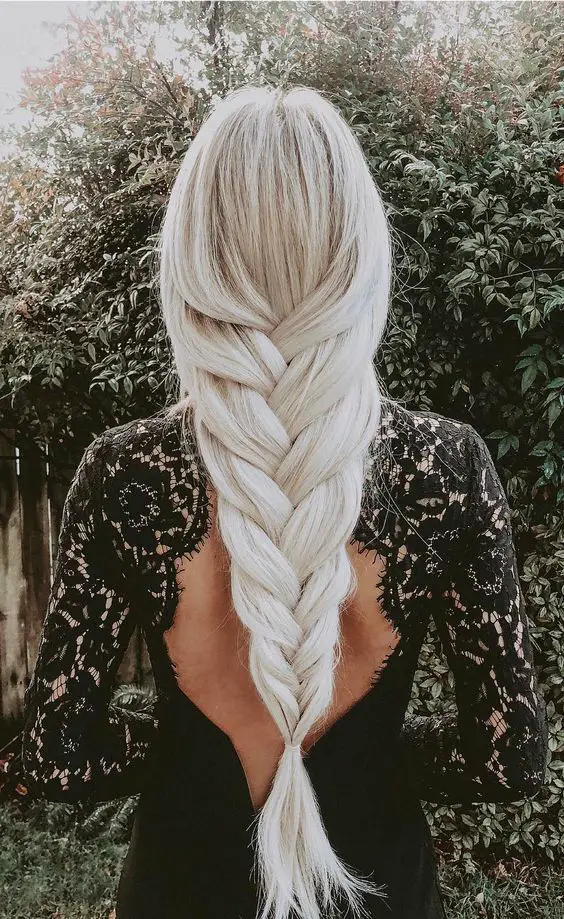
7. Loose French Braid
The Loose French Braid is a timeless and versatile hairstyle, perfect for long hair during the hot summer months.
This breezy style not only keeps hair neatly tucked away but also adds a touch of casual elegance to any look. Here’s how to achieve a Loose French Braid:
Preparation: Start by washing and blow-drying your hair to ensure it’s clean and free from tangles. This provides a smooth base for braiding.
Texturizing: Apply a texture tonic from the middle of the hair to the ends. This helps to hold the curls and creates a tussled, effortless look.
Curling:
Use a large barreled curling wand on large sections of hair to create natural waves.
Curl your hair right after applying the texture tonic to maximize the hold and volume.
Braiding:
Begin at the crown of your head and divide your hair into three equal sections.
Start the braid by crossing the left side over the middle section, then the right side over the middle.
Continue adding more hair to each section as you move down the braid, maintaining a loose grip to keep the braid relaxed.
Finishing the Braid:
Once you reach the nape of the neck and there’s no more hair to add, continue with a normal three-strand braid.
Secure the end with an elastic band.
Styling:
Gently pull apart the braid to create more volume and achieve a fuller look.
For a more effortless appearance, remove a few strands around the face from the braid and curl them lightly.
Adding Texture:
Apply texture spray before starting the braid and a volume powder at the end to manage any loose hairs and enhance the braid’s texture.
8. Top Knot with Wispy Strands
The top knot with wispy strands is a versatile hairstyle, perfect for various occasions, whether you’re tackling a bad hair day, heading for a workout, or just need a quick style to feel more awake.
Here’s a straightforward guide to mastering this chic updo:
Preparation:
Simply brush your hair back using your hands or, for a sleeker look, use a fine-tooth comb to smooth out the back.
Creating the Knot:
Gather your hair into a high ponytail and secure it with a hair tie. On the last loop of the hair tie, don’t pull your hair all the way through, creating a loop of hair with ends sticking out.
Twist the hair tie and wrap it around the base of the loop 2-4 times depending on the thickness of your hair.
Styling the Bun:
Wrap the remaining ends around the base of the bun to add fullness and tuck them into the back of the bun to secure.
Use bobby pins if necessary, especially if you have shorter hair, to keep the style intact and manage any stray pieces.
Adding Wispy Strands:
Gently pull out a few strands on each side to create a relaxed and effortless look.
Finishing Touches:
Fluff and position the bun to your liking.
For those with flyaways or baby hairs, a small amount of hairspray can help tame them and keep the hairstyle neat throughout the day.
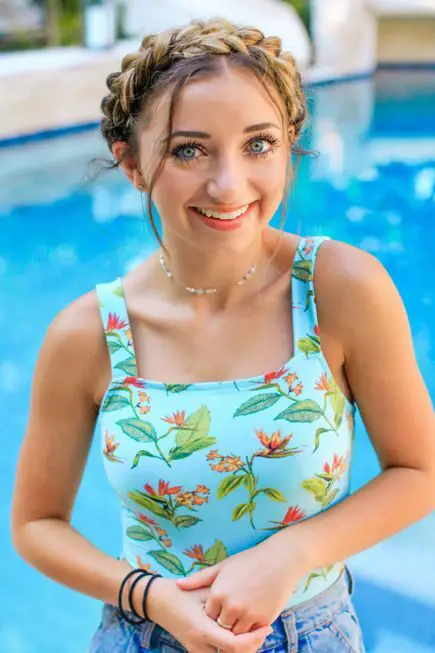
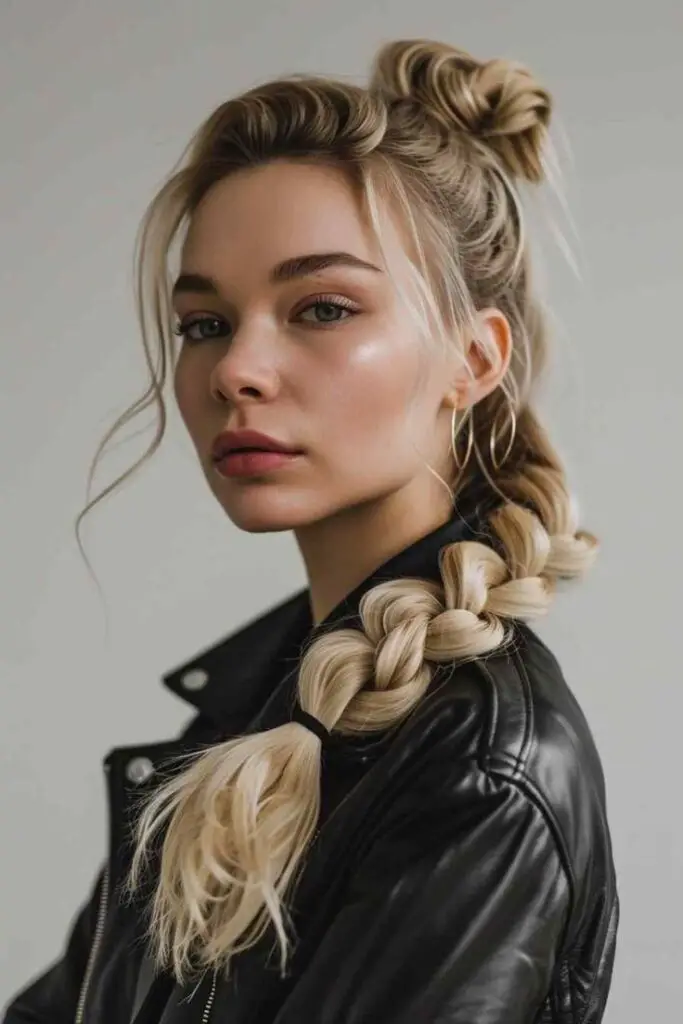
9. Boxer Braids
Boxer Braids, also recognized as Double Dutch Braids, are a standout hairstyle choice for summer, characterized by their neat, symmetrical appearance and practicality in keeping hair secure and off the face.
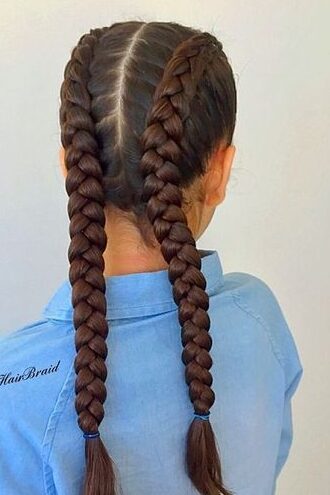
Parting the Hair:
You can achieve this by parting your hair into two equal sections down the middle, ensuring the part aligns with your nose and the center of your head for symmetry.
10. Headband Braid
The Headband Braid is an elegant and practical choice for long hair during the summer, keeping hair neatly away from the face while adding a touch of sophistication.
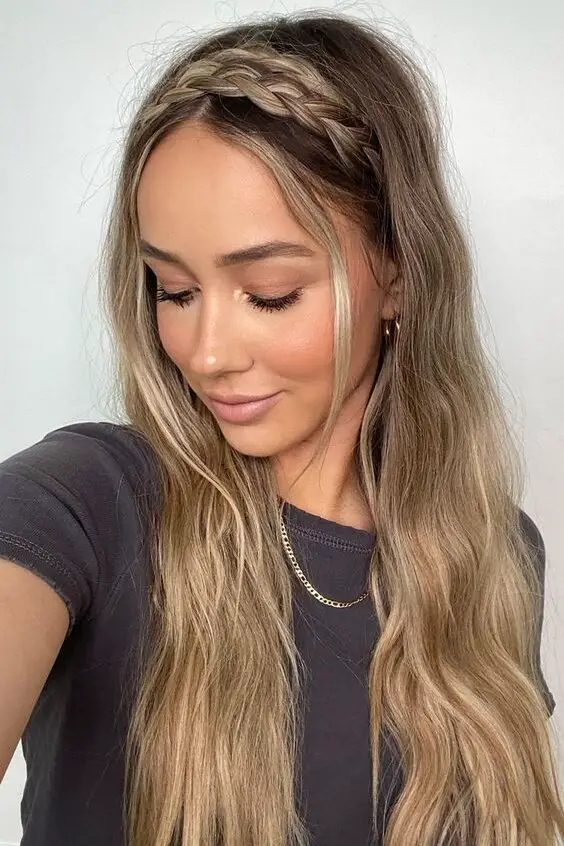
This hairstyle is versatile, suitable for both casual and formal occasions. Here’s a step-by-step guide to creating the Headband Braid:
Preparation:
Begin with clean, dry hair to ensure smooth braiding.
Create a side part about three inches back from the forehead and clip away the section of hair below the part.
Starting the Braid:
Gather the rest of the hair and twist it into a bun, securing it with a clip to keep it out of the way.
Take the section of hair above the side part, divide it into two equal parts, and start crossing the front section over the back section.
Braiding:
Gradually add small sections of hair to the front section before crossing it over the back section.
Continue this process, incorporating all hair into the braid and crossing the two sections around each other to form the headband.
Securing the Braid:
Once the braid is complete, use bobby pins to secure it, inserting them upwards into the braid to ensure they remain hidden.
Apply a light dusting of texturizing powder for added volume and hold.
Finishing Touches:
Pinch and pull at the braid to create a fuller, more voluminous look.
Tease the hair at the crown lightly to further enhance volume.
11. Side Braid with Ribbon
Creating a Side Braid with Ribbon is a charming and versatile hairstyle ideal for both casual and special occasions.
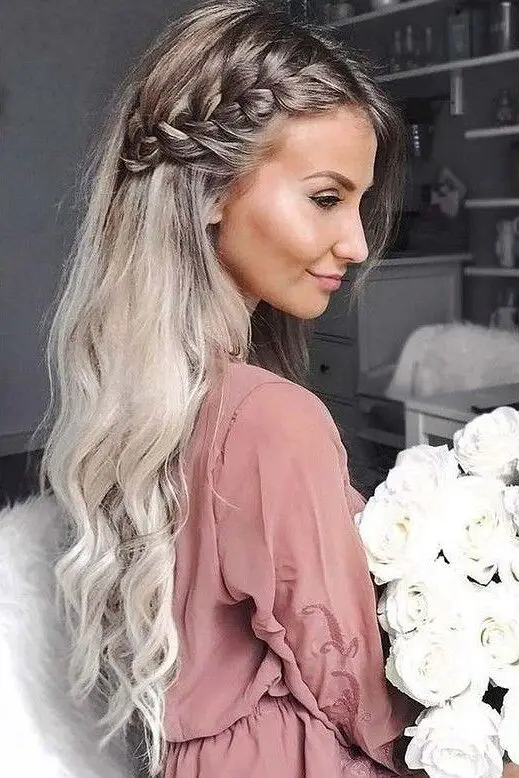
This style incorporates elements of traditional and modern hairdressing, making it suitable for various hair textures, including long, curly hair. Here’s how to achieve this look:
Step-by-Step Guide
Part and Section:
Begin by creating a side part on the head.
Make a rectangular section by going down parallel to the side part and connect it at the back of the head.
Split this section into two halves, tying off one half to keep it out of the way.
Braiding:
Spray a little water on the loose half to prevent flyaways.
Start a regular three-strand braid but stop midway, securing with a tie where it can be combined with a ponytail.
Repeat the process with the other half.
12. Loose Bun with Bobby Pin Accents
Creating the Loose Bun
To achieve a chic and effortless loose bun with bobby pin accents, follow these simple steps:
Preparation:
Begin by creating loose waves in your hair if starting with straight hair, to add texture.
Forming the Bun:
Gather your hair into a low ponytail and loosely twist it around the base, securing it with bobby pins. Allow some strands to fall freely around your face to enhance your features.
Adding Accents:
Introduce decorative bobby pins strategically around the bun to add a touch of elegance and hold the style in place.
Variations of the Loose Bun
High Messy Bun:
For a more casual look, pull the hair high on top of the head, twist, and secure with bobby pins, allowing strands to escape for a relaxed feel.
Bun with Bangs:
Incorporate bangs, whether they are curtain, blunt, or side-swept, to frame the face and add texture to the hairstyle.
Ultra-Messy Bun:
Embrace a highly undone texture with wispy pieces around the face for an effortless, cool appearance.
Bun with a Twist:
Start by twisting the underside of your hair from front to back before forming the bun, ideal for keeping the hair off the neck during warm months.
Volume for Thin Hair:
Use a hair doughnut to add volume. Pull hair into a ponytail, place the doughnut at the base, wrap the hair around, and secure with bobby pins.
13. Messy Low Chignon
Creating the Messy Low Chignon
Part and Section Hair:
Start with a side parting.
Use a comb to divide front sections from the top of the head to just above the ear on both sides.
Clip the top half of the hair from ear to ear and set aside.
Forming the Base:
Tie the remaining hair into a low ponytail at the nape.
Backcomb the crown section to add volume and lift.
Creating the Chignon:
Cut a hair donut, roll it into a long shape, and slip it onto the end of the ponytail.
Wrap the end of the ponytail around the hair donut, rolling it up to the nape.
Secure the rolled hair with bobby pins at the nape.
Styling and Securing:
Spread the hair along the padding towards the side of the head and secure with bobby pins.
Repeat the process on the opposite side to ensure symmetry.
Detailing the Front Sections:
Unclip the front sections.
Leave a small amount of hair out to frame the face.
Bring the remaining front hair around the back and pin it to the right-hand side of the padding.
Wrap the tail ends around a bobby pin and tuck them underneath the chignon.
Final Adjustments:
Use a topsy tail tool to create a loop with the hair on the opposite side and secure with a bobby pin.
Tuck any loose ends with a bobby pin under the chignon.
Apply hairspray to tame flyaways and hold the style in place.
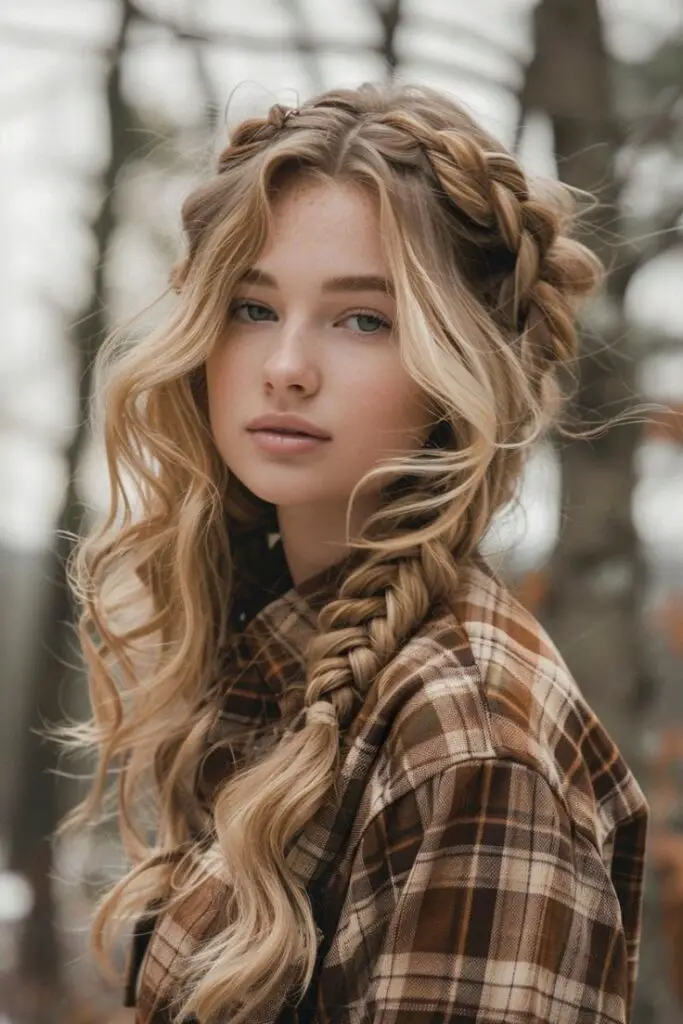
14. Milkmaid Braid
Step-by-Step Guide to Creating a Milkmaid Braid
Prepare the Hair:
Start by applying dry shampoo to give your hair texture and grip. Make sure to remove all knots and tangles for a smooth braiding process.
Part and Section:
Create a circular part from the crown to the nape of the neck. Gather the hair at the back of the head, leaving the top and sides up, and secure with bobby pins to keep it smooth.
Braid Formation:
Divide the hair into two sections below the hairline. Braid each section, pulling one braid to the opposite side of the head, and secure each with a small hair elastic.
Securing the Braids:
Cross the braids in the back and lay them flat in the desired direction. Tuck the ends of one braid underneath the other and secure with bobby pins.
Enhance and Pin:
Insert bobby pins discreetly underneath the larger braids for a cleaner look. Pinch and pull on small pieces of hair around the crown to add texture and volume.
Detailing:
Trace down about a centimeter back from the hairline down to the front of the ear on both sides, twist these sections away from the face, and clip them out of the way.
Final Braiding and Securing:
Start with a Dutch braid on the right side, incorporating small sections of hair from the face-framing pieces into the outer right section to create a swoop detail. Secure your braid with a small hair elastic and repeat on the other side.
Connecting the Braids:
Take the right braid and open it up in the middle, pull the left braid all the way through, tightly bring the left braid up the right side of your head just above your Dutch braid, and begin bobby pinning it into place. Fold the ends underneath the braid and tuck them out of the way, adding more bobby pins to both sides, crossing them over one another to lock them into place.
15. Bubble Braid
The Bubble Braid is a delightful and modern twist on the classic ponytail, ideal for summer days.
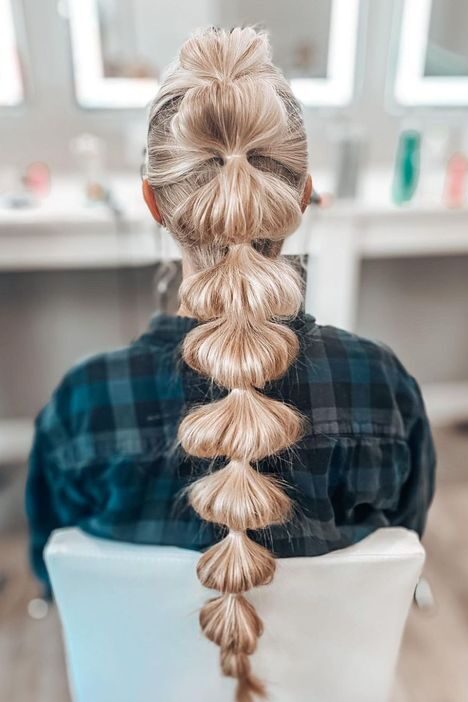
This hairstyle is not only easy to create but also versatile, suitable for various occasions from casual outings to more formal events. Here’s how to achieve the Bubble Braid:
Preparation:
Begin by applying a leave-in conditioner to help minimize hair tension and a styling cream to smooth the hair, ensuring it’s free from knots and tangles.
Creating the Base:
Pull your hair back into a high, slicked-back ponytail. Secure this with an elastic close to the scalp for a tight hold.
Forming the Bubbles:
Place additional elastics along the length of the ponytail, spacing them about 2 inches apart.
Gently tug at the hair between each elastic to puff it out and form the “bubbles.”
Finishing Touches:
Use your fingers to adjust the bubbles to your desired fullness.
Apply a lightweight hairspray to tame any flyaways and add extra hold.
16. Half-Up Twist with Scarf
The Half-Up Twist with Scarf is a stylish and easy-to-create hairstyle, ideal for those looking for a quick yet fashionable summer look.
Here’s a straightforward guide to achieving this chic hairstyle, which requires minimal tools and time.
Step-by-Step Guide
Part and Section:
Begin by using your thumbs to create a part line. Gently pull back a section of hair from the curve of your head.
Initial Twisting:
Soften the section with your fingers. Then, fold the left part of this section over the right part and secure it with a bobby pin at the point where your fingers are holding the section tight.
Front Section Twist:
Take a section of hair about an inch thick from the front, leaving any bangs out to enhance the feminine and romantic feel of the style.
Twist this section away from your face and wrap it over to where the bobby pin is holding the bottom of the first twist.
Securing and Adding Volume:
Use your other hand to gently pull and tug on the twist to add volume. Wrap the twist around your finger, pin it in place with a bobby pin, and adjust the twist to achieve the desired look.
Repeat on the Other Side:
Take the end of the first twist and nestle it underneath the second twist on the opposite side. Pin it in place and stretch both twists together so they appear as one cohesive piece.
17. Wet Look
Achieving the wet look hairstyle begins with starting from damp, not soaking wet hair. This ensures that the products adhere better and distribute evenly.
Here’s a simple guide to mastering this sleek, chic style:
Product Application:
Begin by applying a generous amount of mousse or hair gel from the roots to the tips. For fine hair, use gel for a sleek finish, and for curly or coily hair, a mix of gel and pomade will define the texture without weighing it down.
Enhancing Shine:
After the initial product application, add a shine serum to give the illusion of wetness and enhance the overall sheen of the hair.
Styling Techniques:
Use a wide-tooth comb to evenly distribute the product through your hair. For a back-swept look, comb the hair away from the face and over the crown, adding a touch of glamour to the style.
Drying Options:
Choose between air drying to preserve natural waves, using a diffuser attachment to enhance curls, or a hooded dryer for a more controlled drying process. Each method helps maintain the wet appearance while setting the style.
Securing the Style:
Apply hairspray to any clipped-back sections or the overall style to ensure it holds throughout the day. For added volume, strategically place clips at the roots while drying.
Final Touches:
For those seeking a more dramatic effect, complement the wet hair look with dewy makeup, glossy lips, and a subtle highlighter to reflect light and enhance the overall moisture-rich appearance.
18. High Ponytail with Bubble Braid
Creating the High Ponytail with Bubble Braid
Preparation:
Start by applying a generous amount of gel to ensure the hair is sleek and smooth. Comb the hair up into a high ponytail, ensuring it’s positioned on top of the head.
Securing the Ponytail:
Use a clear or hair-colored elastic, suitable for all hair types, to secure the ponytail firmly in place.
Smoothing Flyaways:
Apply additional gel with hands or spray directly to tame any flyaways, achieving a sleek finish.
Creating Bubbles:
Add more elastics to the ponytail, spacing them evenly. Ensure each section between elastics is roughly the same size to maintain uniformity in the bubbles.
Adjusting the Bubbles:
Gently pull the hair between the elastics to create the “bubbled” effect. Adjust the size of each bubble by pulling more or less hair as needed.
Final Touches:
Apply a light layer of hairspray over the entire style to set the bubbles and smooth any remaining flyaways. Run hands down the ponytail to ensure it remains sleek and polished.
19. Messy Bun with Headband
Creating a messy bun with a headband is a stylish and practical choice for long hair during the summer, providing a relaxed yet elegant look.
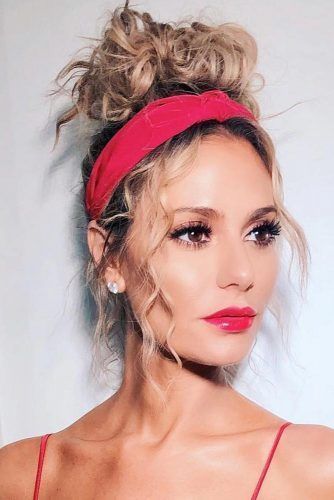
Here’s how to master this hairstyle:
Preparation:
Start by applying dry shampoo to the roots for added volume and texture.
Creating the Base:
Section off the front pieces of hair and gather the remaining hair into a high ponytail. Secure with a hair tie, positioning the bun where desired.
Forming the Bun:
Twist the ponytail loosely and wrap it around the base, securing with bobby pins. Pull on sections of the bun to loosen it and enhance the messy look.
Adding the Headband:
Place a soft headband high on the head, over the forehead. Adjust to sit comfortably behind the ears.
Styling and Securing:
Tug at the bun to create a fuller appearance and pull the sides of the bun slightly behind the headband for a natural, tousled look. Secure with bobby pins.
Finishing Touches:
Use hairspray to block humidity and keep flyaways at bay. Optionally, straighten pieces around the face for a polished look or leave them natural for a more casual vibe.
20. Messy Bun with Face-Framing Layers
Creating a messy bun with face-framing layers is a stylish and effortless summer hairstyle, ideal for long hair.
This hairstyle not only adds a casual elegance to your look but also keeps you cool during the warm months. Here’s a quick guide to achieving this look:
Steps to Create a Messy Bun with Face-Framing Layers:
Preparation:
Start by tracing your thumbs in front of your ears and moving upwards to the top of your head. This helps in identifying where to position your bun for the most flattering look.
Forming the Ponytail:
Gather your hair at the point you’ve identified, which should ideally align with your cheekbones. Secure this into a tight ponytail.
Creating the Bun:
Shift the ponytail to your left side and hold the base with your right hand. Use a second hair tie to loop the hair into a bun. Ensure any loose ends are neatly arranged around the base and tucked away.
Adjusting the Bun:
Manipulate the bun by pulling it gently to achieve the desired size and shape. This step is crucial for adding the ‘messy’ aspect of the hairstyle.
Extracting Face-Framing Layers:
Carefully pull down small sections of hair in the front to frame the face. This enhances the layered look and adds softness to the overall style.
Securing the Style:
Use bobby pins to secure the bun and ensure it holds throughout the day. Optionally, twist a rubber band around the base three times for a firmer hold.
Final Touches:
For added texture and volume, lightly tug at the bun and the face-framing layers. Applying a light mist of hairspray can help maintain the style’s shape and volume.
This hairstyle is perfect for a variety of occasions, from a day at the beach to a casual evening out. It’s quick to do, taking only about 2-3 minutes, and works best on long hair with some natural texture.
Conclusion
Navigating through the diverse range of summer hairstyles for long hair, we’ve explored a variety of chic, elegant, and practical styles suitable for any occasion.
From the timeless charm of beachy waves and the intricate beauty of braids to the modern simplicity of high ponytails and the relaxed elegance of buns, this compilation proves that long hair offers a canvas for creativity and personal expression.
Moreover, the significance of these styles extends beyond mere aesthetics, offering fresh inspirations and enabling one to navigate the summer months with confidence and flair.
Engaging with these hairstyles, therefore, does not just mean adopting new trends; it’s about embracing a season of transformation, creativity, and personal evolution.

Leave a Reply
You must be logged in to post a comment.