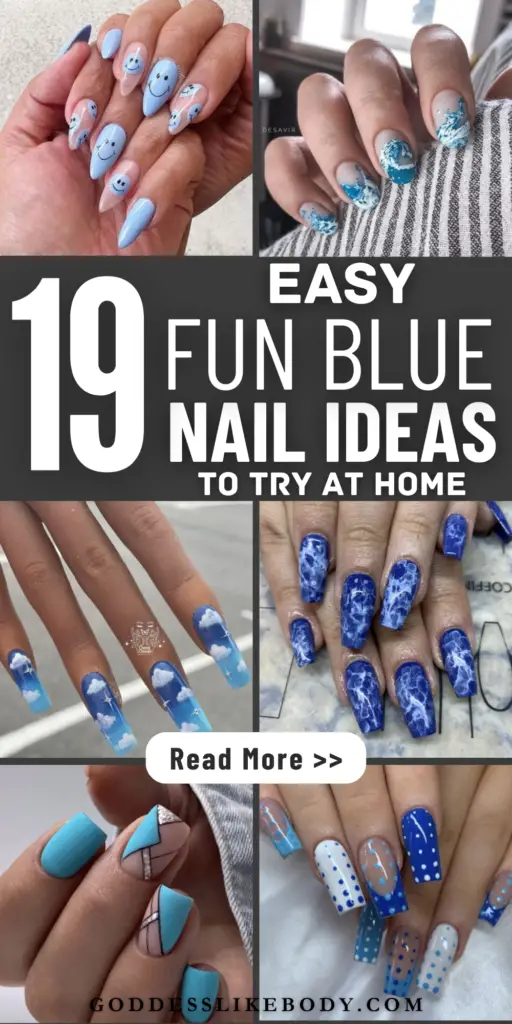
Exploring fun blue nail ideas at home opens a realm of creativity and style right at your fingertips. Whether you’re aiming for a sophisticated navy color palette or playful swirls and abstract designs, the options are limitless.
This surge of interest in do-it-yourself nail art, especially in unique mix-and-match styles, mirrors the increased time for creativity afforded by recent lockdowns, making now the perfect time to elevate your nail game.
This article lays out 19 DIY designs that promise to refresh your style with minimal tools and simple techniques.
Busy? Save this pin for later.
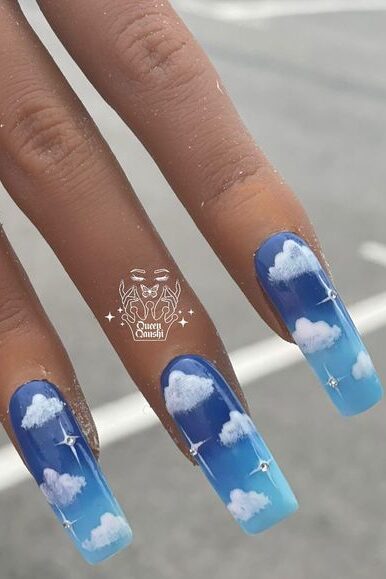
1. Cloud Nails
Materials and Preparation
To create stunning cloud nails, gather the following:
- Nail polishes from the mini secret fruity collection
- Samia’s secret white for clouds
- Blue color for the ombre effect
- Me secret cover beige for blending
- Iridescent and star-shaped glitter
- Young Nails white 101 for the base
- Top coat with 60-90 seconds curing time
Step-by-Step Instructions
-
Base Preparation:
- Start with a clean, buffed nail and apply a base coat of Young Nails white 101.
-
Creating the Ombre Effect:
- Apply the blue color at the tip and middle of the nail.
- Gradually blend it towards the cuticle using me secret cover beige to create a smooth ombre effect.
-
Cloud Formation:
- Using Samia’s secret white, add dots on the nail.
- With a 3D art brush, create the round fluffiness of the clouds.
- Switch to a rounded firmer brush to press the white gel into desired areas of the cloud.
-
Detailing and Glitter Application:
- Add iridescent and star-shaped glitter on the nails using a top coat as adhesive.
- Use a dotting tool and a little beadles brush to enhance the cloud details.
-
Curing and Finishing Touches:
- Flash cure the clouds for about five to six seconds to set the design.
- Once all elements are dry, apply a clear top coat to seal in the design and add a glossy finish.
Tips for Best Results
- Ensure each layer is thin to avoid smudging and to allow quicker curing times.
- Use the smudgie brush to maintain nail stability while painting for more precise cloud details.
- If adding a second coat of top coat, mix a little white gel paint with it for a sheer wash of color enhancing the light flare effects in the clouds.
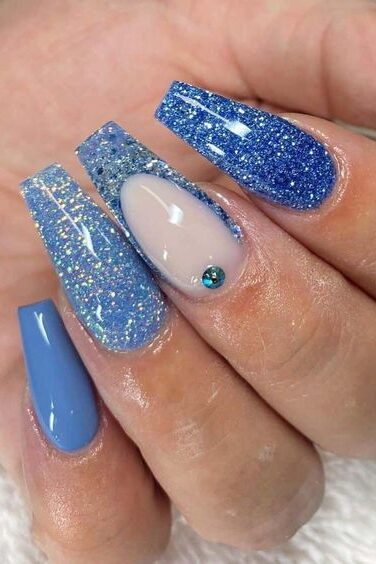
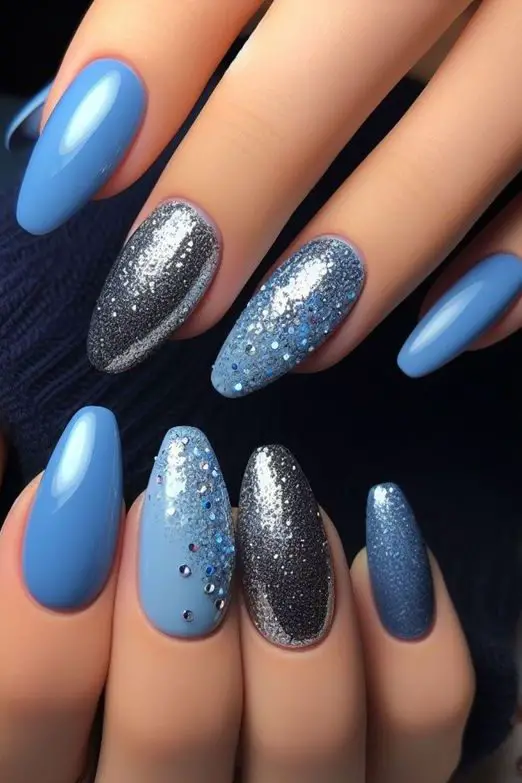
2. Mismatched Blue Glitter
To achieve the playful and eclectic look of mismatched blue glitter nails, consider each nail as a canvas for its own unique design.
This approach allows you to experiment with various shades of blue and glitter combinations, creating a personalized and trendy manicure. Here’s how you can create this fun look:
Materials Needed
- A variety of blue nail polishes (navy, sky blue, teal)
- Different types of glitter (fine, chunky, holographic)
- Clear top coat
- Nail polish remover
- Cotton swabs
- Nail tape (optional for designs)
Step-by-Step Instructions
-
Preparation:
- Start by cleaning your nails with nail polish remover to ensure they are oil-free.
- Apply a base coat to protect your nails and enhance the adherence of the polish.
-
Apply Base Colors:
- Choose a different blue shade for each nail. Apply two coats for full coverage, allowing each coat to dry completely.
-
Adding Glitter:
- For a uniform look, apply a thin layer of clear polish and sprinkle your chosen glitter over the wet polish.
- For more controlled designs, use nail tape to create stripes or shapes, then fill these areas with glitter.
-
Seal the Design:
- Once your glitter is set and all elements are dry, apply a clear top coat to seal in your designs and add a glossy finish.
-
Cleanup:
- Use a cotton swab dipped in nail polish remover to clean up any polish or glitter outside your nail beds.
Tips for Best Results
- Mix and match different types of glitter on each nail for a truly unique look.
- Use a sponge to dab on glitter for a denser, more opaque effect.
- Experiment with abstract and geometric patterns using nail tape for an artistic touch.
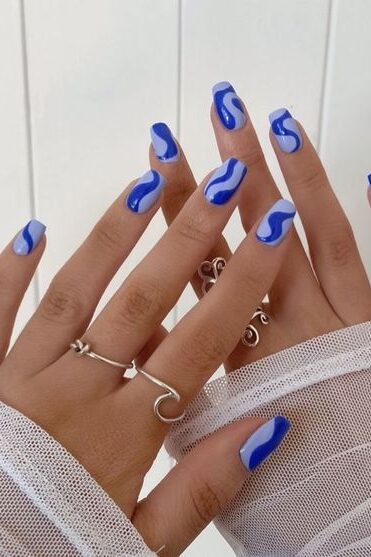
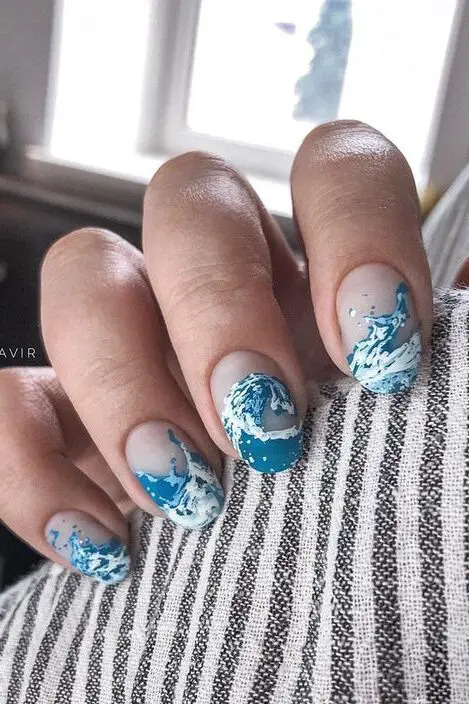
3. Wavy Stripes
Materials Needed
- Blue nail polish in various shades (navy, sky blue, aqua)
- White nail polish
- Striping tape or a thin brush
- Top coat
Step-by-Step Instructions
-
Base Coat Application:
- Start by applying a clear base coat to protect your nails and ensure a smooth canvas.
-
Apply the Base Color:
- Choose a light blue shade as the base color for a vibrant contrast. Apply two coats, allowing each to dry completely.
-
Creating Wavy Stripes:
- Use striping tape to outline wavy patterns across each nail. If you prefer freehand, use a thin brush to draw the waves.
- Fill in the waves with alternating shades of blue. For a dynamic look, mix navy, aqua, and sky blue.
-
Detailing:
- Once the design is dry, carefully remove the striping tape if used. Clean up any edges with a small brush dipped in nail polish remover.
-
Top Coat for Protection:
- Apply a clear top coat to seal in your design and add a glossy finish.
Tips for Best Results
- Ensure each layer is completely dry before applying the next to avoid smudging.
- Use a thin brush for more precise wave patterns.
- Practice drawing the wave design on paper before attempting on nails to gain confidence.
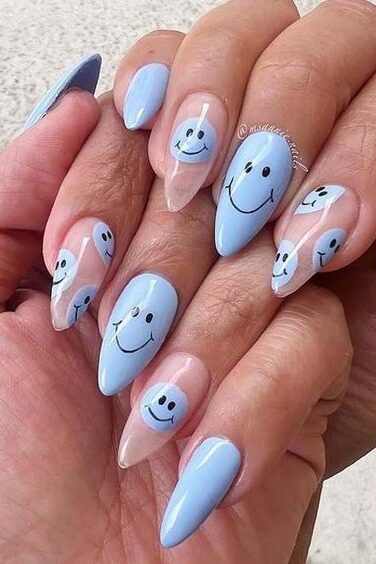
4. Smiley Face Accents
Materials Needed
- Base coat (e.g., Essie Gel Setter Top Coat)
- Sheer nude nail polish (e.g., Essie Ballet Slippers)
- Yellow nail polish (e.g., Makeup Revolution Zesty)
- Black nail polish (e.g., Essie Licorice)
- White nail polish (e.g., Sally Hansen’s French Manicure White)
- Liner brush (e.g., Glisten Cosmetics Liner Brush)
- Dotting tools or sharpie
- Top coat (e.g., Moyou London Smudge Resistant Top Coat)
- Cuticle oil (e.g., Essie Nail Care Cuticle Apricot Oil Treatment)
Step-by-Step Instructions
-
Preparation:
- Start by preparing your nails: trim, file, and clean them thoroughly. Apply a base coat to protect your nails and enhance polish adherence.
-
Base Color Application:
- Apply two coats of sheer nude nail polish, such as Essie Ballet Slippers, allowing each coat to dry completely.
-
Creating Smiley Faces:
- Use a dotting tool or the end of a sharpie to create small white dots on each nail as the base for the smiley faces. Allow the white to dry completely.
- Fill in these white dots with yellow nail polish to form the base of the smiley faces. Let it dry.
- With a liner brush, add smiley face details using black nail polish. Paint two small dots for the eyes and a curved line for the mouth on each yellow circle.
-
Finishing Touches:
- Once all the details are dry, apply a top coat to seal in the design and add a glossy finish.
- Nourish your cuticles by applying cuticle oil.
Tips for Best Results
- Ensure each layer of polish dries completely before applying the next to prevent smudging.
- Use a fine-tip liner brush for precise detailing of the smiley faces.
- For a playful variation, you can add a tiny red tongue using a detail brush and red nail polish.
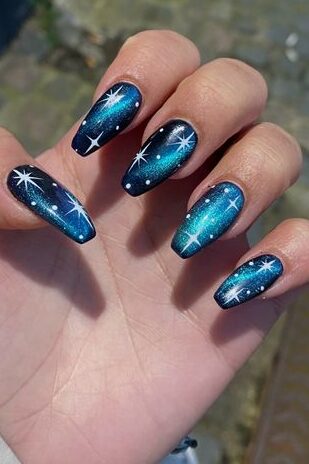
5. Starry Night
Materials Needed
- Base coat
- Dark blue nail polish
- Light blue nail polish
- White nail polish
- Yellow nail polish
- Black nail polish
- Top coat
Step-by-Step Instructions
-
Base Coat Application:
- Start by applying a base coat to protect your nails and create a smooth surface.
-
Color Base Layers:
- Paint your ring finger and thumb with dark blue nail polish.
- Apply light blue nail polish to your remaining nails.
-
Creating the Sky:
- On the dark blue nails, use light blue nail polish to paint a swirl pattern representing the sky.
- Add a medium-sized white dot near the swirl and gently blend it into the light blue to mimic the cloudy night sky.
-
Adding Stars and Moon:
- Use white nail polish to dot out placements for the moon and stars.
- Draw a crescent moon and several small stars with yellow nail polish.
-
Top Coat for Durability:
- Seal your artwork with a top coat to ensure longevity and add a glossy finish.
Tips for Best Results
- Ensure each layer is completely dry before applying the next to prevent smudging.
- Use a fine brush for detailed work on the moon and stars.
- Practice the swirl and star patterns on paper before painting on your nails.
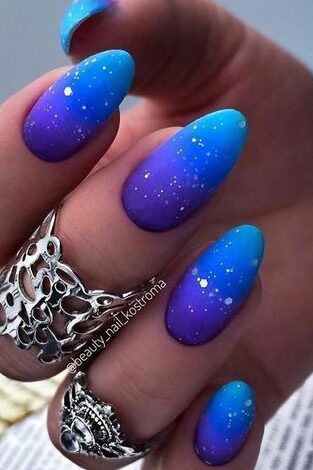
6. Ombre Nails
Materials Needed
- Base coat (e.g., OPI Natural Nail Base Coat)
- Blue nail polishes: 96 Cotton Candy, 29 Blue Paradise, 98 Totally Denim
- Makeup sponge for blending
- Sticky tape or Vaseline
- Brilliant Topcoat by Deborah Milano
- Nail dehydrator (optional for preparation)
- Nude polish (natural beige), metallic blue polish, crystal clear top coat
Step-by-Step Instructions
-
Nail Preparation:
- Clean and shape your nails. Apply a nail dehydrator if available, followed by a base coat to protect your nails.
-
Apply Base Color:
- Start with a light base color, preferably natural beige. Allow it to dry completely.
-
Creating the Ombre Effect:
- Apply metallic blue polish at the tip of your nails.
- Use a makeup sponge to dab the blue polish, blending it into the base color towards the cuticle.
- Repeat the process to intensify the color gradient as desired.
-
Clean Up:
- Use sticky tape or Vaseline applied around the nails beforehand to protect your skin or clean up with nail polish remover after applying the colors.
-
Top Coat Application:
- Apply a layer of Brilliant Topcoat by Deborah Milano to seal the design. Add a second coat for enhanced durability and shine.
Tips for Best Results
- Ensure each polish layer is completely dry before applying the next to prevent smudging.
- Use a dabbing motion rather than dragging when applying the sponge to blend the colors seamlessly.
- Regularly change the part of the sponge used for dabbing to maintain a smooth color transition.
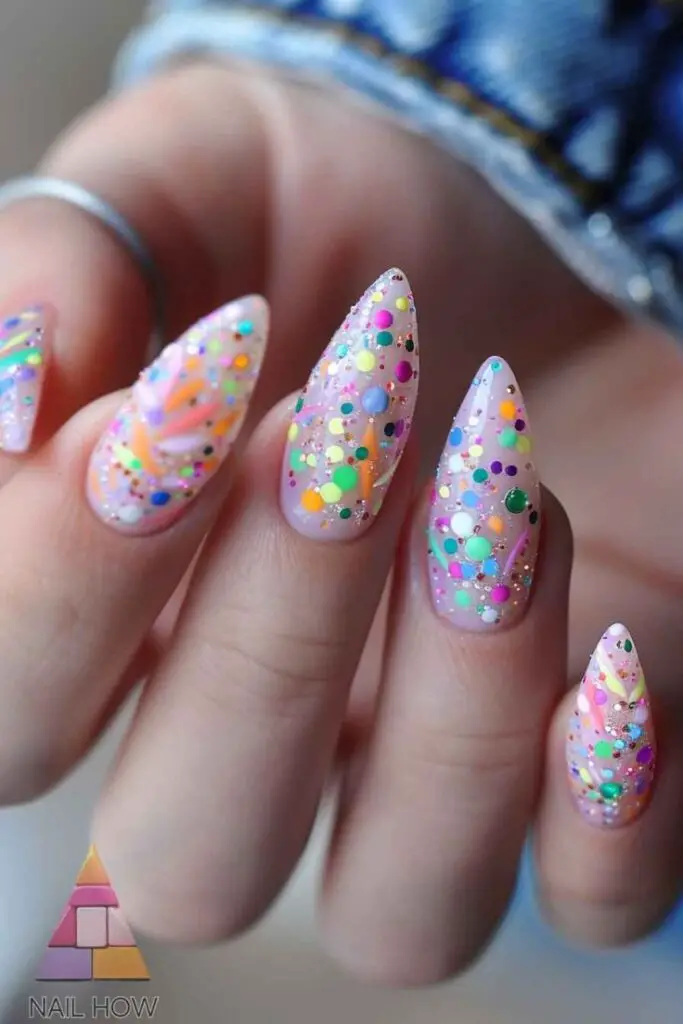
7. Confetti Nails
Materials Needed
- Base coat (e.g., OPI Natural Nail Base Coat)
- Blue nail polish (various shades)
- Confetti glitter (mixed sizes and colors including pink, purple, and silver)
- Top coat (thick formula preferred)
- Tweezers or a dotting tool
Step-by-Step Instructions
-
Nail Preparation:
- Begin by pushing back the cuticles and buffing the nail surface to remove any shine. Apply a protein bond if available, followed by a base coat to protect your nails.
-
Base Color Application:
- Paint your nails with two coats of your chosen shade of blue nail polish, allowing each coat to dry completely.
-
Applying Confetti:
- Pour out some confetti glitter on a clean surface. Using tweezers or a dotting tool, pick up the larger pieces of confetti and place them strategically on the nail. Follow with smaller pieces to fill in the gaps and create a layered, textured look.
-
Sealing the Design:
- Once you are satisfied with your confetti placement, apply a thick layer of top coat to seal in the design. This not only protects the confetti but also gives your nails a glossy, finished look.
-
Curing and Final Touches:
- If using gel products, cure your nails under a light for the recommended time. Finish by applying cuticle oil to nourish the skin around the nails.
Tips for Best Results
- Start with clean, dry nails to ensure the best adhesion of the base coat and polish.
- Use a mix of confetti sizes and colors for a dynamic, eye-catching effect.
- Apply the top coat generously to prevent any edges of the confetti from lifting.
- For a more dramatic look, mix metallic confetti with matte shades of blue.
This fun and festive confetti nail design is perfect for special occasions or just to brighten up your everyday look. With its mix of colors and textures, it’s sure to catch the eye and spark conversations!
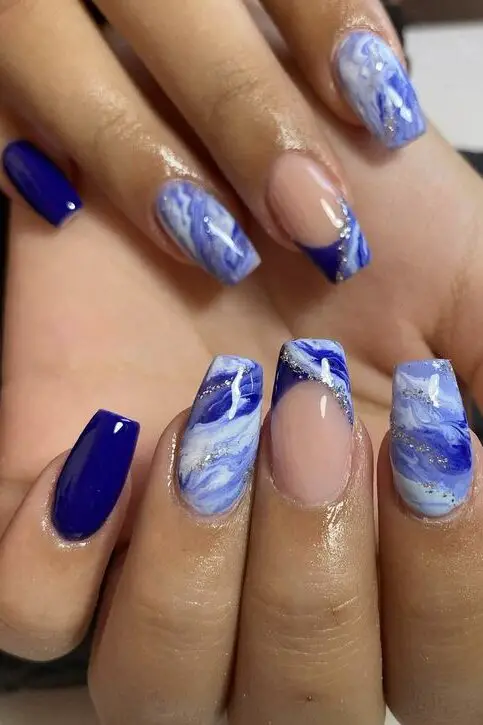
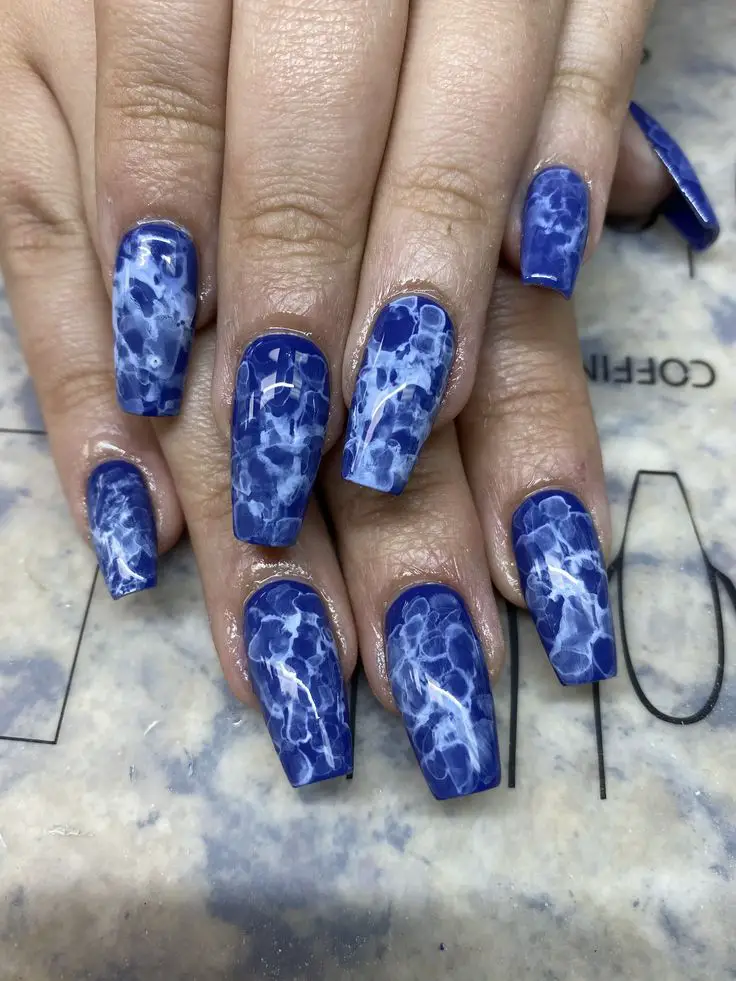
8. Marble Nails
Materials Needed
- Base coat (e.g., OPI Natural Nail Base Coat)
- Gel polish colors (blue shades and a lighter color for contrast)
- Liqui compounder/fusion ink or polygel (optional)
- Ombre brush or flat brush
- Crystal clear compound (for fusion ink technique)
- Acetone or nail prep cleaner
- Matte or glossy top coat
- Nail decorations (optional): crystal placements, caviar beads, charms
- LED/UV nail lamp
- Nail dehydrator and primer (optional)
Step-by-Step Instructions
-
Nail Preparation:
- Start by cleaning your nails, pushing back cuticles, and applying a nail dehydrator if using. Apply a base coat and cure it under a LED/UV lamp to prepare nails for marbling.
-
Applying Base Color:
- Choose a white or light beige as the base color to enhance the marble effect. Apply and cure under the LED/UV lamp.
-
Marbling with Gel Polish:
- Drop different shades of blue gel polish onto a mixing plate. Using an ombre brush, lightly mix the colors.
- Pick up the mixed polish with the brush and gently drag across your nails to create marble patterns. Cure under the lamp.
-
Fusion Ink Technique:
- If using liqui compounder, apply a light base color and then add darker blue shades. Blend with a crystal clear compound using a clean brush to create vein-like patterns.
-
Enhancements and Details:
- Add any crystal placements, caviar beads, or charms while the top layer is still tacky. This will ensure they adhere properly.
-
Top Coat Application:
- Seal your design with a matte or glossy top coat and cure it under the lamp for durability and shine.
Tips for Best Results
- Ensure each layer is completely dry or cured before applying the next to prevent smudging.
- Use a lint-free wipe dipped in acetone to clean up and define edges, especially if creating a French tip marble design.
- Experiment with different color intensities and swirling techniques to achieve unique marble effects. Each nail will look distinctively different, adding to the charm of this design.
- For a ‘lazy girl method’, apply polygel over tips and cure, then peel off for reusable custom press-on nails.
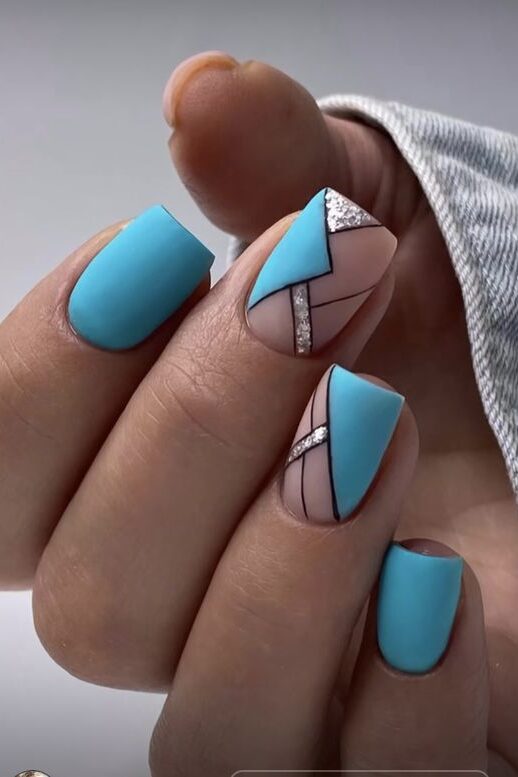
9. Geometric Shapes
Materials Needed for Geometric Shapes Nail Design
- Base coat
- White nail polish
- Copper striping tape
- Small scissors
- Cuticle clipper or nipper trimmer
- Top coat (optional matte top coat)
- Grey, dark green, metallic gold, and wine nail polish
- Nail striping tape
- Striper brush
Step-by-Step Instructions
-
Preparation:
- Start by cleaning your nails with remover to ensure they are oil and debris-free. Apply a base coat to strengthen nails and prevent staining.
-
Apply Base Color:
- For the copper geometric design, apply a white base coat and let it dry completely. For other designs, choose a base color that complements the geometric pattern you plan to create.
-
Creating Geometric Patterns:
-
Copper Geometric Design:
- Place a piece of copper striping tape in the center of the nail.
- Connect two pieces of tape to the middle one to form a geometric pattern.
- Seal the design with a top coat.
-
Chevron Stripes:
- Paint nails in solid grey.
- Apply striping tape in a chevron pattern on the accent nail.
- Finish with a clear top coat.
-
Crisscross Nails:
- Paint nails white in three stripes, let dry.
- Paint diagonal stripes of wine-colored and gold nail polish.
- Finish with a clear top coat.
-
Half-Matte Nails:
- Paint two coats of dark green polish, let dry.
- Apply a shiny top coat on all nails.
- Use a matte top coat on the top half of the nails.
-
Copper Geometric Design:
-
Detailing:
- Use a striper brush to create additional designs such as zigzag or swirl patterns on selected nails for an accentuated look.
-
Finishing Touches:
- Remove any tape used before the polish dries to ensure clean lines.
- Apply a final layer of top coat to all nails for a glossy or matte finish, depending on your preference.
Tips for Best Results
- Ensure each layer of polish is completely dry before applying the next to prevent smudging.
- Experiment with different color combinations and placements for a unique look.
- Use small scissors and a cuticle clipper to precisely cut and place striping tape.
- Consider using a matte top coat on some geometric patterns to add a modern touch to your design.
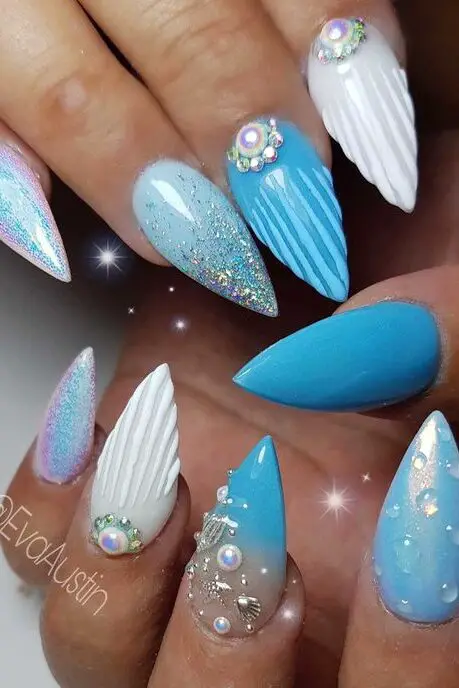
10. Seashell Accent Nail
Materials Needed
- “Lot Divein” blue polish from the retro remix collection
- No wipe top coat
- Clear builder gel (Mosaic Neo CLE)
- Gelish Foundation or thick builder gel for gem application
- Luminara Aurora Pigment by Social Claws
- Makeup wedge and silicone tool for application
- SS 3 Para AB Crystal and SS7 Blue Crystal
- Dip powders (e.g., Bahamian)
- Nail glue and micro styler brush
- UV lamp for curing
Step-by-Step Instructions
-
Preparation and Base Color:
- Prepare your nails by cleaning and applying a base coat. Cure under a UV lamp for 60 seconds.
- Apply two coats of “Lot Divein” blue polish, curing after each layer.
-
Creating the Seashell Accent:
- Use a micro styler brush to pick up the clear builder gel. Spread it in thin lines over one accent nail to mimic the shell’s structure.
- While the gel is still wet, gently dip your finger into the Luminara Aurora Pigment. Use a makeup wedge for initial application, then a silicone tool to burnish the pigment to a mirror finish.
-
Adding Crystals and Seashells:
- Apply a dot of Gelish Foundation on the spots where you want to place crystals and seashells. Place each gem and shell carefully, securing them with the gel.
- Cure under a UV lamp to set everything in place.
-
Final Touches:
- Apply a layer of no wipe top coat over the entire nail, ensuring not to smudge the design.
- Cure under the UV lamp for a final set, giving a durable and glossy finish.
Tips for Best Results
- Ensure each layer is completely dry or cured before applying the next to prevent any smudging or displacement of the design elements.
- Use a lighter touch when applying the top coat over the seashells and crystals to keep them clearly visible and to prevent flooding the design.
- Experiment with different shell placements and additional embellishments like pearls or smaller gems to enhance the beach-like feel of your manicure.
11. Textured Nails
Materials Needed
- Gel nail polish (sweater-like colors)
- Fine nail art brush
- Dotting tools of various sizes
- Loose clear acrylic powder
- Matte top coat
- Alcohol (for cleaning)
- UV/LED nail lamp
Step-by-Step Instructions
-
Nail Preparation:
- Begin by removing any old polish and thoroughly cleaning your nails. Shape and buff them, then apply a base coat and cure under a UV/LED lamp for 60 seconds.
-
Apply Base Color:
- Paint your nails with a gel polish in your chosen color. Cure under the UV light for 60 seconds.
-
Creating the Textured Design:
- Use a fine nail art brush to paint a sweater-like pattern on each nail. Work quickly as gel polish tends to dry fast under light.
- Before curing, lightly dust the design with loose clear acrylic powder to add texture.
- Cure under the UV light for 60 seconds.
-
Finishing Touches:
- Brush off any excess powder with a clean, dry brush.
- Seal the design with a matte top coat to enhance the textured look and cure again under the lamp.
Tips for Best Results
- Ensure each layer is fully dry or cured before proceeding to the next to avoid smudging.
- Use a fine brush for detailed patterns to mimic the intricate designs of knitwear.
- Experiment with different sweater patterns and colors to match your style or season.
This technique allows you to create visually stunning and tactile nails that are perfect for cooler seasons or whenever you want to add a unique touch to your manicure.
12. Negative Space Waves
Materials Needed
- Base coat (OPI Nail Envy)
- Black and white nail polishes (Art Brillante Black Poison and Art Brillante White)
- Top coats (Super Matte and Tip-Top)
- Nail art brushes (Master Nail Art 006 and 007)
- Nail art stencils (Straight Line Nail Stencils)
- Nail polish remover and cleanup brushes
Step-by-Step Instructions
-
Preparation:
- Start by applying a base coat to protect your nails and enhance the longevity of your manicure. Allow it to dry completely.
-
Applying the Base Color:
- Apply a thin layer of mineral base blush and cure it under a lamp for 30 seconds to set the foundation for your design.
-
Creating Negative Space Waves:
- Place striping tape in curved patterns on each nail to outline the areas that will remain color-free.
- Use black or white nail polish to fill in the areas around the tape. Carefully paint thin lines using the Master Nail Art brushes for precision.
-
Detailing:
- Once the primary color is dry, remove the striping tape to reveal the negative space. Clean up any imperfections with a small brush dipped in nail polish remover.
-
Applying Top Coat:
- Finish your design by applying a layer of Super Matte or Tip-Top top coat for a durable and glossy finish. Wait a minute before applying any cuticle oil to ensure the polish is completely set.
Tips for Best Results
- Ensure each polish layer is completely dry before applying the next to prevent smudging.
- Use high-pigmented polishes like Art Brillante for vibrant colors and clear negative spaces.
- Experiment with different wave patterns and colors for a unique look each time.
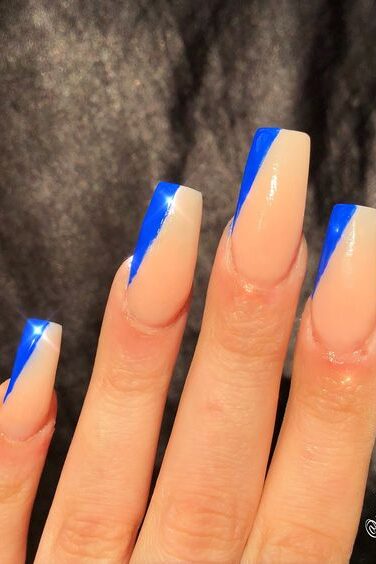
13. Diagonal French Tip
Materials and Tools Needed
For creating the chic diagonal French tip nails, you’ll need the following items:
- Nail clippers or scissors
- Nail file
- Cuticle pusher
- Base coat
- White nail polish (or a color of your choice for a dramatic look)
- Clear top coat
- Tape or a ruler/straight edge (optional for precision)
Step-by-Step Instructions
-
Nail Preparation:
- Trim your nails to the desired length and shape them, preferably squared-off for the best effect.
- Gently push back your cuticles to prepare the nail bed for painting.
-
Base Coat Application:
- Apply a base coat to protect your nails and enhance the longevity of your nail polish.
-
Marking the Diagonal Tip:
- You can either eyeball the middle of the nail or use tape as a guide to achieve a clean diagonal line. Place the tape in a diagonal pattern starting from the middle of the nail to one side.
-
Painting the Tip:
- Apply white nail polish along the edge of the tape to create a diagonal tip. Use a long liner brush for precision if needed.
-
Second Coat (if necessary):
- For better opacity, apply a second coat of white polish.
-
Drying and Top Coat Application:
- Allow the polish to dry completely. Carefully remove the tape if used, then apply a clear top coat to seal in the design and add a glossy finish.
Additional Tips
- For a unique twist, try using a mint green base with a bright pink polish for the tip, or explore other color combinations like a reverse ombre or adding nail art stickers.
- If opting for a more gradual tip, paint the white polish closer to the cuticle and blend softly.
- Enhance your manicure with a finishing touch glitter top coat for a sparkling effect.
This diagonal French tip design offers a modern twist on the classic French manicure, perfect for adding an elegant yet playful touch to your nails.
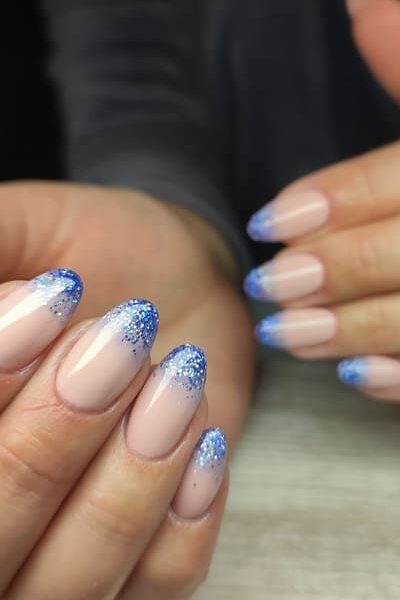
14. Glitter Fade French
Materials Needed
- Base coat (e.g., D Lipman Rehydrating Base Coat)
- Nude color polish (e.g., Chaso Polish No. 12 Filigree Rose Transparent)
- Glitter polish (finely milled and chunky options)
- Top coat (e.g., Sally Hansen Miracle Gel Top Coat)
- Toothpick or dotting tool
- Makeup sponge
Step-by-Step Instructions
-
Base Coat Application:
- Apply a base coat like D Lipman Rehydrating Base Coat to protect your nails and create a smooth canvas for the polish.
-
Apply Nude Base Color:
- Use a nude color, such as Chaso Polish No. 12 Filigree Rose Transparent, as the base color. Allow it to dry completely.
-
Glitter Application:
- Start applying the glitter polish at the tip of the nail using a makeup sponge for a gradient effect. Begin with a lighter amount and increase the density as you move towards the nail tip.
- For a more precise glitter placement, use a toothpick or dotting tool to place chunky glitter pieces, creating a fading effect towards the middle of the nail.
-
Seal with Top Coat:
- Apply a generous amount of top coat, like Sally Hansen Miracle Gel Top Coat, starting from the back of the nail and smoothing it out to prevent any texture from the glitter.
Tips for Best Results
- Ensure each layer is completely dry before applying the next to avoid smudging.
- Use finely milled glitter near the cuticle and chunkier glitter towards the tip for a dramatic fade.
- Mix different sizes and colors of glitter in the top coat for a unique effect.
- Regularly clean your workspace to avoid mixing glitters and ensure a clean application for each nail.
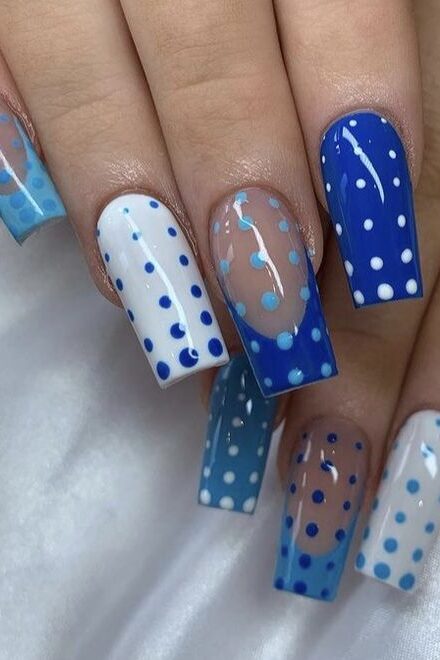
15. Mismatched Blue Dots
Materials Needed
- Base coat (e.g., OPI Natural Nail Base Coat)
- Blue nail polishes: Beach Bum Blu by Essie, and various shades for dotting
- White nail art pen by Sally Hansen
- Dotting tools of various sizes
- Top coat (e.g., Seche Vite Dry Fast Top Coat)
- Nail polish remover or acetone
- Fine detail brush
Step-by-Step Instructions
-
Base Coat Application:
- Apply a base coat to protect your nails and provide a smooth surface for painting.
-
Apply Base Color:
- Paint two coats of Beach Bum Blu by Essie, allowing each coat to dry completely.
-
Creating Dots:
- Using a dotting tool, apply various shades of blue dots across the nail. Start with larger dots in the center and smaller dots towards the edges.
- Add white dots using the Sally Hansen nail art pen for contrast.
-
Detailing and Top Coat:
- After all dots have dried, apply a clear top coat to seal the design and enhance durability.
Tips for Best Results
- Ensure each layer is completely dry before applying the next to prevent smudging.
- Use dotting tools of different sizes for varied dot effects.
- Experiment with dot placement and color combinations for a unique look.
Troubleshooting/Common Mistakes
- Smudged Dots: If dots smudge, use a fine detail brush dipped in nail polish remover to clean up the edges.
- Fading Design: Apply a top coat every few days to maintain the design’s vibrancy and prevent chipping.
This playful and trendy mismatched blue dots design allows for creativity and personal expression through simple dotting techniques, making it an ideal choice for DIY nail art enthusiasts.
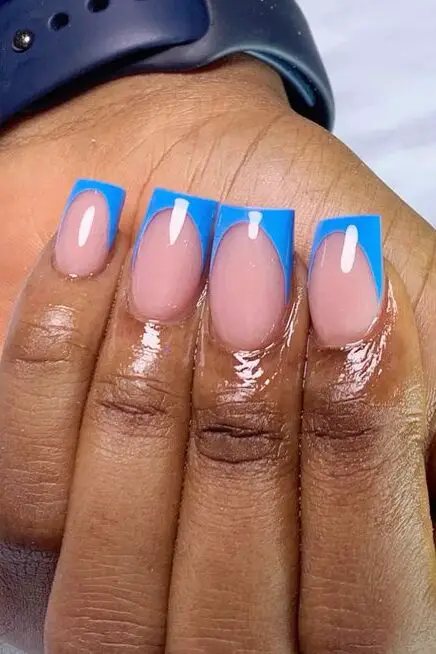
16. Neon Blue Tips
Materials Needed
- Base coat (e.g., OPI Natural Nail Base Coat)
- White nail polish (to enhance neon color)
- Neon blue nail polish (e.g., DND “Bubbles”)
- Glossy top coat (for shine and protection)
- Nail tips and glue (for extension method)
- Acrylic or gel supplies (depending on the method)
- UV/LED lamp (for curing gel polish)
Step-by-Step Instructions
-
Base Coat Application:
- Start by applying a base coat to protect your nails and provide a smooth surface for painting.
-
White Base Layer:
- Apply one or two layers of white nail polish. This helps the neon color stand out more vividly.
-
Applying Neon Blue Polish:
- Choose a vibrant neon blue polish, such as “Bubbles” by DND, and apply it to the tips of your nails. If using nail tips, apply after attaching and shaping the tips.
-
Glossy Top Coat for Shine:
- Finish with a glossy top coat to enhance the neon color’s vibrancy and provide a durable, shiny finish.
Alternative Methods
-
Using Gel and Nail Tips:
- Prepare the nails, apply nail tips, and use a clear gel over the nail tips. Cure under a UV/LED lamp and then paint the neon blue tips.
-
Acrylic Method:
- After preparing the nails and attaching the tips, apply a bead of internal beige color, then the neon blue acrylic powder. Shape and buff the nails, then seal with a top coat.
Tips for Best Results
- Ensure each layer is completely dry or cured before applying the next to prevent smudging.
- Use a UV/LED lamp to cure gel polishes for durability.
- Experiment with different designs such as tie-dye or adding glitter for a unique twist on the neon blue tips.
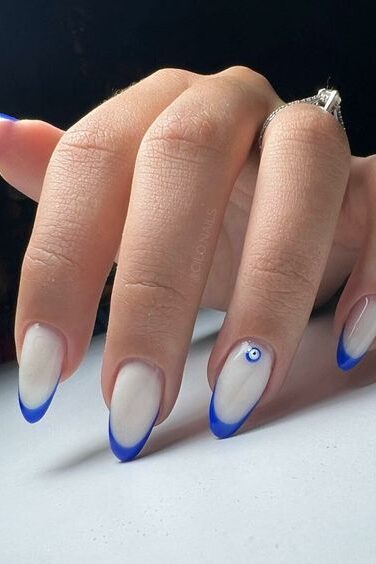
17. French Manicure with Blue Tips
Materials Needed
- Base coat (e.g., OPI Natural Nail Base Coat)
- Baker St by Nails Inc. (deep blue shade)
- Black Taxi by Nails Inc. (for tips)
- French manicure guideline stickers or painter’s masking tape
- Top coat (e.g., Seche Vite Dry Fast Top Coat)
- Cauli Gel (for smoothing imperfections)
- Rhinestones (optional for decoration)
- Nail polish remover
- Eyeshadow brush (for cleanup)
- UV lamp (if using gel products)
Step-by-Step Instructions
-
Nail Preparation:
- Ensure your nails are clean, trimmed, and cuticles are pushed back. Apply a base coat to protect your nails and enhance the polish adherence.
-
Apply Base Color:
- Paint your nails with three coats of Baker St by Nails Inc. for a rich, deep blue base. Allow each coat to dry completely.
-
Tip Application:
- Place French manicure guideline stickers or painter’s masking tape at the desired location for the tips. Ensure it is straight and secure.
- Apply Black Taxi by Nails Inc. in a downward motion starting from the sticker, creating a clean line for the tip.
-
Cleanup and Perfecting Details:
- Use an eyeshadow brush dipped in nail polish remover to clean up any imperfections or excess polish around the edges.
-
Adding Decorations:
- Optionally, you can apply rhinestones or other decorations using a small dab of Cauli Gel for adhesion.
-
Top Coat Application:
- Apply one or two layers of top coat to seal in your design and add a glossy finish. If using gel products, cure under a UV lamp as required.
Tips for Best Results
- For a smoother finish, apply a bead of Cauli Gel before the top coat if you notice any bumps or uneven areas.
- Practice the tip application on paper before attempting on your nails to ensure a steady hand.
- Consider using a matte top coat for a modern twist on the classic glossy French manicure.
This French manicure with blue tips offers a unique twist on a classic style, perfect for adding a pop of color and elegance to your look.
18. Tie-Dye Blue
Materials Needed
- Base coat
- White nail polish
- Blue nail polish (various shades)
- Sticky nail tape or liquid latex
- Sandwich bag or plastic wrap
- Top coat
- Nail polish remover
- Fine brush
Step-by-Step Instructions
-
Preparation:
- Start by applying a base coat to protect your nails and ensure a smooth surface. Allow it to dry completely.
-
Base Color Application:
- Paint your nails with a white base coat to help the colors pop. Ensure it’s completely dry before proceeding.
-
Creating the Tie-Dye Pattern:
- Place random dots of white nail polish on your nail. Add drops of different shades of blue over these dots.
- Cover the nail with a sandwich bag or plastic wrap and gently smudge the colors together by pressing and slightly twisting.
-
Detailing and Cleanup:
- Remove the plastic and use a fine brush dipped in nail polish remover to clean up any excess polish around the edges of your nails.
-
Top Coat Application:
- Once your tie-dye design is dry, apply a clear top coat to seal in the design and add a glossy finish.
Tips for Best Results
- Use sticky nail tape around your nails to create a barrier for easy cleanup.
- Experiment with the size and placement of dots to achieve different tie-dye effects.
- For a unique twist, incorporate other colors like red or yellow along with blue tones.
This tie-dye technique allows for a creative and fun approach to nail art, perfect for casual outings or just to brighten up your day.
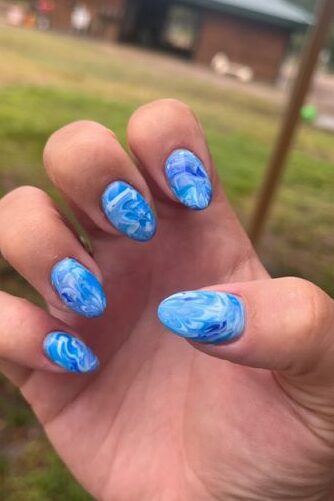
19. Water Marble Blue
Materials Needed
- Base coat (e.g., OPI Natural Nail Base Coat)
- White nail polish for the base layer
- Multiple shades of blue nail polish
- Room temperature filtered water
- Disposable cup or container
- Toothpick or orange stick for design creation
- Liquid latex or tape for skin protection
- Nail polish remover
- Q-tips and a fine brush for cleanup
- Top coat for sealing the design
Step-by-Step Instructions
-
Preparation:
- Start by applying a base coat to protect your nails and enhance polish adherence. Let it dry completely.
- Apply a layer of white nail polish as the base color to make the colors pop. Allow it to dry thoroughly.
-
Protecting the Skin:
- Use liquid latex or tape around your nails to protect your skin from getting stained by the nail polish.
-
Creating the Water Marble:
- Fill a disposable cup with room temperature filtered water.
- Begin by dropping your first shade of blue polish into the center of the water. Continue with other shades, adding each drop into the center to form a bullseye pattern.
- Use a toothpick or orange stick to draw designs through the polish layers, creating a marbled effect.
-
Dipping Your Nails:
- Line up your nail with the part of the pattern you like most.
- Gently dip your nail into the water, nail-first, and hold it there for a few seconds.
- Use the toothpick or orange stick to swirl away excess polish from the surface of the water before slowly removing your finger.
-
Cleanup:
- Carefully peel off the tape or latex.
- Use a Q-tip dipped in nail polish remover to clean up any polish on your skin.
- Use a fine brush for more precise cleanup around the nail edges.
-
Sealing the Design:
- Once your nail is completely dry, apply a top coat to seal in the design and add a glossy finish.
Tips for Best Results
- Ensure the water is room temperature to prevent the polish from drying too quickly.
- Work quickly after dropping the polish into the water to ensure it remains manipulable.
- Experiment with different tools like a finer or thicker stick to vary the design details.
- Practice the technique on a tester nail or plastic surface before applying it to your actual nails to perfect your skill.
Final Thoughts
Throughout this article, we’ve embarked on a creative journey through the vibrant world of blue nail art, imparting the tools and techniques necessary for you to bring these vivid designs to life in the comfort of your home.
From the serene vistas of ombre nails to the playful exuberance of confetti, and the refined elegance of marble nails, each design offers a unique opportunity to express your style through the artistry of DIY nail aesthetics.
The step-by-step guides provided aim to inspire confidence in your ability to achieve salon-worthy nails, empowering you to experiment with patterns, textures, and colors.
The exploration of these twenty DIY blue nail ideas not only enhances your nail art repertoire but also invites you to delve into the limitless possibilities of personal expression and creativity.
The significance of these designs transcends mere aesthetics, serving as a testament to the joy and satisfaction derived from crafting beauty with your hands.
As you continue to experiment with and refine these techniques, you’re encouraged to explore further, mix and match ideas, and perhaps invent new styles that reflect your evolving taste and creativity.
Let your nails be the canvas for your imagination, showcasing the infinite shades of your personality.

Leave a Reply