Braids hairstyles for medium length hair are weaving their way into the spotlight as a trendsetting choice for anyone looking to refresh their look.
With the versatility of medium hair, which strikes a balance between ease of management and styling flexibility, it’s no wonder why braids have become a staple in the world of hairstyles.
From elegant french braids to playful waterfall braids, these styles are perfect for a range of occasions, offering both protective qualities for natural hairstyles and a chic edge for those seeking something unique.
This post will guide you through 18 trendsetting braids hairstyles, tailor-made for medium length hair.
Busy? Save this pin for later.
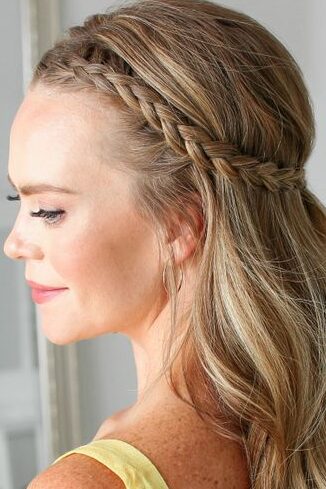
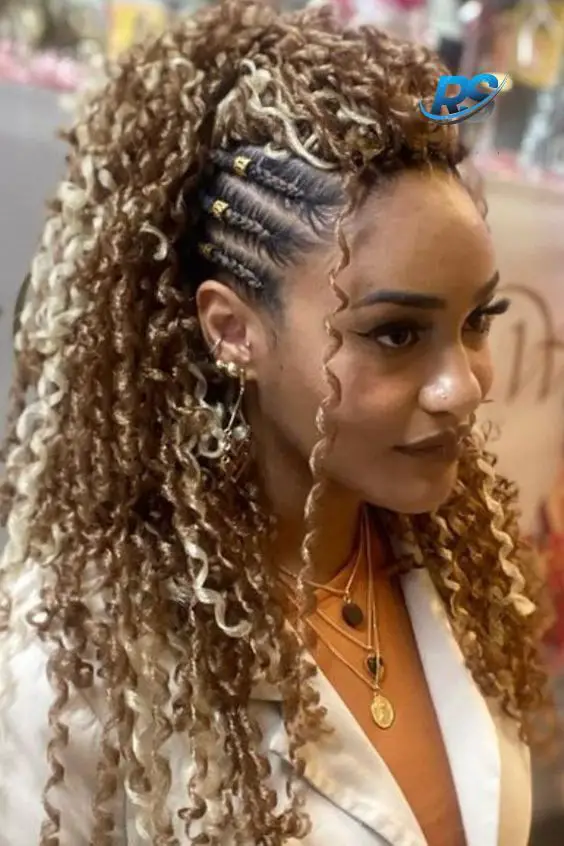
1. Half-Up Dutch Braid
The Half-Up Dutch Braid is not just a hairstyle; it’s a statement of elegance and creativity, perfect for medium length hair.
This style combines the charm of a traditional braid with the sophistication of an updo, making it ideal for both casual outings and formal events.
Step-by-Step Guide to Creating the Half-Up Dutch Braid
Begin by Parting Your Hair: Start with clean, dry hair, and use a comb to part your hair down the middle or slightly to one side, depending on your preference.
Section the Hair: Take a section of hair from the top of one side and divide it into three equal strands.
Start Braiding: Begin the Dutch braid by crossing the right strand under the middle strand, then the left strand under the new middle strand. Add more hair to each strand as you continue braiding, keeping the braid tight and neat.
Secure the Braid: Once you reach the crown of your head, secure the braid with a small elastic band. Let the rest of your hair flow freely or style it as desired.
The beauty of the Half-Up Dutch Braid lies in its versatility. It beautifully frames the face while keeping hair out of your eyes, making it perfect for those with medium length hair who want a stylish yet manageable look.
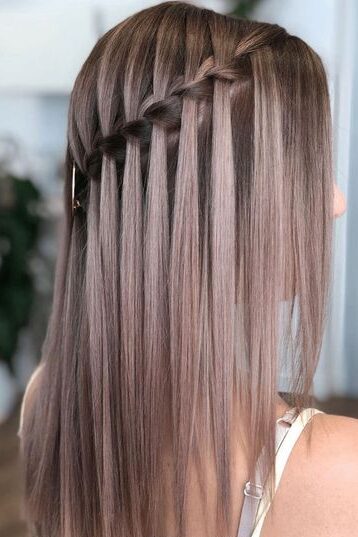
2. Waterfall Braid
The Waterfall Braid is a stunningly beautiful hairstyle that effortlessly combines sophistication with a touch of whimsy, making it perfect for medium length hair.
This braid allows your locks to cascade softly around the face like a waterfall, hence its name. It’s ideal for those special occasions where you want to add an extra touch of elegance without compromising on a playful, down-to-earth vibe.
How to Create a Waterfall Braid
Start with a Section at the Front: Pick a thick strand of hair from the front, near your temple. Divide this into three parts.
Begin Braiding: Start a traditional French braid. After a couple of stitches, drop the outermost strand so that it blends with the rest of your hair, and pick up a new section from nearby to replace it.
Continue Across the Head: Keep braiding across the top of your head, dropping one strand and picking up another as you go. This creates the ‘waterfall’ effect.
Secure the Braid: Once you reach the opposite side, secure the braid behind your ear with pins or a small elastic.
This hairstyle not only enhances your natural beauty but also serves as a protective style for your hair. It keeps your hair organized and minimizes exposure to environmental stressors, thereby helping to maintain hair health.
The Waterfall Braid is versatile enough to be worn at both formal events and casual outings, making it a fantastic choice for anyone looking to diversify their medium-length hairstyles.
3. Fishtail Braid Crown
The Fishtail Braid Crown offers a regal and intricate look that is surprisingly easy to achieve and is perfect for medium length hair.
This hairstyle wraps around your head giving a crown-like effect, making it an excellent choice for both formal events and casual days where you want to feel a bit more polished.
How to Create a Fishtail Braid Crown
Prepare Your Hair: Brush your hair to remove any tangles and apply a light mousse to give your hair some texture and hold.
Start on One Side: Pick up a small section of hair just behind your ear and split it into two smaller sections.
Begin the Fishtail Braid: Alternately pull small strands of hair from the outside of each section and cross it over to the inside of the opposite section. Continue this pattern, working towards the back of your head.
Continue Around the Head: As you braid, gradually add more hair from the front and keep braiding around the crown of your head.
Finish the Braid: Once you reach the starting point, secure the end of the braid with a small elastic and tuck it under the beginning of the braid, securing with pins.
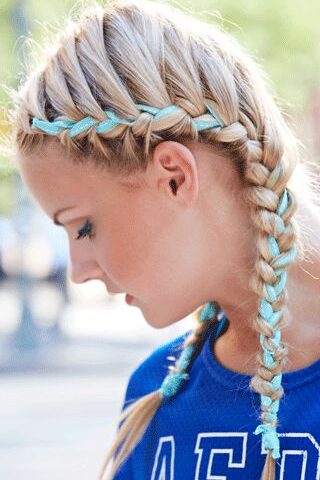
4. French Braid with Ribbon
The French Braid with Ribbon combines traditional elegance with a playful twist, making it a standout choice for those with medium length hair.
This style not only highlights the versatility of braiding techniques but also allows for personalization through the choice of ribbon, adding a unique touch to the classic braid.
Preparation and Tools
Before you begin, ensure you have the following:
A rat tail comb for precise parting
A brush for smoothing
Large hair clips for sectioning
Bobby pins and rubber bands for securing the braid
A ribbon, approximately four feet in length, preferably in a color that contrasts or complements your hair
Creating the French Braid with Ribbon
Part Your Hair: Start with a subtle zigzag part in the middle of your head to add an element of intrigue right from the onset.
Section and Clip: Create a triangle part on both sides of the head and secure these sections with clips to manage your hair easily as you braid.
Place the Ribbon: Position your chosen ribbon under the clipped triangle part on one side and pin it in place with a bobby pin to start integrating it into your braid.
Begin Braiding: Start with a traditional three-strand braid, incorporating the ribbon into one of the strands. Ensure the ribbon remains on top as you cross the strands to keep it visible.
Add Hair and Adjust Ribbon: Continue adding hair to the braid with each stitch, adjusting the ribbon to ensure it stands out. If the ribbon slips, twist it back into place.
Secure and Decorate: Once you reach the end of the braid, secure it with a rubber band and create a decorative bow with the remaining ribbon ends.
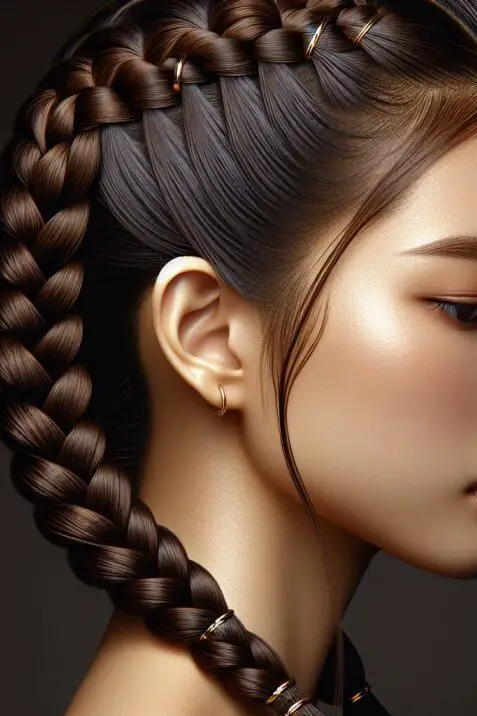
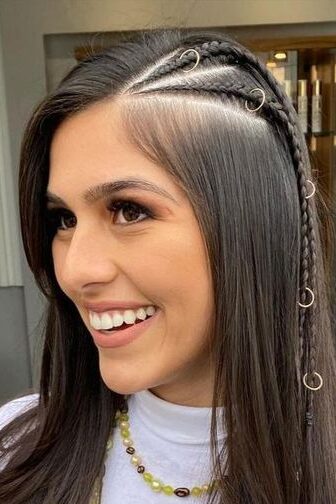
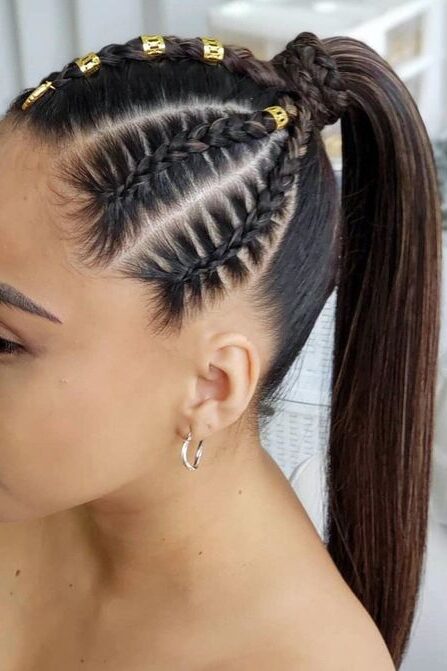
5. Boxer Braids with Hair Cuffs
Boxer braids, also recognized as Dutch braids, are not just a trend but a dynamic hairstyle that combines style with practicality, especially for medium length hair.
This braid begins with a center parting, leading to a sleek, pulled-back look that is both sporty and chic. Here’s how you can achieve this look:
Start with a Center Parting: Ensure your hair is detangled. Use a comb to create a sharp center parting from the forehead to the nape of your neck.
Tie One Side Off: To manage your hair easily, tie off one side with a hair tie. This allows you to focus on creating a perfect braid on the other side without interference.
Begin Braiding: Pick up three small sections of hair at the top of the free side. Start the braid by crossing the right strand under the middle one, then the left strand under the new middle strand. Continue this pattern, adding more hair to each strand as you move back.
Secure with a Hair Elastic: Once you reach the back of your head, secure the braid with a hair elastic. Ensure it’s tight enough to hold but not so tight that it causes discomfort.
Repeat on the Other Side: Mirror the process on the other side to ensure symmetry and balance in your look.
To elevate this style, adding hair cuffs can transform the braids from casual to chic. Hair cuffs are easy to clip around the braids and come in various colors and designs, allowing for personalization of your hairstyle. They not only add a metallic flair but also help in keeping any flyaways tamed.
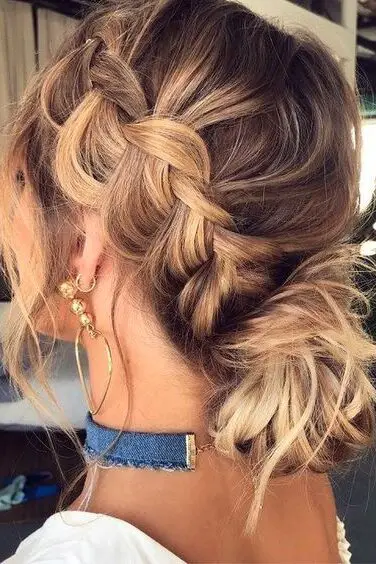
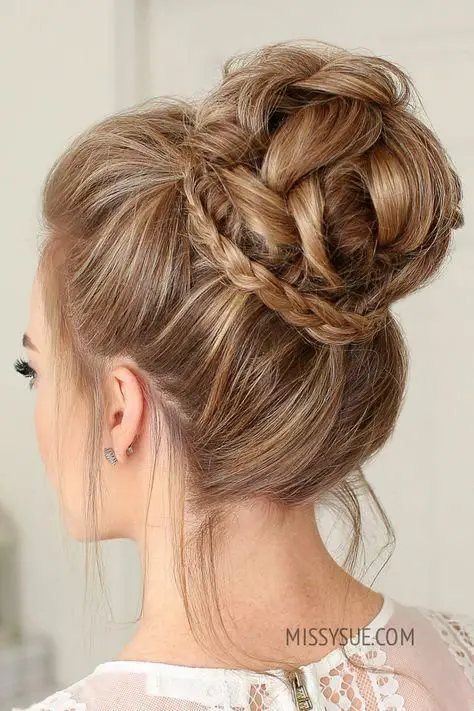
6. Messy Bun with Braid Detail
Step-by-Step Guide for the Messy Bun with Braid Detail
Prepare Your Hair: Begin by ensuring your hair is free from tangles. A light mousse can be applied to add texture, which helps in securing the style.
Create the Base Ponytail: Pull your hair back and secure it into a ponytail at the desired height for your bun. For a messier look, scrunch the hair at the base of the ponytail.
Form the Bun: Twist the ponytail around the base to form a bun. Secure with bobby pins, allowing some strands to fall freely for a relaxed appearance.
Add the Braid: Take a section of hair and braid it loosely. This braid will wrap around the bun to give an elegant detail. Secure the end with a small elastic before wrapping it around the base of the bun.
Secure the Braid: Use bobby pins to discreetly secure the braid around the bun. Ensure it lies flat against your head for a polished look.
Adjust for Softness: Gently pull at the braid and the bun to loosen them slightly. This step enhances the soft, effortless vibe of the hairstyle.
Final Touches: Add a light spray of hairspray to hold the style in place. Optionally, accessorize with decorative pins or a ribbon for an extra touch of charm.
Its versatility makes it suitable for various hair textures and lengths, particularly medium hair, ensuring anyone can achieve this stylish look with ease.
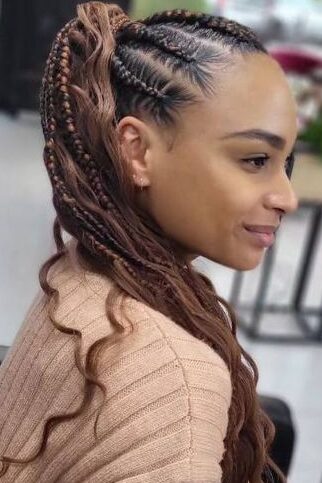
7. Braided Ponytail with Highlights
Preparing Your Hair
Wash Your Hair: Start with freshly washed hair to ensure volume and lift, as older hair might be weighed down by oils and pollution.
Blow-dry for Volume: Use a low heat setting while blow-drying, focusing on the roots. Dry in the opposite direction of growth to maximize lift.
Apply Volumizing Product: Add a dry shampoo at the crown and back for extra volume. Massage your scalp to activate the volumizing effect.
Creating Texture and Volume
Curl Your Hair: Use a 1 to 1.25-inch curling iron to create loose waves. Curl away from the face, leaving ends out for a modern, textured look.
Cool Down: Allow your hair to cool without touching it. Avoid brushing to maintain the integrity of the curls.
Adding Extensions and Braiding
Insert Extensions: Place hair extensions above the ears to enhance volume and length.
Start the Dutch Braids: At the crown, begin weaving two Dutch braids, adding hair to the braid as you move towards the top of the ears.
Secure the Braids: Direct each braid over the ear and pin at the nape, ensuring pins are hidden by crossing the braids.
Forming the Ponytail
Gather Hair: Combine all your hair, including the braids, into a high ponytail. Secure tightly.
Adjust for Fullness: Pull at the top sections of the ponytail to boost volume and give a fuller appearance.
8. Side Braid with Curls
Step-by-Step Guide to Creating the Side Braid with Curls
Prepare Your Hair: Begin by blow-drying or brushing your hair using a blow dry brush to smooth it out and add volume. This initial step sets the foundation for a sleek and elegant braid.
Pin Up the Crown Section: Carefully pin up a section of hair near the crown, allowing some strands to softly frame your face. This technique adds a touch of romance to the style.
Start the Dutch Braid: On the thicker side of your part, select a section of hair and start weaving a Dutch braid. This braid, also known as a reverse or inside-out braid, adds a striking three-dimensional look.
Add Volume to the Braid: As you braid along the side, gently pull at the edges of the braid to widen it, creating a fuller and more dramatic appearance.
Secure and Wrap the Braid: Continue the braid until you reach the desired length and then secure it with bobby pins on the opposite side, ensuring it wraps beautifully around your head.
Curl the Remaining Hair: Use a curling iron to curl the hair that flows down the side, enhancing the braid with soft, cascading curls that add movement and grace to the overall look.
Final Adjustments: Adjust the braid and curls, ensuring everything is symmetrical and secure. This might involve re-pinning or re-curling certain sections for perfection.
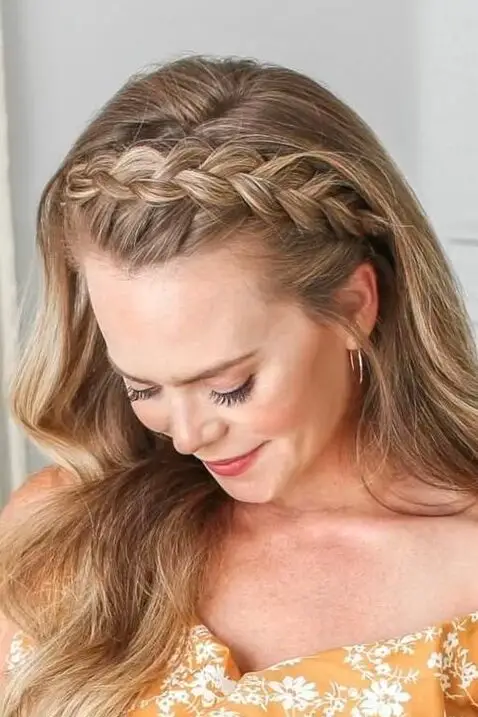
9. Dutch Braid Headband
The Dutch Braid Headband is a stunningly versatile hairstyle for medium length hair, perfect for keeping bangs neatly away from the face while still flaunting some flowing locks.
How to Create the Dutch Braid Headband
Prepare Your Hair: Start by parting your hair from ear to ear. Comb it out to eliminate any tangles and lightly moisten with water. Apply a spray gel to the roots to help the braid hold its shape.
Begin the Braid: At the front, take a small section of hair and divide it into three strands. Initiate the braid by crossing the right strand under the middle strand, then the left strand under the new middle strand.
Add Hair to the Braid: Continue the process by adding more hair to each outer strand as you cross under from the outside, but do not add hair when crossing from the inside. This technique helps create the ‘headband’ effect.
Secure and Pancake the Braid: Once the braid is complete, secure the end with an elastic. For added fullness, gently pull at the edges of the braid (pancaking) to widen it.
Final Touches: Take a small section of hair from under the braid to create an anchor point and secure the braid to it. This helps the headband stay in place and adds to the boho chic look.
For those looking to dress up this hairstyle, integrating accessories like pearls or small flowers can add a touch of elegance, making it suitable for both everyday wear and special occasions.
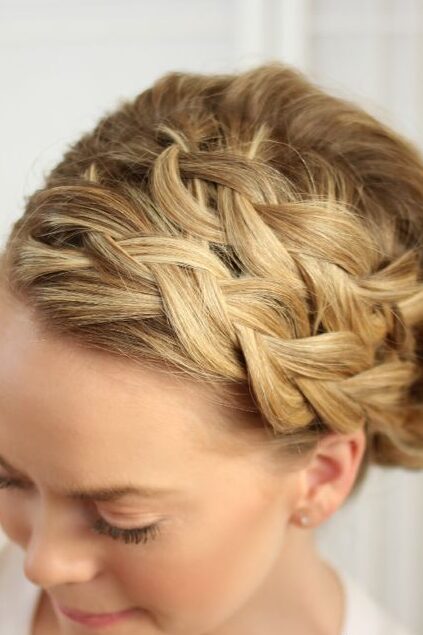
10. Milkmaid Braid Updo
The Milkmaid Braid Updo is a charming and functional hairstyle that perfectly suits medium length hair.
This style begins with a simple parting of the hair down the middle, leading to the creation of two neat three-strand braids.
These are then stylishly pinned around the front of the head to craft a look that combines both traditional and modern elements.
Step-by-Step Creation of Milkmaid Braid Updo
Part and Prep Your Hair: Start by parting your hair down the middle. It’s fine if the part is slightly messy, which can even add to the style’s relaxed charm. Use a bit of dry shampoo to add texture and grip to your hair.
Braid Each Side: Pull all your hair behind your ears and divide it into three sections on each side. Braid each side tightly, securing the ends with small, clear elastic bands.
Loosen the Braids: Gently pull out small sections of the braids to fluff them up. This creates a fuller and more textured look, adding an element of depth to the hairstyle.
Frame Your Face: Pull a few strands out around your face to soften the look and frame your features beautifully.
Position and Pin the Braids: Bring the braids up around to the front of your head and flatten them slightly. Use bobby pins to secure the braids in place, making sure to hide the pins within the braids or under other sections of hair for a cleaner look.
Cross and Tuck the Braids: Cross the two braids at the back of your head. Tuck one braid underneath the other to conceal the ends and ensure everything looks neat and tidy.
Enhancing the Style
Accessorize: Add a whimsical touch by incorporating decorative elements like flowers or sparkling pins. These can be placed strategically along the braids or at the cross-section at the back.
Adjust for Hair Length: If your hair is on the shorter side, start the braids slightly further forward to ensure there’s enough length to pin them properly.
Final Touches: For an extra secure hold, add more bobby pins where necessary, crossing them over one another to lock them in place.
11. Double Dutch Braids
Double Dutch braids, a dynamic and stylish choice for medium length hair, provide both a chic look and practical benefits.
This hairstyle not only keeps hair neatly out of the face but also offers a versatile appearance suitable for various occasions, from casual outings to more formal events.
Step-by-Step Guide to Creating Double Dutch Braids
Part and Prep Your Hair: Use a sectioning comb to divide your hair into two equal parts. Secure one side with a hair tie to keep it out of the way.
Apply Smoothing Product: On the free side, apply a smoothing product like argan oil or a heat protectant to ensure a sleek finish.
Detangle and Smooth: Brush through the section to remove any knots, creating a smooth base for braiding.
Start the Braid: At the front, section out a small triangle of hair and divide it into three strands. Begin braiding by tucking the outer corner under the middle section, keeping the braid tight to the scalp.
Continue Braiding: As you add more hair to each strand, lift sections slightly to smooth and maintain neatness. Use duck bill clips if needed to hold sections in place.
Secure and Adjust: At the neck’s nape, ensure the braid remains tight and secure any loose strands with bobby pins. Repeat the braiding on the other side.
Finish with Flair: After completing both braids, gently tug at sections of the braid to create a fuller appearance. Secure the ends with clear elastics, hiding them by wrapping a small strand of hair around the elastic and pinning it in place.
Enhancing Your Double Dutch Braids
Add Extensions: For added volume and length, clip in Luxy Hair extensions in the direction of the braid before starting. Make sure they blend seamlessly.
Increase Texture: Apply products like dry shampoo or styling paste to add texture and hold, making your braids look fuller and more defined.
Create Waves: These braids can also act as a heat-free method to style your hair. Once removed, they leave your hair with beautiful waves.
12. Lace Braid
Creating a Lace Braid is a delightful way to add elegance and charm to your medium-length hair.
This hairstyle is particularly appealing because it beautifully frames your face while maintaining a light, airy feel that’s perfect for any occasion, from a casual day out to a more formal event.
Step-by-Step Guide to Crafting the Lace Braid
Section Your Hair: Begin by sectioning off a small piece of hair near the forehead, about 1-2 inches wide. This will form the base of your lace braid.
Divide and Begin Braiding: Divide this section into three equal parts. Start the braiding process by crossing the right strand over the middle, then the left strand over the new middle.
Add Hair to the Braid: After the first stitch, before crossing the left strand over the middle again, add a new section of hair from the hairline to the left strand. This addition should only be done on the side closest to your face to create the ‘lace’ effect.
Continue the Pattern: Repeat the process of adding hair to the left strand each time before you cross it over the middle. This technique allows the braid to gently curve along the side of your head.
Secure the Braid: Once you reach the crown of your head or the desired stopping point, continue with a regular three-strand braid for the remaining length of the hair.
Finish with Style: Secure the end of the braid with an elastic. For a more relaxed and voluminous look, gently tug on the sections of the braid to loosen it slightly.
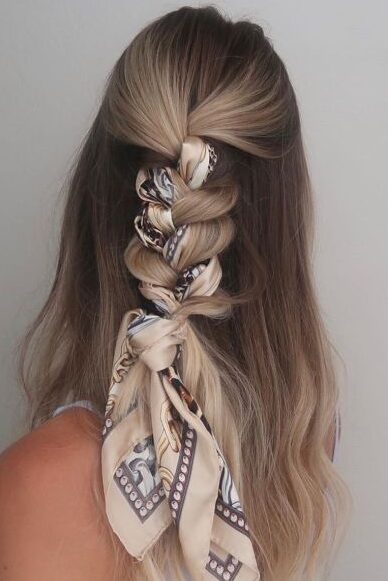
13. Braided Half-Up, Half-Down with Scarf
Begin by preparing your hair with Repairing Shampoo and Conditioner.
For this particular hairstyle, choose a square scarf, which works best for creating a stylish half-up, half-down look. Fold the scarf into a rectangular shape to integrate seamlessly into your hair.
Create a base by pulling your hair into a ponytail and dividing it into two equal sections. Place the middle of the scarf vertically between the two sections of hair, right at the base of the ponytail.
This placement is crucial as it serves as the foundation for the braiding.
Begin braiding by integrating the scarf into your hair. Keep the braid tight and ensure the sections are clearly separated for a neat appearance. The scarf should become a part of the braid, adding a unique texture and color contrast to the hairstyle.
As you braid, remember the pattern that helps maintain the correct braiding sequence: left over right, top down, left bottom up, right. This method helps in keeping the braid consistent and incorporating the scarf effectively.
Once the braid reaches your desired length, secure it with a small, clear hair elastic. This choice of elastic keeps the focus on the braid and the scarf without any visible distractions.
To add a final touch, gently pancake the braid. This means pinching the outside of the twist and pulling it outwards slightly to fan it out, which enhances the braid’s volume and showcases the scarf more prominently.
The entire process is surprisingly quick, taking about four minutes to complete, as demonstrated in the tutorial.
This hairstyle is not just about looking good; it’s about transforming your medium-length hair into a statement of style and creativity, effortlessly blending functionality with elegance.
14. Messy Braided Bun
Step-by-Step Guide to Creating the Messy Braided Bun
Prepare Your Hair: Start with your hair down and gently brush to eliminate any tangles. This will help in handling your hair easily as you style.
Create the Base: Section off the top third of your hair, approximately 3 inches wide, at an angle. This section should leave some hair in the front and back. Secure the rest of your hair temporarily with a clip to keep it out of the way.
Initial Styling:
Divide the top section into three parts.
Twist the middle section around your finger to create volume and bobby pin this section at the back of your head.
Form the Ponytail:
Release the clipped hair and divide it into three sections again.
Gather the middle section into a ponytail at the back of your head, securing it with a hair tie.
Braid and Pancake:
Braid the ponytail into a regular three-strand braid all the way down and secure with a clear elastic.
For added volume, pancake the braid by gently tugging at the outer loops.
Create the Bun:
Wrap the braided ponytail around its base to form a bun.
Secure the bun with bobby pins, ensuring any loose ends are neatly tucked and pinned.
Add Texture and Volume:
Optionally, curl the loose sections of hair with a curling iron or wand to add elegance.
Loosen up the braid and around the bun to enhance the messy look.
Final Touches:
Use hairspray for additional hold and to manage any flyaways.
Consider accessorizing with decorative pins or flowers for a chic finish.
15. Braided Bangs with Ponytail
Braided Bangs with Ponytail offers a youthful and charming look, ideal for adding a playful yet sophisticated touch to your hairstyle repertoire.
This style beautifully combines the elegance of braids with the casual flair of a ponytail, making it versatile for both everyday wear and special occasions.
Creating Braided Bangs with Ponytail
Prepare Your Hair: Start by applying a heat protectant and curling your hair to achieve a messy, romantic base which enhances the overall texture.
Braid the Bangs: Grab a chunk of hair from each side of your head. Create a fishtail braid on each side, ensuring they are symmetrical and neatly done.
Secure the Braids: Tie off the braids at the back of your head and pin them together with bobby pins, ensuring they stay in place and blend seamlessly.
Form the Ponytail:
For a high, messy ponytail, gather all your hair and secure it with a hair elastic high on the back of your head. Conceal the elastic by wrapping a strip of hair around it.
For a low, voluminous ponytail, pull your hair back to the nape of your neck. Secure it loosely to maintain volume and gently tug at the top to enhance poofiness.
Add a Ribbon: Tie a ribbon around the ponytail for a girly and whimsical touch, choosing a color that complements your outfit or occasion.
16. Inverted French Braid
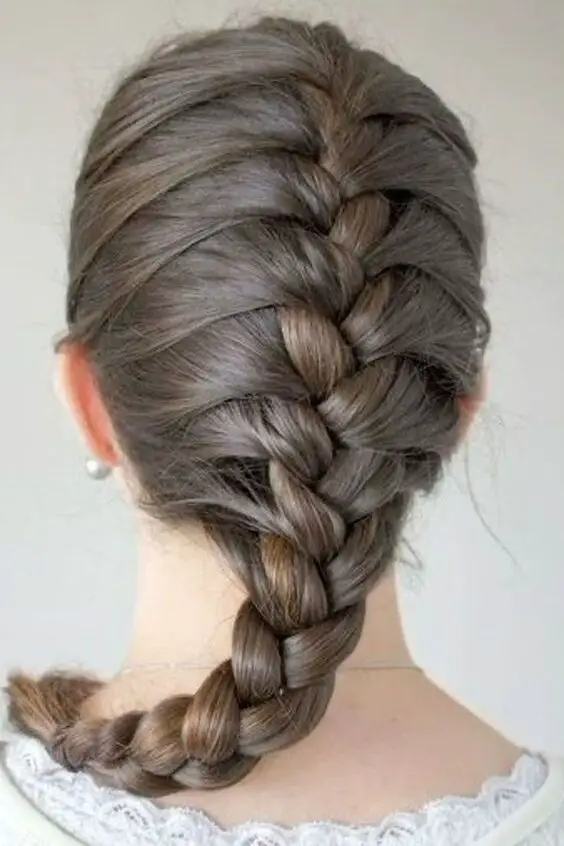
The Inverted French Braid, also known as the reverse French braid, is a stunning twist on the classic braid that begins at the hairline and works its way down.
This technique involves an underhand method where you cross strands under each other instead of over, creating a braid that stands out with a 3D effect on the scalp. Here’s how you can achieve this eye-catching style:
Step-by-Step Guide to Crafting an Inverted French Braid
Prepare Your Hair: Start by brushing your hair to remove any tangles. This ensures smooth braiding.
Begin at the Hairline: Select a small section at the top of your head and divide it into three equal parts.
Start Braiding: Move the right strand under the middle strand, then the left strand under the new middle. This is your initial stitching.
Add Hair: Continue the braid by adding small sections of hair to each strand before crossing it under the middle. Keep the additions even to maintain a uniform look.
Work Down to the Neck: As you add more hair and progress, direct the braid down towards the nape of your neck, following the natural curve of your head.
Secure the Braid: Once you reach the nape, continue with a regular three-strand braid for the remaining length and secure with a hair tie.
Add Volume: For a fuller braid, gently tug at the sides of the braid to loosen it slightly, which adds volume and a more relaxed appearance.
Final Touches: If desired, wrap a small strand of hair around the hair tie to conceal it, securing the end with a bobby pin under the braid.
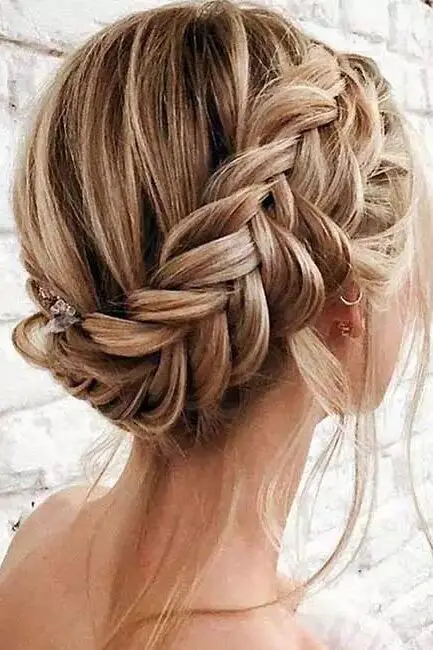
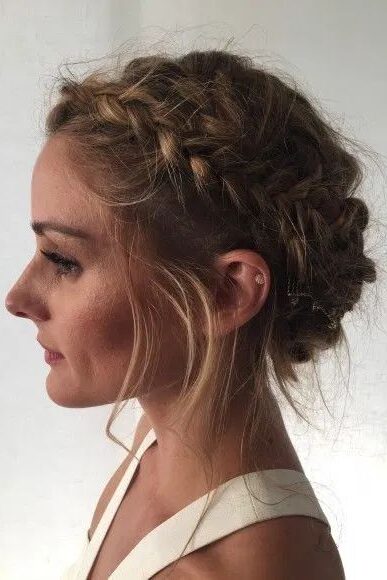
17. Braided Halo
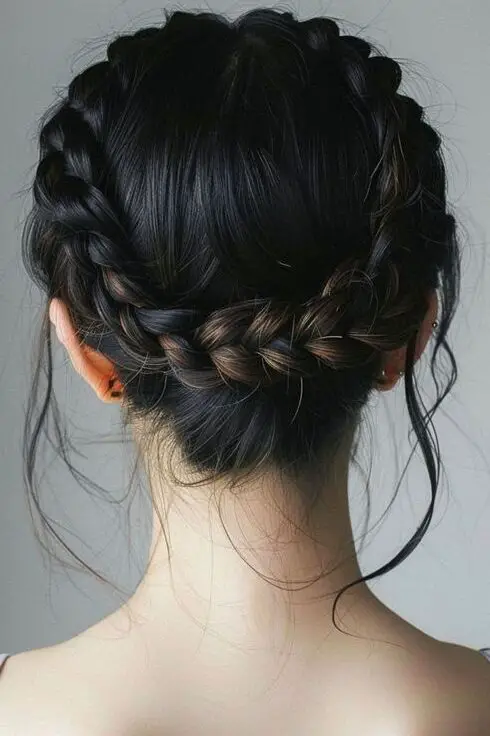
The Braided Halo is a truly stunning hairstyle that encapsulates both elegance and simplicity, making it an excellent choice for medium length hair.
This style, often referred to as a “crown braid,” encircles your head with a plait that resembles a halo, offering a heavenly and regal appearance.
How to Create the Braided Halo
Start with Textured Hair: For better grip and a more durable braid, use a texturizing spray on your hair before you begin.
Part Your Hair: You can start the braid from any point, but typically, it begins at the front or side of your head.
Begin Braiding: Pick up three strands of hair and start a regular French braid, adding more hair to the braid as you move around your head.
Continue the Circle: Work your way around the head, keeping the braid as close to the scalp as possible for a neat look.
Finish the Braid: When you return to the starting point, finish off the braid with the remaining hair and tuck the end under the starting point. Secure it with pins.
This hairstyle is not just visually appealing but also practical. It keeps hair neatly away from the face, making it perfect for both casual and formal occasions.
Its versatility allows it to be dressed up with accessories like flowers or jewels for weddings or other special events, or worn plain for a more understated, everyday look.
The Braided Halo is particularly beloved for its ability to highlight the natural beauty and texture of your hair while offering a comfortable, secure fit that can last all day.
18. Braided Pigtails with Bobby Pins
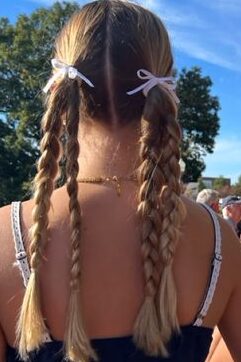
Braided pigtails are not just a throwback to your school days; they’ve evolved into a chic hairstyle perfect for adding a playful yet polished touch to your look.
Ideal for medium length hair, this style uses the natural texture of day 2 hair, which provides the perfect grip for braiding, although freshly washed hair can also be used with a bit of dry shampoo to add texture.
Creating Braided Pigtails with Bobby Pins
Prepare Your Hair: Begin by splitting your hair into two sections down the back of your neck. If your hair is freshly washed, apply some dry shampoo to give it more texture.
Start the Braids: At the top of each section, create a small ponytail. Make another ponytail right behind the first one on either side.
Form the Pigtails: Split the first ponytail in half and pass it underneath the second ponytail, adding some hair before securing it. Repeat these steps down to the nape of your neck.
Secure the Style: Once you reach the nape, you should have two ponytails. Take a piece of hair from the end, wrap it around the two ponytails, and secure it with a bobby pin for a neat finish.
Add Details: For a sassier look, leave the hair from the nape of your neck out of the twist. This adds a more textured look to the pigtails.
Loosen and Tousle: Gently massage the braids with your fingers to loosen them up for a more tousled appearance. Pull out a few strands around the temples and ears to soften the look.
Advanced Finishing: Optionally, wrap a small piece of hair around the elastic bands and pin it in place to hide them, giving your pigtails a seamless look.
This hairstyle is beautifully versatile, suitable for a casual day out or even a more formal setting when styled neatly.
Final Thoughts
Throughout this post, we’ve explored a variety of braids hairstyles tailor-made for medium length hair, each unique in its beauty and versatility.
As we conclude, it’s evident that the world of braided hairstyles for medium length hair is ripe with opportunities for exploration and innovation.
Embracing these hairstyles means stepping into a realm where tradition meets modernity, and simplicity coexists with sophistication.
As you experiment with these trendsetting braids, you’re not just styling your hair; you’re weaving your personality and flair into every strand, crafting an image that’s uniquely yours
Leave a Reply
You must be logged in to post a comment.