Searching for the perfect prom hairstyles for short hair can be daunting, but your quest ends here. This post dives into the world of elegant short hair updos, mesmerizing braids for short hair, and captivating short hair curls that promise to elevate your prom look.
These styles aren’t just about making a statement; they’re about showcasing the versatility and charm of short hair, proving that length doesn’t limit creativity when it comes to prom hairstyles for short hair.
From chic short hair waves that add a soft romance to edgy braided hairstyles for short hair that stand out in the crowd, this collection covers it all.
You’ll discover down prom hairstyles for short hair that blend sophistication with simplicity, and for those aiming to make a bolder statement, the prom hairstyles for short hair updos offer intricate designs that are sure to turn heads.
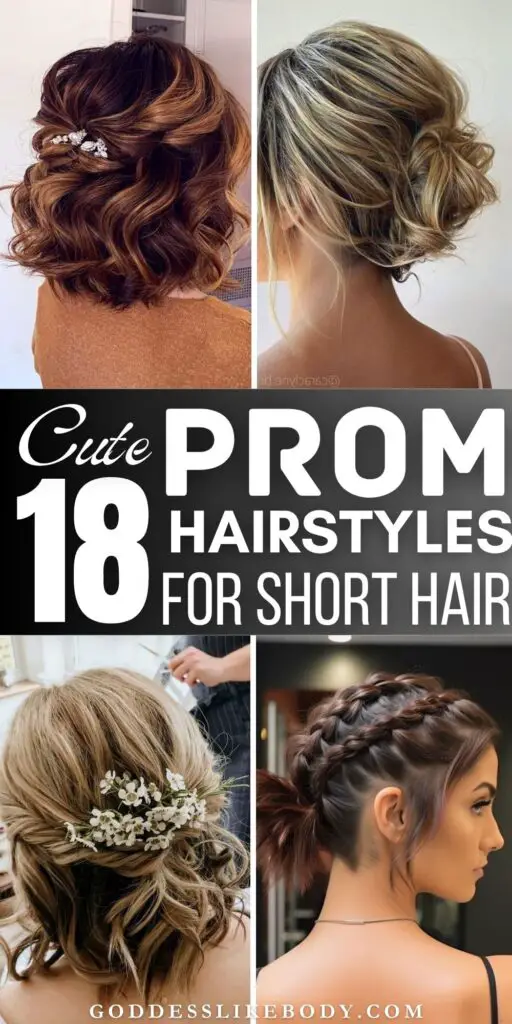
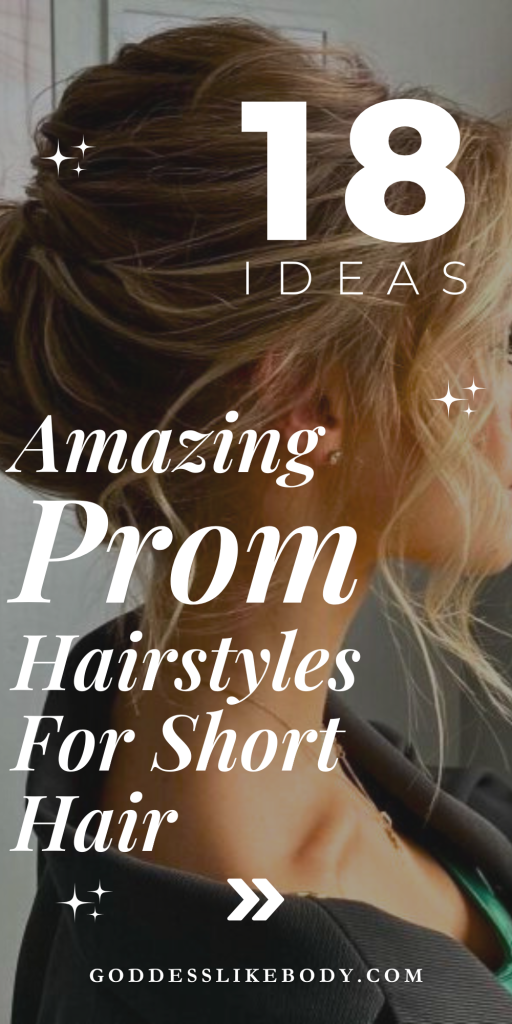
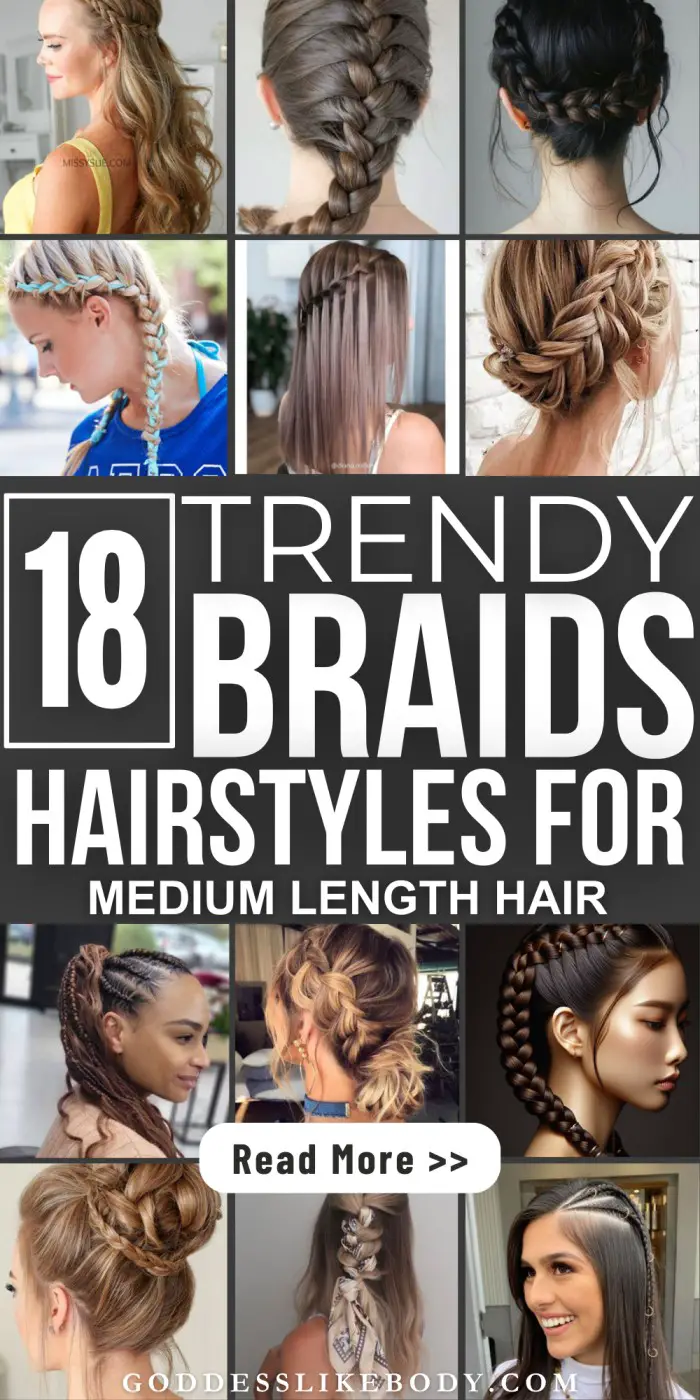
Busy? Save this pin for later.
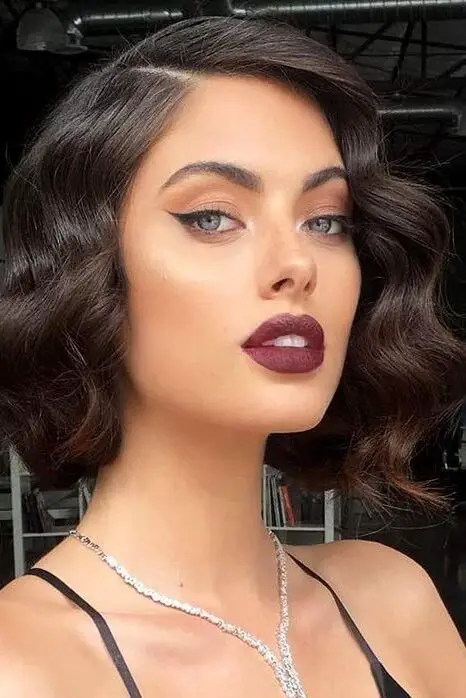
1. Hollywood Waves
To achieve the glamorous Hollywood Waves, a timeless choice for prom, follow these detailed steps to ensure your short hair captures the elegance of classic cinema stars.
Step-by-Step Guide:
Preparation:
Begin by protecting your hair from heat damage with a product like Nexxus Prep and Protect Leave-In Spray, which contains hyaluronic acid.
Detangle your hair and apply a leave-in conditioner for added moisture.
Styling:
Dry your hair straight using a brush. As you approach dryness, create a deep side part to frame your face beautifully.
Section your hair, starting from the bottom half, then divide it into smaller sections for precise curls.
Use a curling iron, such as the Shape and Define Multi-Styler. Before curling each section, apply a flexible hold product like Bodybuilder by Kevin Murphy to ensure your curls have both hold and shine.
Carefully wrap each section around the curling iron, holding the iron at an angle. Allow the curl to cool on the iron before gently releasing it to maintain its shape.
Finishing Touches:
Once all sections are curled, allow them to cool completely. Then, gently brush out the curls with a soft bristle brush, starting from the ends, to create a soft, elegant wave.
Set your hairstyle with a light hold hairspray, such as Aveda’s Air Control, to ensure your waves hold throughout the evening without feeling stiff.
For added volume and a touch of classic glamour, use a teasing comb at the roots and apply Aveda’s thickening tonic.
These steps will help you achieve a stunning Hollywood wave look that’s perfect for short hair, ensuring you shine at your prom with a hairstyle steeped in vintage charm.
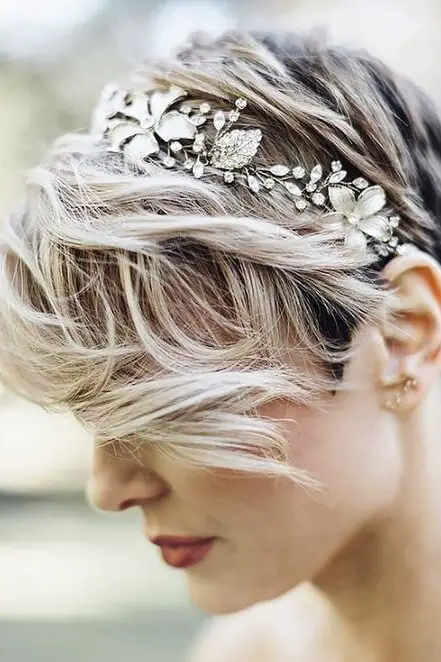
2. Textured Pixie with Headband
To style a textured pixie with a headband, begin by selecting the right type of headband to complement your look.
For a casual yet chic appearance, Sadie, a well-known hairstyling influencer, recommends using thin, jeweled, or embellished headbands that enhance the pixie without overwhelming it.
Step-by-Step Styling Guide:
Preparation:
Start with clean, dry hair. If your hair lacks texture, apply a small amount of texture paste, such as Road auntie Beverly Hills texture paste, to give it some grip and volume.
For additional flair, consider making a DIY headband by repurposing fabric from an old skirt or using a stylish bandana.
Styling:
Place your chosen headband around your head. Adjust it to sit comfortably above the forehead or along the hairline, depending on the look you’re aiming for.
Use a back combing brush to tease the hair at the back and roots gently, enhancing the texture and volume of your pixie cut.
Finishing Touches:
For a polished look, apply a small amount of edge control paste to tame any flyaways and style your edges with a fine-tooth comb.
If using a scarf or fabric headband, tie it securely and tuck in the ends for a neat finish.
Experimenting with different accessories like scarf bandanas, wire headbands with patterns, or even slouchy beanies and berets for colder months can add a fun twist to your pixie cut. Each accessory can transform your hairstyle, making it suitable for various occasions, from a simple day out to a more formal event like prom.
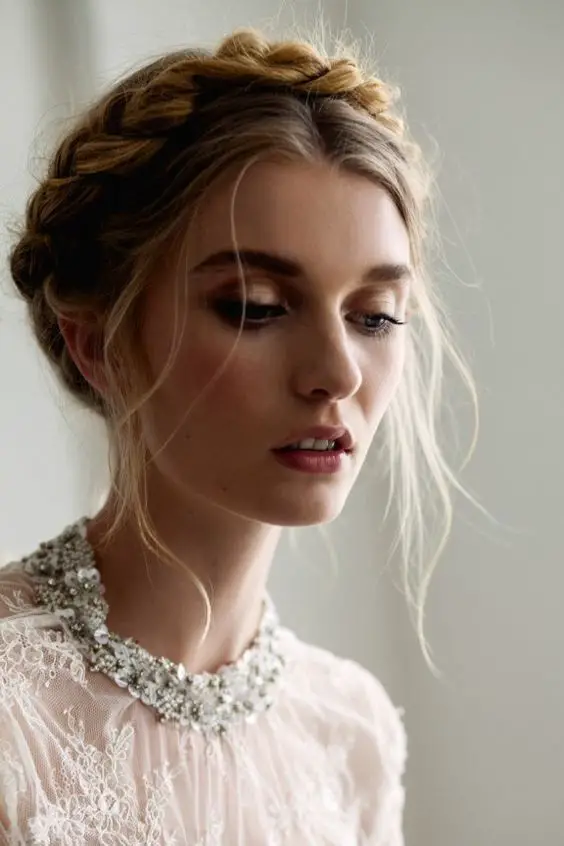
3. Braided Crown with Curls
Step-by-Step Guide:
Preparation:
Start by applying Living Proof Perfect Hair Day dry shampoo to add texture and volume, essential for holding the braids in place.
For those with very short hair, consider using a small amount of styling mousse to enhance grip and manageability.
Creating the Braids:
Divide your hair into two equal sections as if you were making pigtails. Begin braiding each section at the front of your head, moving backwards to create a tight, French braid.
Secure each braid with a clear elastic band. Gently pull at the braids to loosen them slightly, giving a more relaxed and romantic appearance.
Forming the Crown:
Cross the braids over the top of your head to form the crown. Tuck the ends under the opposite braid and secure discreetly with bobby pins.
Use additional pins to ensure the braids are firmly attached and to maintain the shape of the crown.
Additional Styling Tips:
- For a more festive look, such as for prom or holiday events, consider weaving in small flowers or decorative pins along the braids.
- This style works exceptionally well on second-day hair, which can hold styles better due to its reduced slipperiness.
Maintenance and Wear:
- To keep your braided crown fresh and in place all night, finish with a spritz of OGX Locking + Coconut Curls Finishing Mist. This will add a subtle shine and ensure your style holds without becoming crunchy.
- The braided crown with curls is versatile and can be adapted for various short hair lengths and types, making it a perfect choice for a standout prom hairstyle.
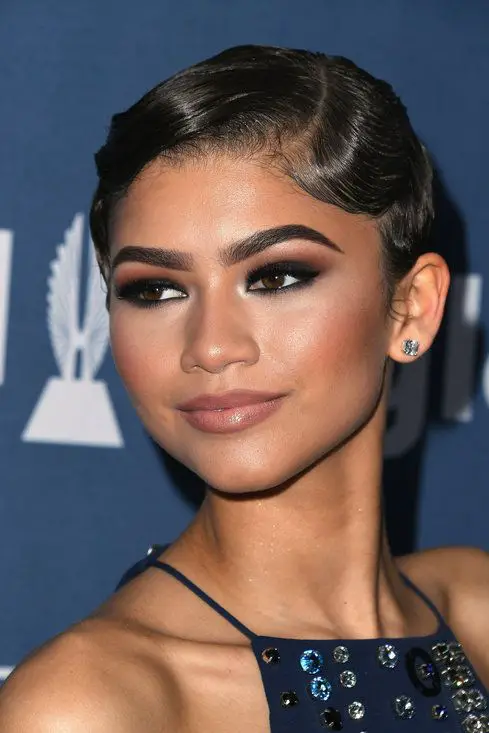
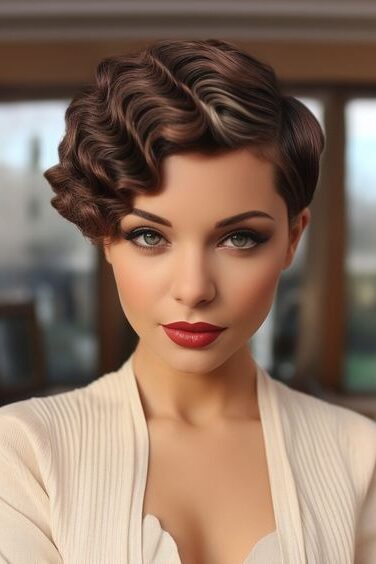
4. Finger Waves with Side Part
Finger waves with a side part are a chic and timeless choice for prom, especially for those with short hair.
Step-by-Step Styling Process:
Preparation:
Begin by applying a generous amount of styling gel, such as Wet Line Extreme Gel or Nairobi Wrapping Lotion for stronger hair types like 3c 4a. This will help in sculpting the waves more precisely.
Create a distinct side part using a tail comb to define the direction of the waves.
Styling the Waves:
Using a fine-tooth comb, start at the front and comb the hair in alternating C and S shapes along the side of the head. This classic technique creates the iconic finger wave look.
For the back, push the hair forward slightly and then comb it back to create a flat wave, ensuring the style wraps seamlessly around the head.
Setting and Finishing Touches:
After shaping the waves, cover your hair with a silk or satin scarf to absorb excess product and help set the style firmly.
If your hair tends to dry quickly, keep a spray bottle handy to dampen it while styling. This will prevent the gel from setting too quickly and allow for adjustments.
Once set, gently comb through the waves with a wide-tooth comb for a softer, modern look and apply a sculpting wax to smooth any flyaways.
Finish by curling the ends with a medium barrel curling iron, focusing on the middle and ends of the hair to maintain the flat appearance at the back. Secure with a light hold hairspray to keep everything in place throughout the night.
For those new to styling finger waves, start by laying the hair down flat, brush it back, and then create small “S” shapes with the comb. This beginner-friendly approach simplifies the process while still delivering a stunning result.
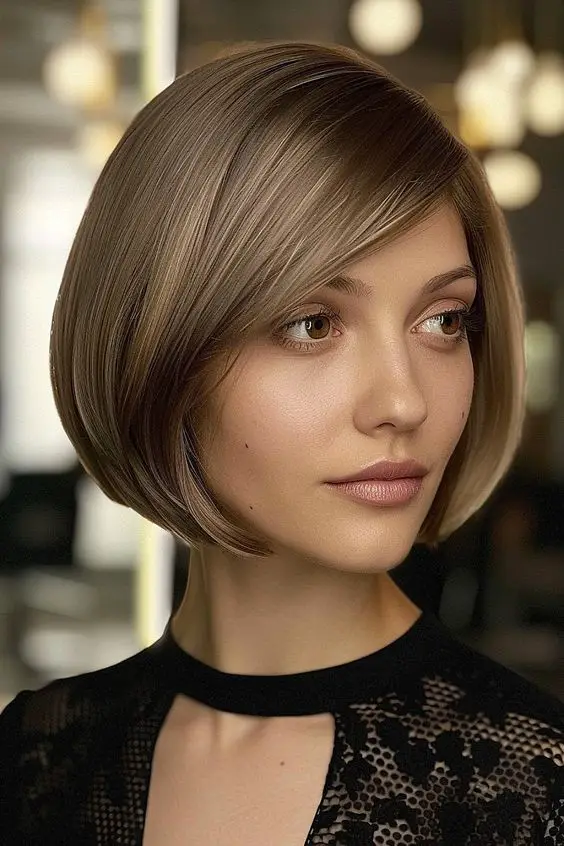
5. Polished Bob with Deep Side Part
Step-by-Step Styling Guide:
Preparation:
Begin by washing your hair with a volumizing shampoo and conditioner to ensure your hair has the necessary lift and texture.
Apply a heat protectant spray evenly throughout damp hair to safeguard against heat damage during styling.
Creating the Deep Side Part:
Use a tail comb to sharply define a deep side part on your preferred side. This parting will help accentuate your facial features and add a touch of sophistication to the bob style.
For those with thinner hair, consider applying a root-lifting spray at the parting to enhance volume and fullness.
Styling the Bob:
Blow dry your hair with a large barrel round brush, focusing on lifting at the roots and smoothing down the lengths for a polished finish.
For a sleek look, use a flat iron to straighten your hair, gently curving the ends under. If you prefer waves, opt for a curling iron to create soft curls that add body and movement.
Finish with a light mist of hairspray to hold your style in place, ensuring your polished bob looks great all night.
Additional Styling Tips:
To add a modern twist to your polished bob, consider incorporating subtle highlights or a balayage effect, which can enhance the depth and dimension of your hairstyle.
For a more dramatic evening look, accessorize with a statement hair clip or a sleek headband placed just behind the part to draw attention to the deep side parting.
Maintenance and Wear:
To maintain the sleekness of your polished bob, use a smoothing serum or oil to tame any flyaways and add a glossy shine to your hair.
Regular trims are essential to keep your bob looking sharp and well-shaped, especially if you have a blunt or asymmetrical cut.
This polished bob with a deep side part not only offers a classic look but also versatility, making it suitable for various prom themes and outfit styles. Whether you choose to style it straight or with waves, this hairstyle remains a chic and timeless choice for your special night.
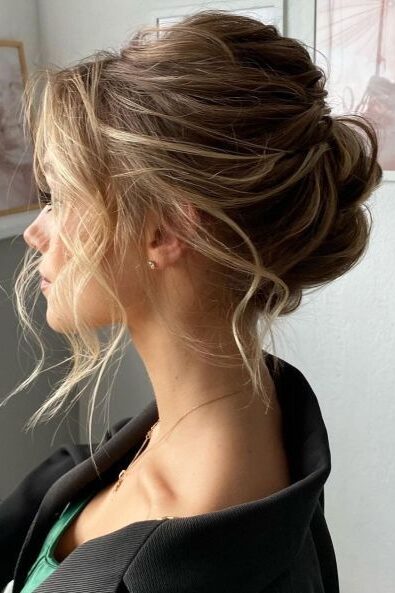
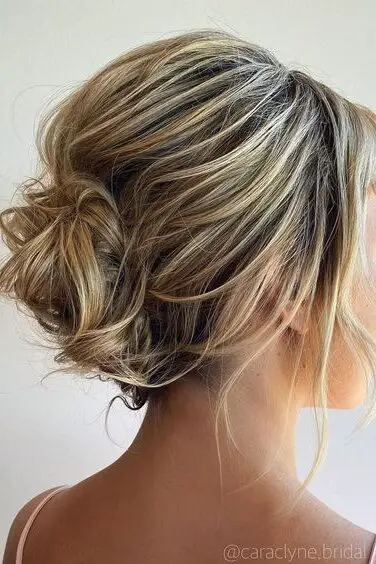
6. Messy Bun with Face-Framing Pieces
Preparation:
To set the stage for a perfect messy bun, especially if your hair is freshly washed, apply a generous amount of Batiste dry shampoo.
This not only absorbs excess oil but also provides the necessary texture and body, making styling easier and more effective.
Creating the Bun:
Gather Your Hair: Collect all your hair at your desired spot, whether it’s a high or low bun. Use your hands to loosely gather it to maintain a relaxed look.
Adjust Volume and Shape: Lightly tug at the top and sides of your hair to adjust the volume and shape of the bun to your liking.
Secure the Style: With a small, clear hair scrunchie, secure the gathered hair. Tuck any loose ends into the bun and pin them down with 2-3 bobby pins for extra hold.
Optional Finishing Touches:
For a more refined appearance, especially if you have baby hairs or shorter layers around your face, use a straightener to smooth them out. This adds a polished touch to your overall messy yet chic bun look.
Incorporating these steps will help you achieve a stylish messy bun with face-framing pieces, perfect for short hair, ensuring you look both casual and sophisticated for your prom night.
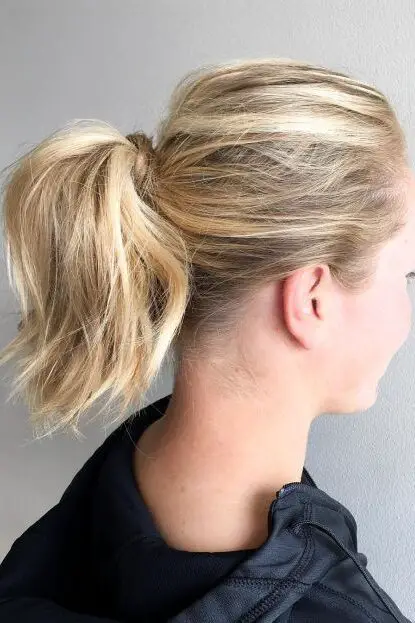
7. High Ponytail
Step-by-Step Guide:
Preparation:
Begin by applying Kenra Volumizing Powder at the roots to enhance texture and volume, crucial for supporting the high ponytail.
Curl the mid-shafts of your hair using a one-and-a-quarter-inch curling iron, leaving the roots and ends straight for a polished yet voluminous look.
Creating the Ponytail:
Start by splitting your hair into two sections. Secure the bottom half into a ponytail at the crown of your head.
Drop the top layer and gently brush it back, maintaining volume while smoothing over the surface. Secure this layer with an elastic around the first ponytail.
To conceal the elastic and add a chic touch, wrap a strand of hair around the base of the ponytail and secure with a bobby pin.
Finishing Touches:
Back brush the ponytail to enhance its fullness and apply Kenra Heat Cast Spray 12 on the ends for thermal protection and hold.
For added flair, mess with the front of the ponytail to create more volume and secure any baby hairs with bobby pins for a neat finish.
Optionally, accessorize with gold round hoop earrings to complement the voluminous style, drawing inspiration from celebrity looks like Hailey Bieber and JLo.
Additional Styling Tips:
Use a thick rubber band for the initial ponytail to add texture and prevent slippage.
For extra support and to maintain the volume throughout the event, consider placing a claw clip into the center of the ponytail.
To manage and maintain the volume, smooth over the top with a comb and apply a light hold hairspray to ensure your high ponytail stays voluminous and elegant all evening.
Maintenance and Wear:
To keep your high ponytail looking fresh, occasionally backcomb the crown section during the event and spritz with Kenra Volume Spray 25 for lasting hold.
This hairstyle is versatile and can be adjusted to suit various hair types and lengths, ensuring everyone can achieve a glamorous and voluminous high ponytail for prom.
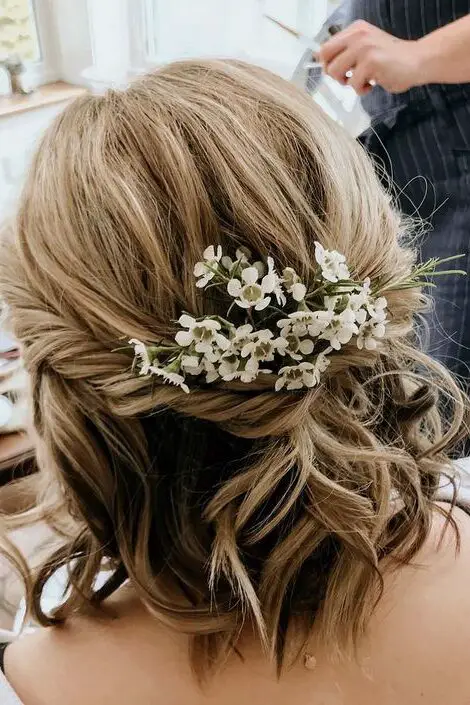
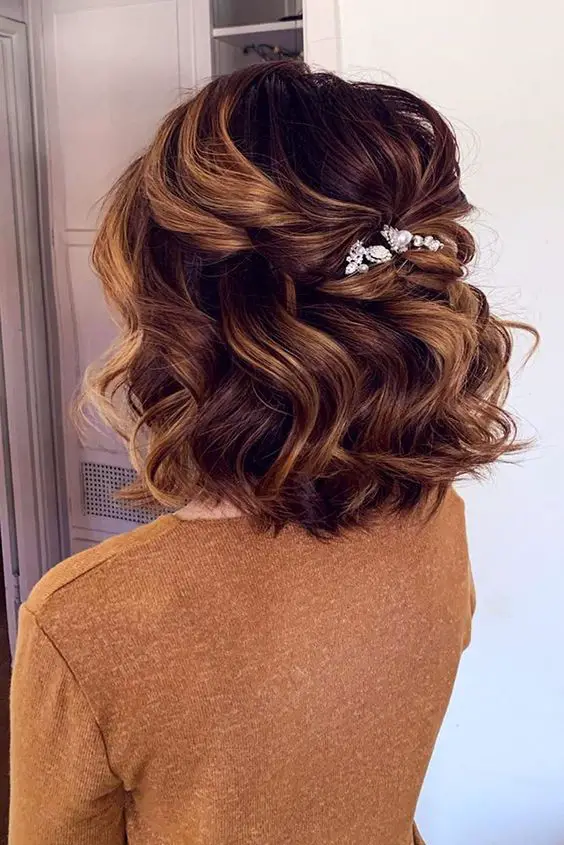
8. Half-Up Half-Down with Flowers
The Half-Up Half-Down with Flowers hairstyle brings a blend of elegance and simplicity, making it ideal for proms, weddings, and other formal occasions.
Lexie Hair Channel suggests a twisted version of this style that incorporates floral elements for a fresh, summery look.
Step-by-Step Guide:
Section and Prepare: Start by sectioning your hair just below the ears. Clip the top section out of the way to work on the bottom half first.
Twist and Secure: Optionally add hair extensions for volume. Create four even twists from the bottom half and secure each with hair elastics. Combine these at the back of your head, using a topsy tail technique for an intricate detail.
Add Floral Accents: Enhance the hairstyle with flowers. You can choose from a flower crown, flower pins, or a floral hairpiece to weave into the twists, depending on your outfit and the occasion.
Additional Tips:
This hairstyle is versatile and can be adapted to either straight or curled hair. Secure the style with bobby pins for added hold.
For a more personalized touch, consider integrating small flowers or decorative pins that match the theme of the event.
This half-up half-down style not only highlights the natural beauty of your hair but also keeps it manageable and stylish throughout your special event.
9. Dutch Braided Mohawk
Step-by-Step Guide:
Preparation:
Begin with second-day hair or hair that has been straightened using a flat iron for optimal texture.
Apply dry shampoo generously to add texture and volume, focusing on the roots for better grip during braiding.
Creating the Dutch Braid:
Part your hair by drawing a line from the arch of each eyebrow up to the crown. This will create two sections.
Secure the rest of your hair into a ponytail to keep it out of the way while you work on the top section.
Start the Dutch braid at the top of your head with a small section of hair and continue adding hair from the sides as you braid towards the crown.
Secure the end of the braid with a small, clear elastic band.
Finishing the Mohawk:
Gently pull apart the braid to widen it, creating more volume and the mohawk effect.
Release the ponytail and style the remaining hair as desired—either leave it down or style it into a soft bun or ponytail.
Adjust the braid to ensure it stands out like a mohawk and use bobby pins for extra hold along the sides.
Additional Styling Tips:
This hairstyle is particularly effective with slightly dirty hair, as the natural oils provide better texture and hold. Use dry shampoo if your hair feels too slick.
For a more dramatic look, you can create a bump or pompadour at the front before starting the braid, adding an edgy twist to the classic mohawk.
If you prefer a neater appearance, consider tucking the ponytail under the braid and pinning it in place for a seamless transition.
This Dutch Braided Mohawk is not only striking but also versatile, making it suitable for prom-goers of all ages who wish to add a unique and bold element to their ensemble.
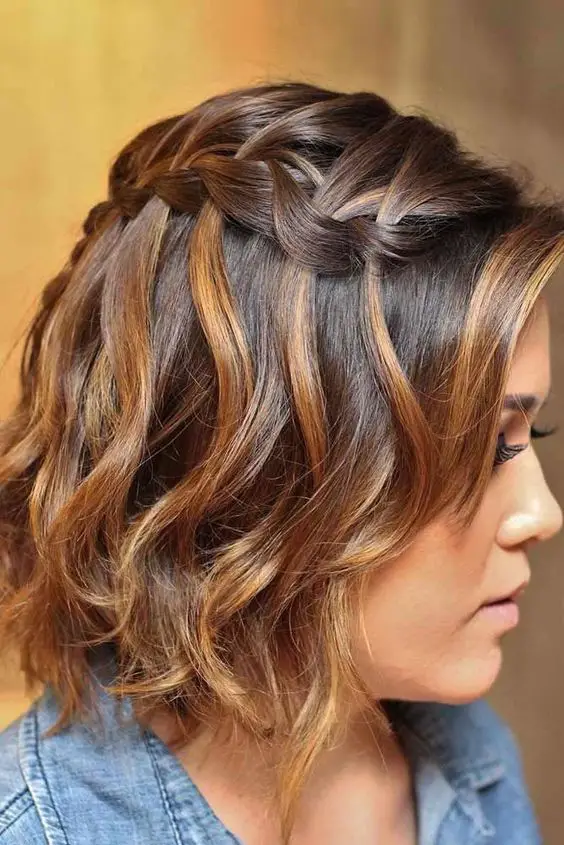
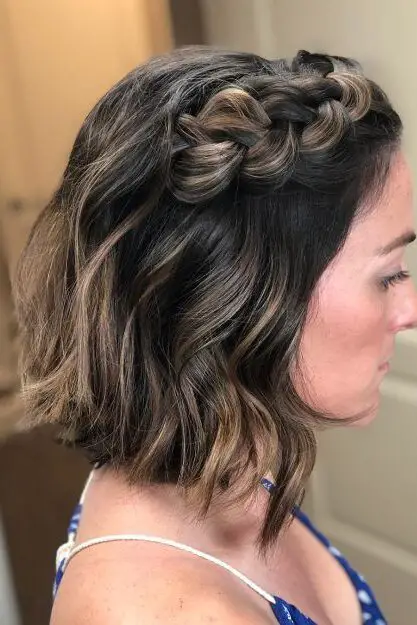
10. Headband Braid with Waterfall Braid
Tutorial Overview
Carrie and her daughter Gracie demonstrate how to create an enchanting headband braid with a waterfall braid specifically tailored for short hair. This style elegantly frames the face and adds a whimsical touch, perfect for prom night.
Necessary Materials
Before you begin, ensure you have the following items ready:
A hairbrush
Hair ties
Bobby pins
Step-by-Step Instructions
Step 1: Sectioning the Hair
Start by taking a section of hair right behind the ear. Extend this section in a rectangular shape across the top of your head.
Step 2: Beginning the Braid
Divide the initial section into three equal parts.
Step 3: Standard Braiding
Begin a standard braid by moving the right strand under the middle strand, then the left strand under the new middle strand.
Step 4: Incorporating New Hair
Add a new section of hair from the neckline, placing it between the middle strand and the single strand in the back.
Step 5: Continuing the Pattern
Continue repeating Steps 3 and 4, consistently bringing in new sections from the neckline and weaving them into the braid.
Step 6: Completing the Headband
Keep splitting the three strands and perform the X-pattern, integrating new sections from the front of the head until the braid reaches the other side.
Finishing Touches
Secure the Braid
Once you’ve achieved the desired length, finish off the braid and secure it with a hair tie.
Add Fullness
Gently tug at sections of the braid to make it appear fuller and more textured.
Conceal the End
Wrap a small section of hair around the end of the braid to hide the hair tie and secure it discreetly with a bobby pin.
This headband braid with a waterfall effect is designed to enhance short hairstyles by adding volume and intricate detail, making it an ideal choice for a standout prom hairstyle.
11. Textured Updo with Pins
Step-by-Step Guide:
Preparation:
Begin by applying a texturizing spray such as Bumble and Bumble Invisible Oil Soft Texture Spray to your dry hair to enhance grip and volume.
Use a teasing comb at the roots to add extra body, particularly at the crown, to support the structure of the updo.
Creating the Textured Updo:
Gather your hair at the back in a loose ponytail and start twisting it upwards towards the crown of your head.
As you twist, intermittently insert bobby pins in alternating directions to secure the hair. Ensure the pins are close enough to hold the twist but are hidden within the hair for a seamless look.
Adding Pins for Style:
Once the basic shape of your updo is formed, enhance the texture by strategically placing long gold bobby pins. Insert these pins in a visible pattern that complements the shape of the updo, such as in a crisscross or parallel arrangement.
For a more dramatic effect, use pins with decorative ends or in contrasting colors to your hair.
Additional Styling Tips:
To maintain the updo’s integrity throughout the evening, spritz with a flexible hold hairspray after inserting all the pins.
This hairstyle works well with both sleek and curly textures, making it versatile for any prom dress style.
Maintenance and Wear:
Keep a few extra bobby pins and a mini hairspray in your purse for quick touch-ups during the prom night.
If your hair begins to loosen, gently push the pins back into place to secure the updo.
This textured updo with pins not only adds a modern twist to classic styles but also holds your hair securely, allowing you to enjoy your prom night without any worries about your hairstyle.
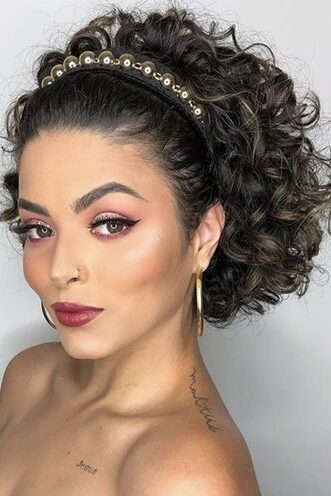
12. Chunky Headband with Loose Curls
TikTok content creators have recently brought the chunky headband trend to the forefront, especially for styling short hair with loose curls.
These headbands not only keep hair out of the face but also simplify the management and styling of curls. Their popularity on social media platforms has inspired a wave of hair styling challenges, including layered hairstyles and heatless curls tailored for short hair.
For those interested in achieving this look, there is a helpful tutorial available on YouTube, demonstrating how to create curls using a chunky headband.
This method is particularly beneficial for those with thick hair, as the headbands from Busy Bee Crafts, featured in the April 2023 Curls Monthly mailer, are made from soft, gentle materials that are kind to curls.
These headbands are not only functional but have also become a stylish accessory in their own right, adding a touch of elegance to simple hairstyles.
It’s important to note that while chunky headbands are great for adding detail and style, they are not typically designed to hold hairstyles firmly in place.
For more secure styles, such as the Bouffant Hairstyle, additional steps involving backcombing, smoothing with a brush, and securing with hairspray are necessary to maintain the desired look throughout the event.
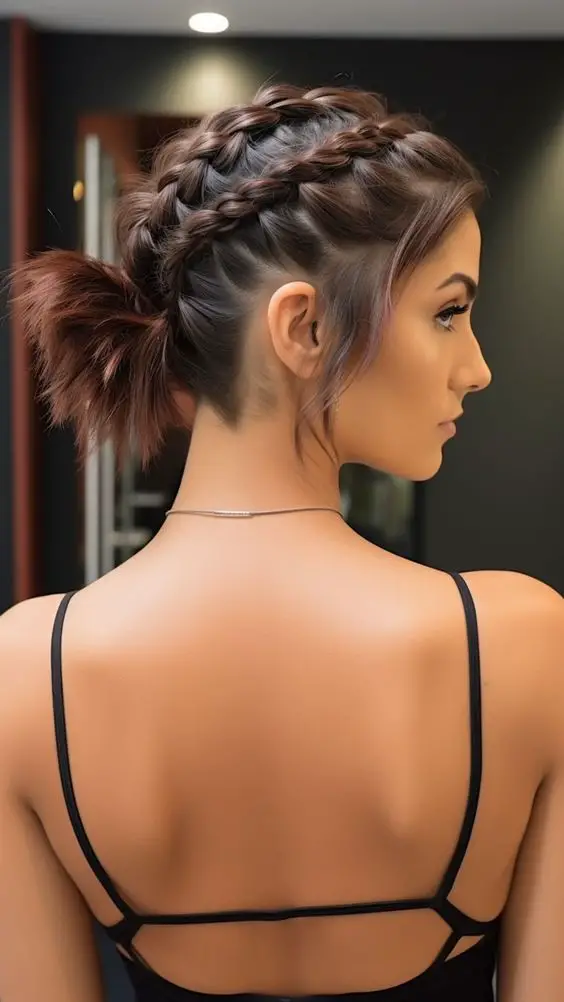
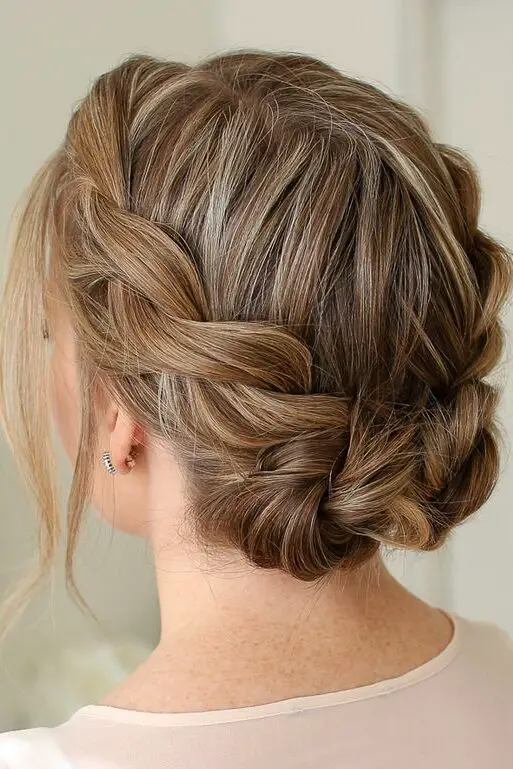
13. Double Dutch Braids Updo
Double Dutch braids, often referred to as boxer braids, are a versatile and stylish choice for prom, especially for those with short hair.
This updo not only keeps your hair secure during long prom nights but also adds a touch of sporty elegance to your look. Here’s how to achieve this chic hairstyle:
Step-by-Step Guide:
Preparation:
Start by creating a middle part to evenly divide your hair into two sections.
Apply Oribe Dry Texturizing Spray to add texture, which is crucial for fine or slippery hair types.
Braiding:
Begin at the front of your head on one side. Take a small section and divide it into three parts.
Start braiding by crossing the right section under the middle, then the left section under the new middle, gradually adding more hair to each section as you go.
Continue this method down the back of your head. Once you reach the nape of your neck, secure the braid with a clear elastic band, leaving a small ponytail.
Repeating and Securing:
Repeat the same steps on the other side to ensure symmetry.
For additional hold and to manage any flyaways, especially if you have layers, secure the braids with small bobby pins.
If your hair is longer, instead of leaving it as pigtails, twist the ends into small buns and pin them securely.
Additional Tips:
To achieve fuller braids, gently pull apart each loop of the braid. This technique, known as pancaking, makes your braids appear thicker and more voluminous.
For an embellished look, consider adding hair cuffs or small flowers to the braids, perfect for enhancing your prom ensemble.
Ensure your hairstyle lasts all night by finishing with a flexible hold hairspray, which will keep everything in place without stiffness.
This Double Dutch Braids Updo is not only practical for keeping your hair out of your face during the dance but also serves as a fashionable statement that complements a variety of prom outfits.
Whether you opt for a glamorous or more understated dress, this hairstyle can be easily adapted to match your personal style and make your prom night unforgettable.
14. Pinned Back Curls with Statement Earrings
Pinned back curls create a stunning backdrop for showcasing statement earrings, especially when paired with large, shiny, bright diamond earrings that capture and reflect light beautifully.
This style not only accentuates the earrings but also enhances your overall prom look, making it both elegant and eye-catching.
Step-by-Step Styling Guide:
Preparation:
Start by applying a volumizing mousse to damp hair to give your curls extra body and hold.
Blow dry your hair using a diffuser attachment to enhance your natural curls, or use a curling iron to create soft, bouncy curls.
Styling the Curls:
Once your curls are set, gently brush them out to soften the look and create a more natural wave.
Take sections from the front and gently pin them back, allowing some curls to naturally frame your face. This technique not only keeps your hair off your face but also provides a perfect stage for your earrings.
Securing the Style:
Use bobby pins that match your hair color to discreetly secure the curls. Ensure the pins are tucked away so they don’t detract from the earrings.
Set your hairstyle with a strong-hold hairspray to ensure it holds throughout the evening.
Recommended Earrings and Additional Tips:
Opt for large diamond earrings or other bright, ornate designs that stand out against your hair. The sparkle from these earrings will draw attention and beautifully complement the softness of the curls.
To maintain the focus on your earrings, keep other jewelry minimal. A simple bracelet or a delicate necklace will suffice, ensuring that your earrings and hairstyle remain the stars of the show.
By following these steps, your pinned back curls will not only look stunning but also serve as the perfect showcase for your statement earrings, adding a touch of glamour to your prom night ensemble.
15. Side-Swept Pixie with Finger Waves
To begin styling your side-swept pixie with finger waves, start with freshly washed hair to ensure a clean and manageable base.
Apply a shine-inducing oil to add a glossy finish and a lightweight gel to keep the style sleek throughout your event.
Step-by-Step Styling Process:
Apply Styling Products:
Use a root-lifting product if you desire more volume at the crown. This can be enhanced with a blow dryer, using a concentrator nozzle and a flat brush to lift the roots while drying.
For the sleek, polished finger waves, apply a styling foam like Frizz-Ease by John Frieda which provides control without weighing down your hair.
Forming the Waves:
Decide where you want your waves to start—typically, from the front or side of your head. Place two fingers at this point and use a comb to press the hair against your scalp, creating the first wave.
Continue this technique down the side of your head, alternating the direction of the waves to achieve that classic finger wave look.
Finishing Touches:
Once your waves are defined, consider accessorizing with long dangly earrings and pairing the hairstyle with red lipstick and a black dress for a stunning evening look.
For everyday wear, simply reduce the amount of product for a lighter version of this style, maintaining the side-swept look with softer waves.
Additional Tips:
If considering bleaching or hair coloring, use products like L’Oreal Beach Baby Highlights and Wella t11 with a volume developer to achieve desired lightness. Follow up with a purple shampoo and conditioner to maintain color and reduce brassiness.
Always deep condition post-processing to restore moisture and strength to your hair, ensuring it remains healthy and vibrant.
This hairstyle not only offers versatility for both special occasions and daily wear but also showcases the unique character of short hair, making it a perfect choice for those looking to stand out at their prom.
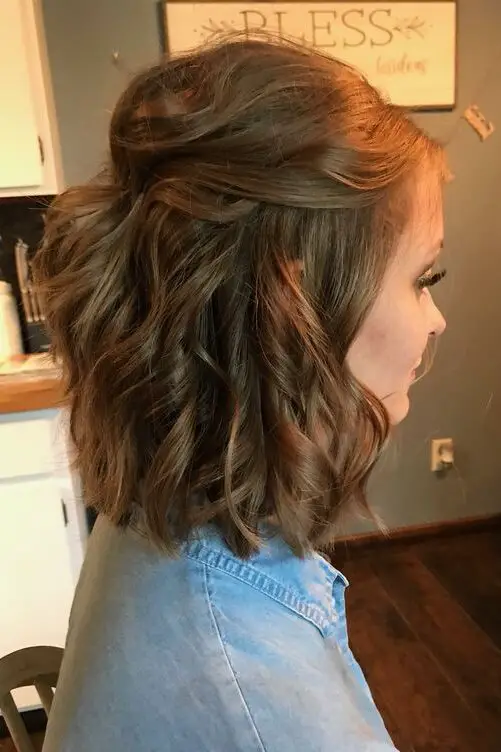
16. Textured Lob with Headband Braid
To create a stunning textured lob with a headband braid, start by preparing your hair to ensure it has the right texture and volume.
Freshly washed hair is recommended for this style. Begin by applying a volume-boosting mousse at the roots, then blow-dry your hair upside down to maximize lift at the crown.
For added texture, use a 19mm tight curling iron to curl small sections of your hair, leaving the last inch straight for a modern, edgy look.
Remember to alternate the curling direction for each section to enhance the contrasting effect, and apply dry shampoo to the bottom sections for extra grit.
Step-by-Step Styling Guide:
Create Beachy Waves:
Part your hair in the opposite direction of your desired side part to start with more volume.
Curl your hair in small sections, alternating the direction of the curls for a dynamic look.
Gently run your fingers through the curls to loosen them into soft waves, adding body without breaking up the texture too much.
Form the Headband Braid:
Take a medium-sized section of hair from the front and divide it into three pieces.
Begin braiding in a Dutch braid style, only adding hair from the top to each section.
Continue the braid until about two inches behind your ear and secure it with a pin, pointing in the opposite direction and then pushed forward for a firm hold.
Final Touches:
Switch up the parting of your hair to add a dramatic effect and gently massage the scalp to boost volume where needed.
Use a light touch with hairspray to set the style while maintaining a natural appearance.
This hairstyle is versatile enough for both casual and formal occasions, allowing you to experiment with different curl sizes and directions for a unique look.
The headband braid adds a charming touch to the textured lob, making it a perfect choice for prom or any special event.
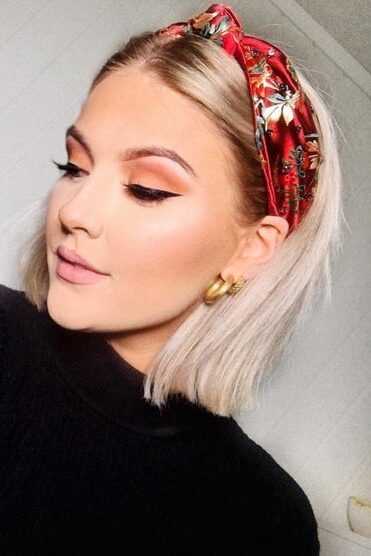
17. Sleek Bob with Deep Part and Headband
To achieve the elegant Sleek Bob with Deep Part and Headband, begin by preparing your hair to ensure it’s manageable and styled to perfection.
Initially, dampen your hair by lightly spraying it with water. Then, apply a water-based pomade evenly throughout to achieve a sleek, controlled look. This preparation is crucial for the hairstyle to hold well and look polished.
Step-by-Step Styling Guide:
Creating the Deep Side Part:
Use a fine-tooth comb to create a sharp deep side part. This parting is essential as it defines the face and adds a touch of sophistication to the bob style.
Blow Drying Techniques:
Start by blow drying your hair forward using the Dyson Supersonic Pro Hair Dryer, focusing on the front sections to create a soft curtain bang effect.
Work on the crown area to add volume by lifting sections with a two-inch barrel round brush, then style the back of your hair with motions that alternate between upward and straight down to enhance the sleekness.
Final Touches with Headband:
Once your hair is dried and styled, select a wide headband that complements your outfit. Position the headband just behind the deep part to accentuate the sleekness of the bob and add a chic final touch to your prom look.
For those looking to vary this hairstyle, consider a straight blowout with curtain bangs for a simpler look, or for a more dressed-up style, opt for a half-up, half-down using a stylish hair clip.
These variations maintain the base sleekness while offering flexibility for different prom themes or personal preferences.
Additional tips for maintaining and enhancing this hairstyle include using a flat iron with temperature control for fine tuning any unruly sections and applying a light mist of hairspray for lasting hold.
Keeping some natural root visible can also add a modern, edgy touch to your overall prom night ensemble.
18. Bouffant with Loose Curls
Step-by-Step Guide:
Preparation:
Begin with dry, brushed hair. Apply texture spray to half-inch sections from the front to the back, focusing around the crown area to prepare for volume.
Use a rattail or teasing comb to backcomb the crown section, setting the initial volume with a strong-hold hairspray.
Creating the Bouffant:
Brush back the top sections of the hair gently with a natural-bristle brush, creating a smooth overlay while maintaining the volume underneath.
Gather all the brushed-back hair into a low ponytail at the back of your head. Twist this section into a loose French twist and secure it under the base with open-ended pins, giving a soft, feathery look.
Adding Loose Curls:
With the remaining hair, use a 1.25 inch curling iron or a deep waver to create soft waves and curls. Alternate between the tools for the top layers to add texture.
Finish by applying a light mist of hairspray to help the curls hold, especially important for hair that tends to lose its curl easily.
Additional Styling Tips:
For those with shorter styles, like a grown-out pixie cut with layers and bangs, start the curls with a heated set rolled on base for maximum volume.
After cooling, brush out the curls slightly to blend them into the bouffant, maintaining the fullness and shape.
Consider using corn starch powder at the roots before starting for extra lift and to avoid buildup, ensuring the bouffant stays voluminous and elegant throughout the event.
Maintenance and Wear:
Carry a small bottle of hairspray and a few extra bobby pins for quick touch-ups during the event.
Adjust the bouffant during the evening if necessary by gently smoothing the top layer with a comb and reapplying hairspray to maintain its elegant shape.
This bouffant with loose curls combines classic elegance with modern styling, making it a perfect choice for a glamorous prom night.
Conclusion
Throughout this exploration of prom hairstyles for short hair, we have traveled from the elegance of Hollywood waves to the whimsical charm of braids and flowers, spotlighting the versatility and beauty of short hairstyles.
As the curtain falls on our prom hairstyle guide, we hope to have inspired you with a spectrum of styles that cater to every taste and hair type.
May these suggestions guide you to find a hairstyle that not only complements your outfit but also adds that extra touch of magic to your prom night, making it an unforgettable experience.

Leave a Reply
You must be logged in to post a comment.