Whether you’re attending a holiday party or simply want to feel merry and bright, these 45+ classic nail ideas are perfect for Christmas.
Christmas is a magical time of year when we deck the halls with boughs of holly and spread cheer and joy. One way to embrace the festive spirit is by adorning our nails with beautiful, classic Christmas designs.
Busy? Save this pin for later.

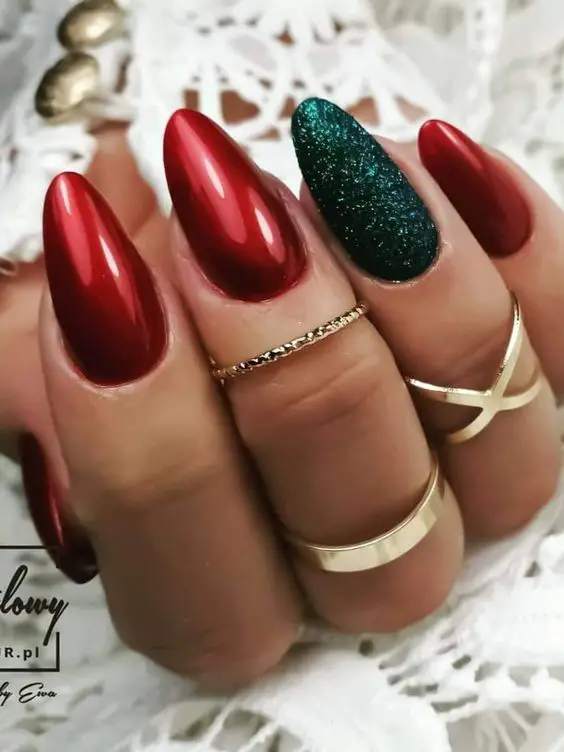
1. Festive Red and Green
Nothing says Christmas quite like the classic combination of red and green. Paint your nails a vibrant red and add a touch of holiday spirit with green accents. You can create a variety of designs, such as alternating red and green nails or painting holly leaves on your nails.
- To achieve the alternating red and green nails design, start by applying a base coat of red nail polish on all your nails. Once it’s dry, use striping tape or a thin brush to create vertical or diagonal lines with green nail polish. Remove the tape or clean up any mistakes with a small brush dipped in acetone. Finish off with a top coat for a glossy finish.
- Another option is to paint holly leaves on your nails. Start with a base coat of red or green nail polish. Then, using a thin brush or a toothpick, draw holly leaves with green nail polish on some or all of your nails. Add small red dots for berries using a dotting tool or a toothpick. Seal it with a top coat for a polished look.

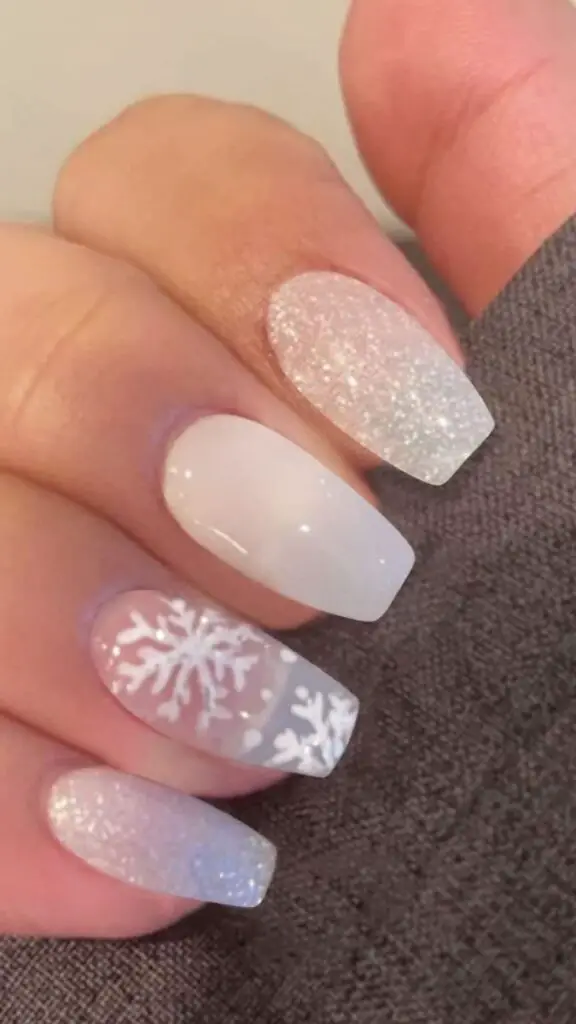
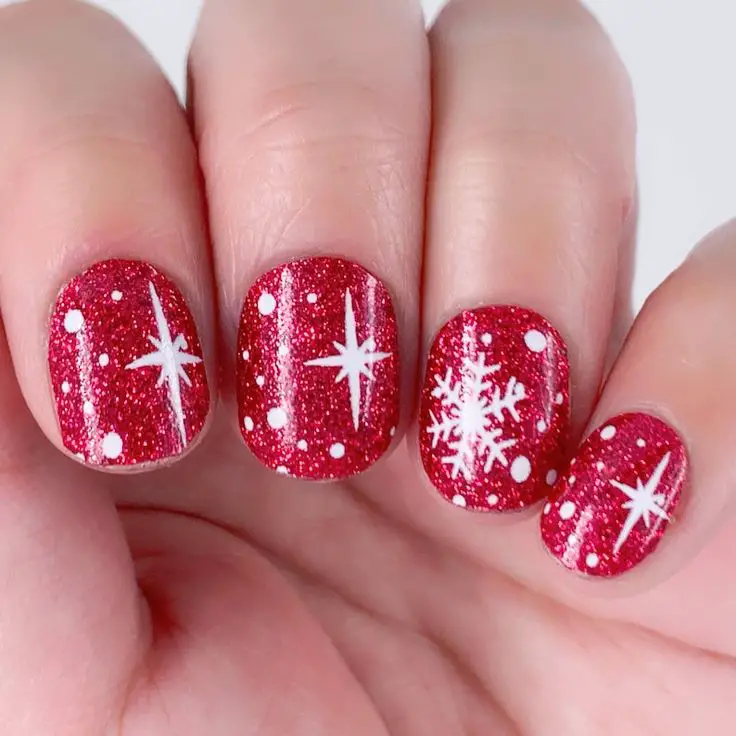
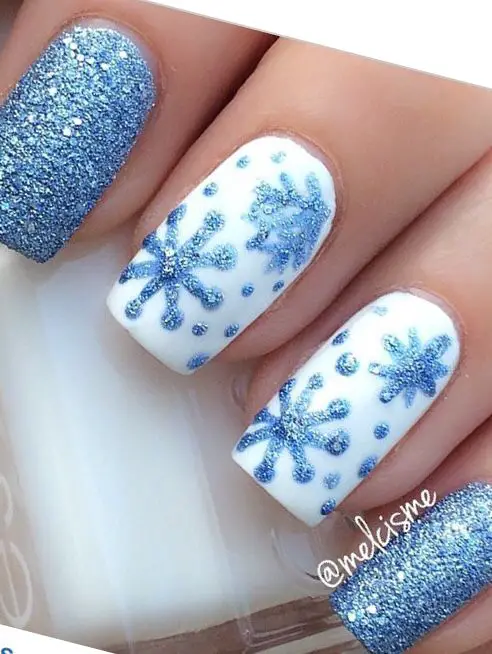
2. Sparkling Snowflakes
Capture the beauty of a winter wonderland on your nails with sparkling snowflakes. Paint your nails a wintry blue or white, then add intricate snowflake designs using a thin brush or a nail stamp. Finish off the look with a sprinkle of silver or white glitter for a touch of magic.
- Start by applying a base coat of blue or white nail polish to all your nails. Once it’s dry, use a thin brush or a nail stamp to create delicate snowflake designs on each nail. You can find snowflake nail stamps online or at beauty supply stores. For an extra touch of sparkle, apply a layer of silver or white glitter on top of the snowflake designs. Seal it with a top coat to make it last longer.


You Might Also Like: Holiday Inspired Nail Ideas for Christmas
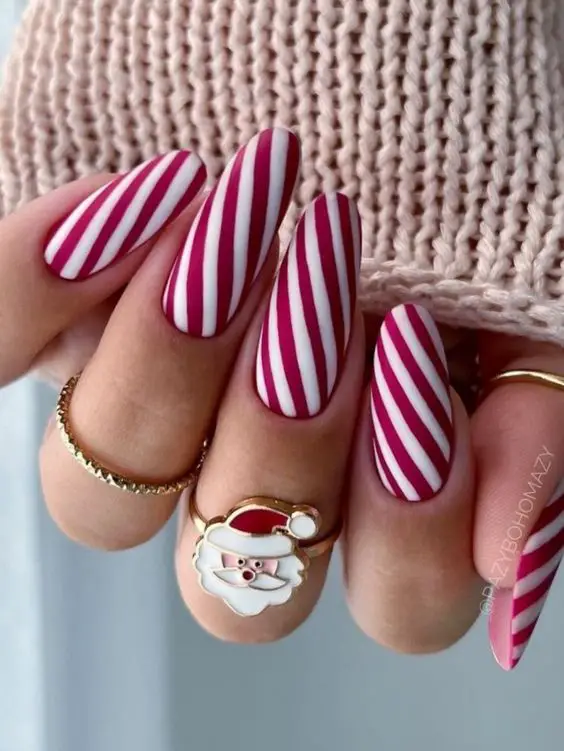
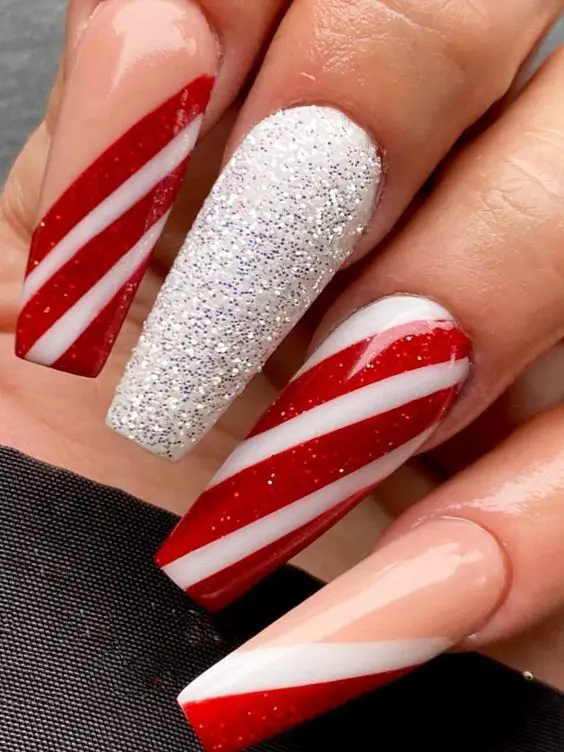
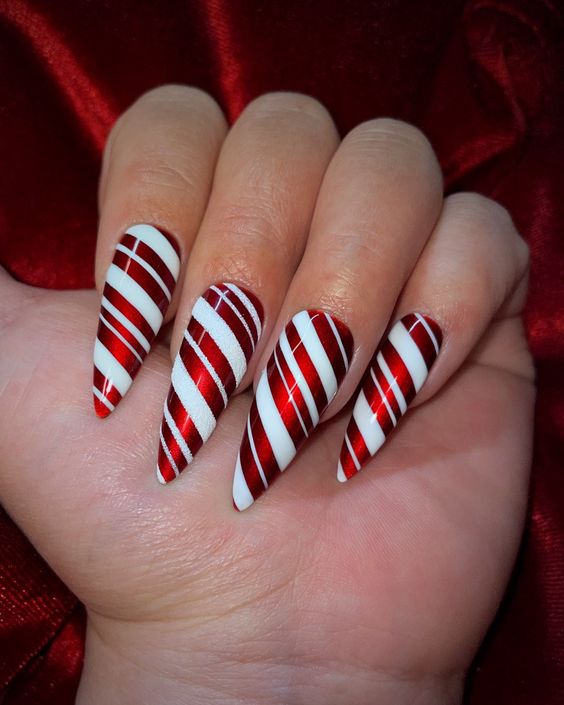
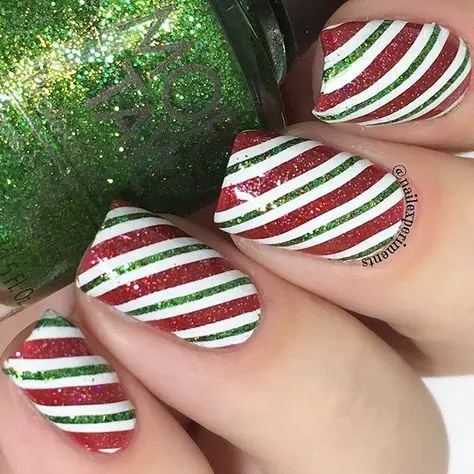
3. Candy Cane Stripes
Bring the sweetness of candy canes to your fingertips with this classic Christmas design. Paint your nails a bright red and add diagonal stripes using white nail polish. For a twist, you can also alternate between the traditional red and white stripes on each nail.
- Start by applying a base coat of red nail polish to all your nails. Once it’s dry, use striping tape or a thin brush to create diagonal stripes with white nail polish. Place the tape or draw the lines at an angle for a candy cane effect. Alternatively, you can paint red and white stripes next to each other or alternate the colors on each nail. Remove the tape or clean up any mistakes with a small brush dipped in acetone. Finish off with a top coat for a glossy finish.

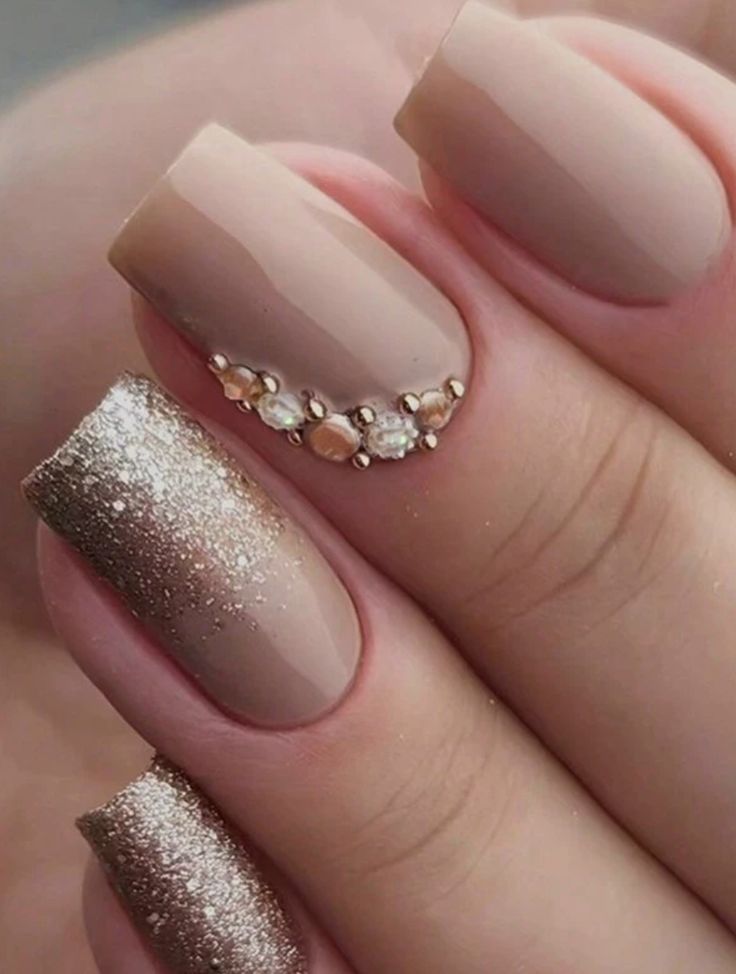
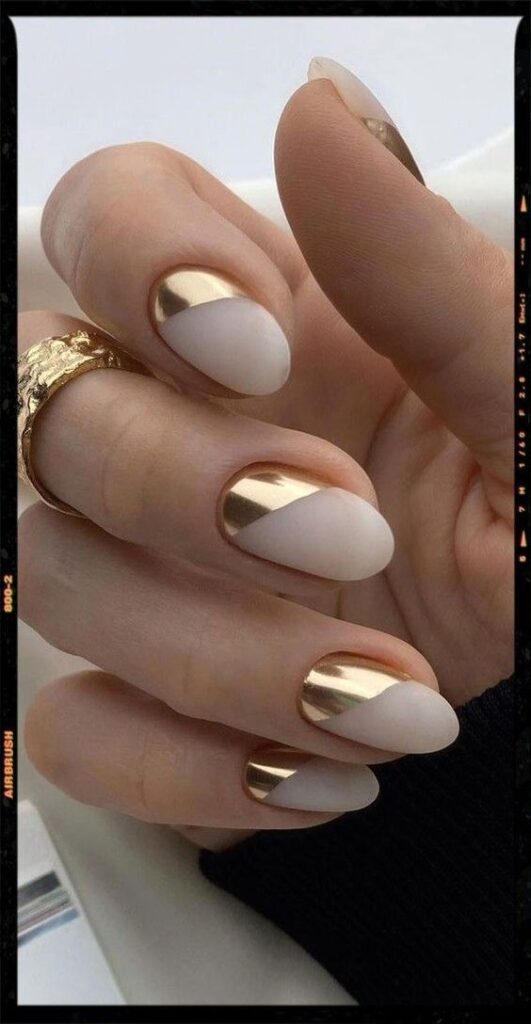
4. Elegant Gold Accents
If you prefer a more sophisticated look, opt for elegant gold accents on your nails. Paint your nails a deep burgundy or a rich shade of green, then add gold details such as stars, dots, or stripes. The combination of the deep base color and the luxurious gold accents will exude glamour and elegance.
- Apply a base coat of deep burgundy or rich green nail polish to all your nails. Once it’s dry, use a thin brush or a dotting tool to create gold details on each nail. You can create stars, dots, or stripes using gold nail polish. For a more intricate design, you can also add gold foil or gold nail stickers. Seal it with a top coat to enhance the shine and make it last longer.


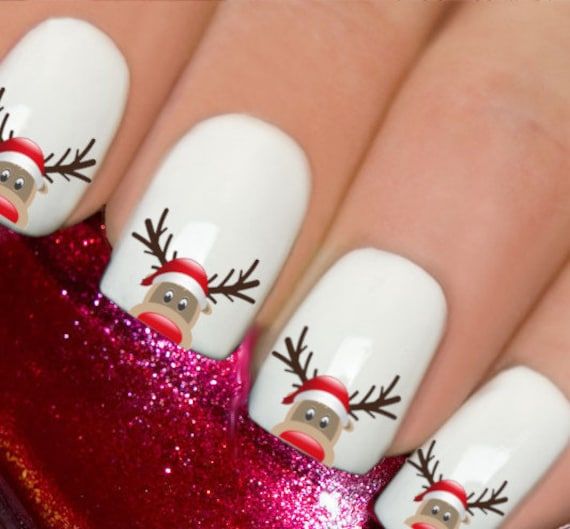
5. Whimsical Reindeer
Add a touch of whimsy to your nails with adorable reindeer designs. Paint your nails a neutral color, such as nude or beige, then use brown polish to draw the reindeer’s face and antlers. Finish off the design with googly eyes or small red gems for Rudolph’s iconic red nose.
- Start by applying a base coat of nude or beige nail polish to all your nails. Once it’s dry, use a thin brush or a toothpick dipped in brown nail polish to draw reindeer faces on each nail. Draw a small circle for the head and two curved lines for the antlers. For Rudolph, add a small red gem or use red nail polish to create his iconic red nose. To make it even more whimsical, you can add googly eyes or use a thin brush to paint the eyes. Seal it with a top coat for a polished finish.

You Might Also Like: 55+ Holiday Nail Inspirations for Christmas 2024
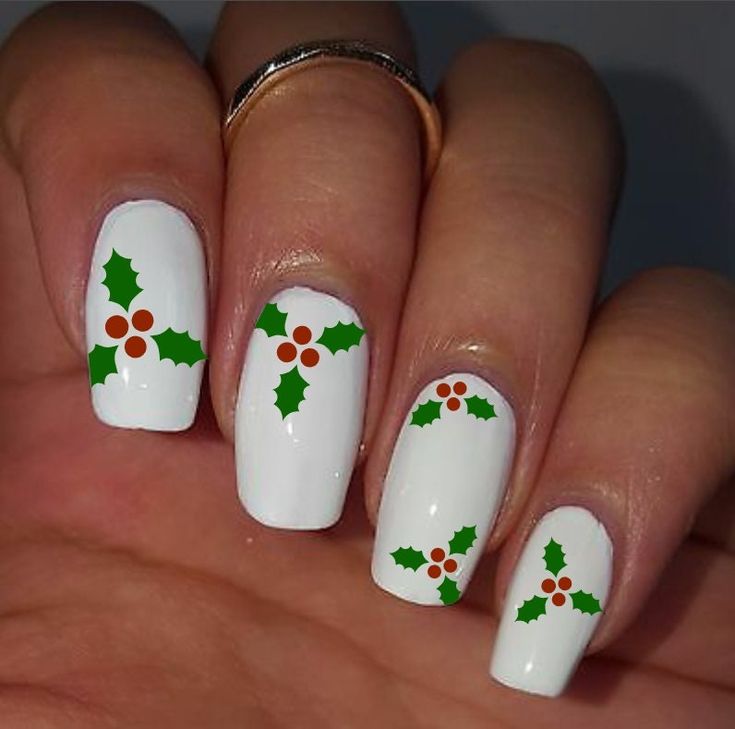
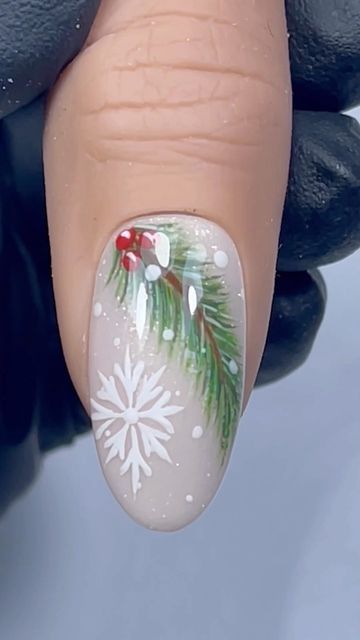
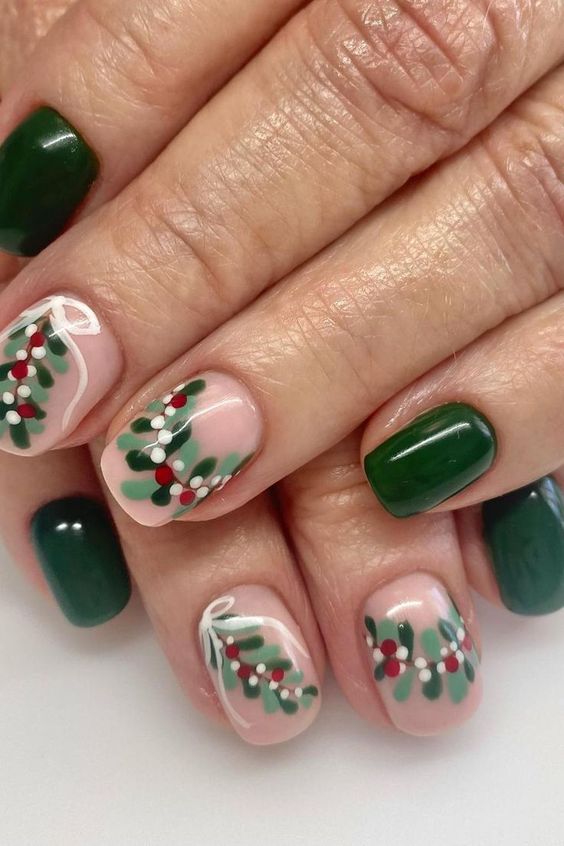
6. Holly Jolly Berries
Embrace the beauty of nature with holly and berry-inspired nail designs. Paint your nails a festive green and add red berries using a dotting tool or a toothpick. For an extra touch, use a thin brush to draw holly leaves around the berries. This design will surely make your nails the highlight of any Christmas gathering.
- Apply a base coat of festive green nail polish to all your nails. Once it’s dry, use a dotting tool or a toothpick dipped in red nail polish to create berries on each nail. Start by creating small dots or circles at different positions on the nail. Then, use a thin brush dipped in green nail polish to draw holly leaves around the berries. You can create simple or intricate holly leaf designs depending on your preference. Seal it with a top coat to protect the design and add shine.


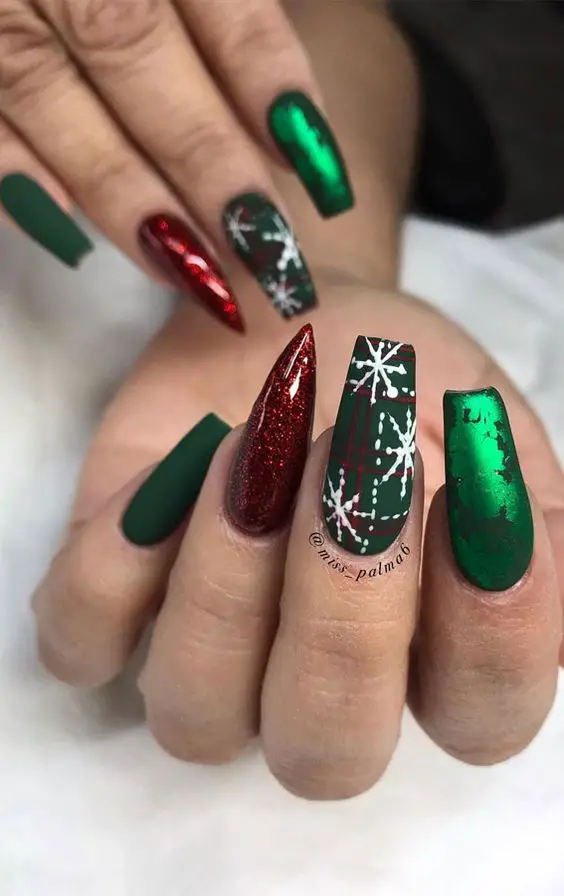
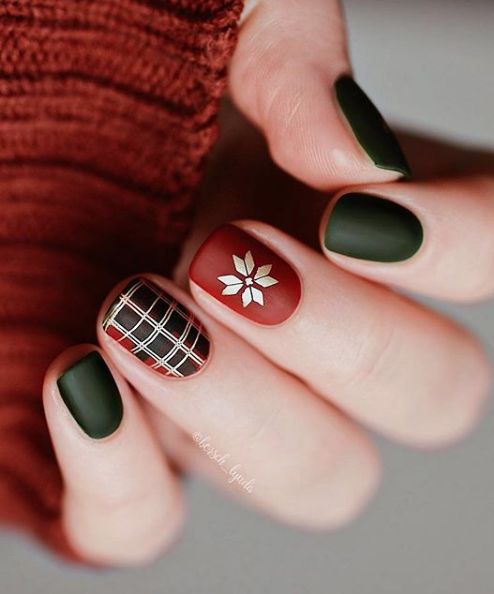
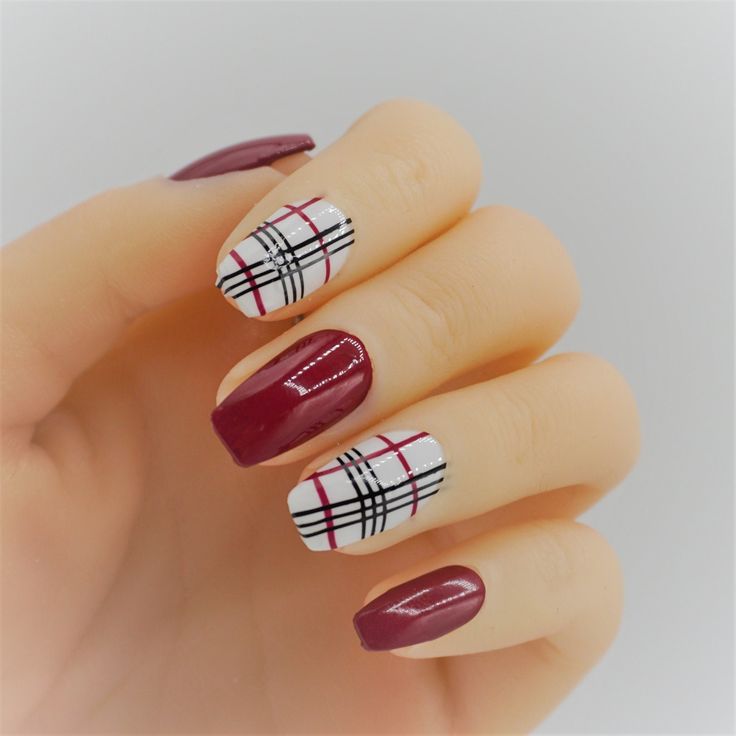
7. Festive Plaid
Capture the cozy and traditional feel of the holiday season with festive plaid nails. Start by painting your nails a neutral base color, such as white or beige. Then, use thin brushes or nail striping tape to create the plaid pattern using classic Christmas colors like red, green, and white. The result will be a timeless and chic design that adds a touch of sophistication to your holiday look.
- Apply a base coat of white or beige nail polish to all your nails. Once it’s dry, use thin brushes or nail striping tape to create a plaid pattern on each nail. Start by painting vertical or horizontal lines using red, green, and white nail polish. You can create a classic plaid pattern with equal-sized squares or experiment with different widths and angles for a unique look. Remove the tape or clean up any mistakes with a small brush dipped in acetone. Finish off with a top coat for a glossy finish.


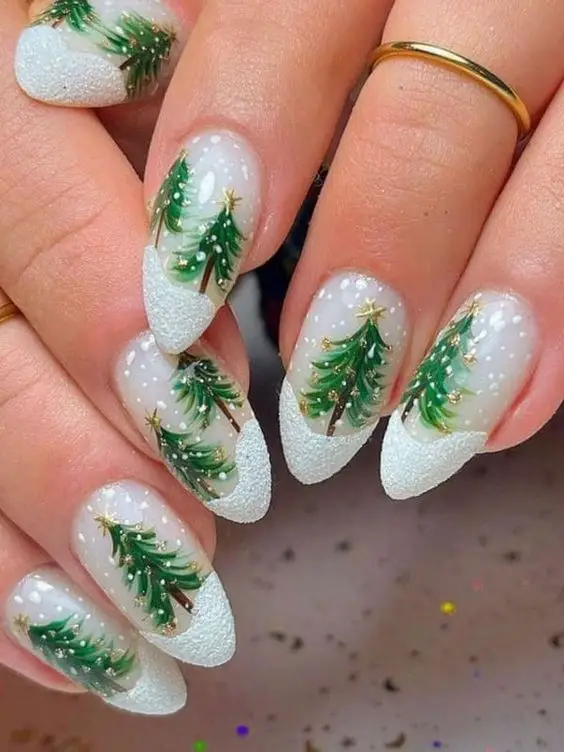
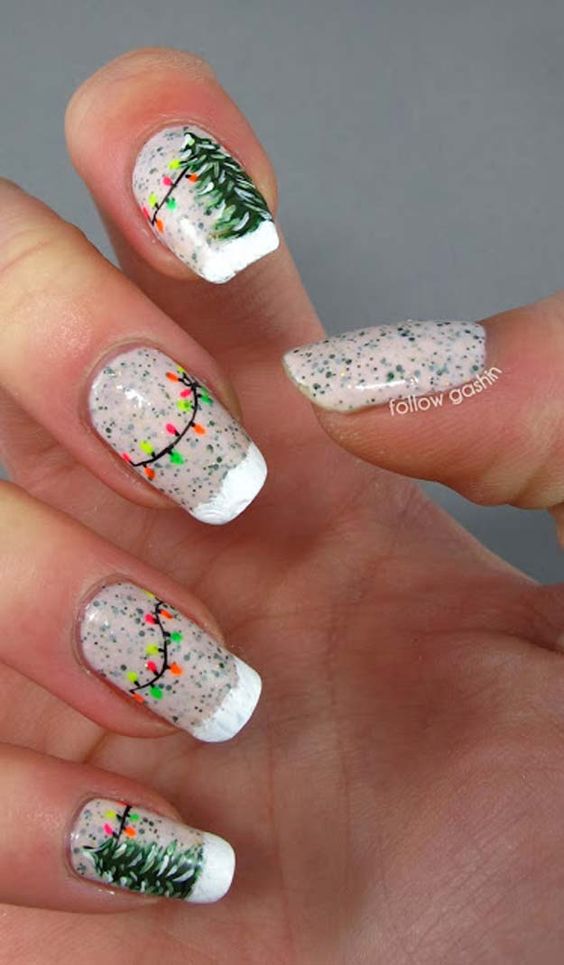
8. Glittery Christmas Tree
Channel the spirit of Christmas with glittery Christmas tree nails. Paint your nails a deep green for the tree base, then add layers of multi-colored glitter for the branches. Finish off the design with a gold or silver star on top. This festive design will make your nails shine as bright as the holiday lights.
- Apply a base coat of deep green nail polish to all your nails. Once it’s dry, use a thin brush or a dotting tool to create a Christmas tree shape on each nail. Start by drawing a triangle for the tree and add diagonal lines to represent the branches. Then, apply a layer of multi-colored glitter on the branches to mimic ornaments. Finish off with a gold or silver star-shaped nail charm or use nail polish to draw a star on top of the tree. Seal it with a top coat for a dazzling finish.

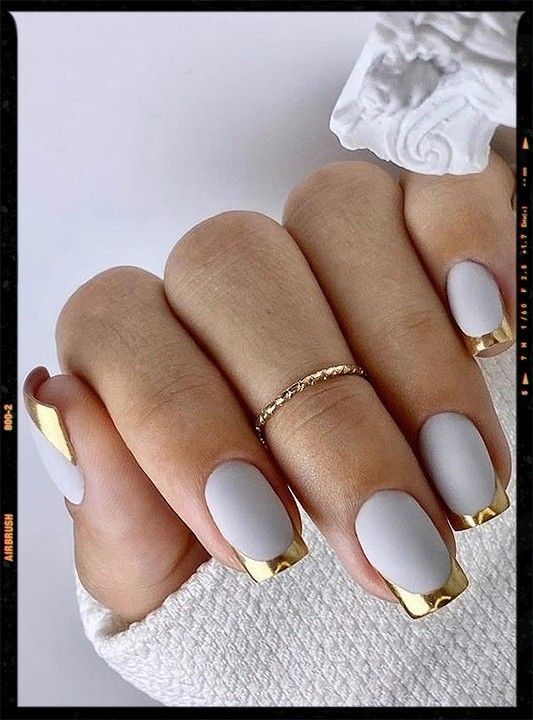
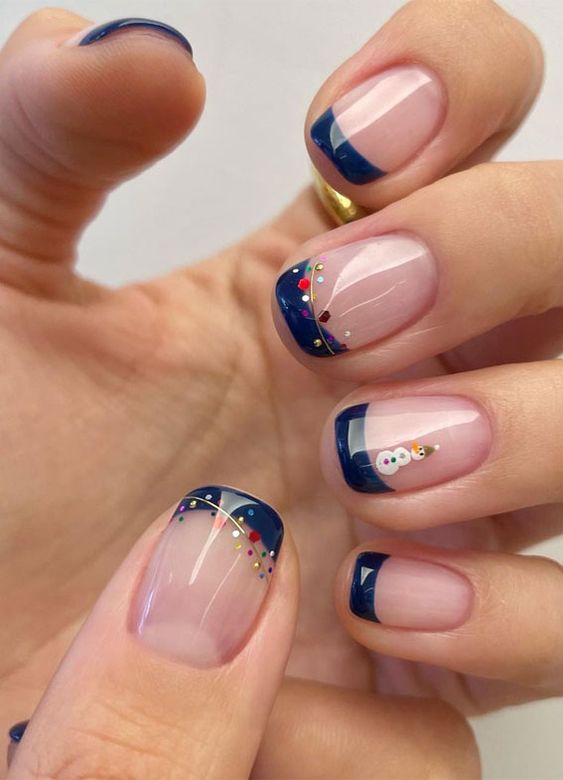
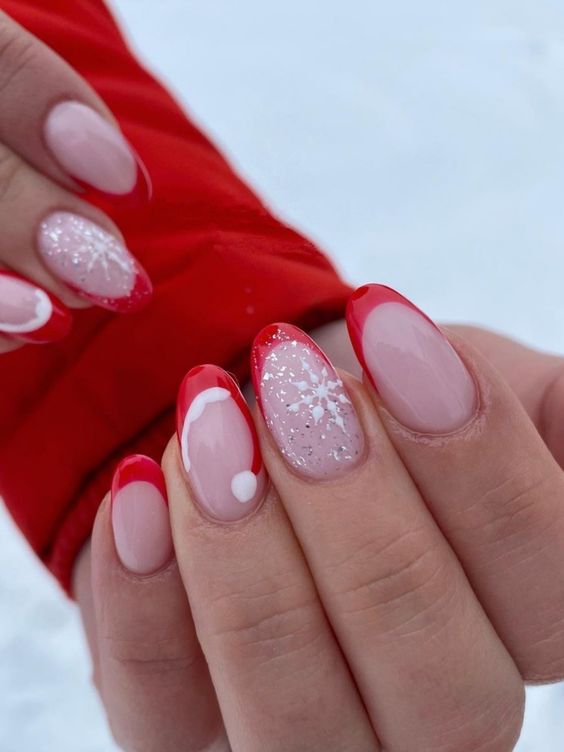
9. Festive French Tips
Put a holiday twist on the classic French manicure by adding festive colors. Paint your nails a neutral or pale pink base, then add a thin line of red or green at the tip of each nail. You can also opt for glittery tips to make your nails truly stand out. This subtle yet elegant design is perfect for those who want a hint of Christmas on their nails.
- Apply a base coat of neutral or pale pink nail polish to all your nails. Once it’s dry, use a thin brush or a striping brush to create a thin line of red or green nail polish at the tip of each nail. Alternatively, you can use striping tape to achieve a clean and straight line. For a glamorous touch, apply a layer of glittery nail polish or loose glitter on the tips. Seal it with a top coat for a polished finish.


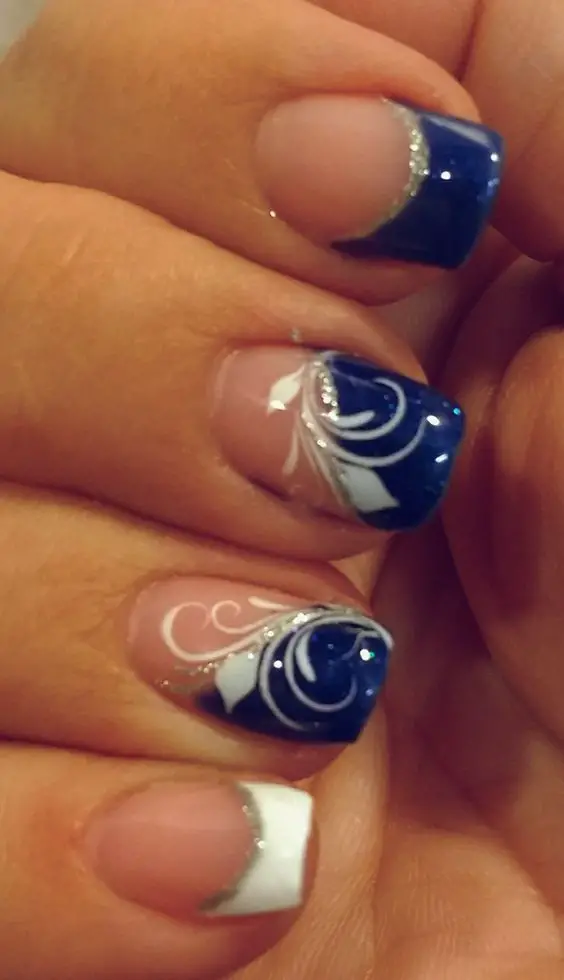
10. Ornamental Delight
Bring the beauty of Christmas ornaments to your nails with this stunning design. Paint your nails a dark blue or black, then add intricate designs of ornaments using silver or gold nail polish. You can experiment with different shapes and colors to create a unique and eye-catching look.
- Apply a base coat of dark blue or black nail polish to all your nails. Once it’s dry, use a thin brush or a dotting tool to create intricate designs of ornaments on each nail. Start by drawing circles or other shapes to represent the ornaments. Then, fill in the shapes with silver or gold nail polish or use nail stickers or decals for a more precise design. You can create different patterns and colors for each nail to make it more interesting. Seal it with a top coat to protect the design and add shine.


You Might Also Like: Holiday-Inspired Nail Ideas for Christmas
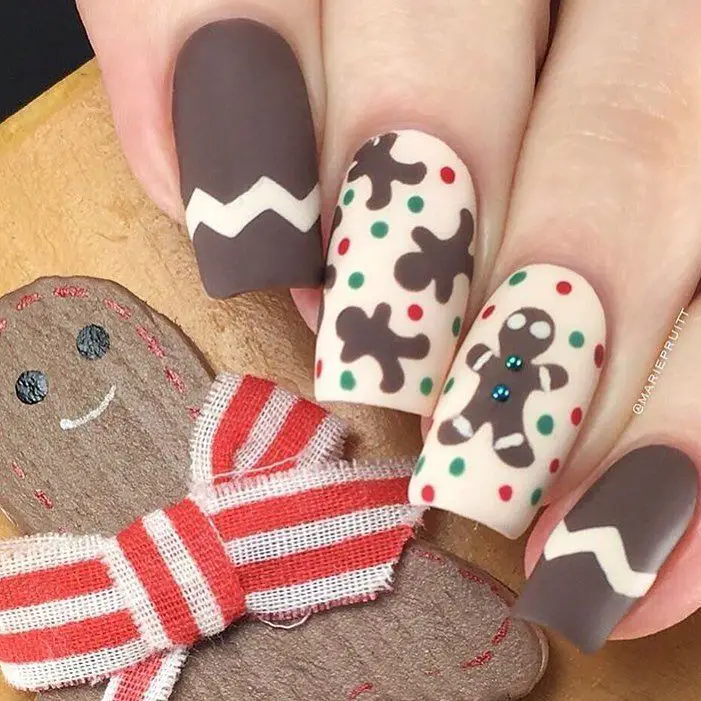
11. Charming Gingerbread
Celebrate the sweetness of the holiday season with charming gingerbread nail designs. Paint your nails a warm brown and add intricate gingerbread house or gingerbread man designs using white and red polish. For a touch of whimsy, you can even add tiny decorations like candy canes or gumdrops to complete the look.
- Apply a base coat of warm brown nail polish to all your nails. Once it’s dry, use a thin brush or a dotting tool to create gingerbread house or gingerbread man designs on each nail. Start by drawing the outline of the gingerbread house or gingerbread man using white nail polish. Then, fill in the shapes with white polish or use a toothpick to create intricate designs. Add small details like windows, doors, or buttons using red nail polish. For a fun twist, you can add tiny decorations like candy canes or gumdrops using a dotting tool or a toothpick. Seal it with a top coat for a polished finish.


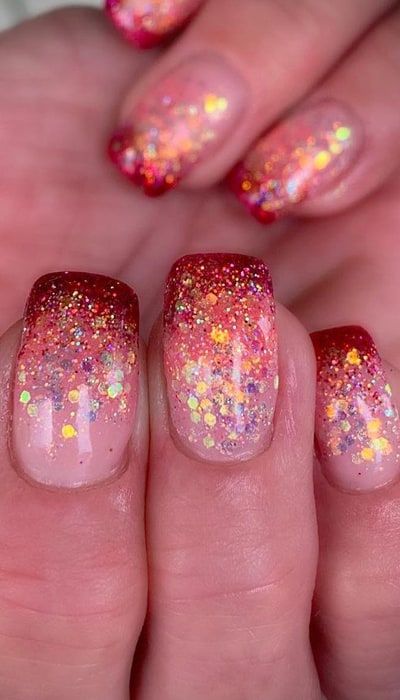
12. Glitter Gradient
Create a mesmerizing effect on your nails with a glitter gradient design. Start by painting your nails a solid color, such as red or green, then apply a glitter top coat starting from the base of your nails and fading towards the tips. This simple yet glamorous design will add sparkle and pizzazz to your Christmas ensemble.
- Apply a base coat of red or green nail polish to all your nails. Once it’s dry, apply a glitter top coat starting from the base of your nails and fading towards the tips. You can use a brush or a sponge to create the gradient effect. Start by applying more glitter at the base and gradually decrease the amount as you move towards the tips. You can choose a silver, gold, or multi-colored glitter top coat depending on your preference. Seal it with a top coat to enhance the shine and make it last longer.

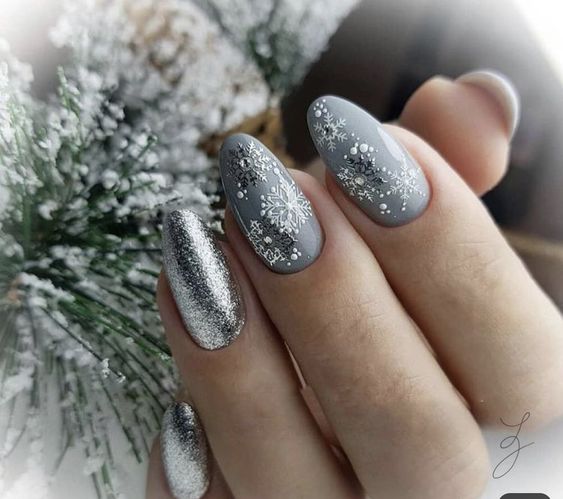
13. Snowy Wonderland
Transport yourself to a magical snowy wonderland with this nail design. Paint your nails a pale blue or white, then add delicate snowflakes using a nail stamp or a thin brush. You can also sprinkle white glitter on your nails to create the illusion of glistening snow. This design will evoke feelings of joy and enchantment.
- Apply a base coat of pale blue or white nail polish to all your nails. Once it’s dry, use a nail stamp or a thin brush to create delicate snowflake designs on each nail. If you’re using a nail stamp, apply a white or silver nail polish onto the stamping plate and transfer the design onto your nails. If you’re using a thin brush, dip it into white or silver nail polish and carefully paint the snowflakes on your nails. To add an extra touch of sparkle, sprinkle white glitter on your nails while the polish is still wet. Seal it with a top coat to protect the design and add shine.


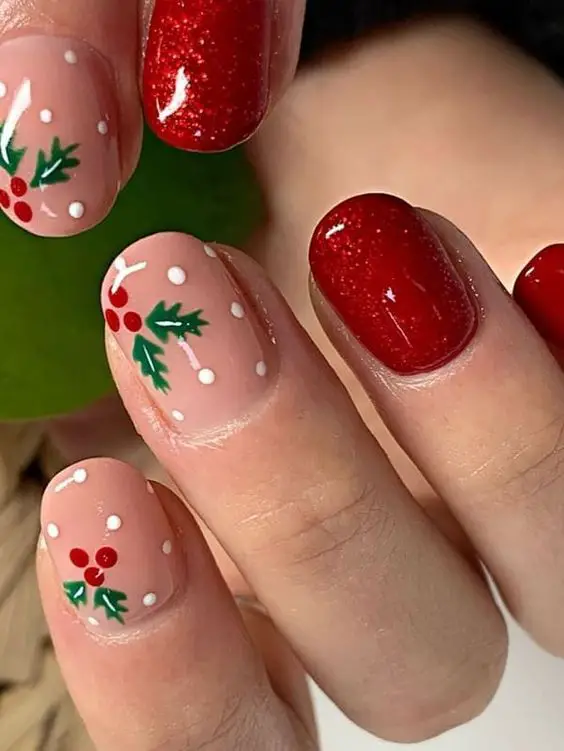
14. Mistletoe Magic
Spread some holiday love and romance with mistletoe-inspired nail designs. Paint your nails a festive red and add small white dots to represent mistletoe berries. You can also use a thin brush to draw mistletoe leaves. This design will surely make your nails a focal point for stolen kisses under the mistletoe.
- Apply a base coat of festive red nail polish to all your nails. Once it’s dry, use a dotting tool or a toothpick dipped in white nail polish to create small dots on each nail to represent mistletoe berries.

You Might Also Like: 25 Simple Eye-Catching Nail Designs to Rock This Fall


Leave a Reply
You must be logged in to post a comment.