While long nails have traditionally dominated the nail art scene, this creative realm where nail polish, gel nails, and french manicures converge, proves that length doesn’t define artistry.
Short nails offer a chic, practical canvas for expressing individual style—ranging from the minimalist elegance of french tips to the daring boldness of nail art.
Beyond mere aesthetics, these artistic creations stand as a testament to the idea that every detail, no matter how small, can be turned into a masterpiece.
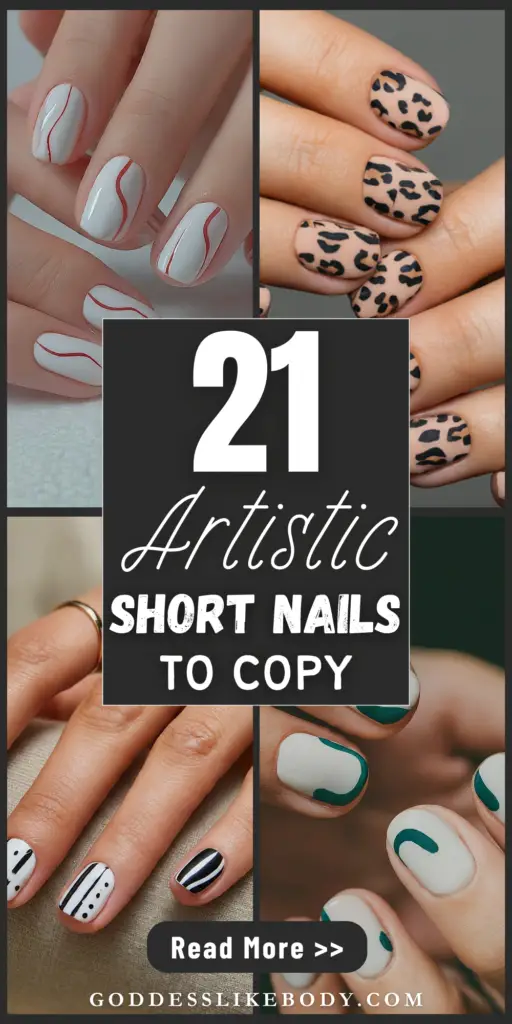
This post takes you on a vivid journey through 21 spectacular designs tailored specifically for short nails.
Busy? Save this pin for later.
1. Minimalist Glitter Tips
If you’re looking to add a touch of sparkle to your nail art without going overboard, Minimalist Glitter Tips are a perfect choice.
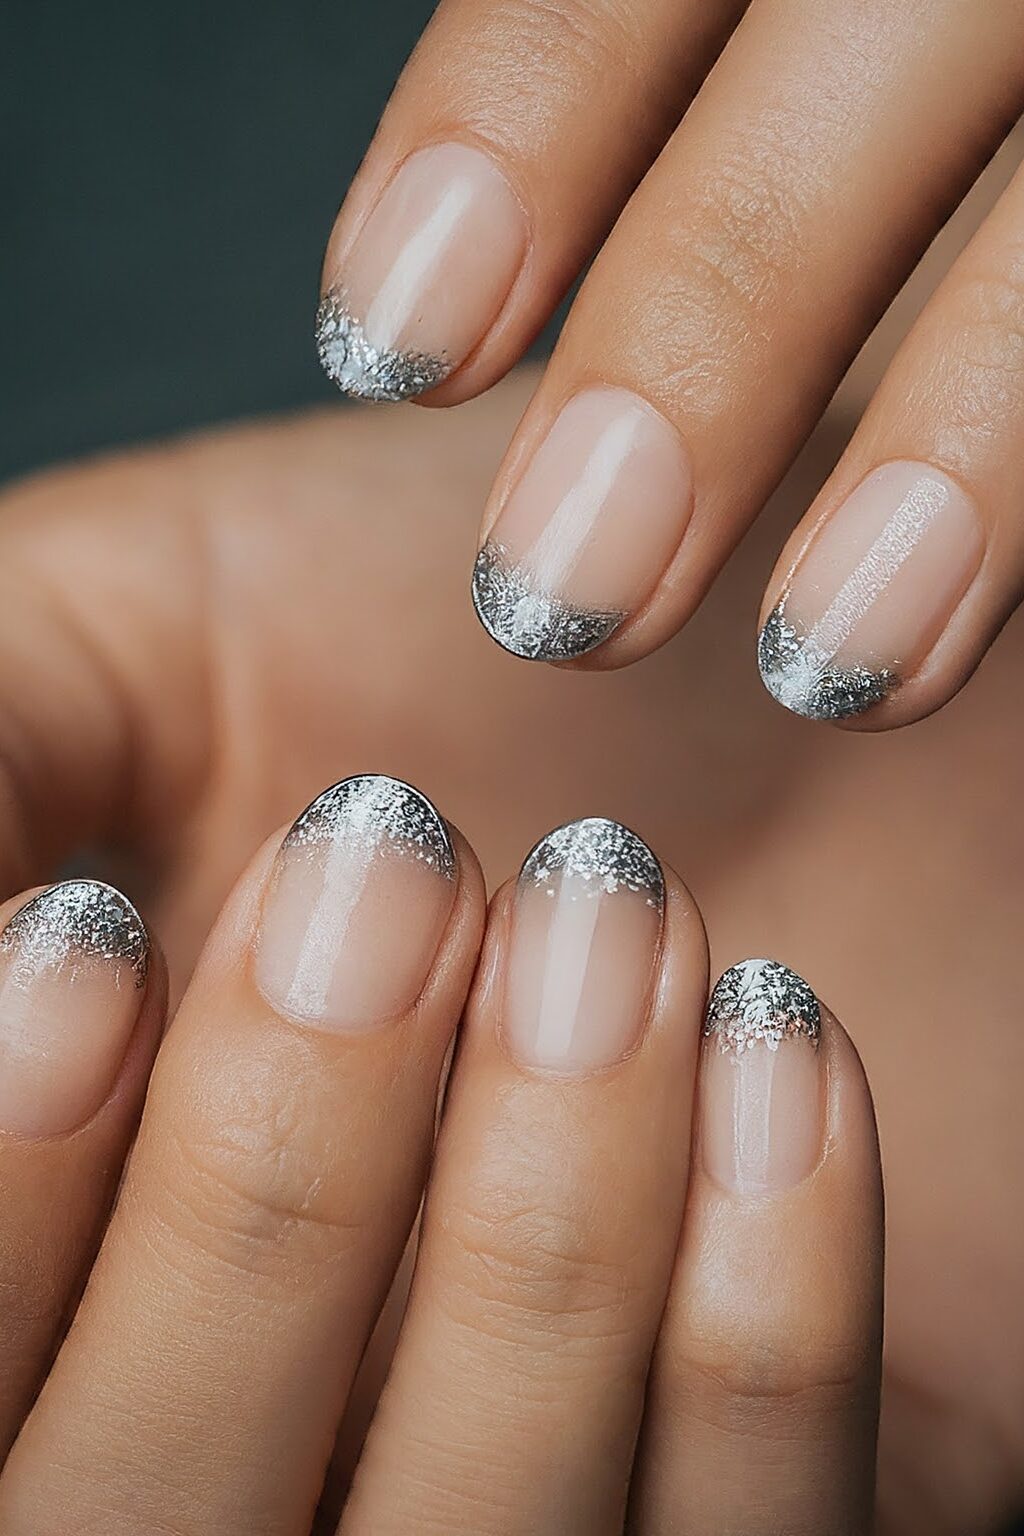
This style blends simplicity with a dash of glamour, making it ideal for both everyday wear and special occasions.
The key to achieving this look is the subtle placement of glitter, ensuring that it enhances rather than overwhelms your natural nail polish.
Start by applying a base coat of your favorite nail lacquer, preferably in a neutral shade to keep the look understated.
Once your base is dry, apply a thin line of glitter gel nails polish just at the tips of your short nails. The trick is to use a sponge or a very fine brush to dab the glitter onto the tips, creating a soft gradient effect that fades into the rest of the nail.
2. Delicate Floral Design
If you’re enchanted by the soft allure of florals, then the Delicate Floral Design on artistic short nails might just be your next favorite.
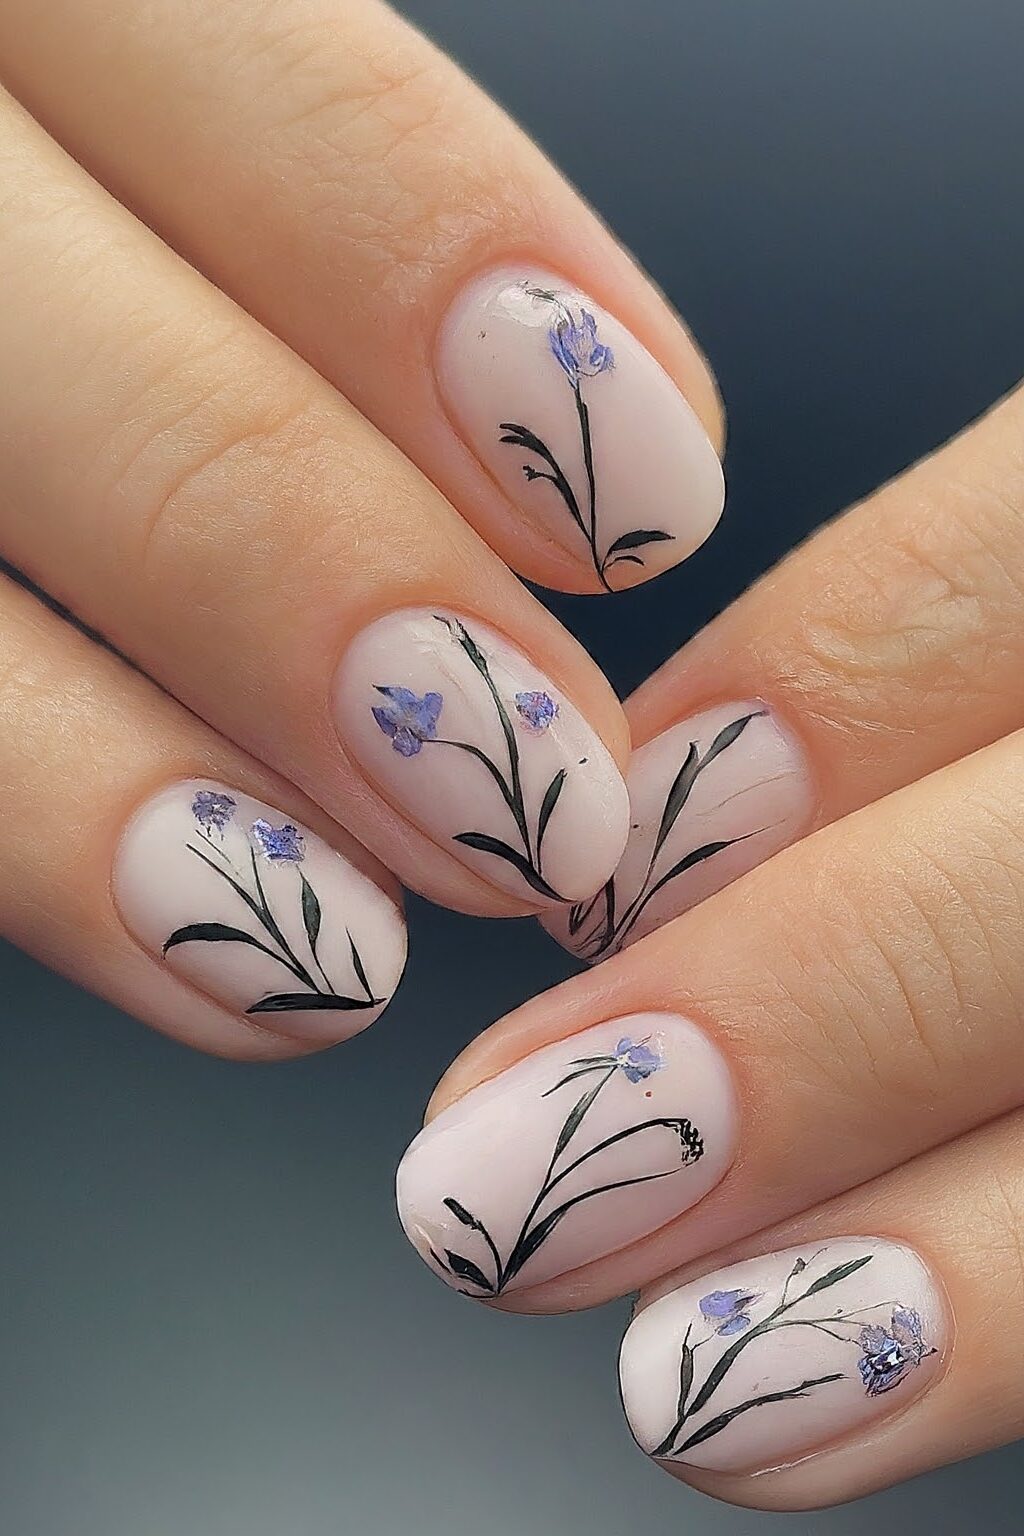
This design harmonizes the elegance of nature with the sophistication of modern nail art, creating a look that’s both refreshing and timeless.
To embark on this floral journey, start with a clean, pale base color, like soft pink or a muted lavender, which ensures that the floral patterns stand out.
Employing a fine brush, you can begin to layer delicate strokes to form the petals. Opt for colors like pastel blues, gentle pinks, or vibrant yellows to bring your flowers to life.
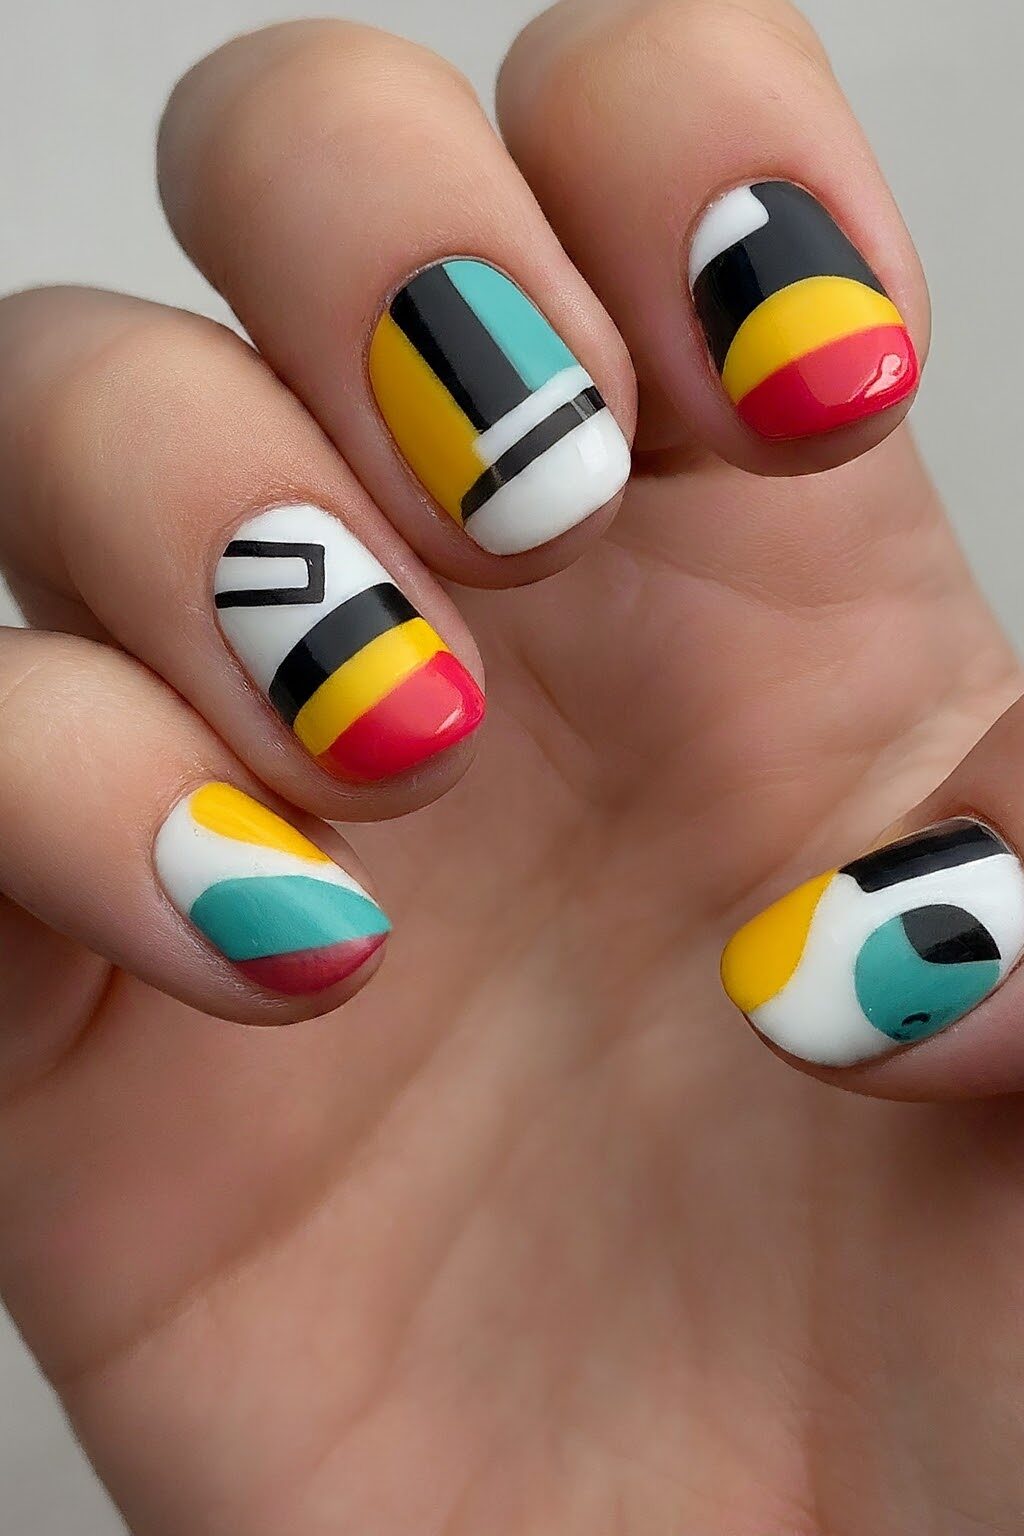
3. Two-Toned Colorblock
The beauty of this design lies in its simplicity and the personal touch it brings, allowing you to wear your school colors with pride in a unique and fashionable way.
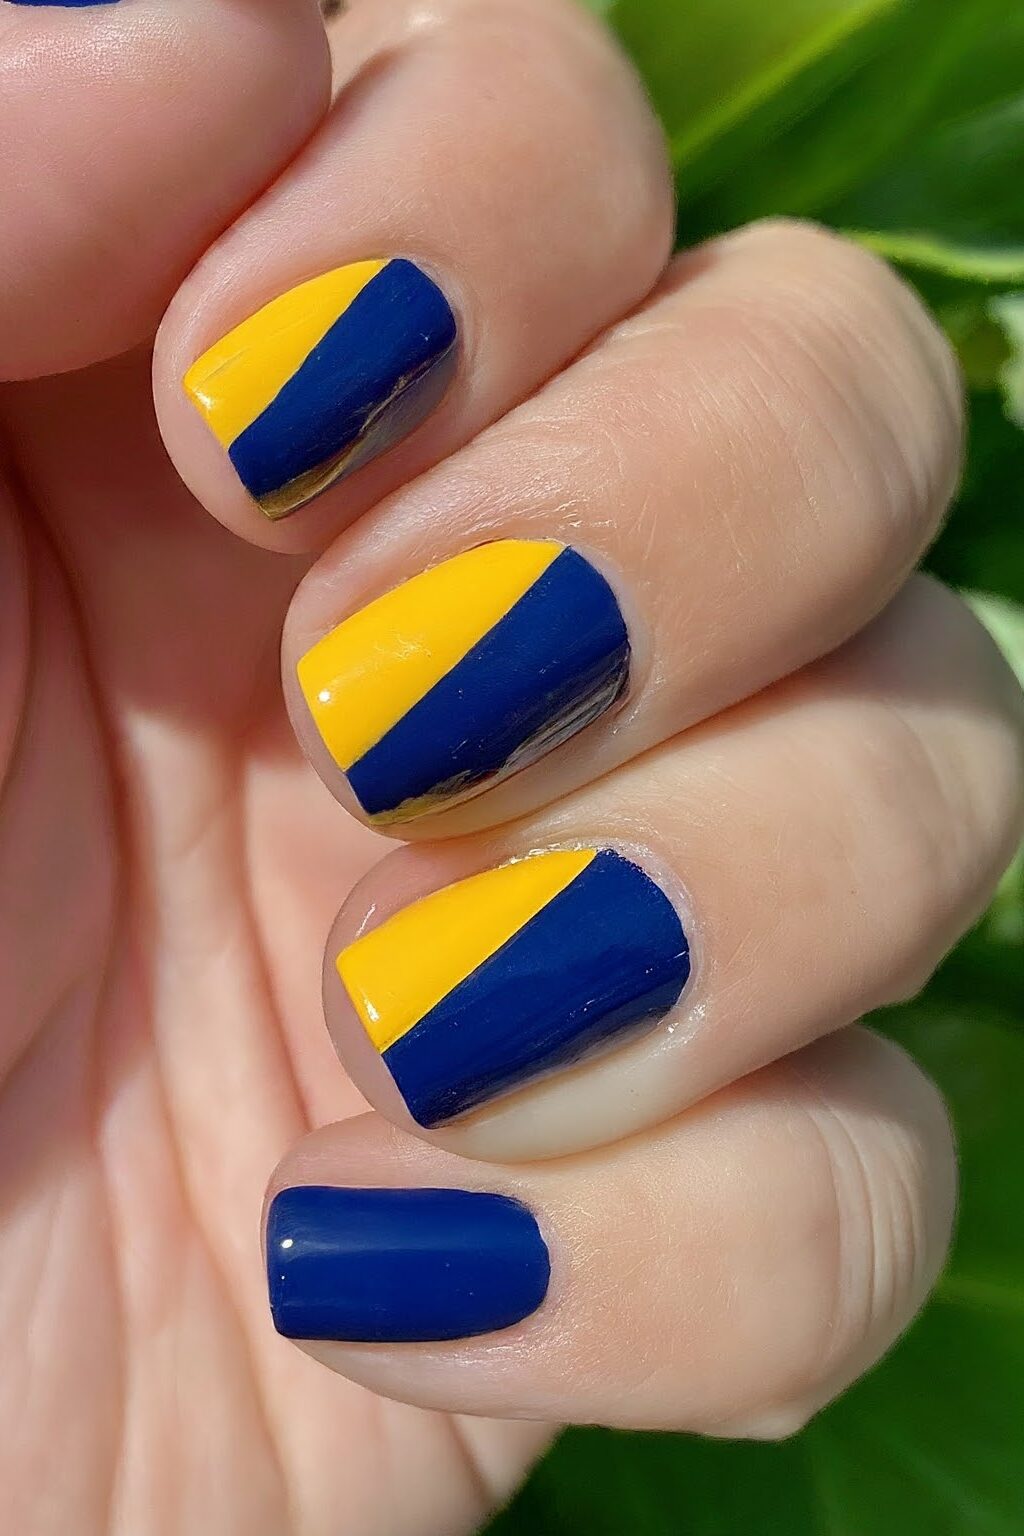
The inspiration behind this design can be traced back to various creative sources, but it’s the simplicity and the personal connection to school colors that make it stand out.
The process begins with choosing a base color that represents one of your school colors. Marine Blue is a popular choice for its deep, vibrant hue that serves as a perfect canvas. After applying your base color, the real magic starts with the application of the second color.
Using tape is a game-changer in achieving crisp, clean lines that define the color block effect. Once your base polish is completely dry, place a piece of tape diagonally across the bottom part of your nail to create a boundary for the two tones.
The choice of a second color, such as a shimmery navy, complements the base while adding depth and interest to the design.
Carefully painting over the tape and the exposed nail with your second color and then slowly removing the tape reveals a sharp, sophisticated two-toned design that’s both eye-catching and meaningful.
4. Mismatched Pastel Palette
This trend offers a refreshing twist on traditional nail art by combining various pastel shades in a single manicure, creating a look that’s as unique as it is stylish.
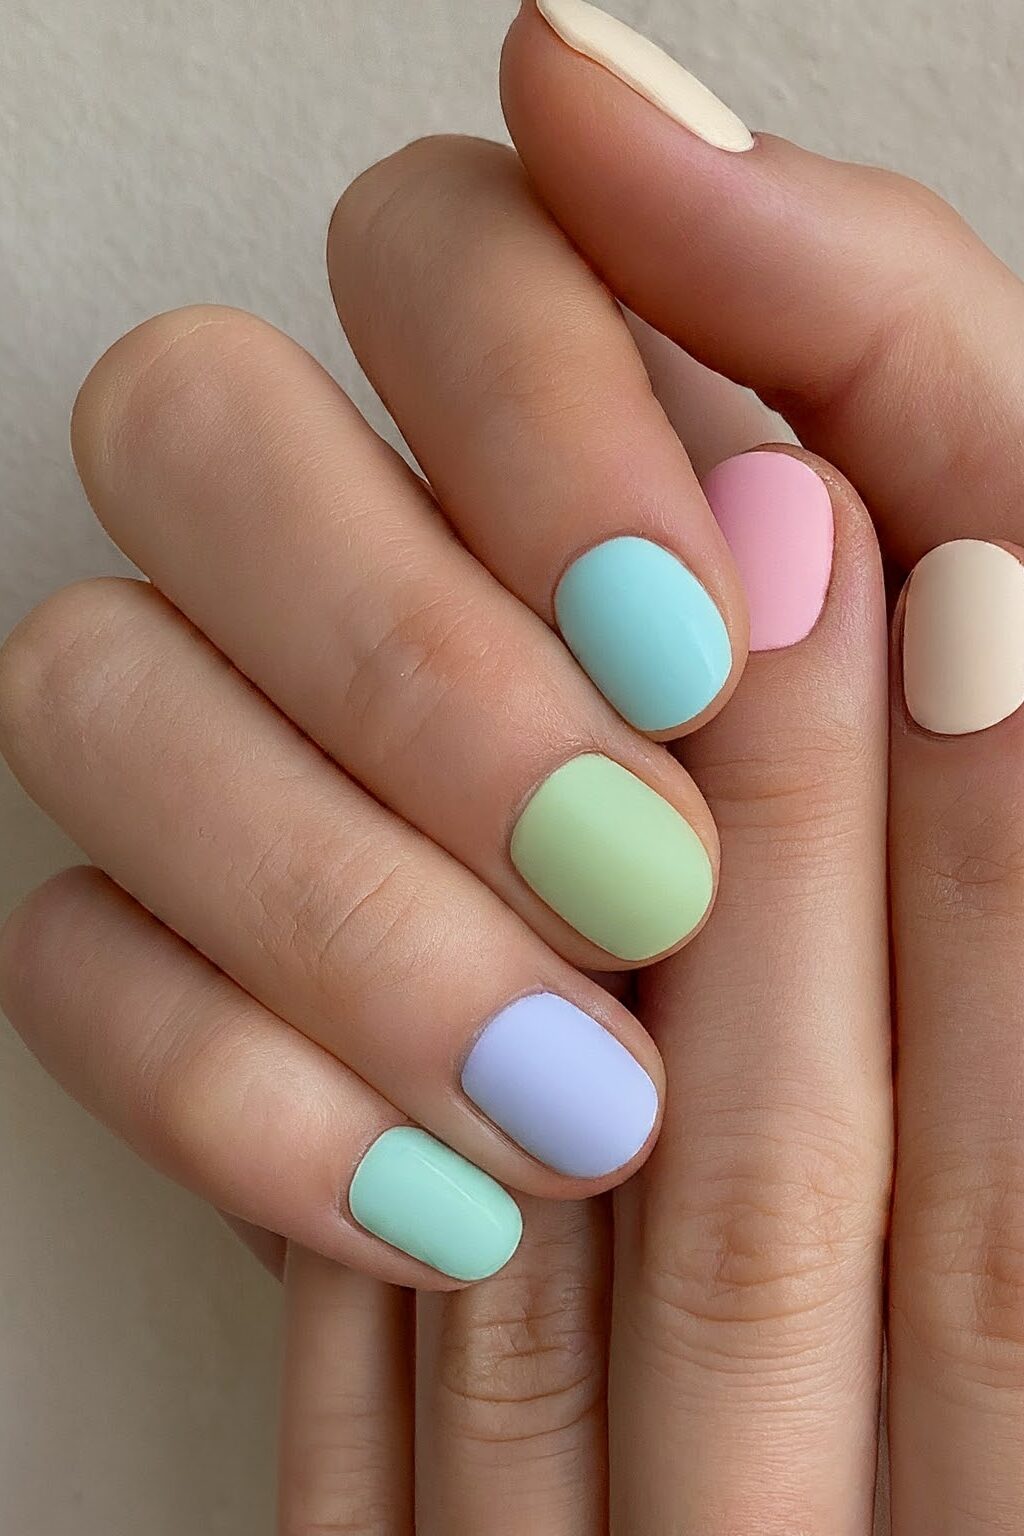
The beauty of this design lies in its effortless ability to blend seemingly disparate colors into a cohesive and eye-catching display.
Start your pastel adventure by selecting a range of soft, airy hues. Think of the tender blush of pink, the serene touch of sky blue, and the subtle warmth of lavender.
The key to nailing this look is in the artful juxtaposition of these colors. You might choose to paint each nail a different pastel shade or creatively segment the colors on a single nail.
For an added twist, incorporate a floral accent nail. This can be achieved by using a fine brush to add delicate floral designs over a base of your favorite pastel polish.
The robin’s-egg-blue-inspired mismatched mani stands out for its simplicity and elegance. It pairs beautifully with a variety of colors, making it a versatile choice that can transition from casual daytime wear to a more formal evening look.
The softness of the blue offers a calm canvas that highlights the vibrancy of other pastel shades.
5. Metallic Accents
If you’re keen on adding a touch of sophistication and shine to your artistic short nails, then incorporating Metallic Accents might be just what you need.
This style is all about enhancing your nail art with metallic colors like gold, silver, or metallic blues that catch the light beautifully and add an element of luxe to your overall look.
To begin, choose a metallic polish that complements your base color or your outfit for the day. You can apply the metallic polish in various ways depending on the look you’re aiming for.
For a subtle yet chic appearance, consider using a metallic polish to paint thin stripes over a matte base coat. This contrast not only highlights the metallic sheen but also keeps the design minimal and elegant.
Another popular method is the sponging technique, where you lightly dab a sponge dipped in metallic polish over your nails.
This creates a more textured, layered effect that is perfect for a night out or a special occasion. The key here is to use a light hand and build the coverage gradually to achieve the desired intensity.
6. Negative Space Art
If you’re looking to elevate your nail art game with a modern twist, Negative Space Art on your artistic short nails might just be the trend you need to try.
This design cleverly uses the natural color of your nail to form part of the artwork, creating striking patterns that are both sophisticated and playful.
The concept of Negative Space Art revolves around leaving parts of the nail unpolished while decorating the rest with bold colors and shapes.
This technique not only highlights the design but also gives your nails a unique, eye-catching look. You can start with a clear base coat to protect your nails and enhance the natural beauty of your nail’s base color.
For a simple yet effective design, try geometric patterns like stripes, triangles, or circles. These shapes can be painted at the tips, along the side, or even across the entire nail, depending on your preference.
The use of contrasting colors, such as black and white or navy and gold, can make these patterns really stand out.
Another popular choice is the half-moon design at the base of the nail, which can be easily achieved with the help of a stencil or a steady hand.
This style pairs well with a glossy top coat to give the artistic design a finished look that’s both professional and stylish.
7. Geometric Shapes
If you’re drawn to clean lines and bold designs, Geometric Shapes on your artistic short nails might just capture your heart.
This style is all about precision and symmetry, or sometimes asymmetry, to create striking visual effects that are modern and edgy.
To embark on this geometric adventure, you’ll want to start with a solid base color that complements the geometric patterns you plan to use.
A classic white or black provides a great canvas, allowing the shapes to truly pop. But don’t shy away from using vibrant colors like electric blue or fiery red if you’re looking to make a bolder statement.
The real fun begins when you start creating the shapes. You can use tape or stencils to achieve sharp lines and perfect angles.
Triangles, squares, and rhombuses are just the start; you can combine several shapes to create a more complex and intriguing design. For a subtler look, consider just a single geometric shape on an accent nail while keeping the other nails in a solid color.
Another exciting approach is to play with the negative space, using the natural color of your nail as part of the design.
8. French Tip with a Pop of Color
Taking your artistic short nails to the next level with a French Tip with a Pop of Color is like adding a splash of excitement to a classic style.
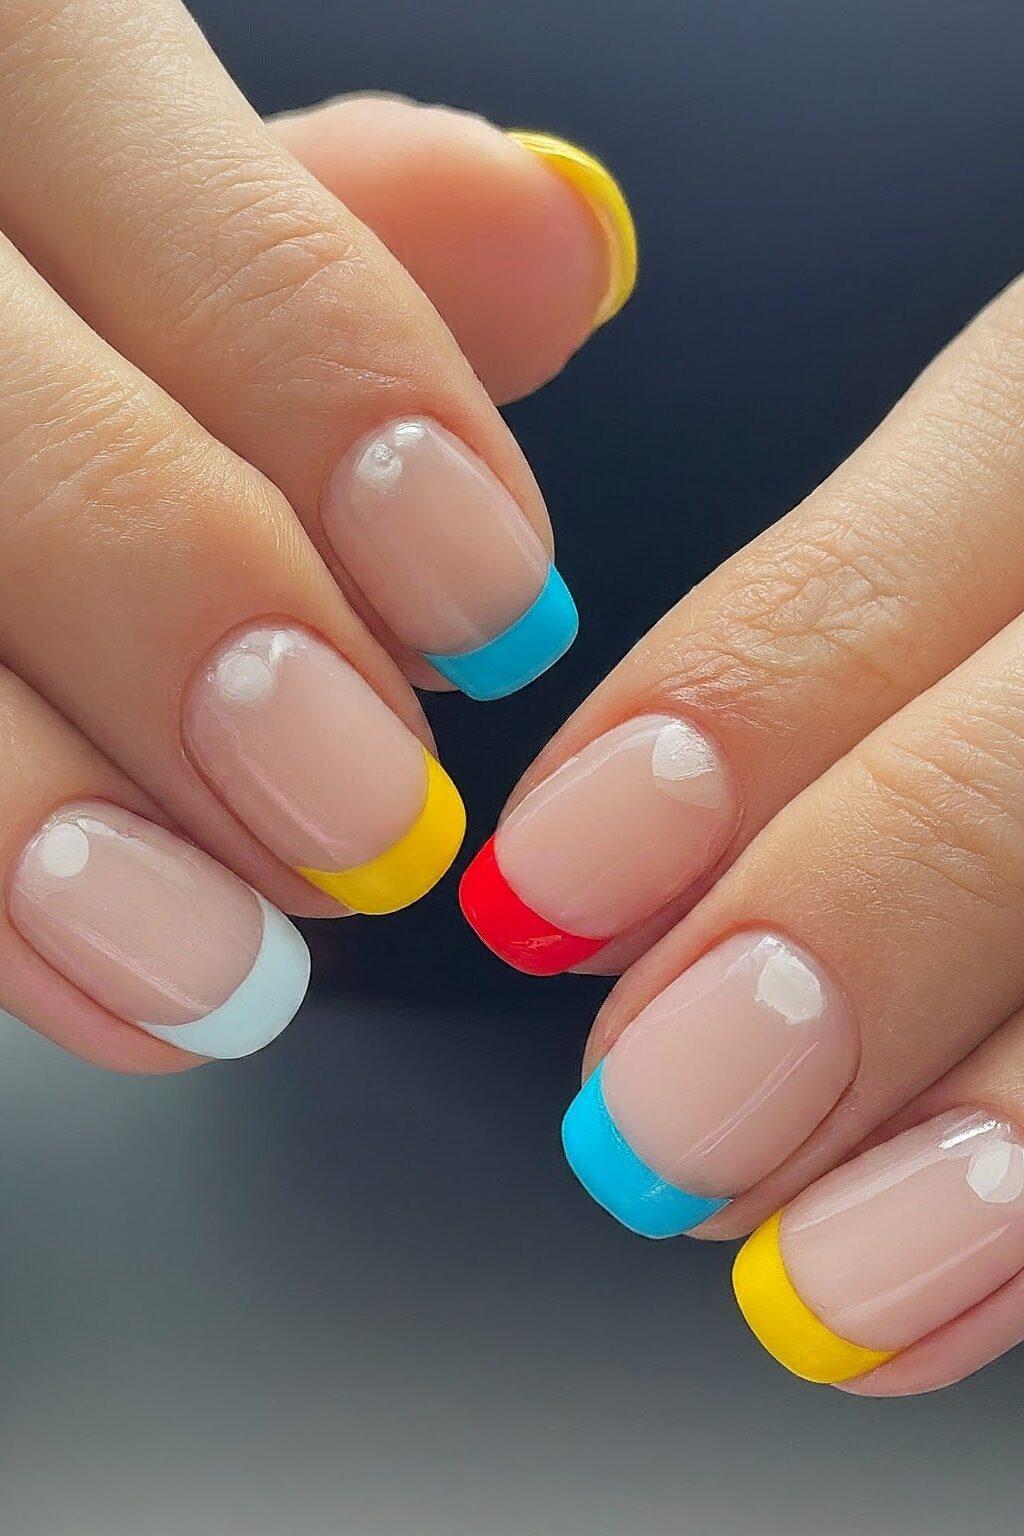
This vibrant twist on the traditional French manicure introduces a burst of color that not only showcases your creativity but also adds a playful edge to your look. The beauty of this design lies in its simplicity and the endless possibilities for customization.
To achieve this lively look, you start with a clean, neutral base on your nails. This could be a soft pink, beige, or any light shade that complements your skin tone.
The base acts as a canvas, setting the stage for the main attraction—the colorful tips. Instead of the classic white, choose a bold color that speaks to you.
Whether it’s a neon green, a deep blue, or even a metallic hue, this is where you can let your personality shine through.
The process of painting the tips requires a steady hand and a bit of patience. You can use tape to create sharp, clean lines, or if you’re confident in your freehand skills, go for it.
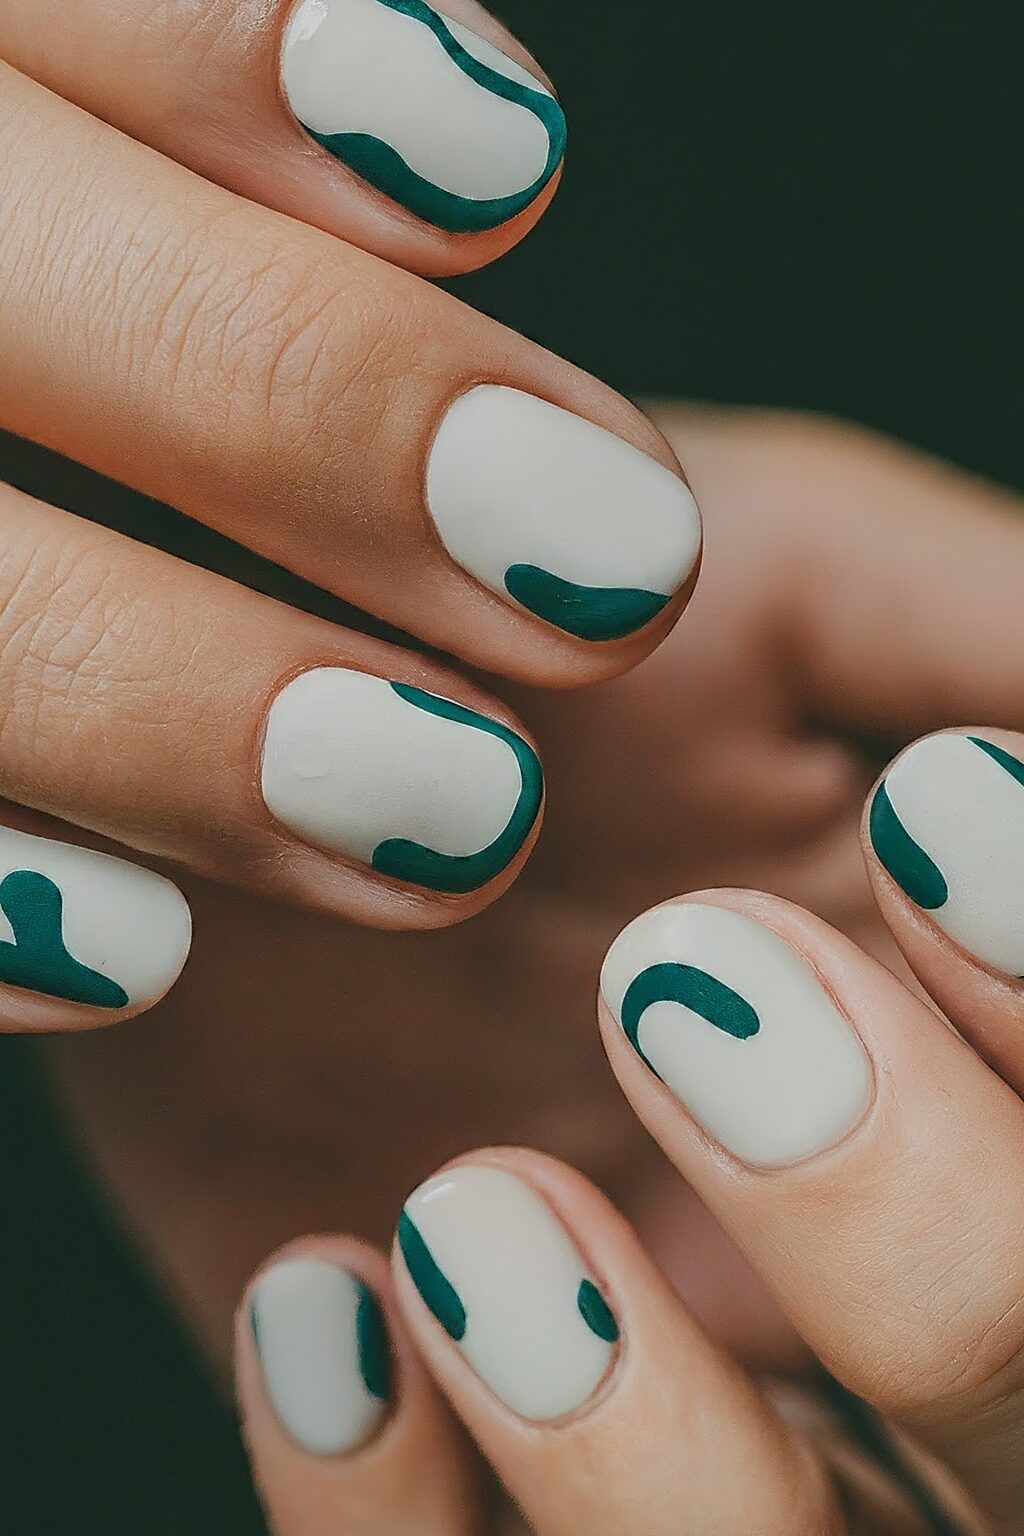
9. Waved Lines
This design captures the fluidity and grace of waves, bringing a sense of motion to your nails that’s truly captivating.
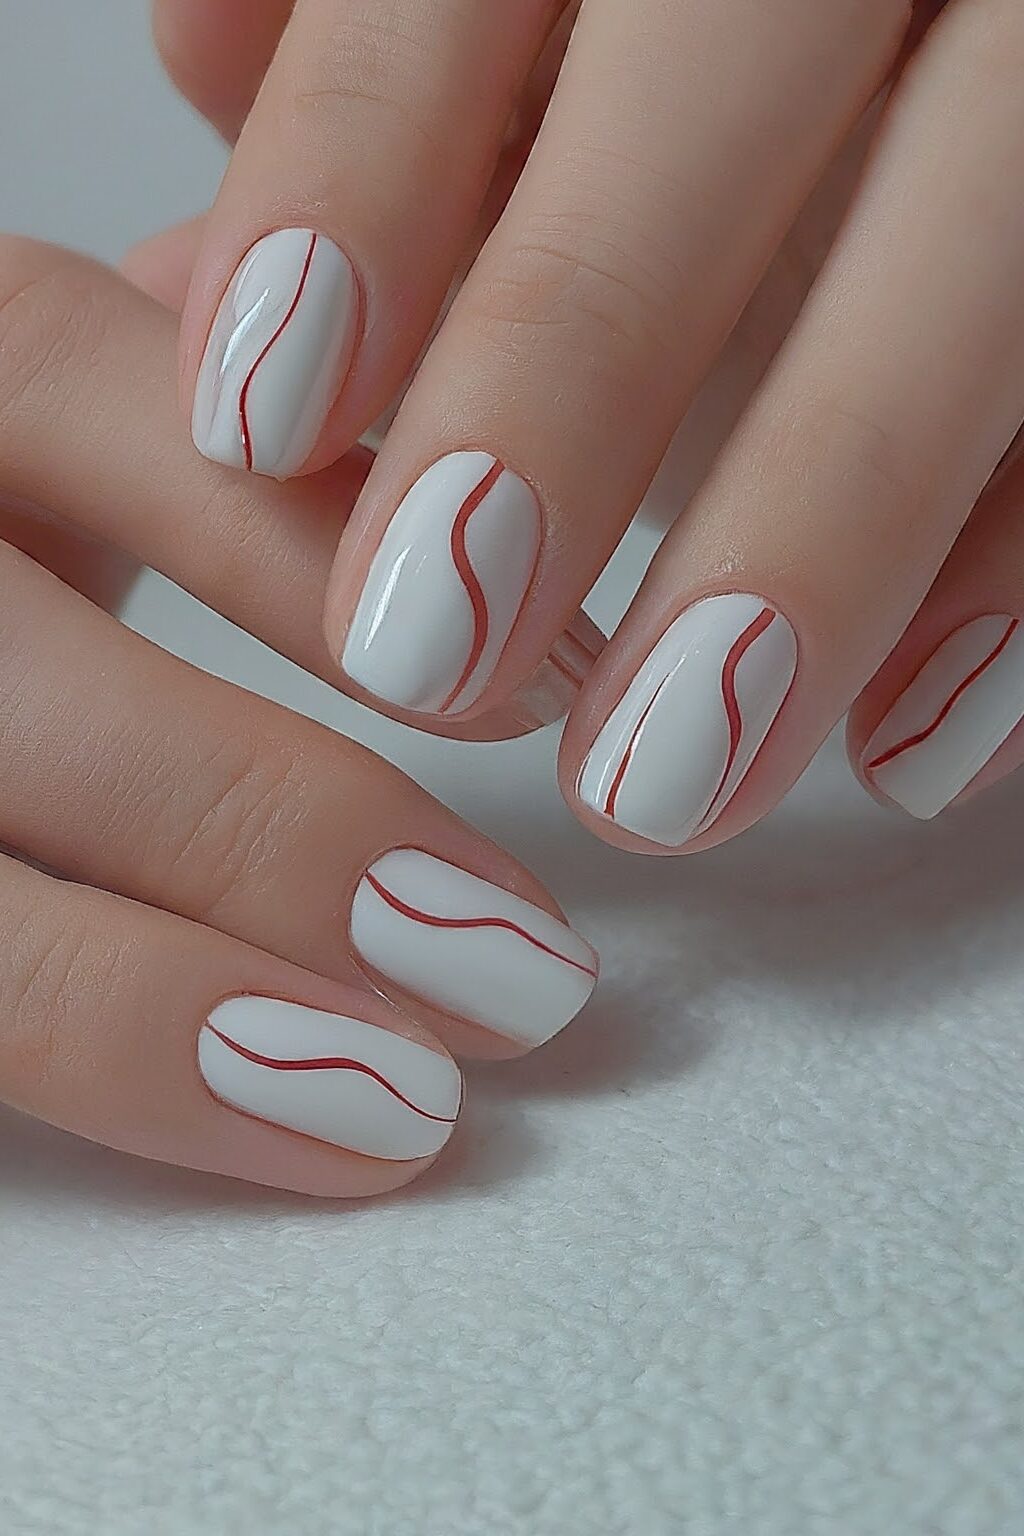
To embark on creating this aquatic masterpiece, you’ll want to start with a smooth, solid base color that will make your waves stand out.
A serene sky blue or a soft pastel shade can serve as the perfect backdrop for your waved lines. Once your base is dry, the real fun begins.
Using a fine brush dipped in a contrasting color, gently draw curved lines across each nail, mimicking the natural flow and rhythm of waves.
The beauty of this design lies in its simplicity and the freedom to experiment with different wave patterns and colors.
10. Constellation Design
Perfect for those who look up and dream, a constellation manicure is both enchanting and surprisingly easy to achieve.
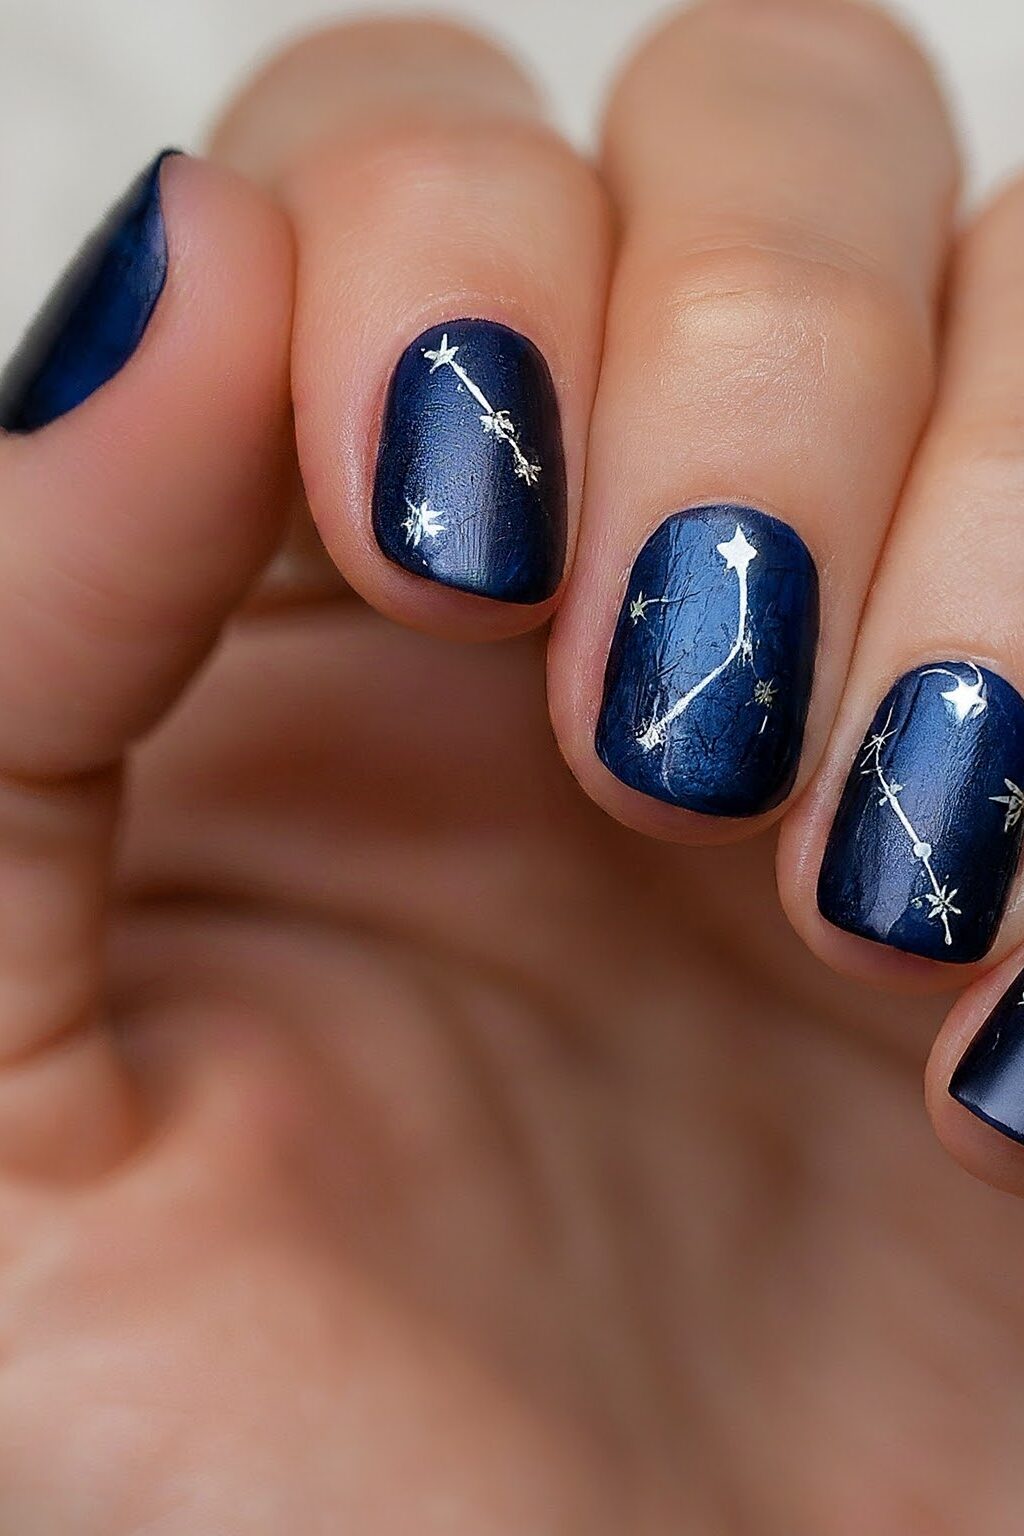
To start, pick a deep navy or black as your base color to represent the night sky. This dark canvas will make your constellations pop and give the impression of gazing into the vast universe.
Once your base coat is dry, the real art begins. Using a fine-tipped brush or a dotting tool, you can create miniature constellations by dotting small stars and connecting them with thin lines.
For an added touch of realism, include a few solo stars scattered across your nails, mimicking the random beauty of the night sky.
A dotting tool is perfect for this, allowing you to create stars of varying sizes. If you’re feeling adventurous, a tiny sprinkle of glitter polish on your constellations can mimic the twinkling effect of stars, adding depth and a subtle sparkle to your design.
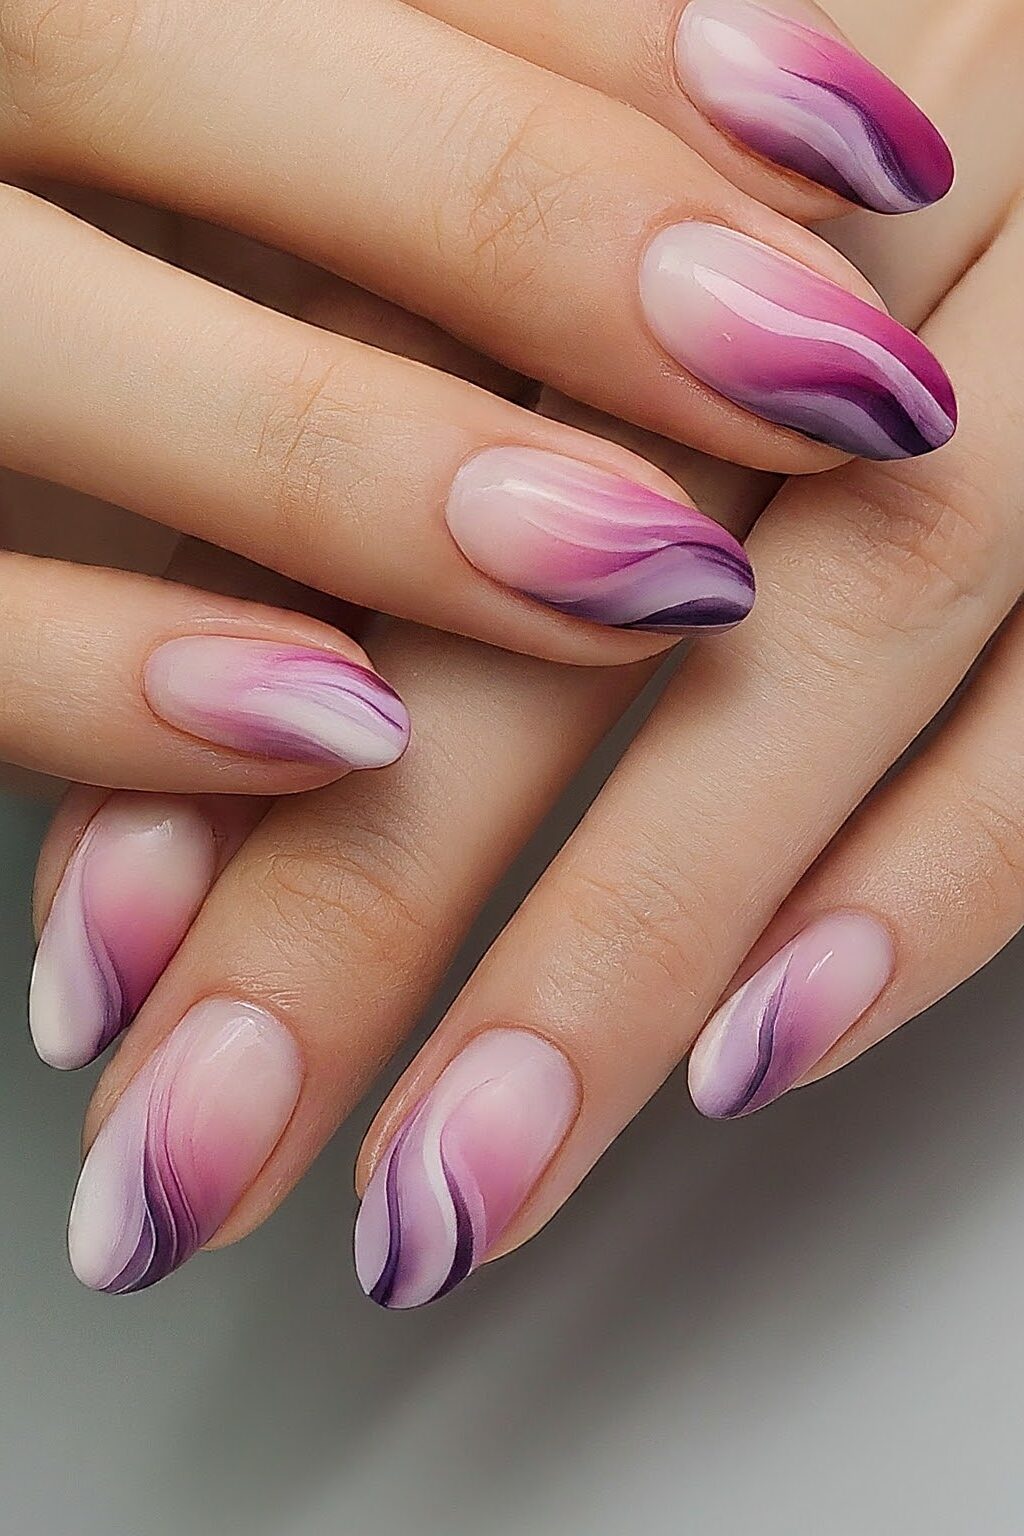
11. Marble Effect
This design mimics the intricate and natural patterns found in marble stone, bringing an element of sophistication and luxury to your nails.
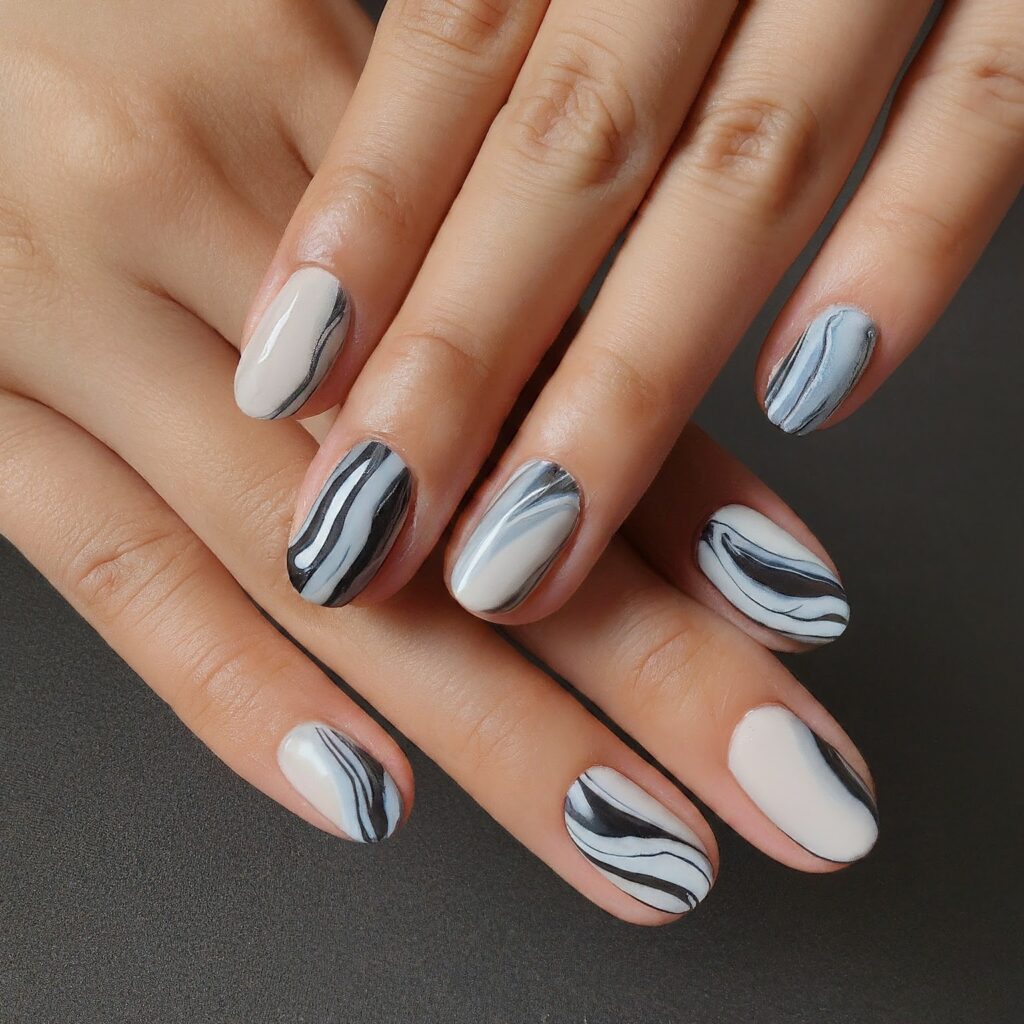
The allure of the Marble Effect lies in its complex appearance, which, surprisingly, can be achieved with a few simple steps, making it a fantastic option for those looking to add a touch of elegance to their manicure without the need for professional help.
To create the Marble Effect, you’ll begin with a solid base color that will act as the background for your marble design.
Whites and light grays are popular choices as they closely resemble the colors of natural marble, but don’t be afraid to experiment with darker shades or even pastels for a more unique look.
Once your base color has dried, the next step involves adding veins that mimic the natural patterns of marble. This is usually done with a contrasting color, such as black or gold, to ensure the design stands out.
Using a fine brush or a toothpick, you’ll gently draw thin, wavy lines across the nail, allowing them to intersect and create natural-looking marble patterns.
12. Ombré with a Twist
This style is perfect for anyone looking to blend traditional techniques with modern flair, creating a look that’s both sophisticated and striking.
Begin by selecting two colors that contrast well but also blend seamlessly. You might choose a soft pastel as the base and a rich, deep hue for the tip, or perhaps two bold colors that express your vibrant personality.
The application process starts with the lighter color as the base. Once dry, gradually sponge on the darker color starting from the tip, working your way down to create a smooth gradient effect.
The twist in this Ombré comes with the addition of a third color or a special effect like a shimmer or metallic finish.
This third element is subtly applied near the middle of the nail, where the two primary colors meet. It acts as a dazzling bridge, enhancing the transition with its sparkle or texture.
For a more dramatic twist, consider using a glossy top coat on half of the nail and a matte finish on the other half.
13. Textured Polish
This innovative approach to nail art allows you to add depth and dimension to your manicure without the need for intricate designs or professional skills.
Textured Polish stands out for its ability to create a tactile experience, transforming your nails into miniature canvases of art that you can feel as well as see.
The allure of Textured Polish lies in its simplicity and versatility. Whether you’re drawn to the sandy grains of a desert-inspired look, the smooth undulations of a wave pattern, or the sparkling grit of a glitter finish, Textured Polish offers a spectrum of sensory experiences.
The key to mastering this trend is to experiment with different types of textures until you find the one that resonates with your personal style.
Applying Textured Polish is as straightforward as it gets. Start with a clean, dry nail and apply your chosen Textured Polish as you would any regular nail polish.
Depending on the formula, you might notice the texture begin to emerge as the polish dries. Some textures might require a second coat to fully develop their unique effect.
It’s fascinating to watch as what begins as a standard application transforms into a complex, tactile surface on your nails.
One of the most exciting aspects of Textured Polish is its dynamic finish. Unlike traditional nail polish, where the look remains static once dry, Textured Polish can change appearance under different lighting or from various angles.
14. Dots and Lines Play
Immerse yourself in the whimsical world of Dots and Lines Play, where the simplicity of dots meets the elegance of lines to create a truly unique nail art experience.
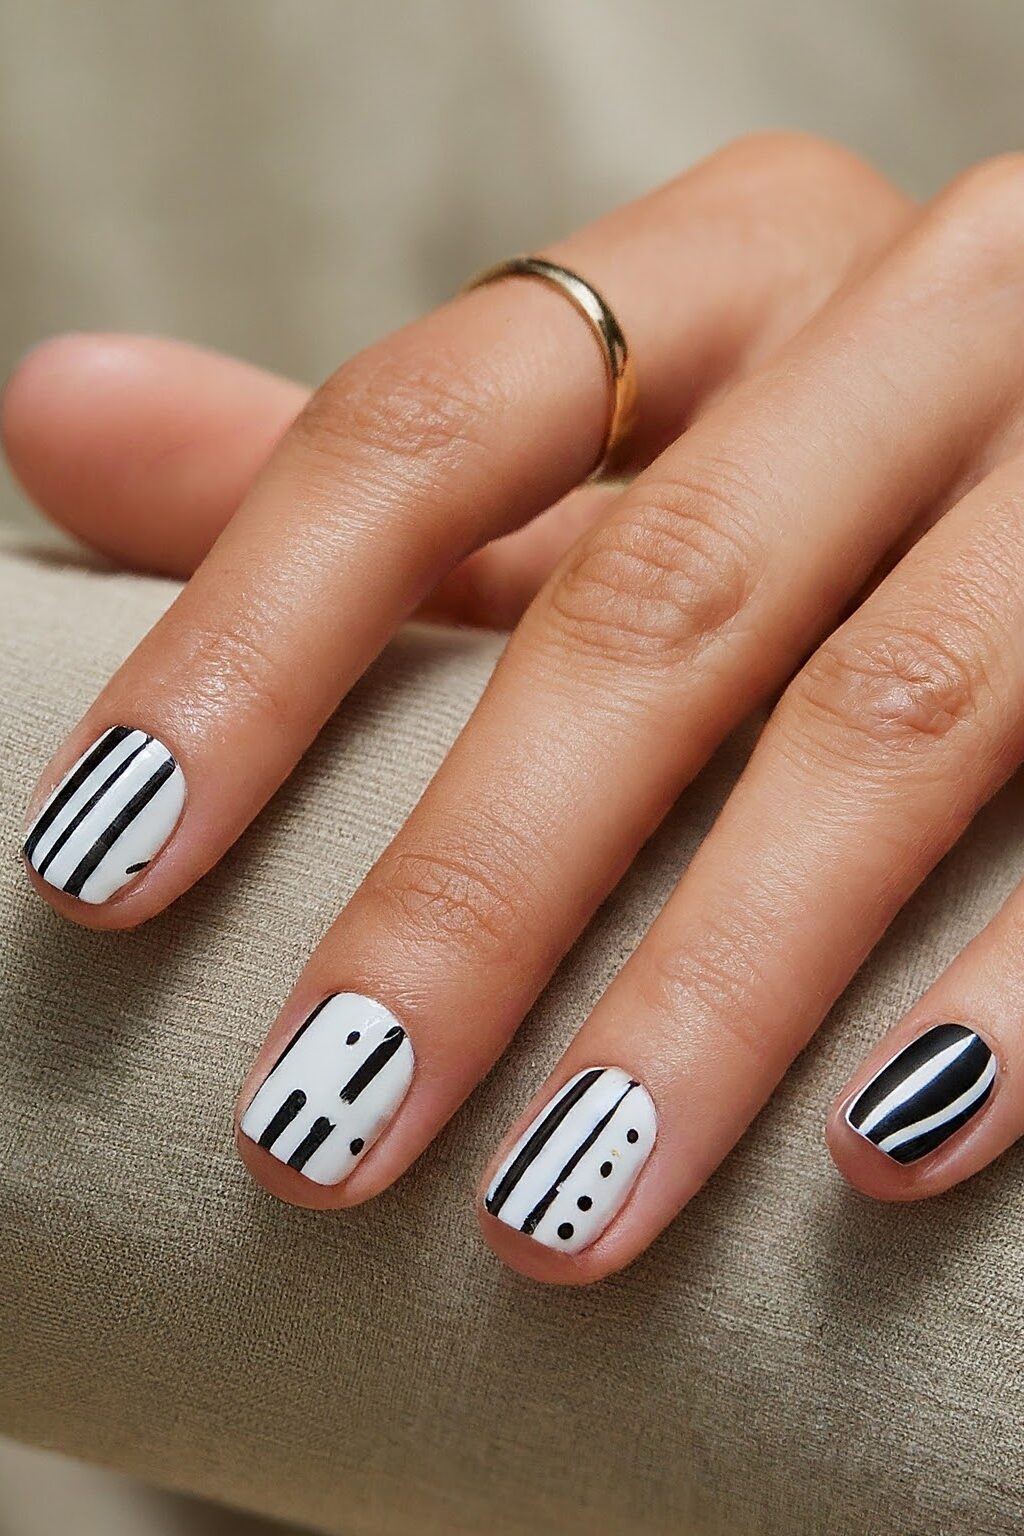
This style is perfect for those who adore a minimalist aesthetic but still crave a touch of creativity and personal flair in their manicure.
Imagine starting with a canvas of alternating chocolate and vanilla base colors across your nails, setting the stage for a delightful contrast.
On one hand, you explore the gentle harmony of light pink, light blue, and mint hues, drawing fine lines with a striping brush that dances across your nails in a playful rhythm.
The joy of seeing these pastel lines gracefully intersecting and overlaying on a chocolate or vanilla background is akin to witnessing art in motion.
As you switch to the other hand, the focus shifts to dots, where the same palette of light pink, light blue, and mint takes center stage.
With the precision of a dotting tool, you dot your way across each nail, creating patterns that range from perfectly aligned to joyously scattered.
This variation in dot sizes and placements adds a layer of depth and intrigue, making each nail a unique piece of the overall masterpiece.
The beauty of Dots and Lines Play lies in its versatility and the endless possibilities it offers. Whether you choose to adorn your nails with stripes on one hand and polka dots on the other or mix and match these elements on each nail, the result is always stunningly artistic.
Dots and Lines Play is a testament to the idea that sometimes, the simplest designs can be the most captivating.
15. Animal Print Accents
Unleashing your wild side has never been more stylish with Animal Print Accents on your artistic short nails.

This trend marries the untamed beauty of the animal kingdom with the refined elegance of modern nail art, creating a look that’s both bold and sophisticated.
To dive into this safari-inspired trend, you’ll want to start with a neutral base color that mimics the natural tones found in the animal kingdom.
Shades of beige, tan, or soft grey work perfectly as a canvas for your animal print designs. Once your base is set and dry, the next step is to choose your animal print.
Leopard spots are a popular choice for their playful yet elegant appearance. Using a fine brush, dot irregular shapes and spots across your nails, leaving some space between each spot to mimic the natural pattern.
For a more dramatic look, tiger stripes can make a bold statement. With the same fine brush, draw thin, wavy lines that stretch across the nail, varying the thickness and curve for a more natural effect.
If you’re feeling adventurous, why not try a zebra pattern? The key to achieving this striking design is precision.
Alternate between black and white polish to create the iconic zebra stripes, ensuring each line is sharp and distinct.
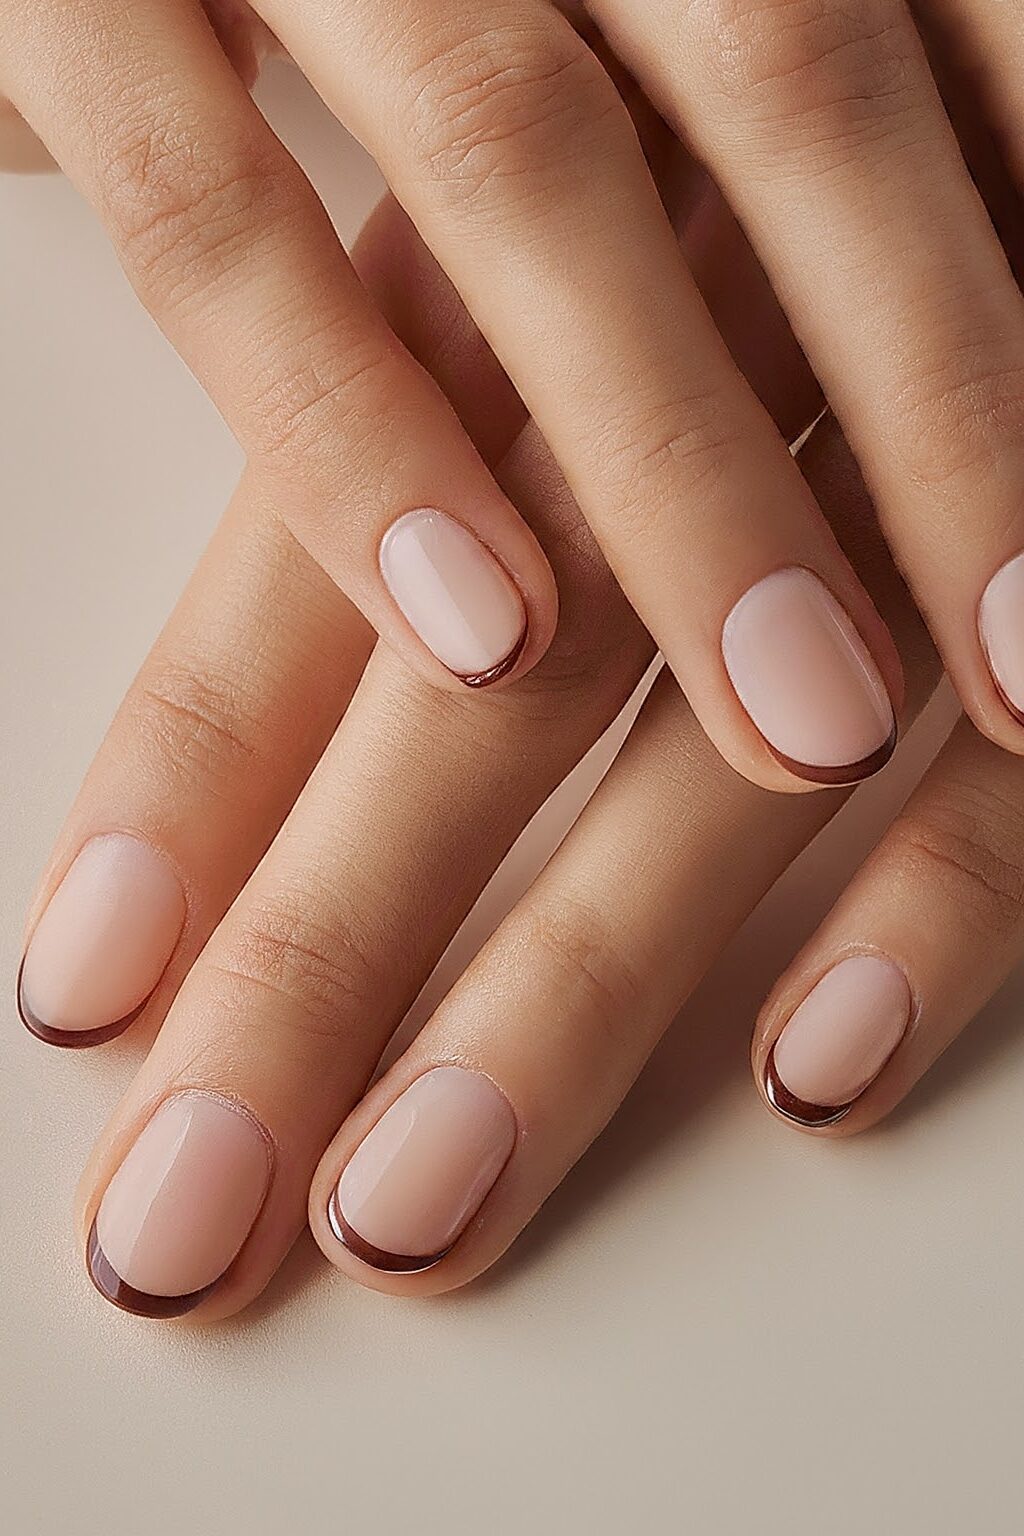
16. Classic French Tip with a Thin Line
French tip nails are the epitome of sophistication and sleekness, adding a chic and classy touch to any look. They’ve been a beloved choice for those seeking an elegant and polished appearance.
The Classic French Tip with a Thin Line elevates this timeless style by incorporating a delicate and precise line that adds a modern twist to the traditional French manicure.
This refined approach is all about subtlety and precision, making it a perfect choice for anyone looking to add a sophisticated yet understated flair to their nails.
The beauty of the Classic French Tip with a Thin Line lies in its versatility. Whether you have short or long nails, this design adapts beautifully, ensuring that it’s accessible to everyone.
The key to achieving a flawless and precise French manicure is patience and attention to detail. The thin line that characterizes this style requires a steady hand and a bit of practice, but the results are absolutely worth it.
The minimalist nature of the thin line adds an element of modern elegance, making your nails Instagram-worthy and suitable for any occasion, from casual outings to more formal events.
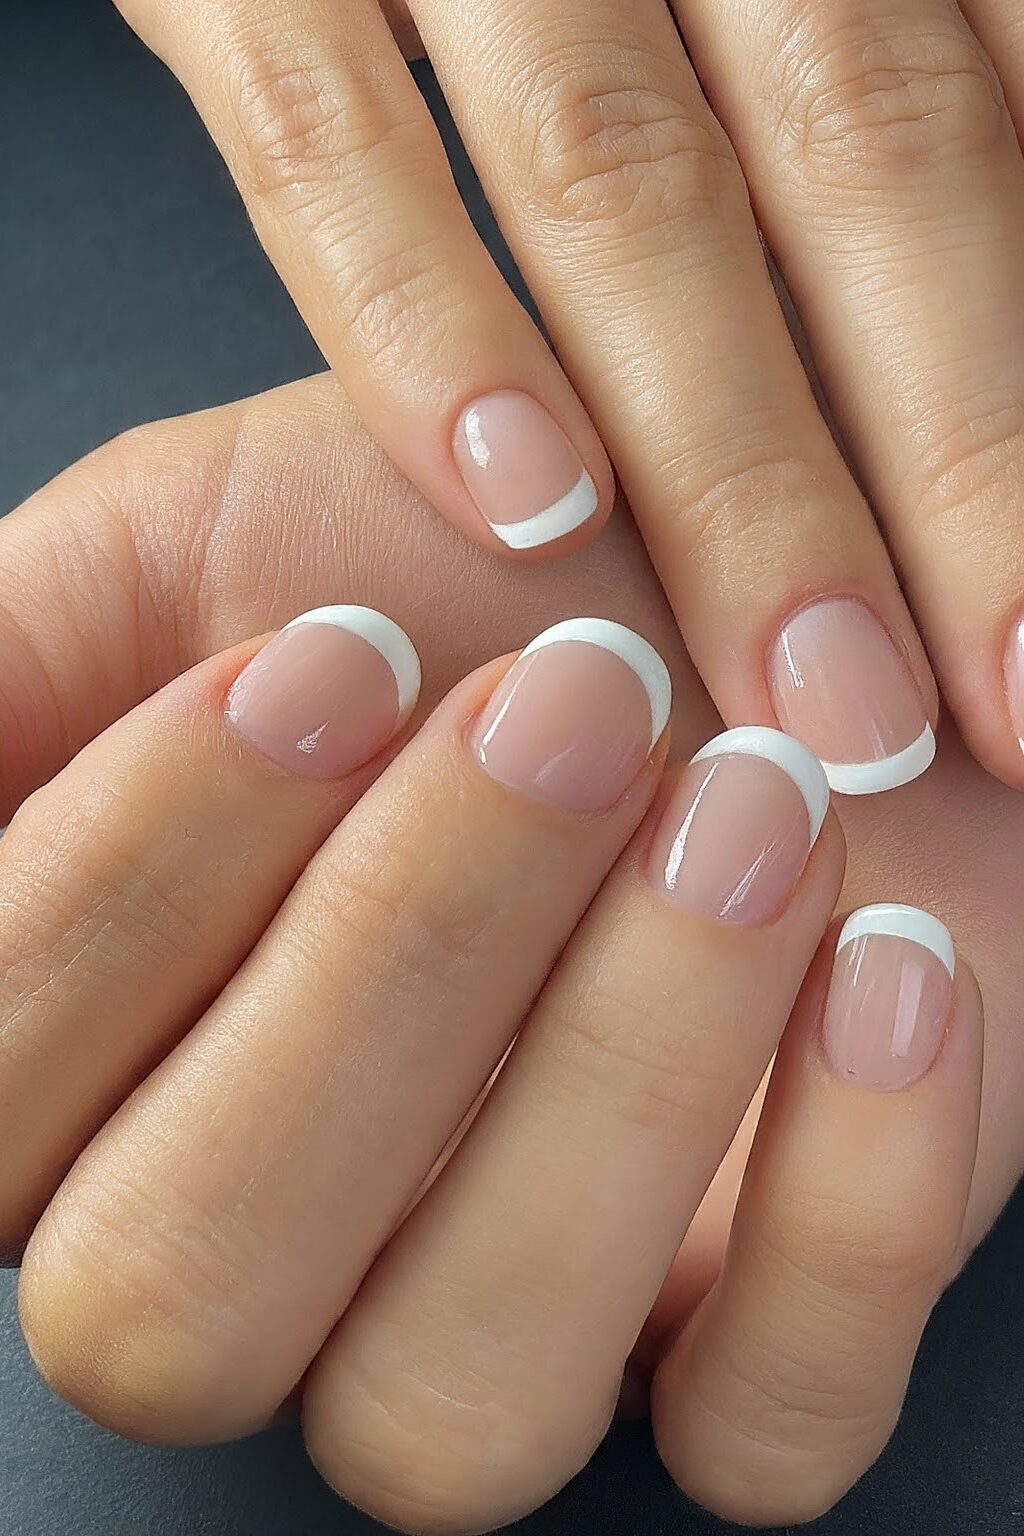
17. Micro French Manicure
It’s a delightful twist on the classic French manicure, characterized by its super-thin line that adds an elegant touch to your nails.
This minimalist design is not just a fleeting trend; it’s a timeless choice that brings sophistication and subtlety to your fingertips.
The essence of the Micro French Manicure lies in its simplicity. According to Rachel Apfel Glass, this style is a subtle take on the traditional French manicure, with the key difference being the significantly thinner line of polish.
It’s this delicate detail that sets the Micro French Manicure apart, offering a refined and modern look.
Despite its simplicity, the Micro French Manicure has been embraced by celebrities and style icons alike, thanks to its versatility and ability to complement a wide range of looks without overpowering them.
What makes the Micro French Manicure particularly appealing is its suitability for all nail lengths, whether short or long.
The focus is on creating a clean, milky white or pink base that conceals the natural smile line of the nail, setting the perfect stage for the micro-thin polish line.
This design adds dimension and elongates the nail, making it an excellent choice for those who prefer a more understated nail art style.
18. Metallic French Tips
One of the most captivating ways to accentuate your artistic short nails is by adorning them with metallic French tips.
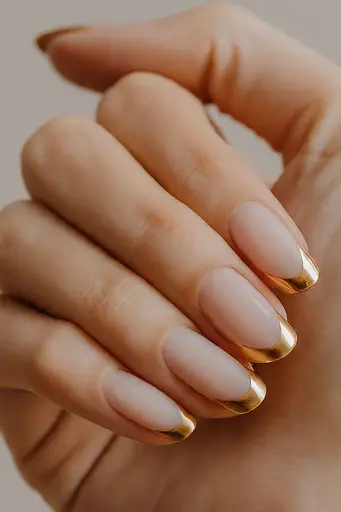
This trend takes the classic elegance of the French manicure and infuses it with a modern, edgy twist, making it a perfect choice for those who love to stand out.
The allure of metallic nails lies in their versatility. You can choose from a variety of metallic hues such as gold nails, silver, or even metallic blues to match your outfit or mood.
The shimmer and shine of the metallic polish catch the light beautifully, adding a luxurious touch to your manicure.
Beauty trends often come back around with a fresh twist, and the metallic French manicure is no exception.
Today’s iterations are more innovative and edgy, offering numerous ways to personalize your look. From subtle shimmery silver tips to bold molten silver, the choice is yours.
The addition of nail art designs such as negative space, silver star decals, or even silver gems, can make your metallic tips truly unique and eye-catching.
For a more futuristic feel, a molten metal design adds texture and an almost three-dimensional look to your nails.
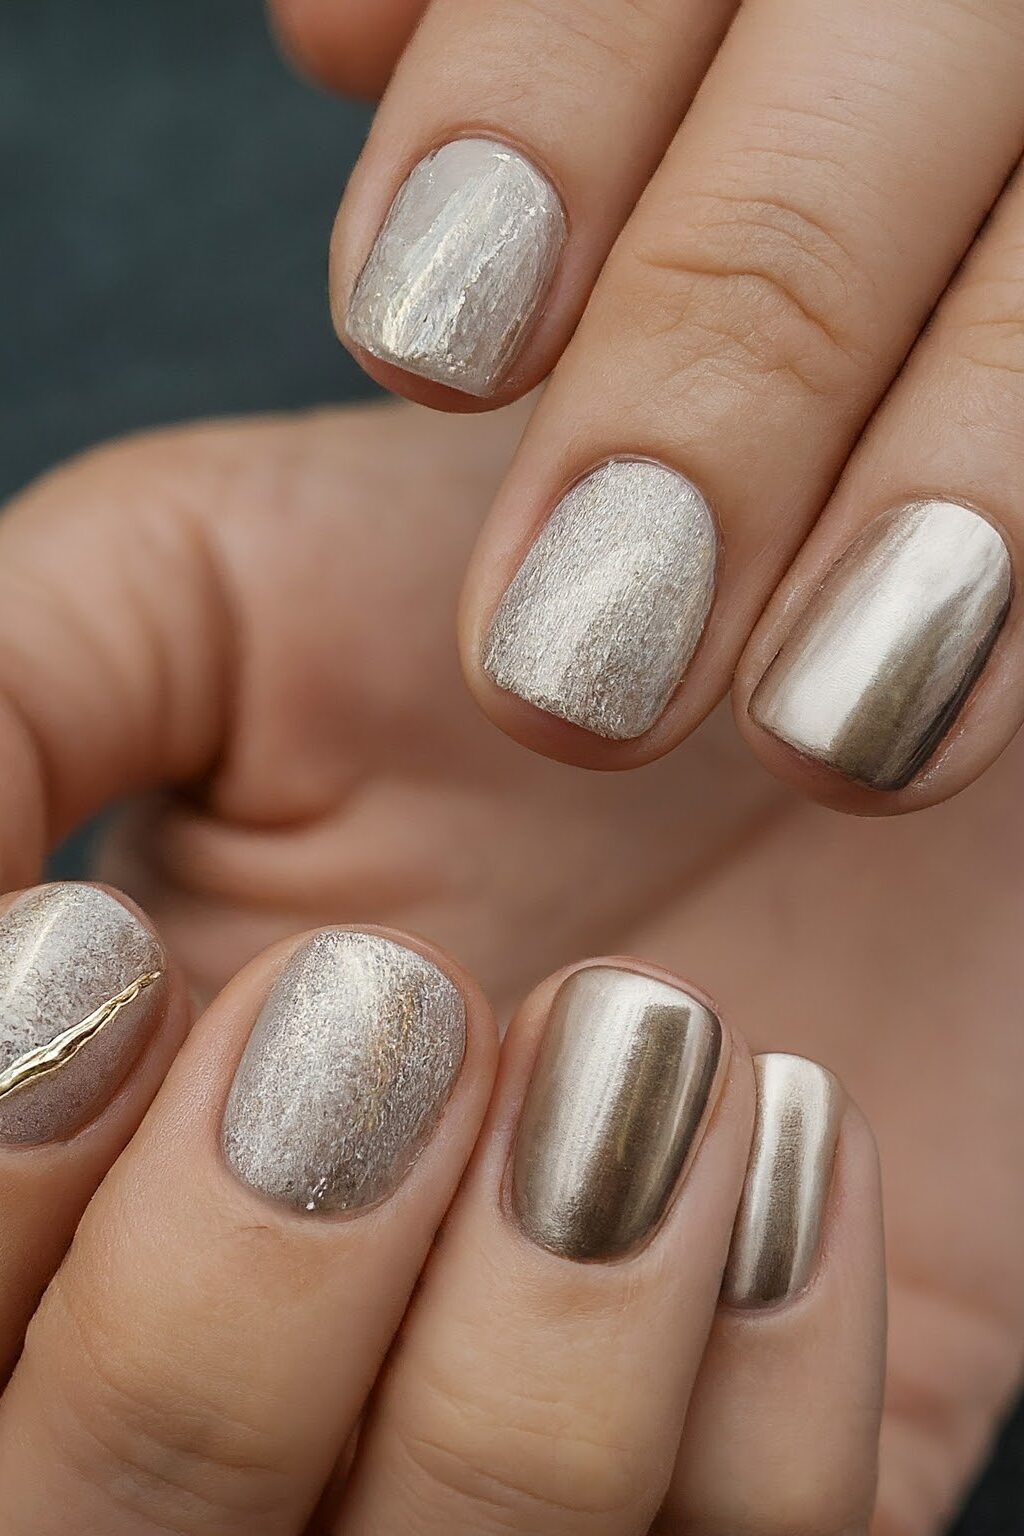
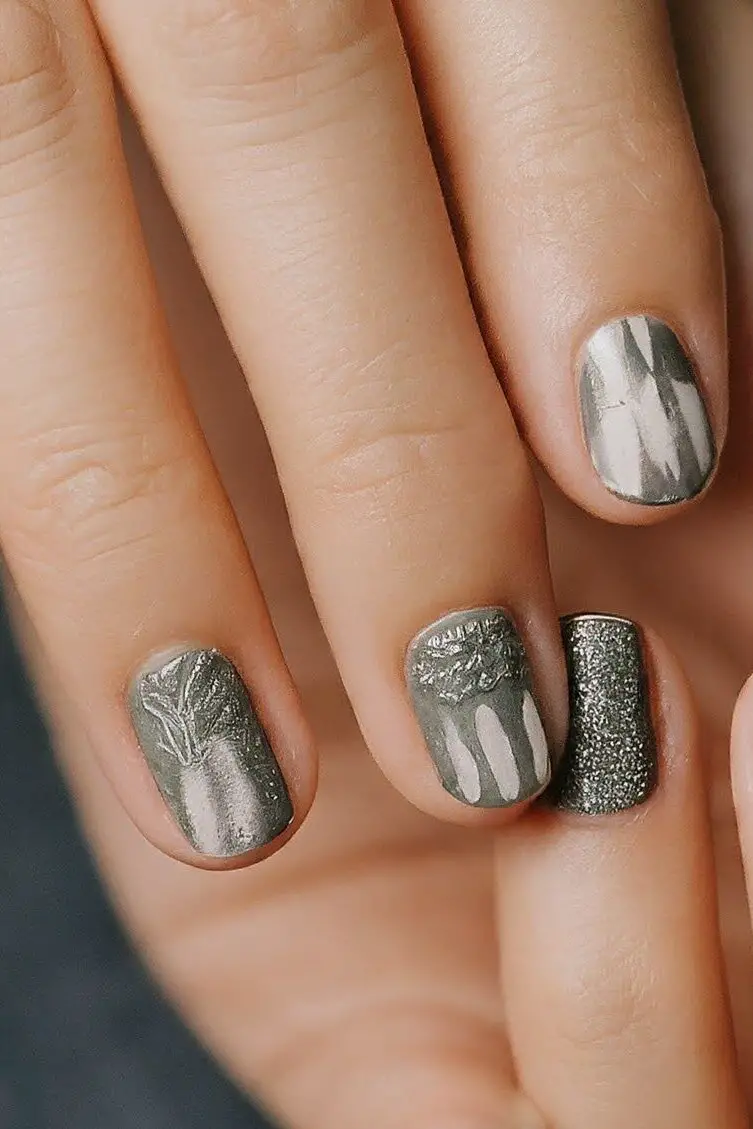
19. Chrome Nails with a Matte Tip
This unique style combines the lustrous appeal of chrome with the understated elegance of a matte finish, creating a look that’s both eye-catching and refined.
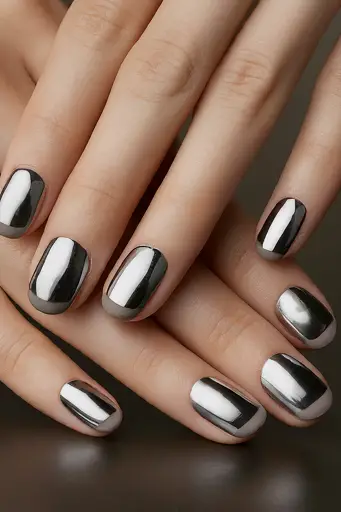
If you’re eager to experiment with a manicure that stands out, yet remains tastefully chic, this design might just be your perfect match.
The journey to achieving this distinctive look begins with selecting a neutral base color that complements your skin tone.
A good neutral base ensures that the chrome and matte finishes can truly shine without any color interference.
Once your base is set, the application of the chrome effect takes center stage. This involves a careful process of buffing the chrome powder onto your nails until a smooth, mirror-like finish is achieved.
It’s essential to ensure that your nails are as smooth as possible before this step; any imperfections will be magnified by the chrome’s reflective surface.
For the matte tip, precision and patience are key. After the chrome application, a defined French tip is carefully painted on using a gel.
20. Glitter Gradient
For those who adore a bit of sparkle and are looking to add a dazzling touch to their artistic short nails, the Glitter Gradient technique is a must-try.
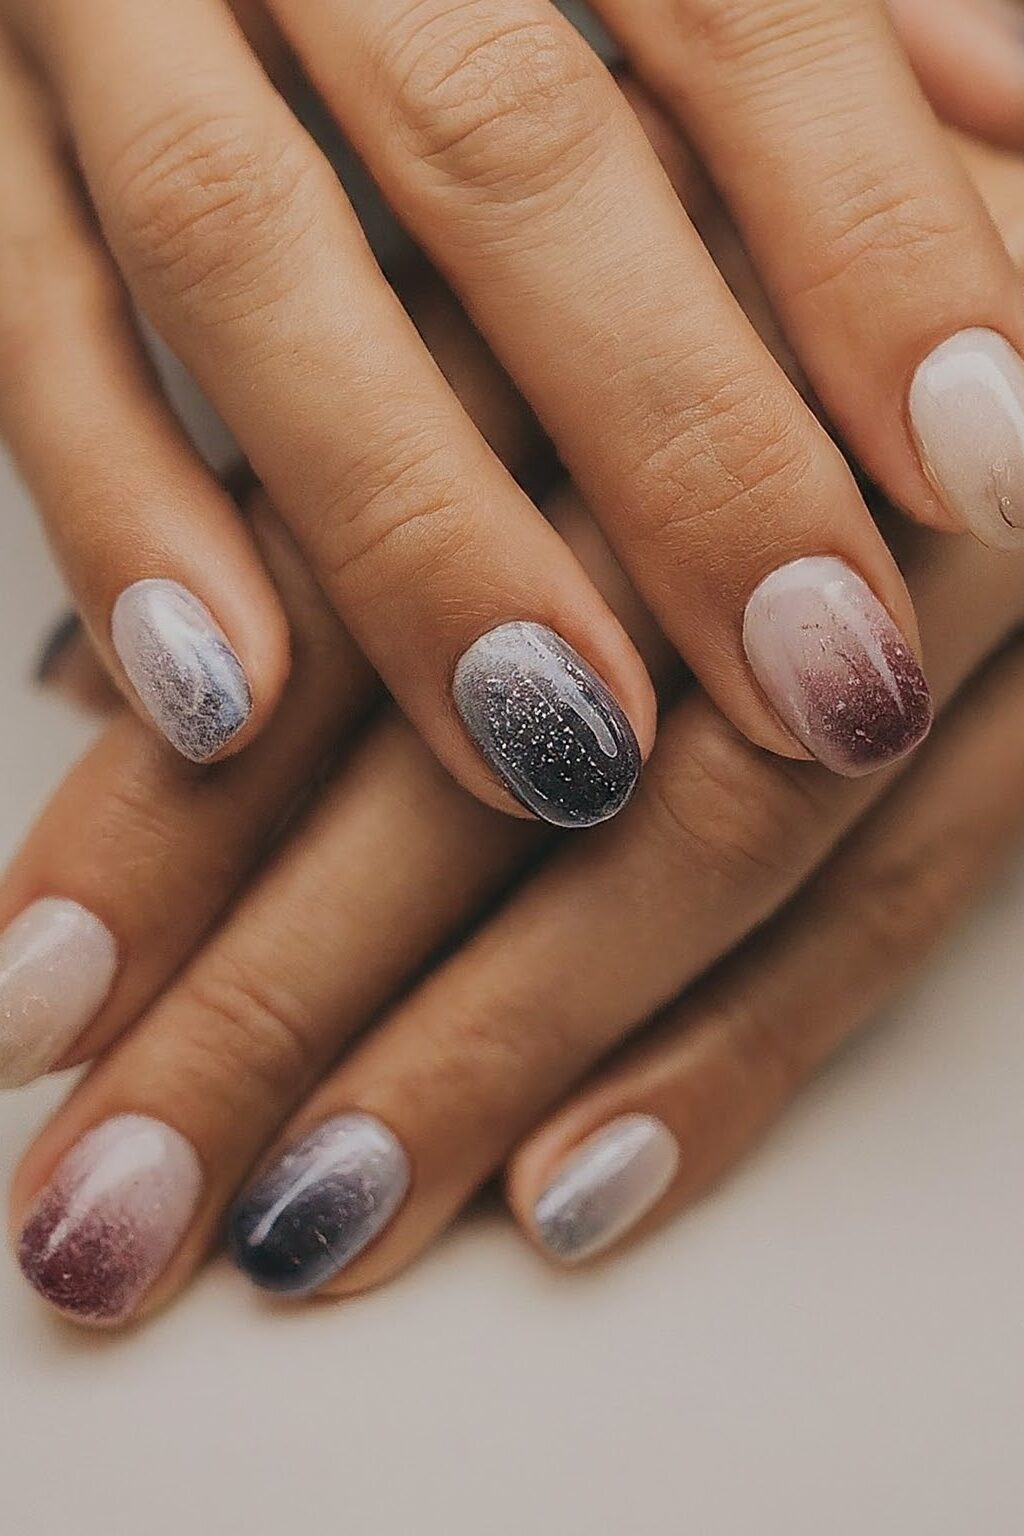
This style is all about creating a seamless transition from your natural nail color to a sparkling, glittery tip, offering an effect that’s both glamorous and sophisticated.
The beauty of this design lies in its versatility and the ability to customize it to match your personal style and occasion.
To achieve the Glitter Gradient look, you start by selecting a base color that complements the glitter polish you plan to use.
A neutral or pastel shade works wonderfully as it allows the glitter to truly stand out. Once you’ve applied your base color and allowed it to dry, the next step is to apply the glitter polish.
The key here is to start with a very light application at the base of your nail and gradually increase the concentration of glitter as you move towards the tip.
This can be achieved by lightly dabbing the glitter polish with a sponge or using the brush to stipple the glitter onto the nail, focusing more product towards the tip to create that beautiful gradient effect.
21. Neon French Tip with a Black Outline
Neon French Tip with a Black Outline nails bring a fresh and contemporary spin to the timeless French tip design.
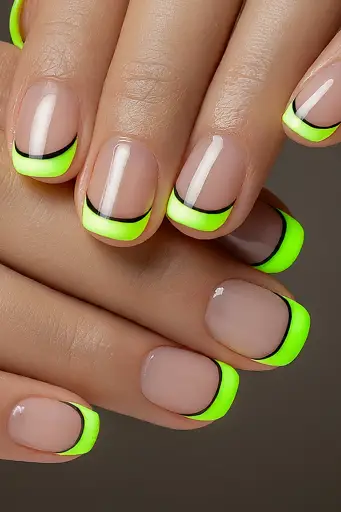
The infusion of neon hues adds a pop of vibrant energy, injecting life into an otherwise traditional manicure.
The sleek black outline serves as a bold contrast, outlining each tip with precision and adding a modern edge to the look.
This dynamic combination creates a striking and eye-catching nail design that’s both playful and sophisticated.
They effortlessly blend classic elegance with trendy flair, making them suitable for any occasion. With their bold colors and sleek outlines, these nails are sure to make a statement and leave a lasting impression wherever you go.
Wrapping up
Nail length doesn’t have to be a barrier to elegance; in fact, designs that elongate your natural nail bed can add a sophisticated touch without the need for length.
The shift towards short nails signifies a broader trend towards nail health and understated elegance. With TikTok highlighting short nails as a top trend for 2024, the move away from long acrylics towards low-maintenance, natural nails is clear.
The preference for short nails is not just a style choice but a reflection of the growing emphasis on nail health and the desire for minimal, elegant manicures.


Leave a Reply