Getting ready for a nail art session at home starts with the right preparation. Applying a base coat is a step no one should skip as it protects the nails and extends the longevity of the nail art.
Ensuring the base color is thoroughly dry before proceeding is equally crucial for achieving flawless easy summer nail art ideas.
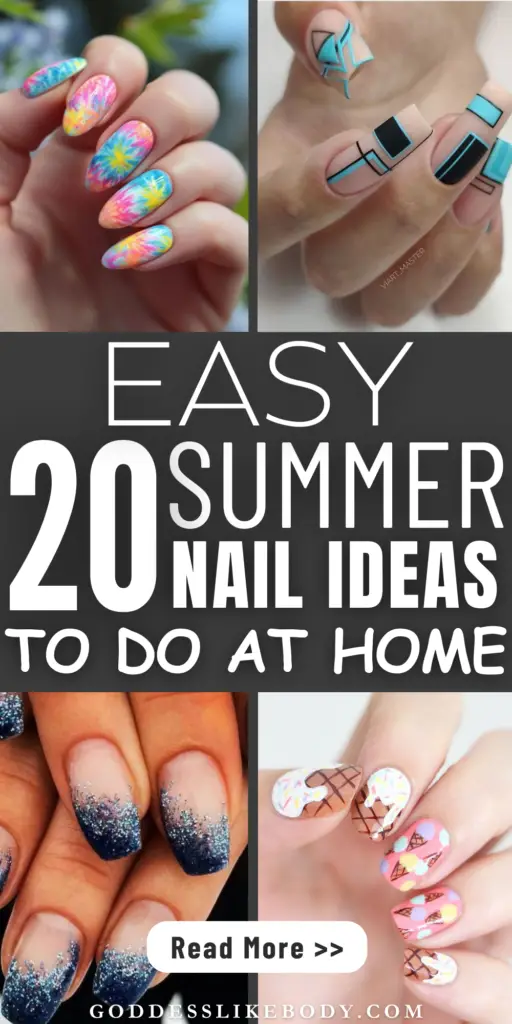
Each idea brings its unique flair, incorporating elements like pastel rainbows, sunny yellows, and beach wave accents to create summer nail art ideas that elevate any look.
Perfect for enthusiasts looking for summer nails ideas or cute summer nails, these designs promise to inspire creativity and bring a touch of summer joy to anyone’s fingertips.
Busy? Save this pin for later.
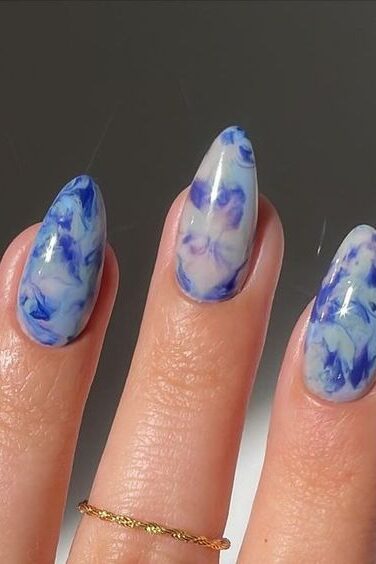
1. Marbled Magic
Materials Required for Marbled Magic Nail Art
Base coat and top coat
Several colors of nail polish
A cup of room temperature filtered water
Toothpick or orange stick
Scotch tape or liquid latex for skin protection
Nail polish remover for cleanup
Step-by-Step Instructions
Preparation:
Start by applying a base coat to protect your nails and ensure a smooth surface.
Wrap the skin around each nail with scotch tape or apply liquid latex to protect from polish overflow.
Creating the Marbled Design:
Fill a cup with room temperature filtered water.
Drop different colors of polish into the water, allowing each to spread before adding the next.
Use a toothpick or orange stick to drag through the circles of polish to create a marbled effect.
Application:
Dip your fingernail into the cup, aiming for the part of the pattern you like most.
Keep the nail submerged and use the toothpick to swirl any excess polish away from the nail.
Slowly remove your finger from the water, ensuring the polish adheres to the nail.
Finishing Touches:
Carefully remove the tape or latex from around the nail.
Use a small brush dipped in nail polish remover to clean up any residue around the nail.
Apply a top coat to seal in the design and add a glossy finish.
Tips and Tricks
Ensure the water is neither too hot nor too cold as the temperature can affect how the polish spreads.
Experiment with different colors and swirling patterns to create unique designs.
If the polish dries too quickly on the water, try adding a drop of polish thinner to the mix.
By following these steps, you can create stunning marbled nails perfect for any summer occasion. This technique allows for endless creativity, making each nail a unique piece of art.
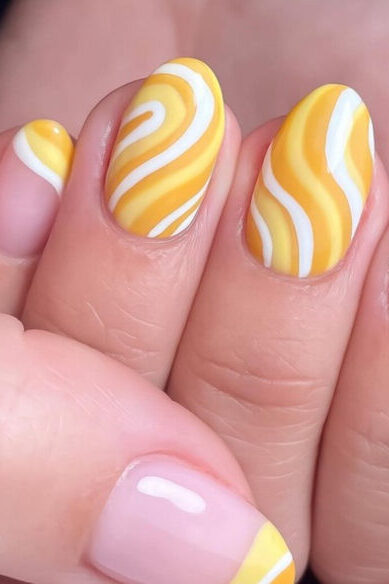
2. Sunny Yellow Splashes
Materials Required for Sunny Yellow Splashes Nail Art
Base coat
White nail polish
Bright yellow nail polish
Liquid latex or clear tape
Straw
Matte topcoat
Nail polish remover
Cotton swabs
Step-by-Step Instructions
Base Preparation:
Apply a base coat to protect your nails and prevent staining.
Follow with two layers of white nail polish, allowing each layer to dry completely for a solid, opaque base.
Setting Up for Splashes:
Cover the skin around your nails with liquid latex or clear tape to ensure easy cleanup.
Pour a small amount of bright yellow nail polish onto a palette or the back of your hand.
Creating the Splashes:
Dip one end of a straw into the yellow polish.
Position the straw above your nail and blow through the other end sharply to splatter the polish onto your nail.
Repeat the process as desired, cutting the straw’s tip if necessary to maintain cleanliness between applications.
Finishing Touches:
Once the design has dried, carefully peel off the liquid latex or tape.
Clean any stray polish from around the nails using a cotton swab dipped in nail polish remover.
Seal your sunny yellow splashes with a matte topcoat to enhance the visual effect and ensure longevity.
Tips and Tricks
Use a straw with a smaller diameter for finer splashes or a larger one for more dramatic effects.
Experiment with the distance and angle of the straw to vary the size and direction of the splashes.
Consider using neon yellow for an even brighter, summer-ready look.
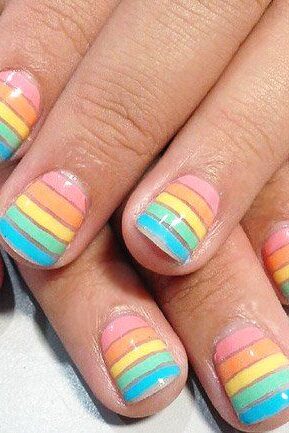
3. Pastel Rainbow Stripes
Materials Required for Pastel Rainbow Stripes Nail Art
Base coat
Lightest shade of polish for base layer
Dense sponge
Liquid latex
Selection of pastel polishes (e.g., pink, mint green, light blue, lavender, pastel yellow)
Top coat (glossy and matte options)
Step-by-Step Instructions
Base Preparation:
Start by applying a clear base coat to all nails to ensure nail strength and prolong the manicure.
Paint each nail with the lightest pastel shade from your selection to create a uniform base.
Protecting the Skin:
Apply liquid latex around each nail to protect the skin from stray polish.
Preparing the Sponge:
On a flat surface, align the sponge and paint a stripe of each chosen pastel color side by side in the order you prefer.
Application of Stripes:
Gently dab the sponge onto each nail, transferring the pastel stripes onto the base layer.
Carefully lift the sponge to avoid smudging the design.
Cleanup and Finishing:
Once the polish has dried, peel off the liquid latex.
Use a small brush dipped in nail polish remover to clean up any imperfections around the nails.
Apply a glossy top coat to give a vibrant finish or opt for a matte top coat for a contemporary look.
Tips and Tricks
Ensure each stripe on the sponge is sufficiently wet with polish to transfer effectively.
For a sharper look, use a thin brush to redefine the edges of each stripe after the sponge application.
Experiment with the order and width of the stripes to find the design that best suits your style.
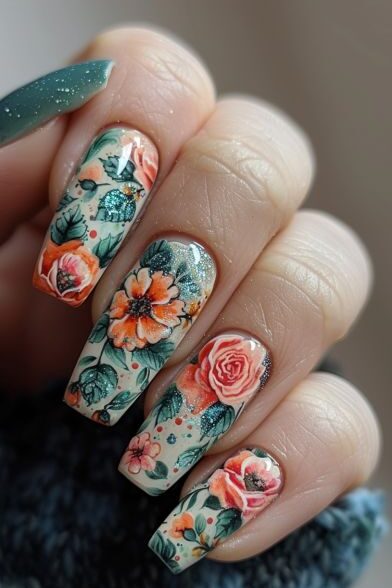
4. Floral Fantasy
Materials Required for Floral Fantasy Nail Art
Base coat and top coat
A variety of nail polish colors (electric blue, butter yellow, white, red, green)
Dotting tools or a bobby pin
Thin nail art brush
Liquid latex or tape for skin protection
Nail polish remover
Cotton swabs
Step-by-Step Instructions
Base Preparation:
Apply a base coat to protect your nails and provide a smooth canvas.
Choose a light sky-blue polish as the base color for a serene background.
Creating the Daisy Design:
Use a dotting tool to place a large white dot at the center of the nail.
Surround this with smaller yellow dots to form the petals, creating a daisy appearance.
Crafting the Rose Design:
Paint a small dark blue or black circle for the rose’s center using a dotting tool.
With a thin brush, draw curved red lines around the circle to simulate rose petals.
Highlight the petals with a lighter shade of pink for a more dimensional look.
Adding Leaves and Stems:
Use a thin brush and green polish to draw stems and leaf shapes, enhancing the floral theme.
Finishing Touches:
After the design dries, carefully remove any protective latex or tape.
Clean up the edges with a cotton swab dipped in nail polish remover.
Apply a glossy top coat to seal in the design and add a vibrant shine.
Tips and Tricks
For beginners, practicing the dot and stroke techniques on paper before applying polish to the nails can build confidence.
Experiment with different sizes of dotting tools to vary the flower designs, making each nail uniquely beautiful.
Incorporate a gradient effect in the petals or background for an advanced artistic touch, blending colors softly with a sponge.
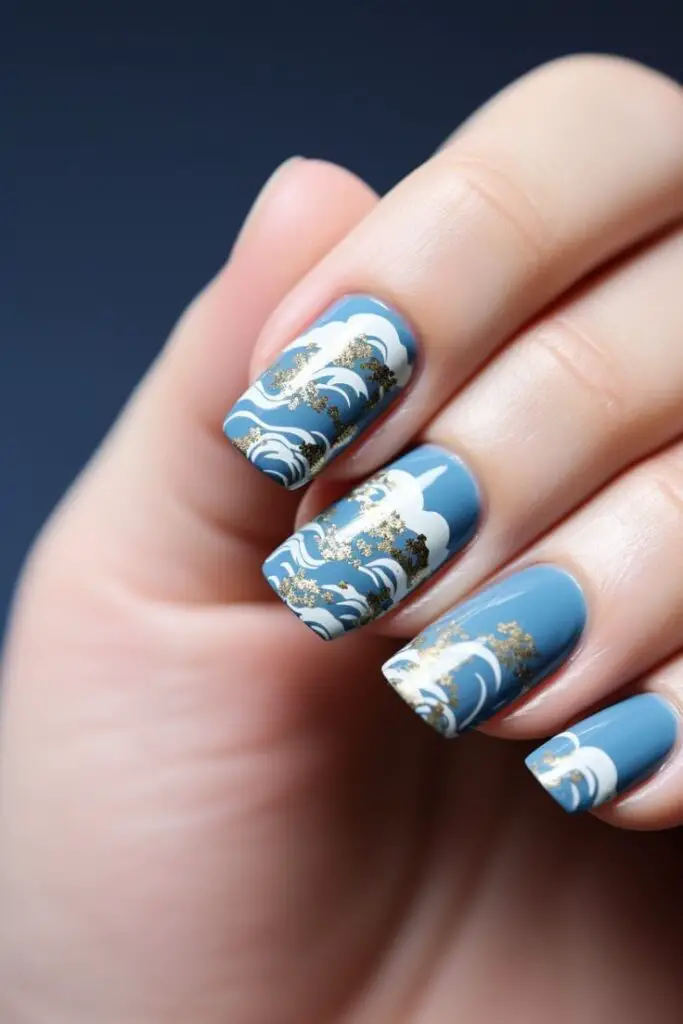
5. Beach Wave Accents
Materials Required for Beach Wave Accents Nail Art
Base coat
Nail polishes: Baby Blue Lagoon, Ballerina, Perfect Blue, Purity Perfect White
Blooming gel
Dotting tool, mop brush, ombre brush, striping brush
Palette
Foaming soap or dish soap
Top coats: Diamond non-white, matte
Acrylic powder (optional)
Glitter or embellishments (optional)
Step-by-Step Instructions
Base Preparation:
Apply a base coat to protect your nails and provide a smooth canvas for painting.
Apply the first layer of Ballerina nail polish and cure under a UV lamp.
Creating the Ocean Gradient:
Place a drop of each color (Baby Blue Lagoon, Ballerina, Perfect Blue) next to each other on the palette.
After curing the first layer of Ballerina, apply a second layer and cure again.
Apply blooming gel over the cured polish, then use the ombre brush to scoop through the colors, creating a marble effect. Cure this layer.
Adding Sea Foam and Sand Details:
Apply another layer of blooming gel over the blue gradient.
Use a striping brush and white polish to trace along the top of the blue, creating the surface of the water. Add more white to enhance the sea foam effect.
Apply a milk white polish below the sea foam to represent the sandy beach.
Creating Bubbles:
Mix foaming soap or dish soap with water and stir until suds form.
Apply these bubbles over the nail where desired and cure.
Finishing Touches:
Remove any excess with a lint-free wipe soaked in alcohol or cleanser.
Fill in the bubbles with a diamond non-white top coat for a glossy effect.
Apply a matte top coat on the sandy beach portion and sprinkle with acrylic powder for texture. Cure and dust off excess powder.
Tips and Tricks
Let each layer dry completely before applying the next to avoid smudging.
Use a gentle wrist motion when applying the sponge to create more natural wave-like patterns.
Experiment with different placements of sea foam and sand to mimic the natural unevenness of a beach shoreline.
Additional Options
Sponge Gradient with Starfish: For a starfish motif, use a dotting tool with orange polish to create a star shape on one of the nails.
Sandy Beige with Gold Nail Charms: Apply sandy beige polish as a base and add gold metal shells or a starfish charm for a luxurious beach look.
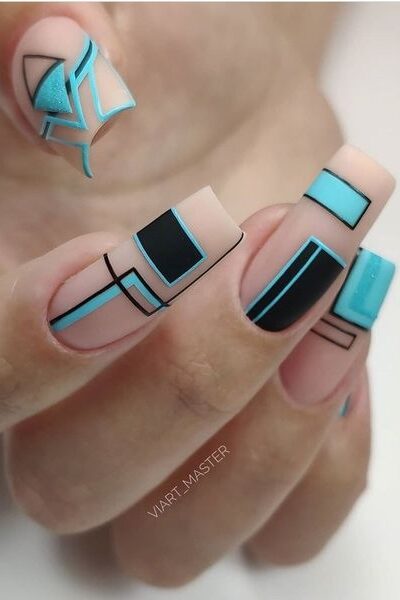
6. Geometric Patterns
Materials Required for Geometric Patterns Nail Art
Base coat and top coat
Colorful nail polishes
Cello tape
Scissors
Cotton bud
Nail polish remover
Step-by-Step Instructions
Base Preparation:
Clean and prepare your nails by filing them to the desired shape.
Apply a base coat to strengthen the nails and prevent staining.
Tape Design Setup:
Cut cello tape into various shapes and sizes for different geometric designs.
Place the tape on the nails at different angles to create unique patterns.
Applying Color:
Apply two coats of nail polish on the exposed areas of the nail. Let each layer dry completely before applying the next to avoid smudging.
Carefully remove the cello tape to reveal the geometric design.
Finishing Touches:
Clean up any imperfections around the nails using a cotton bud dipped in nail polish remover.
Apply a top coat to seal the design and add a high shine.
Tips and Tricks
Ensure each layer of nail polish is completely dry before proceeding to the next step to achieve crisp lines.
Experiment with different color combinations and tape shapes to create visually striking patterns.
Optional Additions
Add Sparkle: Place rhinestones on the thumb and ring finger nails for an extra touch of glamour.
Color Choices: Consider using a combination of matte and glossy finishes to add depth to your geometric patterns.
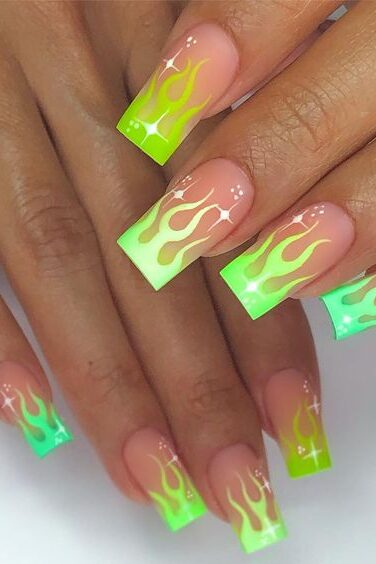
7. Neon Flames
Materials Required for Neon Flames Nail Art
Base coat and top coat
White gel polish
Neon pigments (pink and purple)
Detailer brush and dust brush
Liquid latex or tape for skin protection
Nail polish remover
Step-by-Step Instructions
Base Preparation:
Start by applying a base coat to strengthen the nails and prevent staining.
Use a white gel polish as the base to make the neon colors pop.
Creating the Base of the Flame:
Paint the flames starting thick at the base and thinning out towards the top.
Cure the white gel polish slightly under the usual time to enhance pigment adhesion.
Applying Neon Pigments:
Begin with the lighter pink pigment at the top of the flame.
Apply the darker purple pigment at the bottom, ensuring the colors meet and blend in the middle.
Detailing and Finishing:
Use the detailer brush to refine the flame shapes, creating smooth transitions between colors.
Gently dust over the nail with the dust brush to remove any excess pigment.
Seal your design with a top coat, opting for a matte finish if desired.
Tips and Tricks
Ensure the gel polish is not fully cured before applying pigments to improve blending.
Use a scrubbing motion with the detailer brush to seamlessly blend the neon colors.
Avoid washing hands immediately after application to prevent washing away the neon pigment.
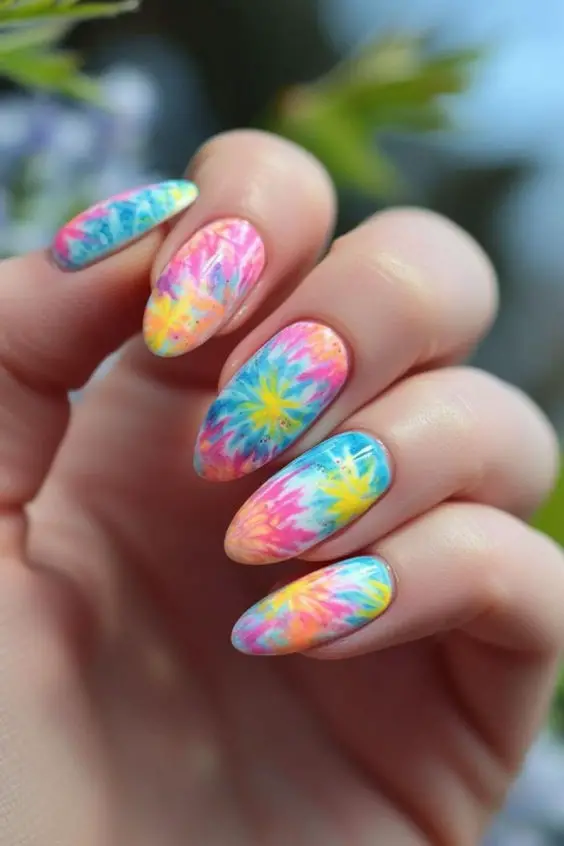
8. Tie-Dye Nails
Materials Required for Tie-Dye Nails
Base coat
Neutral and various colored nail polishes
Nail polish remover
Nail brush, toothpick, detailer brush
Scotch tape
Shallow container of water
Top coat
Step-by-Step Instructions
Base Preparation:
Apply a base coat to all nails and allow it to dry completely.
Paint two coats of a neutral base color and wait for it to dry thoroughly.
Creating the Tie-Dye Effect Using a Brush:
Place small dots of different colored polishes on the nail.
Use a nail brush dipped in nail polish remover to lightly tap and blur the colors together.
Repeat with additional colors if desired and allow to dry.
Using a Toothpick for Detail:
On another nail, apply thick stripes of three or more colors.
While still wet, drag a toothpick through the colors to create a tie-dye effect.
Allow to dry and apply a top coat.
Water Marble Technique:
Protect the skin around your nails using scotch tape.
Drop beads of different polishes into a container of water, layering one color at a time.
Use a detailer brush to pull the polish from the edges towards the center.
Dip the nail into the design, repeat for each nail, and then apply a top coat after removing the tape.
Gel Polish Swirls:
Apply two coats of white gel polish as a base and let it dry.
Create a swirl pattern using a striper brush with different gel colors.
Pull through the colors with the striper brush to blend and create a tie-dye effect.
Finish with a top coat.
Tips and Tricks
Ensure each layer is dry before applying the next to prevent smudging.
Experiment with different colors and techniques on each nail for a unique look.
Use a fine detailer brush for intricate designs and cleaner lines.
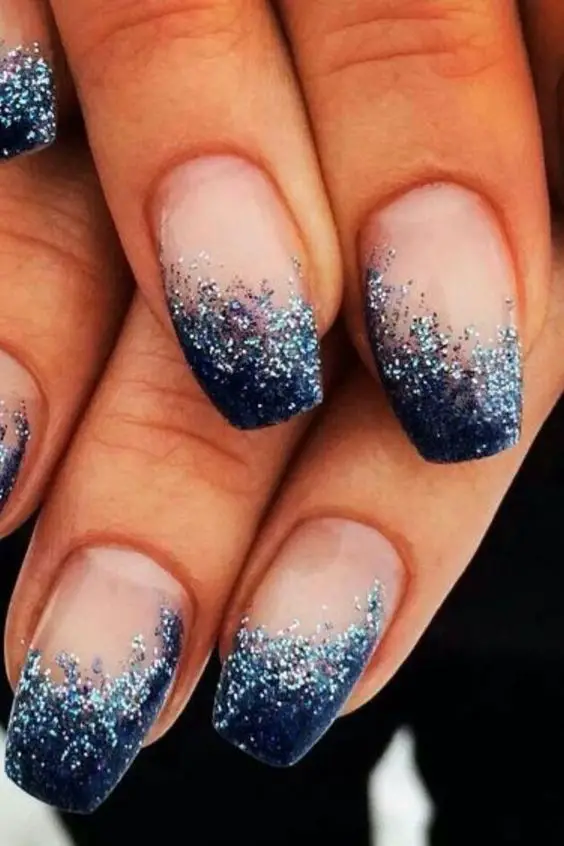
9. Glittery Gradient
Materials Required for Glittery Gradient Nail Art
Base coat
Any base color nail polish
Glitter nail polish
Sponge
Toothpick
Detail brush
Top coat
Nail polish remover
Cotton swabs
Step-by-Step Instructions
Base Preparation:
Apply a base coat to protect your nails and allow it to dry completely.
Paint your nails with a base color of your choice and wait for it to dry thoroughly.
Applying the Glitter:
Dab a small amount of glitter nail polish onto one end of the sponge.
Gently dab the sponge across the bottom three-quarters of your nails, applying less glitter as you move up to create a fading gradient effect.
Enhancing the Gradient:
For a more intense glitter look, use a toothpick to place individual glitters, focusing on the tip of the nail to enhance the “raining down” effect.
Alternatively, use a detail brush to apply glitter gel around the edges of the nail for a defined glitter outline.
Finishing Touches:
Clean up any excess glitter or polish with a cotton swab dipped in nail polish remover.
Apply a couple of coats of top coat to smooth out the glitter and seal in your design.
Tips and Tricks
Ensure the base color is completely dry before applying glitter to avoid smudging.
Use the sponge technique for a soft gradient and the toothpick method for precise glitter placement.
Experiment with different colors and types of glitter to customize the look to your style.
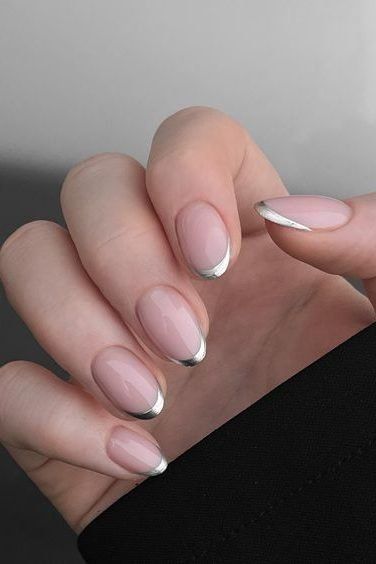
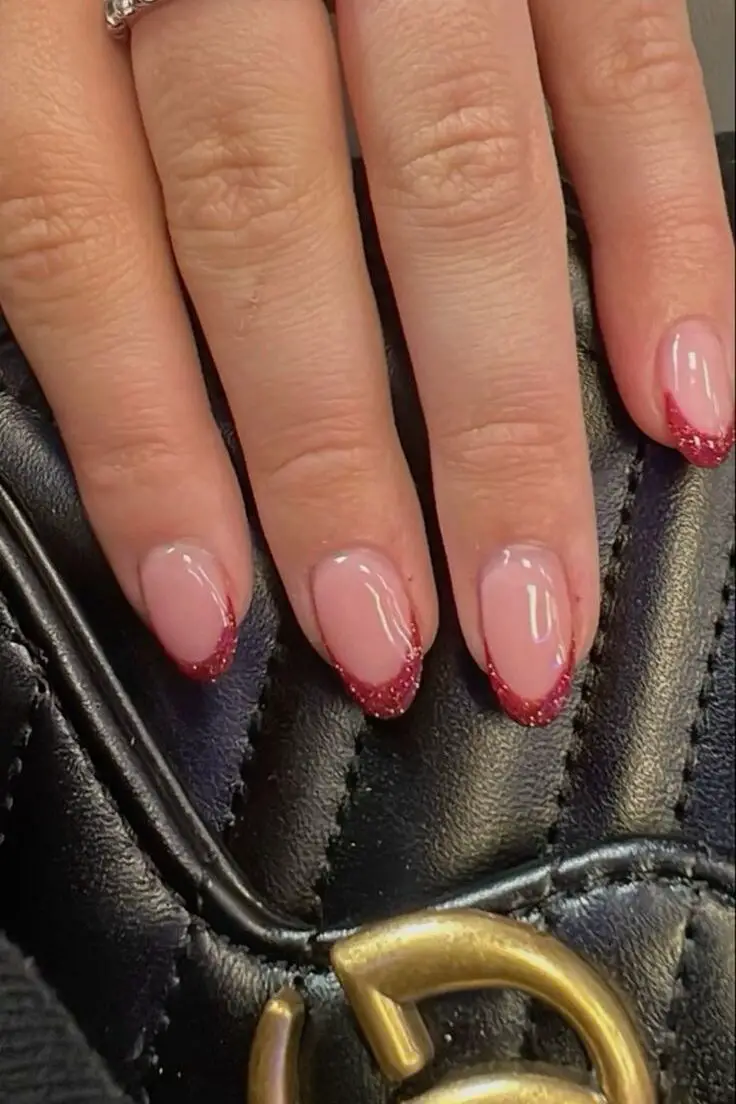
10. French Manicure with Metallic Tips
Materials Required for French Manicure with Metallic Tips
Base coat
Base color nail polish (user’s choice)
Metallic nail polish
Manicure tape or painter’s tape
Top coat
Step-by-Step Instructions
Preparation:
Remove any existing nail polish and clean the nails thoroughly.
Wash hands and shape nails to the desired length and shape.
Push back cuticles for a neat appearance.
Base Application:
Apply a base coat to protect the nails and allow it to dry completely.
Paint nails with a base color of your choice and wait for it to dry.
Tape Application for Precision:
Decide on the width of the metallic tip.
Apply manicure tape or painter’s tape to mark where the base of the metallic tip will begin.
Applying the Metallic Tip:
Paint the tips of your nails with a metallic nail polish.
Allow the polish to dry thoroughly before proceeding to the next step.
Finishing Touches:
Carefully remove the tape.
Apply a top coat to seal in the design and add a glossy finish.
Tips and Tricks
Use thinner brushes for more precise application of the metallic tips.
Experiment with different designs on the tip, such as doubling up lines or incorporating geometric shapes.
Consider adding embellishments like sequins, jewels, or nail stickers for a more decorative look.
Advanced Options
Color Block French Tip: Combine pastel purple polish with a swipe of metallic polish diagonally across the tip, followed by a contrasting dark purple.
Upside-Down French Tip: Start with a pastel pink base, apply a fast-drying top coat, use a circle bandaid to create a stencil at the nail base, then apply bright pink polish near the cuticle and remove the band-aid swiftly for a sharp look.
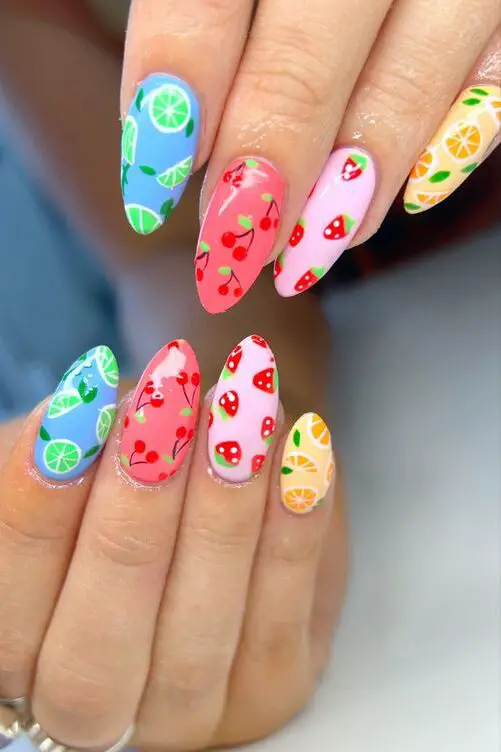
11. Fruit Salad Nails
Materials Required for Fruit Salad Nails Nail Art
Base coat and top coat
Various nail polish colors (green, red, orange, yellow, white)
Dotting tool or a fine brush
Toothpicks
Liquid latex or tape for skin protection
Nail polish remover
Cotton swabs
Step-by-Step Instructions
Base Preparation:
Apply a base coat to protect your nails and ensure a smooth canvas for painting.
Opt for a white or light pastel base color to make the fruit designs stand out.
Creating Fruit Designs:
For watermelons, use green to paint a thin tip, followed by a layer of white, and finish with a red base filled with black dots using a toothpick.
Paint orange segments with a light orange base and darker orange lines for a citrus effect.
Create grapes with clustered dots in shades of purple or green.
Design strawberries by painting the nail red, adding small yellow dots for seeds, and green at the tip for leaves.
Detailing:
Use a fine brush or dotting tool to add details like leaves or texture lines to enhance the realism of each fruit.
Finishing Touches:
Once the designs are dry, apply a top coat to protect your artwork and add a glossy finish.
Tips and Tricks
Use a picture of real fruit as a reference to get the colors and shapes right.
Experiment with fruit combinations on different nails for a fun, vibrant summer look.
Keep the designs simple; too much detail can make the nails look cluttered.
This playful nail art design brings the vibrant colors and joy of summer right to your fingertips, perfect for sunny days and fun outfits.
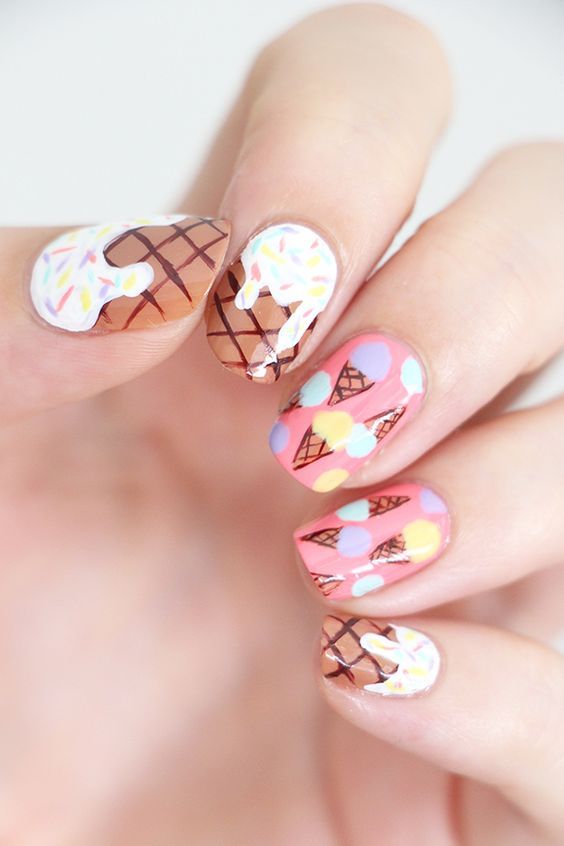
12. Ice Cream Cone Nails
Materials Required for Ice Cream Cone Nails
Base coat
Creamy nude nail polish
Fast drying top coat
Dark brown nail polish
Matte top coat
Large dotting tool
Nail art brush
Pink nail polish (or your choice of ice cream color)
White acrylic paint
Step-by-Step Instructions
Base Preparation:
Apply a base coat to protect your nails.
Paint two thin coats of creamy nude nail polish as the base color for the ice cream cone. Allow each coat to dry completely.
Creating the Cone:
Apply a thin layer of fast drying top coat and let it dry.
Place striping tape in a crisscross pattern on the nails to outline the cone shape.
Paint over the tape with dark brown nail polish. Remove the tape immediately to ensure clean lines.
Once dry, apply a matte top coat over the brown polish.
Ice Cream Scoops:
Use a large dotting tool to add three large dots of pink nail polish at the nail base.
Drag each dot upwards towards the cuticle to mimic the shape of ice cream scoops.
Adding Details:
Use a nail art brush to add drips coming out from the ice cream scoops for a melted effect.
Dip the same brush in white acrylic paint to add highlights and cartoon-like details to the ice cream.
Finishing Touches:
For a glossy finish, apply a fast drying top coat over the ice cream details using another clean nail art brush.
Tips and Tricks
Ensure each layer is completely dry before applying the next to avoid smudging.
Customize your ice cream cone nails by using different colors for the ice cream scoops or by adding toppings like sprinkles with a fine brush or a toothpick dipped in various colored polishes.
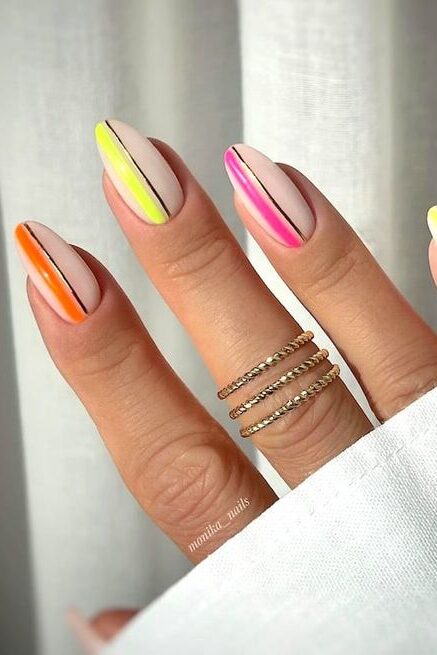
13. Mismatched Neon Lines
Materials Required for Mismatched Neon Lines Nail Art
Base coat
Gel extensions (medium stiletto-shaped)
LED lamp
Dehydrator, primer, and gel glue
Neon yellow gel polish
Two shades of nude gel polish
Thin liner brush
Top coat
Alcohol for cleaning
Step-by-Step Instructions
Preparing the Extensions:
Apply a dehydrator, primer, and gel glue to natural nails.
Prepare gel extensions by etching the inside or applying primer, then attach using gel glue and flash-cure in an LED lamp.
Base Preparation:
Apply a base coat on the extensions to enhance polish adherence.
Clean the nail surface with alcohol before applying polish.
Applying Base Colors:
Paint nails with two coats of nude gel polish, curing each coat under the LED lamp.
Creating Neon Lines:
Use a thin liner brush to paint mismatched neon yellow lines across the nails, creating various geometric patterns.
Adding Details:
Place three dots at the base of each nail as an additional detail to enhance the design.
Finishing Touches:
Apply a shiny top coat and cure the nails for 60 seconds under the LED lamp to seal the design.
Tips and Tricks
Ensure proper curing of each layer to avoid smudging and to ensure longevity of the nail art.
Experiment with different line thicknesses and patterns to create a unique mismatched effect on each nail.
Use high-quality gel products to prevent premature chipping and peeling of the nail art.
14. Textured French Tips
Materials Required for Textured French Tips Nail Art
Base coat
Nude-colored gel polish
French tip guides or tape
Textured polish or embellishments (like chrome powder or rhinestones)
Top coat
Nail art brushes
Acetone
Cotton swabs
Step-by-Step Instructions
Nail Preparation:
Gently push back the cuticles and buff the nails to remove shine, ensuring a clean surface.
Dehydrate the nail surface with acetone for better polish adhesion.
Base Application:
Apply a base coat to protect the nails.
Follow with a layer of nude-colored gel polish but do not cure it yet.
Applying Full Cover Tips:
Customize the full cover tips by filing them to match the curve of the natural nails.
Attach the tips at a 45-degree angle starting from the cuticle and press down firmly.
Curing and Shaping:
Cure the base and tips under a UV lamp.
Shape the nails to the desired length and form using a buffing block.
Creating the French Tip:
Use French tip guides or tape to delineate the smile line for precision.
Apply the textured polish or add embellishments like chrome powder or rhinestones along the tip.
Final Enhancements and Cure:
Remove the guides and clean up any excess using a brush dipped in acetone.
Apply a no-wipe top coat for a glossy finish and cure under the lamp.
Tips and Tricks
For a flawless smile line, use a brush with even bristles cut to precision.
Patience is key when applying embellishments; use tweezers for better placement.
To create a 3D texture, consider using Maart Rhinestone Glue before placing rhinestones.
By following these steps, you can achieve elegant and sophisticated textured French tips that are perfect for any summer occasion.
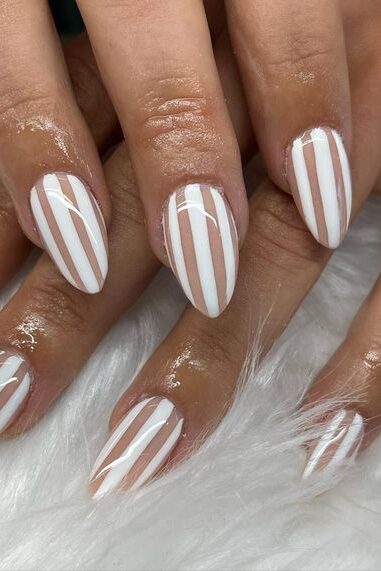
15. Negative Space Stripes
Materials Required for Negative Space Stripes Nail Art
Base coat
Top coat
Striping tape or decals
White and gold nail polish
Nail polish remover
Thin tipped nail brush
Cotton swabs
Step-by-Step Instructions
Base Preparation:
Apply a base coat to all nails to protect them and provide a smooth surface for painting.
Applying Striping Tape:
Place striping tape on the nail in the desired pattern. For a simple look, apply two strips in a criss-cross pattern.
Painting the Design:
Paint the areas segmented by the tape with white and gold polish as desired. For example, paint near the cuticle with gold and the tip with white.
Removing the Tape:
Carefully remove the striping tape before the polish dries to ensure sharp lines and prevent smudging.
Cleanup:
Use a cotton swab dipped in nail polish remover to clean up any excess polish around the nails.
Applying Top Coat:
Add a top coat for a smooth, glossy finish that protects the design.
Tips and Tricks
Ensure each layer of polish dries before applying the next to avoid smudges.
Use a thin tipped brush for precise application and corrections.
Experiment with different tape placements to create unique patterns on each nail.
By following these steps and tips, you can easily create elegant negative space stripes that add a modern twist to your summer nail art collection.
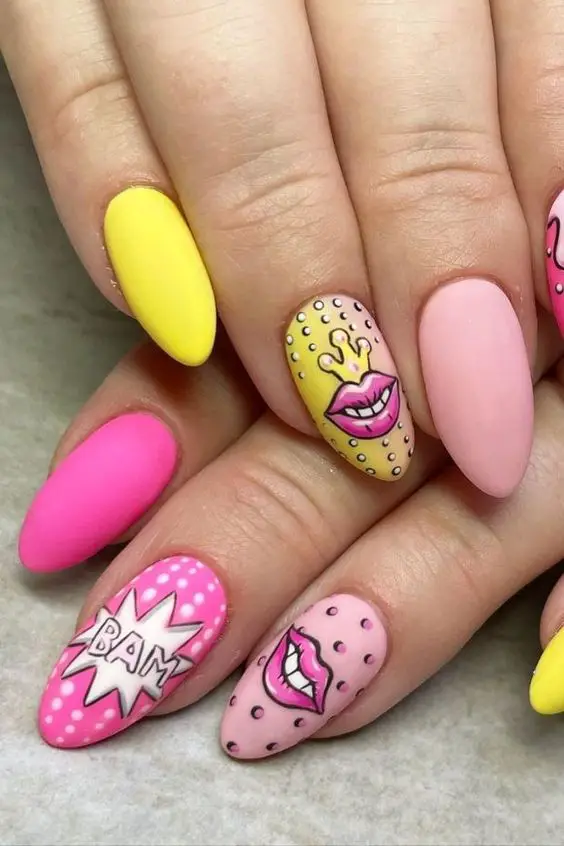
16. Comic Book Pop Art
Materials Required for Comic Book Pop Art Nail Art
Base coat and glossy gel top coat
Gel polish colors (various shades)
Black gel polish for outlines
French white gel polish for highlights
Stainless steel nail art palette
Baddest liner brush
Acid primer and base gel or builder gel
Press-on nail tips
Step-by-Step Instructions
Nail Preparation:
Begin by filing the inside of the press-on nail tips to fit your natural nails.
Apply acid primer on your natural nails for better adhesion.
Use base gel or builder gel on the nail tips and cure under a UV lamp for durability.
Base Color Application:
Apply your chosen base color using gel polish and cure for 30 seconds under a UV lamp.
Ensure full coverage and a smooth layer for the subsequent steps.
Adding Comic Effects:
Use black gel polish to outline the edges of the nails, creating bold comic-style borders.
Add highlights with French white gel polish at strategic points to mimic light reflections and cure each addition.
Detailing:
Mix a slightly darker shade by adding a small amount of black gel polish to the base color on a stainless steel palette.
Apply this mixture to create shadow effects and enhance the 3D appearance of the comic book art.
Use a thin liner brush for precise lines and details.
Finishing Touches:
Once all elements are cured and set, apply a glossy gel top coat to seal in the design and add a vibrant shine.
Tips and Tricks
Practice steady hand movements to achieve clean and sharp lines with the liner brush.
Consider using a mix of matte and glossy finishes to differentiate between the comic panels and elements.
Experiment with different color combinations and comic expressions to personalize your nail art.
This method integrates color theory and specific painting techniques to create striking comic book pop art nails that stand out with their bold and colorful designs.
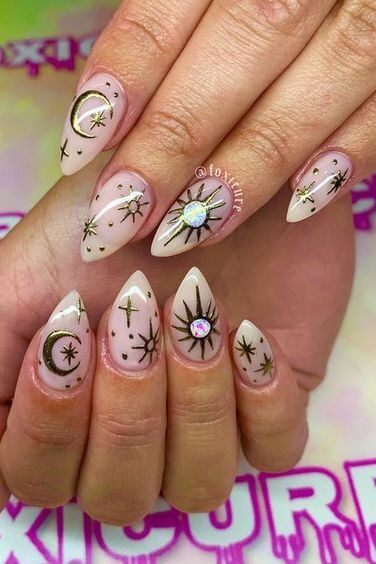
17. Sun & Moon Nails
Materials Required for Sun & Moon Nails
Base coat and top coat
Pale Bloom nail polish (or similar pastel shade)
Serious Black gel polish
Gold pigment and chrome mix
Gel lamp
Detail brushes and dotting tools
Liquid latex or tape for skin protection
Nail polish remover
Cotton swabs
Step-by-Step Instructions
Base Preparation:
Begin by applying a base coat to protect your nails and ensure a smooth canvas.
Paint two layers of Pale Bloom nail polish, allowing each layer to dry completely.
Creating the Sun Design:
Use Serious Black gel polish to draw a semi-circle at the base of the nail for the sun.
Add rays extending from the semi-circle using a detail brush.
Embellish with gold pigment to highlight the sun’s features.
Creating the Moon Design:
On alternate nails, use the same black gel polish to draw a crescent moon.
Enhance the moon by applying a chrome mix over the black outline.
Add stars and a starburst effect around the moon using a dotting tool and white polish.
Adding Details and Finishing Touches:
Apply gems around the moon for added sparkle (optional).
Remove any protective latex or tape.
Clean up the edges with a cotton swab dipped in nail polish remover.
Cure the designs under a gel lamp to set the polish.
Finish with a top coat for durability and gloss.
Tips and Tricks
Ensure that each layer of polish is completely dry or cured before applying the next to prevent smudging.
Use thin brushes for detailed designs like sun rays and moon crescents to maintain precision.
Experiment with different placements of the sun and moon on various nails to create a dynamic look.
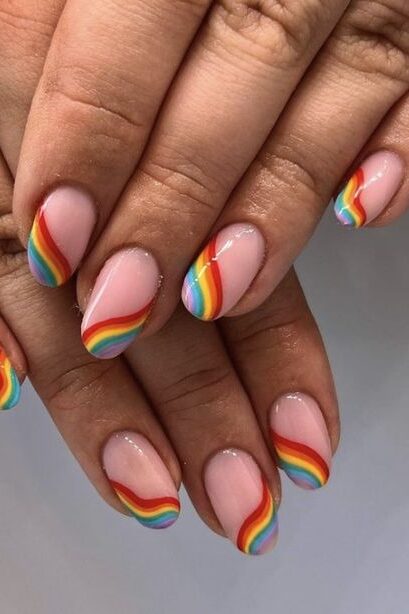
18. Rainbow Tips
Materials Required for Rainbow Tips Nail Art
Base coat
Pale blue nail polish
White nail polish for clouds
Orange nail polish for the sun
Various colors for rainbow tips (include a range of vibrant shades)
Top coat
Cuticle oil
Isopropyl alcohol
Peel-off base coat
Nail polish remover
Sponge
Thin brush for detailing
Step-by-Step Instructions
Base Preparation:
Cleanse the nail with 99% isopropyl alcohol to ensure a clean surface.
Apply a peel-off base coat to aid in easy removal later.
Applying Base Colors:
Paint the nails with a pale blue polish to act as the sky.
Create cloud effects using white nail polish by dabbing lightly with a sponge.
Adding the Sun:
On the index finger, use an orange polish to paint a sun. Use a thin brush to create rays extending outward.
Creating Rainbow Tips:
Apply a thin stripe of each color polish in the desired rainbow order onto a sponge.
Gently dab the sponge onto the nail tips, pressing lightly to transfer the colors.
Detailing and Finishing Touches:
Wait for the design to dry completely.
Apply a generous layer of top coat to achieve a smooth and glossy finish.
Massage cuticle oil around the nails to hydrate and protect the skin.
Tips and Tricks
Ensure each layer is dry before applying the next to prevent colors from blending unintentionally.
Use a light hand when sponging on the rainbow colors to achieve a soft gradient effect.
This technique is beginner-friendly and allows for creativity with the choice and order of colors.
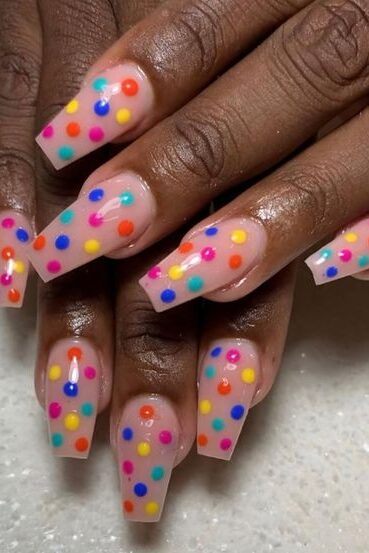
19. Colorful Polka Dots
Materials Required for Colorful Polka Dots Nail Art
Base coat
White nail polish
Various colored nail polishes
Dotting tool or alternatives like a bobby pin or toothpick
Top coat
Step-by-Step Instructions
Base Preparation:
Begin by trimming and filing nails into the desired shape.
Apply a base coat to strengthen the nails and allow it to dry completely.
Applying the Base Color:
Paint a layer of white nail polish as the base color and let it dry thoroughly. This will help make the colors of the polka dots pop.
Creating Polka Dots:
Dip your chosen dotting tool into a colored polish. For varied dot sizes, use different tools: a bobby pin for medium dots and a toothpick for smaller, more precise dots.
Gently dab the tool onto the nail to create polka dots. Vary the colors and sizes to achieve a playful, random pattern.
Finishing Touches:
Once all polka dots are dry, apply a top coat to even out the texture and enhance the durability of your nail art.
Tips and Tricks
Ensure that the white base is completely dry before adding polka dots to avoid smudging.
For a neat finish, clean up any polish outside the nails using a cotton swab dipped in nail polish remover.
Experiment with different colors and sizes of polka dots to match your personal style or seasonal trends.
This easy and fun nail art design is perfect for those looking to add a splash of color to their summer style.
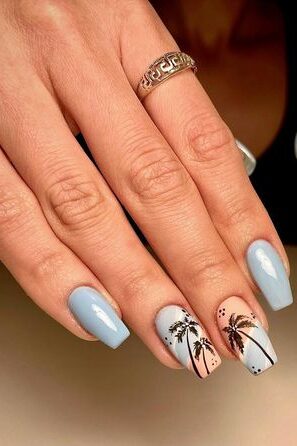
20. Simple Palm Trees
Materials Required for Simple Palm Trees Nail Art
Base coat
White nail polish
Four colors for gradient
Black polish for the palm tree
Matte or glossy top coat
Liquid latex
Cosmetic sponge
Small paintbrush
Q-tip
Acetone for cleanup
Step-by-Step Instructions
Base Preparation:
Apply a base coat to protect your nails and ensure a smooth canvas.
Paint a coat of white polish as the base to make the colors vibrant.
Protecting the Skin:
Apply liquid latex around the skin near the nails for easy cleanup after painting.
Creating the Gradient:
Paint thin stripes of the four gradient colors onto a cosmetic sponge.
Press the sponge onto the nail, blending the colors seamlessly.
Repeat if necessary to intensify the color.
Painting the Palm Tree:
Using a small paintbrush, paint the base of the palm tree with black polish.
Draw the leaves extending from the top of the base.
Cleanup and Finishing Touches:
Peel off the liquid latex.
Use a Q-tip dipped in acetone to clean up any excess polish around the nails.
Allow the tree to dry for about half an hour to prevent smudging.
Apply a matte or glossy top coat as preferred to seal in the design.
Tips and Tricks
Ensure the white base is completely dry before applying the gradient to avoid colors bleeding.
Use a dabbing motion rather than dragging when applying the sponge to keep the base color intact.
For a more detailed tree, use a thinner brush or a toothpick to add fine lines to the leaves.
Final Thoughts
Embarking on a journey through the realm of easy summer nail art ideas allows for a delightful exploration of creativity right at your fingertips.
We’ve covered a diverse range of designs, from the swirling elegance of marbled magic to the vibrant burst of sunny yellow splashes, and the serene beauty of beach wave accents, ensuring there’s a style to match any summer vibe.
These ideas are not only designed to inspire but are also structured to be easily recreated at home, making beautiful nails accessible to everyone.
The significance of these nail art designs extends beyond mere aesthetics; they encapsulate the joy, spontaneity, and vibrant colors of summer.

Leave a Reply
You must be logged in to post a comment.