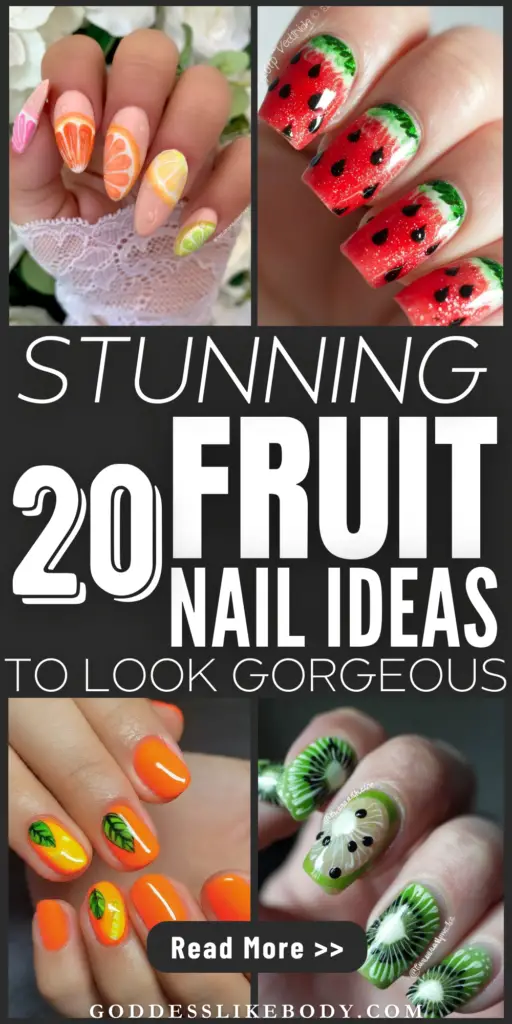
Calling all trendsetters and fruit fanatics! This blog post is bursting with juicy inspiration for your next mani.
Ths post shows the top 20 cutest fruit nail art designs that are perfect for adding a touch of summer fun to your fingertips.
Ditch the boring solids and dive into a world of vibrant colors, playful patterns, and shimmering details – all inspired by your favorite fruits!
Get ready to scroll through these nail ideas that are guaranteed to make a statement and turn heads. So grab your polish and unleash your inner fruit fanatic!
Busy? Save this pin for later.
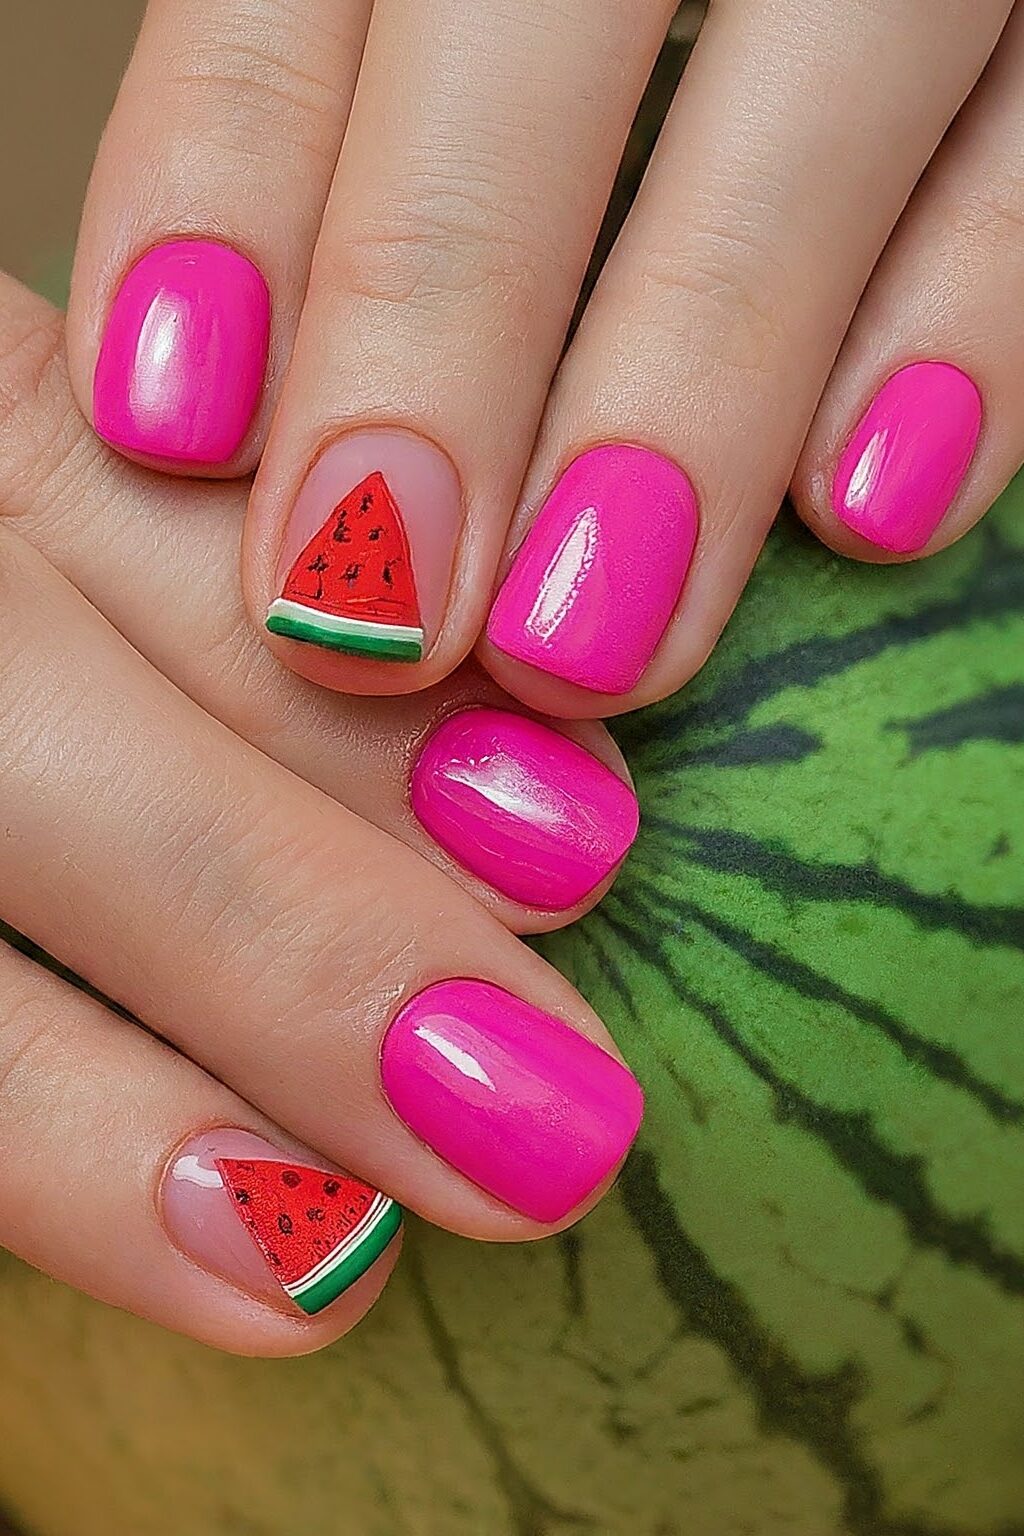
1. Mini Watercolor Watermelon Slices
For a fresh and fun look this spring and summer, the Mini Watercolor Watermelon Slices design is your go-to choice. Start by applying a base coat to protect your natural nails.
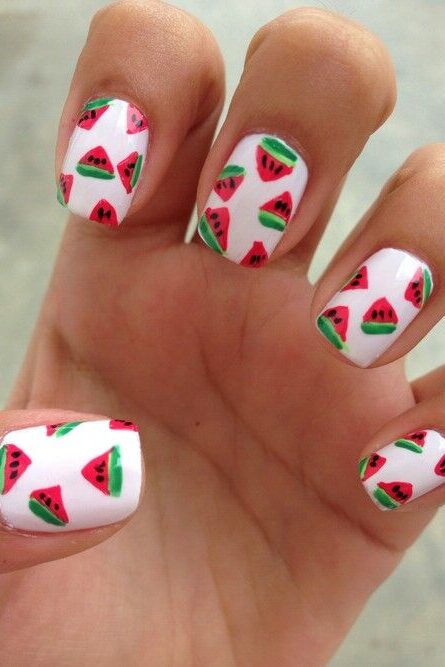
Once that’s dry, lay down a white base to make the colors pop. You’ll need a thin art brush and a makeup wedge—don’t worry if it’s used; it’s perfect for creating that gradient effect by reusing it across several manicures.
Using the makeup wedge, begin sponging on your gradient. Choose fuchsia and light blue polishes for a vibrant base.
With white acrylic paint, draw a smile line on each nail, then shape it into a triangle to form the base of your watermelon slice.
Fill in this shape and repeat across all nails, ensuring you leave a little stripe of white between the fuchsia and the green to mimic the natural coloring of a watermelon.
For the seeds, use a small dotting tool or a toothpick dipped in black acrylic paint. Place three dots in a teardrop shape above the white line, turning each dot into a seed shape.
Finally, add a stripe of green at the tip of your nails, filling in the rest with a darker shade of green for a realistic rind effect.
Finish by adding a glossy top coat to seal in your design and give it a professional finish.
2. Glossy Cherries with Glitter Stems
For a dazzling cherry-themed manicure that stands out, start by applying a ridge filler to create a smooth, clean base.
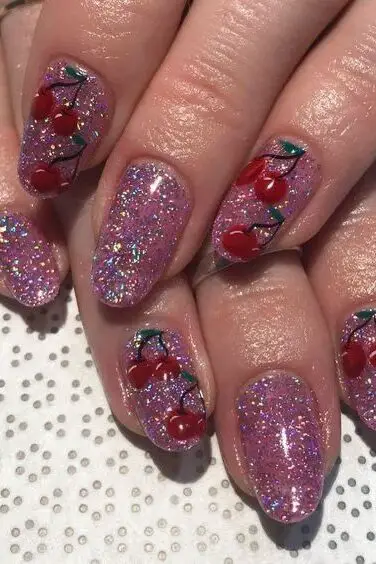
This is especially important when using a sheer polish, as it enhances the overall look. Next, apply a sheer pink polish as the base color. It’s best to apply two coats to achieve a richer pink shade that allows the cherry art to truly pop.
Using a large dotting tool or even a toothpick, place two red dots next to each other on each nail to form the cherries. Vary the placement on each nail to give your design a unique and abstract look.
Once the cherries are in place, use a very thin striping brush or a toothpick to draw glittery green stems. These should be thin lines that meet at a center point above the cherries, adding a whimsical touch to the design.
To add a tiny leaf at the tip of each stem, draw a small line or a slightly rounded shape to mimic a leaf.
This small detail can make a big difference in the overall design, providing a more natural look. Finally, accentuate each cherry with a white line to give them dimension and make them stand out more vividly.
Allow the design to dry for about five minutes before sealing it with a glossy top coat.
3. Neon Citrus Mix
For a vibrant twist on your nail art, the Neon Citrus Mix is a must-try. This design brings together a lively array of bright pink, vivid orange, and radiant yellow, colors that sit side by side on the color wheel, creating a harmonious yet bold look.
The use of these colors isn’t just about their brightness; it’s also a clever application of color theory. The orange acts as a middle tone, providing a smooth transition between the pink and yellow, enhancing the overall cohesion of the design.
To add an intriguing contrast, introduce a dark blue to the mix. This isn’t just any blue; it’s the complementary color to orange on the color wheel, which means it offers the maximum contrast, making the neon shades pop even more.
This choice of a darker tone, against the neon backdrop, intensifies the visual impact, adding depth to your nail art.
4. Gradient Strawberry with Red
Gradient Strawberry with Red design is a perfect blend of creativity and style for your nails.
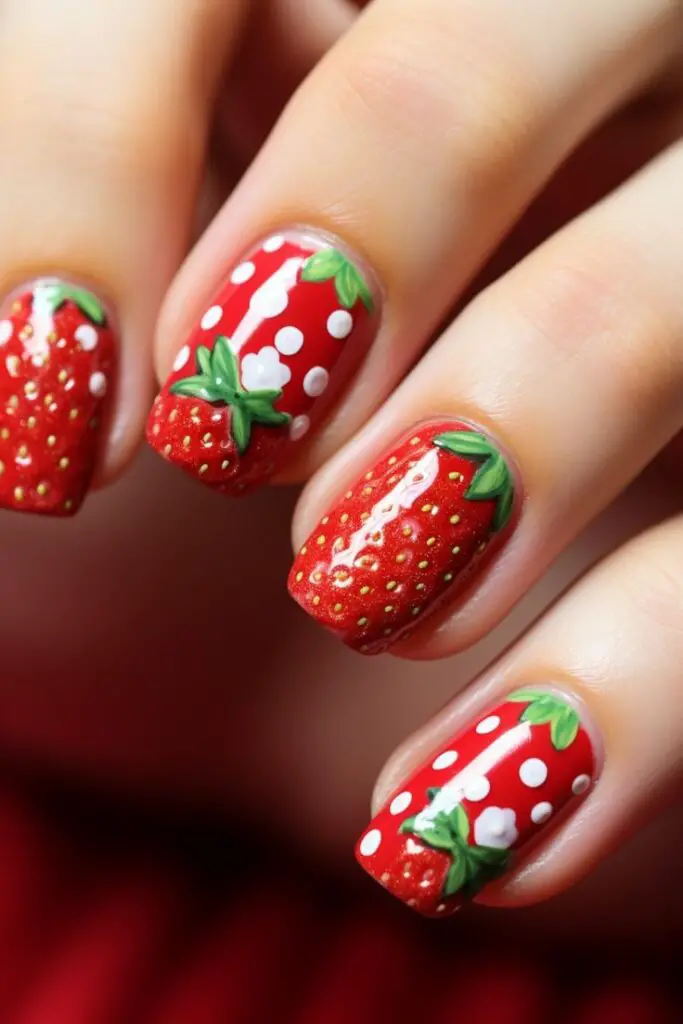
To kick things off, you’ll want to apply a vibrant red polish as your base. After applying the first layer, let it dry completely before adding a second coat to ensure the color truly pops.
This technique not only enhances the color but also prevents any lumpy appearances that thicker layers might cause.
Once your base is set, it’s time to bring your strawberries to life. Take a nail art brush, dip it in a little polish you’ve placed on a piece of paper, and begin outlining the strawberry shapes on your nails.
5. Mismatched Tropical
Embrace the spirit of summer with Mismatched Tropical nails, a trend that combines Boho, Tropical, Fruit, and other stylish summer nail designs.
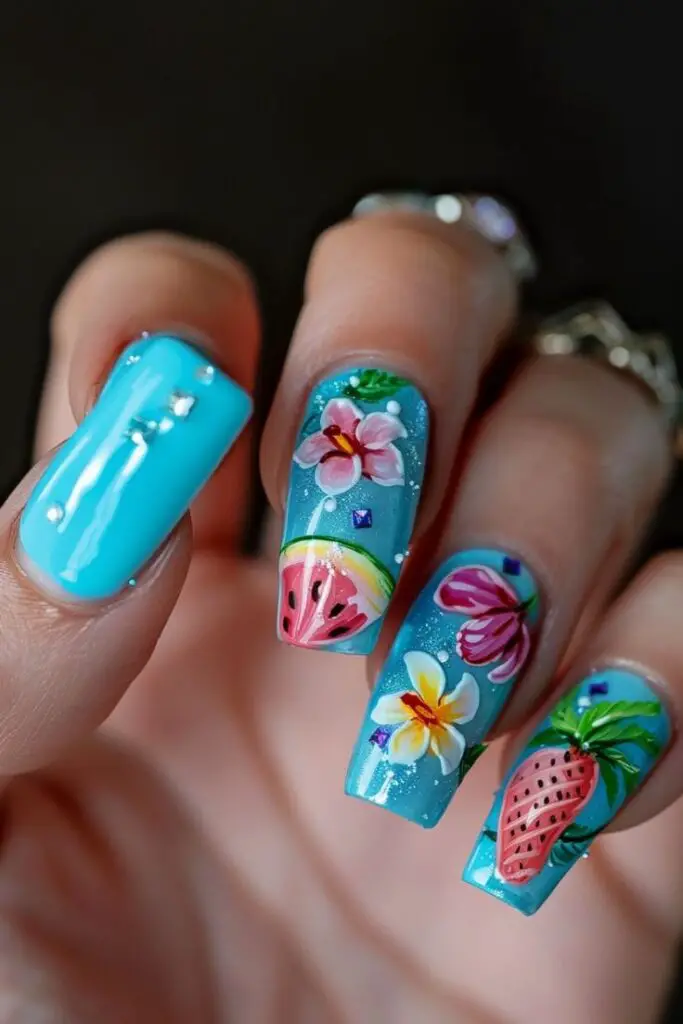
This design is all about expressing your creativity and love for vibrant colors and patterns. Start by exploring our gallery of fruit-inspired manicures to get inspired.
From Tropical Nail Designs to Palm Nails and Vacation Nails, the possibilities are endless.
The beauty of Mismatched Tropical nails lies in their versatility. You can mix and match designs like Tropical Fruit Nail Design, Tropical Fruit Glossy Nail Design, and Tropical Fruits Studs Nail Design.
Each nail can feature a different aspect of tropical paradise, from Colorful Tropical Fruit Nail Design to Fancy Tropical Sunset Nail Design.
The key is to use bright, summery colors like Punky Pink and Caribbean Blue to bring the designs to life.
When creating your Mismatched Tropical nails, remember that regular nail polish works just as well as gel. Use a seven millimeter brush for precision and start with a blob at the bottom of your nail, pushing it down and lifting up slightly as you go to create palm trees or fruit shapes.
If you’re adding rhinestones for a bit of bling, a nail polish product designed to hold them in place can ensure they stay put.
For those looking for a bit more challenge, incorporating French tips with a black tip and a hint of green can add extra dimension to your tropical theme.
Use neon green or lime green for leaves, adding little spikes and layering for a more realistic look. If you’re not confident with hand drawing, there are plenty of tutorials available to help you master the technique.
Finally, don’t be afraid to experiment with color bases. While traditional tropical colors like pinks and oranges are always a hit, trying out gold, black, and purple can give your nails a unique twist.
6. Peach & Cherry Blossom French
Immerse yourself in the elegance of spring with the Peach & Cherry Blossom French nail design, a refreshing twist on the classic French manicure that’s perfect for any occasion.
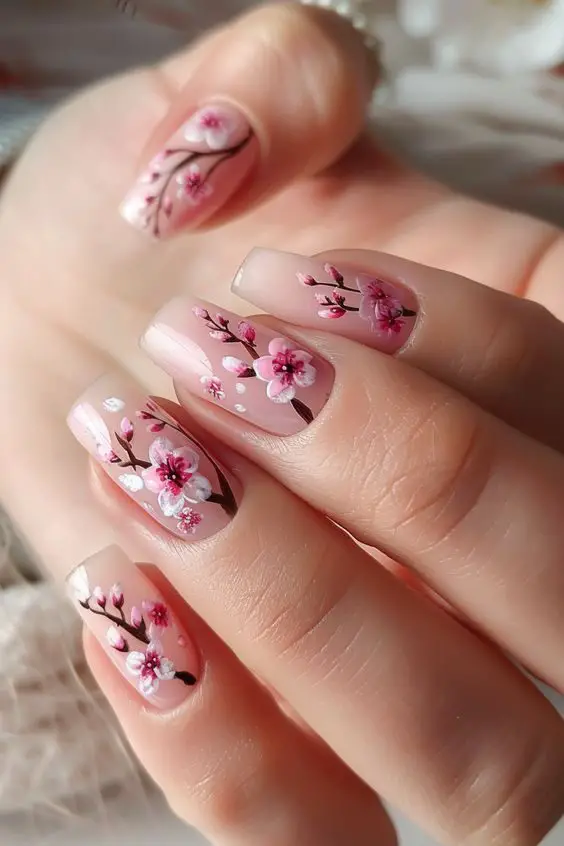
This design intricately combines the soft hues of peach with the delicate beauty of cherry blossoms, creating a look that’s both sophisticated and playful.
To start, you’ll want to apply a peach-colored polish as the base. The key here is to choose a shade that’s soft and subtle, providing a perfect canvas for the cherry blossoms to come alive.
Once your base color is dry, the next step is to add the cherry blossoms. Using a fine-tipped nail art brush, carefully paint small blossoms across the tip of your nails.
For the blossoms, select a light pink polish and add tiny white accents in the center to bring out the intricate details of each flower.
The contrast between the peach base and the light pink blossoms will create a stunning visual effect that’s both eye-catching and elegant.
To achieve the classic French tip look, use a thin brush to outline the tip of your nails with a white polish, carefully following the natural curve of your nails.
This will frame the cherry blossom design beautifully, adding a touch of sophistication to the overall look.
For a final touch, consider adding a few green leaves around the blossoms using a light green polish. This not only adds a pop of color but also enhances the natural beauty of the cherry blossoms, making the design more vibrant and lively.
Seal your artwork with a clear topcoat to ensure longevity and to give your nails a glossy finish that will make the peach and cherry blossom design truly stand out.
7. Matte Kiwi with Black Seeds
Immerse yourself in the freshness of Matte Kiwi with Black Seeds nail design, a perfect choice for those who love to add a touch of nature to their style.
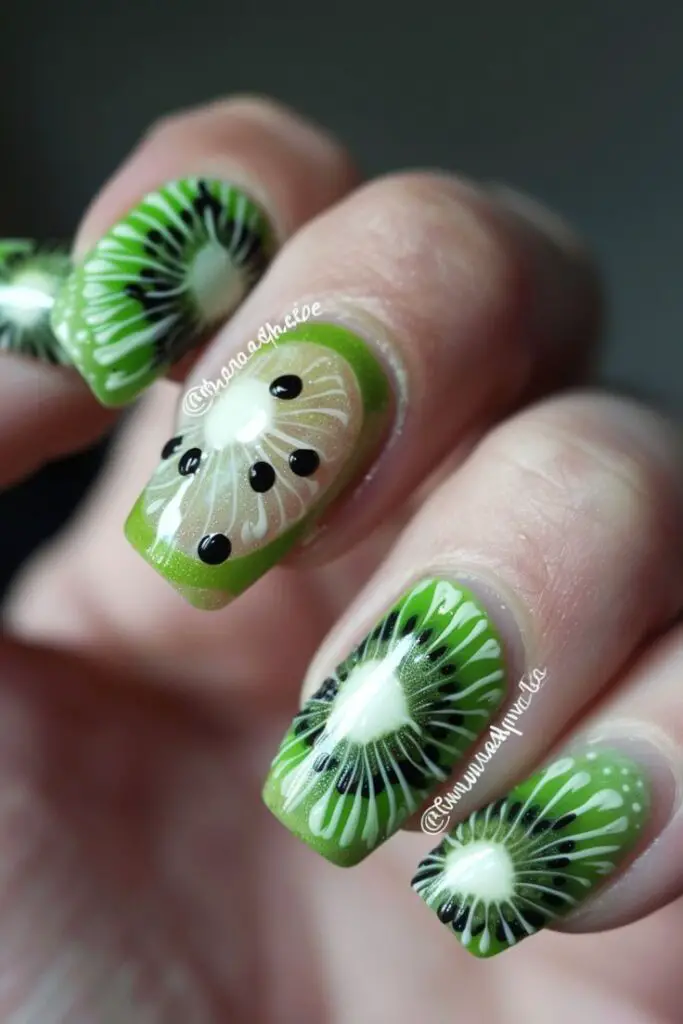
This design captures the essence of kiwi fruit, known for its vibrant green color and distinctive black seeds. To start, select a vibrant green polish that mirrors the bright hue of kiwi skin. This will be your base, laying down the foundation for your kiwi-inspired nails.
Next, for the kiwi’s characteristic seeds, take a medium dotting tool and dip it in black polish. Dot the polish onto your nails, aiming to place them in pairs to mimic the natural seed pattern of a kiwi.
It’s important to dot them randomly but try to avoid cluttering; placing them in twos tends to create a more visually appealing effect.
Remember, the goal is to achieve a look that’s both refreshing and authentic, so keep the dots small and spaced out.
The matte finish plays a crucial role in this design. Unlike glossy nails, a matte top coat gives your kiwi nails a more natural and textured appearance, much like the actual surface of a kiwi.
This subtle yet impactful detail brings a unique twist to your nail art, setting it apart from the usual glossy finishes.
Incorporating kiwi into your nail designs not only makes for an eye-catching aesthetic but also infuses your look with vitality and freshness.
Whether you choose to showcase sliced kiwi on your nails or incorporate the fruit as part of a larger, tropical-themed design, the Matte Kiwi with Black Seeds is sure to turn heads.
Its vibrant colors and unique textures make it an ideal choice for summer, but honestly, it’s a delightful design to wear any time of the year.
8. Watermelon French Tip
If you’re looking to add a summery twist to your manicure, the Watermelon French Tip design is a delightful choice.
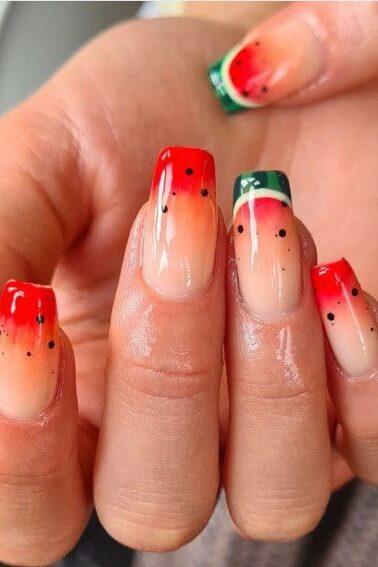
This design cleverly combines the classic elegance of a French manicure with the playful vibe of summer fruit, providing a unique and eye-catching look.
Start by applying a base coat to protect your natural nails. Once that’s dry, apply a white base coat which will make the colors of the watermelon pop.
Next, carefully place a French manicure guide across each nail. This will help in achieving the neat lines that are characteristic of French tips.
On one side of the guide, apply a vibrant green polish, representing the rind of the watermelon. On the other side of the guide, use a juicy pink or red polish to mimic the fruit’s flesh. It’s okay if it gets a little messy; any excess can be cleaned up later.
Once the polish is slightly dry, carefully remove the guide to reveal a crisp line dividing the two colors. To add the finishing touches, take a black nail polish with a small nail art brush and dot on the seeds on the pink side.
You can make three seeds, or more if your nails are longer, to keep it looking balanced and natural.
Finish off with a generous coat of topcoat to seal in your design and add a beautiful shine.
9. Glitter Grapes on Sheer Pink
Dive into the whimsical world of nail art with the Glitter Grapes on Sheer Pink design, a perfect blend of elegance and playfulness.

Starting with a sheer pink base, which provides a delicate backdrop, you’ll find this choice enhances the overall aesthetic, adding a touch of sophistication.
The sheer pink has a slight pearl finish, which might subtly reflect blue or white, depending on the light, creating a mesmerizing effect on your nails.
The journey to creating these enchanting grapes begins with crafting big fat leaves using a mix of black, green, and silver to achieve a dark green hue.
These leaves are not your usual fluid shapes; they’re more boxy and rounded, adding a unique touch to the design.
As you push the brush across the nail, you’ll see how the colors blend, creating variegated leaves that look as though they’re basking under a summer sun.
Next, you’ll work on the vines with curly cues, a process that demands time and dedication. By pushing and pulling the brush, you create intricate curls around which your grapes will dangle.
This step is crucial as it lays the groundwork for where your grapes will sit, ensuring they look like they’re hanging from a vine in a sunlit vineyard.
For the grapes themselves, start with purple dots placed randomly but in a way that they form a triangle shape across the nail.
This strategic placement ensures your design has depth and dimension, making each grape stand out. Then, with a lighter purple, add highlights to give your grapes a 3D effect, making them appear more luscious and juicy.
To achieve a hand-painted look, go around some of the grapes with a very fine black line. This detail is subtle but crucial, as it adds shadows and depth, making the grapes look like they’re popping off your nails.
Finally, add tiny dots of a really light purple to mimic the juicy sheen on real grapes, enhancing the realism of your design.
10. Glittery Pineapple Outline
The Glittery Pineapple Outline nail design is perfect for brightening up your summer days.
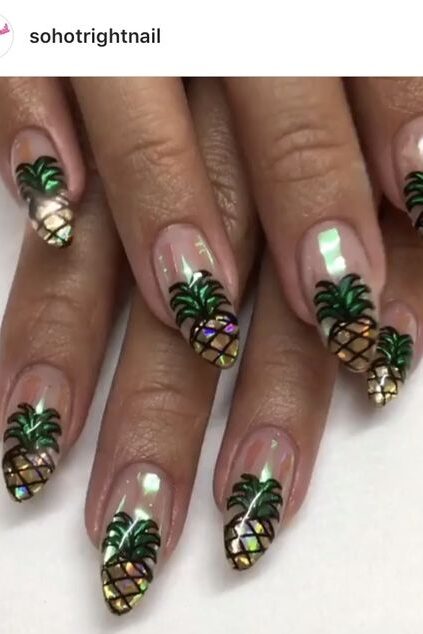
Begin by applying a base coat to protect your natural nails. Once that’s dry, paint your nails a vibrant yellow; you might need two coats to achieve full opacity.
Next, using an orange striper, create bold X shapes across each nail. The trick here is to keep the brush steady while you slowly rotate your finger.
The number of Xs will depend on the length of your nail, but typically, three should suffice, with each end slightly overlapping to form the pineapple’s crisscross pattern.
For the pineapple leaves, think of looking down at the fruit from above. Use a green striper to draw the leaves at the tip of your nail, keeping the design simple and wispy.
Once the leaves are dry, outline them with a dark green striper to give the design a cartoony look and make the leaves pop against the bright yellow.
Finish your tropical creation with a fast-drying top coat to seal in the design and add a beautiful shine.
11. Neon Lime Slices
For a truly vibrant and eye-catching look, the Neon Lime Slices nail design is your perfect summer pick. Begin with a white base coat to ensure that the neon colors stand out brilliantly.
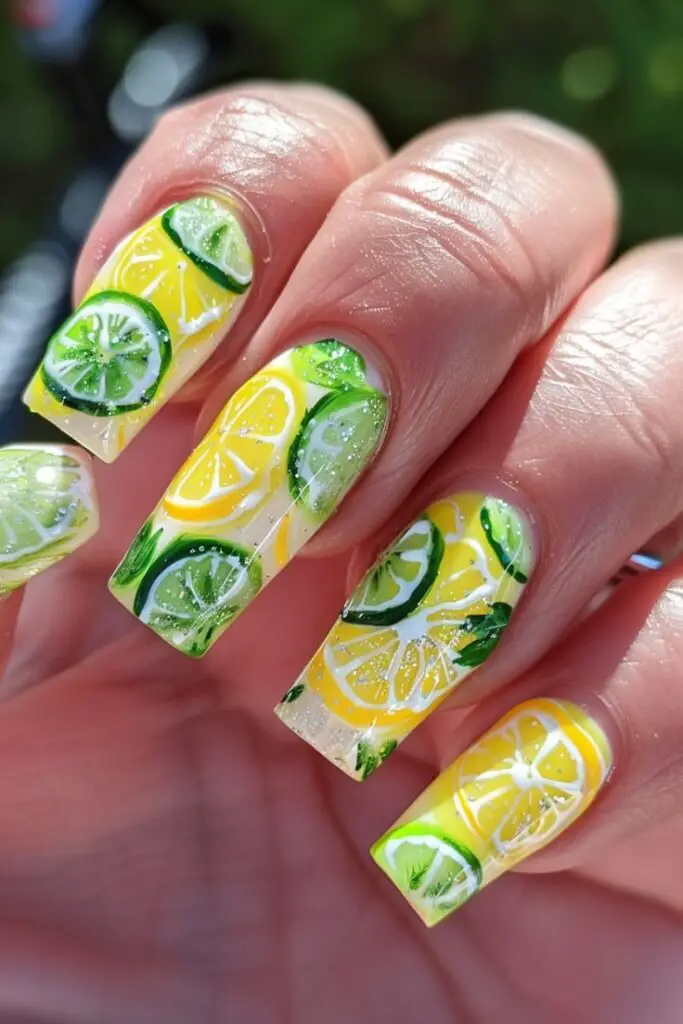
Once dry, use a lime green polish to paint thin, curved slices across each nail, mimicking the cut of a fresh lime. The key here is to use a fine brush for precision and to keep the slices evenly spaced to achieve a clean, symmetrical look.
Next, enhance the neon effect by adding a slightly darker green along the edges of the slices. This not only adds depth to your design but also makes the lime slices pop even more against the white base.
For an added touch of realism, use a fine-tipped brush to draw small white lines within the lime slices, suggesting the natural texture of the fruit.
To really make your nails stand out, consider adding a glitter top coat over the lime design. This not only protects your nail art but also adds a sparkling finish that catches the light beautifully, perfect for sunny days or a night out.
12. Mismatched Berries
For a truly eclectic and vibrant look, the Mismatched Berries nail design is a perfect choice. This style combines various shades and textures to create a playful yet cohesive appearance.
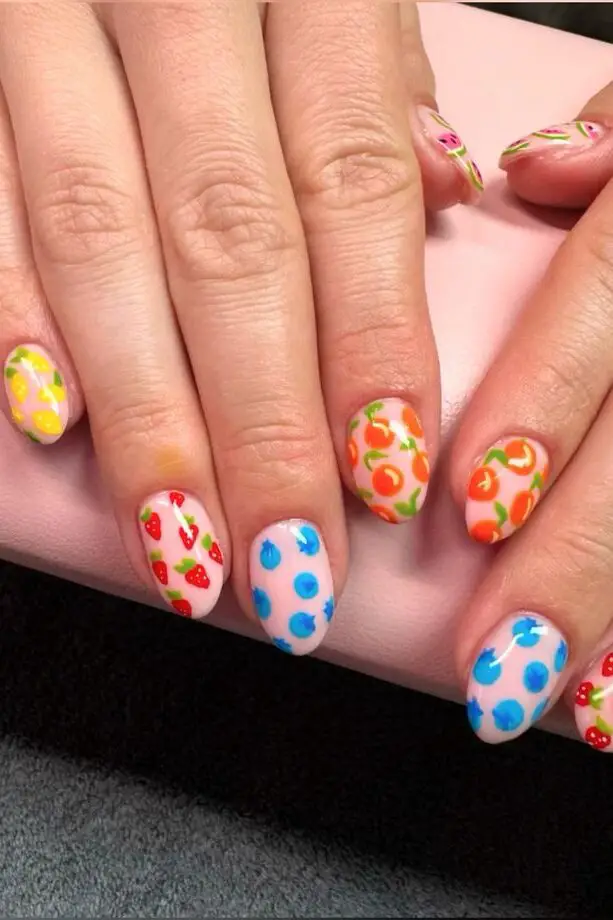
You’ll start by painting most of your nails in a berry shade, which provides a rich, deep base. To add an intriguing contrast, consider using two accent nails painted in a nude tone.
On these accent nails, introduce a berry tone marble effect. This can be achieved by using a thin brush to swirl together various shades of berry – think raspberry, strawberry, and blackberry.
The swirling technique creates a marble-like pattern that looks sophisticated and stylish. It’s a great way to add a unique twist to your manicure without overwhelming the berry theme.
To ensure each nail stands out, go back over the berry-colored nails to enhance their opacity. A second coat will help achieve a more vibrant and eye-catching color.
13. Watermelon Rind with Black Seeds
For a playful and summery nail design, the Watermelon Rind with Black Seeds style is your perfect pick. Start with a vibrant green polish to paint the lower section of your nails, creating the look of a watermelon rind.
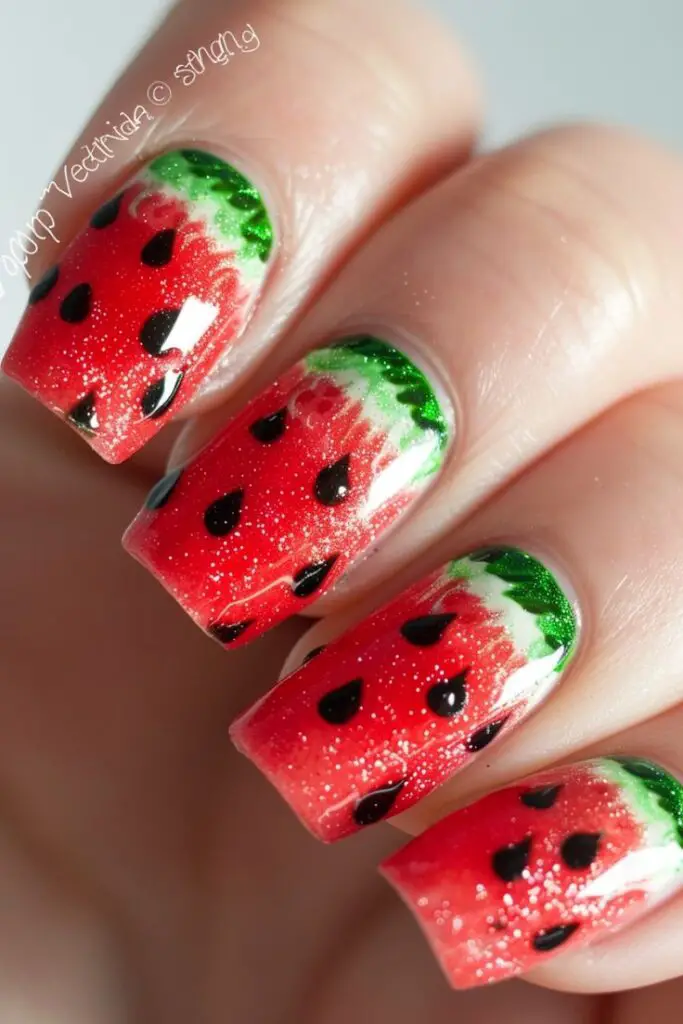
Before the polish dries, peel off any nail vinyls to maintain crisp lines. For a more detailed rind appearance, use a darker green to draw thin vertical stripes at the tips of your nails.
Next, switch to a black polish for the seeds. Place a small amount of polish on a piece of paper to make it easier to work with.
Using a dotting tool, create three black dots on each nail. Then, with a fine nail art brush, draw a line from the center of each dot outwards, filling in the edges to form a teardrop shape.
This technique gives the seeds a more realistic look, enhancing the overall watermelon effect.
To add a touch of whimsy, use a white polish to apply a small highlight to each seed, giving them a cartoony reflection.
If you apply too much white, simply go back with the black polish to correct it. This step is crucial for adding depth and making the seeds pop against the green rind background.
14. French with Detailed Strawberry
For a chic and playful look, why not try the French with Detailed Strawberry nail design? This style combines the elegance of a French manicure with a fun, fruity twist.
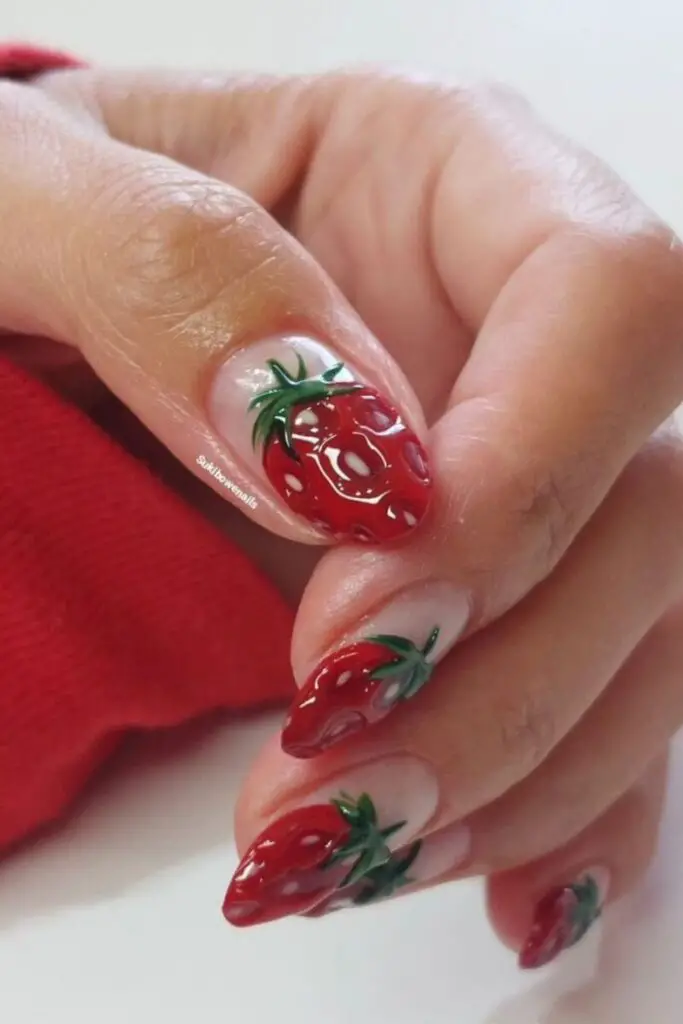
Begin by applying a sheer base coat such as Zoya Bella, which offers a subtle, natural look perfect for enhancing the vibrant strawberry details.
Once the base is dry, proceed with the French tip using a strawberry-colored polish. The trick here is to apply the polish smoothly, starting at one corner of your nail and gradually sweeping up at an angle towards the center. This method helps achieve that classic, clean French tip line.
Next, using acrylic paint for precision, paint on strawberry shapes. A simple way to create these is to paint heart shapes on alternate sides of each nail, which naturally resemble the silhouette of a strawberry.
For a more realistic touch, use a dotting tool to add the tiny seeds. Place these strategically, not too uniformly, to mimic the natural seed pattern found on real strawberries.
Remember, the placement of these seeds can add dimension and make your design look more authentic.
To complete your strawberries, use a green polish or acrylic paint with a detail brush to add the leaves at the top of each strawberry. This not only adds a pop of color but also enhances the overall look of the fruit.
Once you’re satisfied with your design, don’t forget to apply a top coat. This is crucial, especially when working with acrylic paint, as it seals in your design and ensures it doesn’t wash off.
15. Watermelon Slices with Heart Seeds
Dive into a fun and creative journey with the Watermelon Slices with Heart Seeds nail design, a perfect blend of summer vibes and adorable aesthetics.
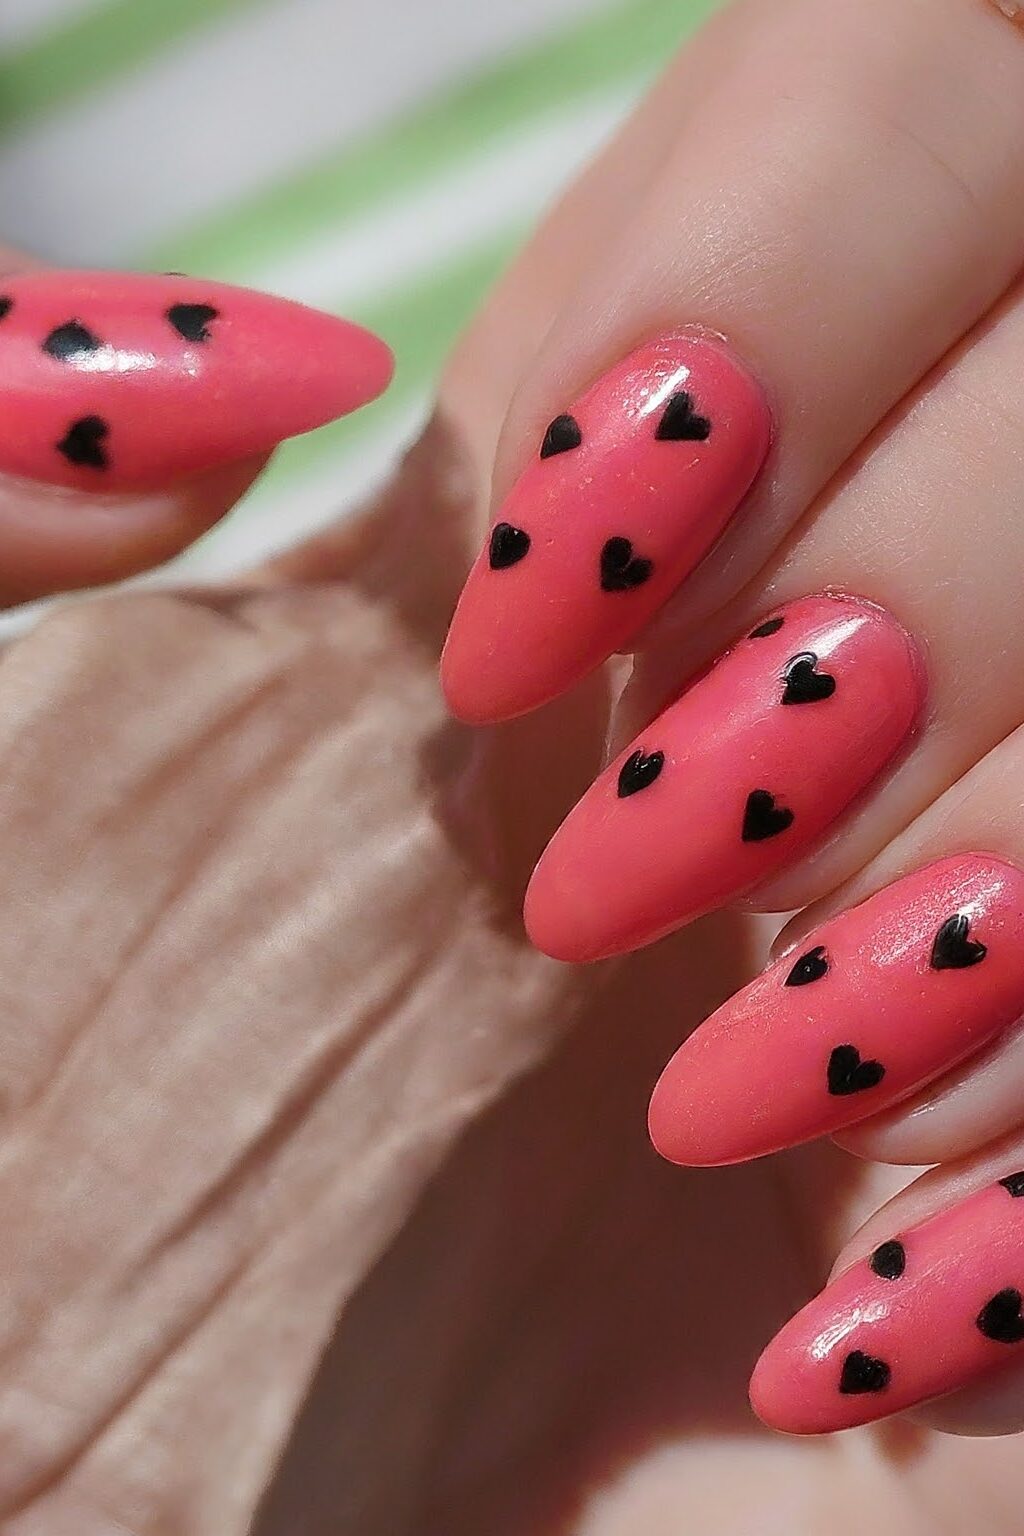
This design captures the essence of watermelon in a unique and playful way, adding a twist with heart-shaped seeds instead of the traditional black dots.
To start, you’ll paint your nails with a neon fuchsia base, layering pink glitter on the bottom half of each nail for that juicy watermelon look.
The glitter not only adds a sparkling effect but also mimics the inner texture of a watermelon, making your design stand out.
For the watermelon rind, sponge on wet n wild white on the tips of your nails, creating a gradient effect that transitions smoothly from the white to the neon green.
This technique mirrors the natural gradient seen in a watermelon slice, from the green rind to the white layer and finally to the fuchsia flesh.
The key here is to let each layer dry thoroughly before applying the next, ensuring a clean and vibrant outcome.
The highlight of this design is undoubtedly the heart seeds. Using a nail stamping technique with a bundle monster plate and konad black polish, stamp on the heart seeds over the pink glitter.
The heart shapes add a whimsical and charming touch to the watermelon theme, making it a cute and eye-catching choice for your summer nail art.
16. Shiny Pink Base
For a touch of elegance and a splash of vibrant color, the Shiny Pink Base nail design is an excellent choice for your next manicure.
This design is particularly flattering for light skin tones, which can beautifully carry both sheer pink colors and bright neon shades with cooler undertones.
The versatility of pink allows it to be a fantastic base for various nail art designs, whether you’re attending a spring event or just want to add some color to your everyday look.
To begin, apply a thin base coat—this step is crucial as it ensures better adhesion of the nail polish and prevents any staining of your natural nails.
Once the base coat is dry, choose a shiny pink polish that complements your skin tone and apply it evenly.
If you’re aiming for a more glamorous look, consider a pink glitter nail polish or even a rose gold glitter variant to give your nails that extra sparkle and shine.
After the pink base has settled, you might want to add some nail designs glitter. This can range from subtle accents to bold patterns, depending on your personal style.
For a unique touch, use a jelly top coat to blend any additional colors or glitter seamlessly, giving your nails a professional and polished finish.
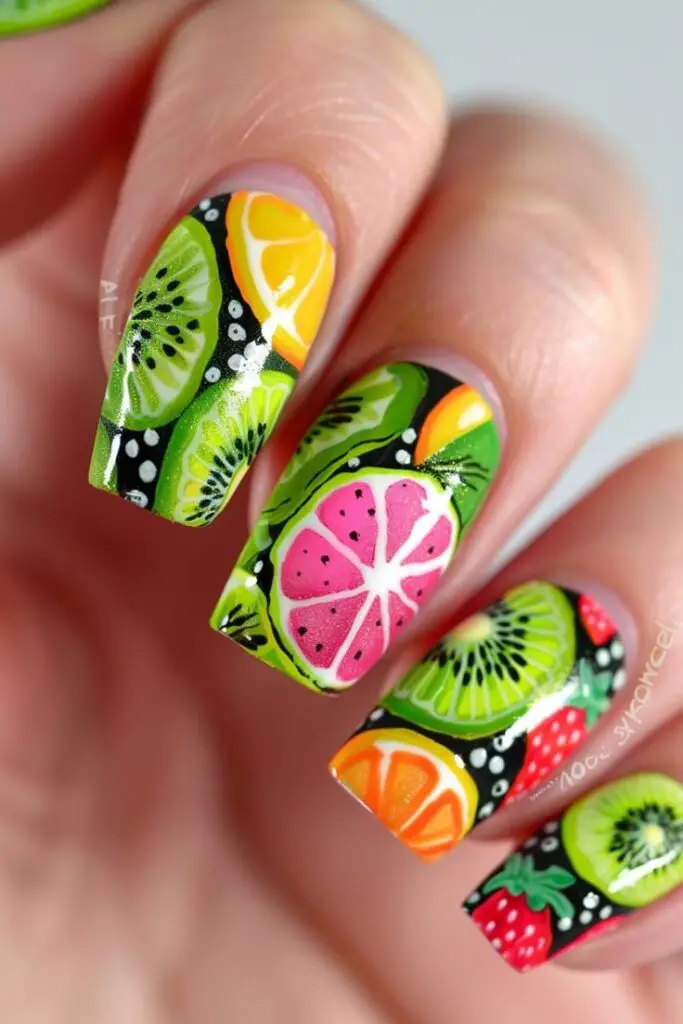
17. Matte Mismatched Citrus Fruits
For a fresh and trendy look, try the Matte Mismatched Citrus Fruits nail design, perfect for both spring and summer. Begin with a pale pink polish as your base, setting a soft and subtle canvas.
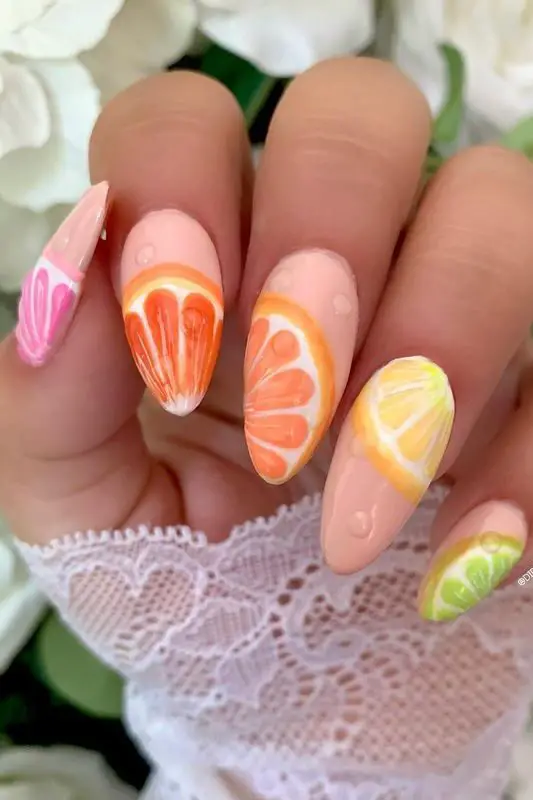
Next, using a lemony yellow polish and a nail art brush, start painting lemons all over your nails. The technique involves drawing ovals with two rounded ends on each side, making them look like real citrus slices.
Don’t forget to add some green leaves using a green polish to enhance the citrus theme.
To achieve the matte effect, use a matte top coat instead of a glossy one, which will give your nails a modern and stylish finish.
This design is not only eye-catching but also easy to execute, making it perfect for any picnic, pool party, or day at the beach.
For those who love a bit of detail, add tiny white dots onto each lemon slice using white polish. This small addition brings a touch of delicacy and depth to your nail art, making the citrus fruits appear more vivid and luscious.
The mismatched aspect comes into play when you incorporate different citrus fruits on each nail.
You might choose to paint oranges, limes, or even grapefruits using similar techniques, altering the colors to match the respective fruit.
This diversity in design allows each nail to stand out, celebrating the vibrancy and variety of summer fruits.
18. French with Lemon Slices
For a refreshing twist on a classic style, try the French with Lemon Slices nail design, which beautifully combines elegance with a zesty pop of color.
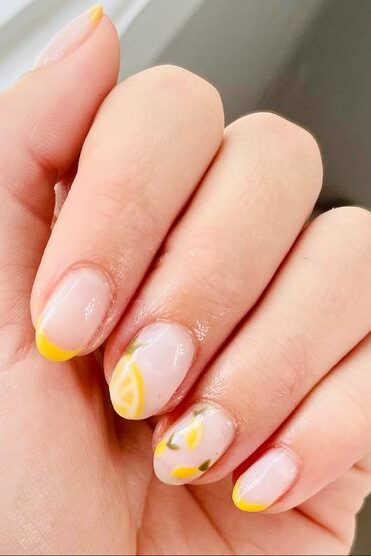
Begin by applying a sheer nude polish as your base, ensuring a clean and subtle backdrop that enhances the vibrant lemon accents. Once your base is dry, it’s time to add the iconic French tip.
Opt for a bright yellow polish to draw a smile line at the tip of each nail. If you prefer less curve, you can create a straighter line, but a curvy smile line adds a playful touch to the design.
Next, use green gel paint to draw one or two leaves on each lemon, adding a natural feel to the fruit-inspired theme.
You can take some green gel polish on a fine nail art brush to add a fringe design on the remaining nails, filling in the smile lines with the same brush for a cohesive look.
To finalize your design, apply a matte gel top coat on your pinky, index, and thumbnail. This gives a modern matte finish to your nails, contrasting beautifully with the glossy French tips.
Cure under a lamp and then remove any sticky residue to reveal your stunning Lemon Slice nails up close.
19. Neon Orange with Glossy Mango Slices
For a truly vibrant and summery feel, the Neon Orange with Glossy Mango Slices nail design is a showstopper.
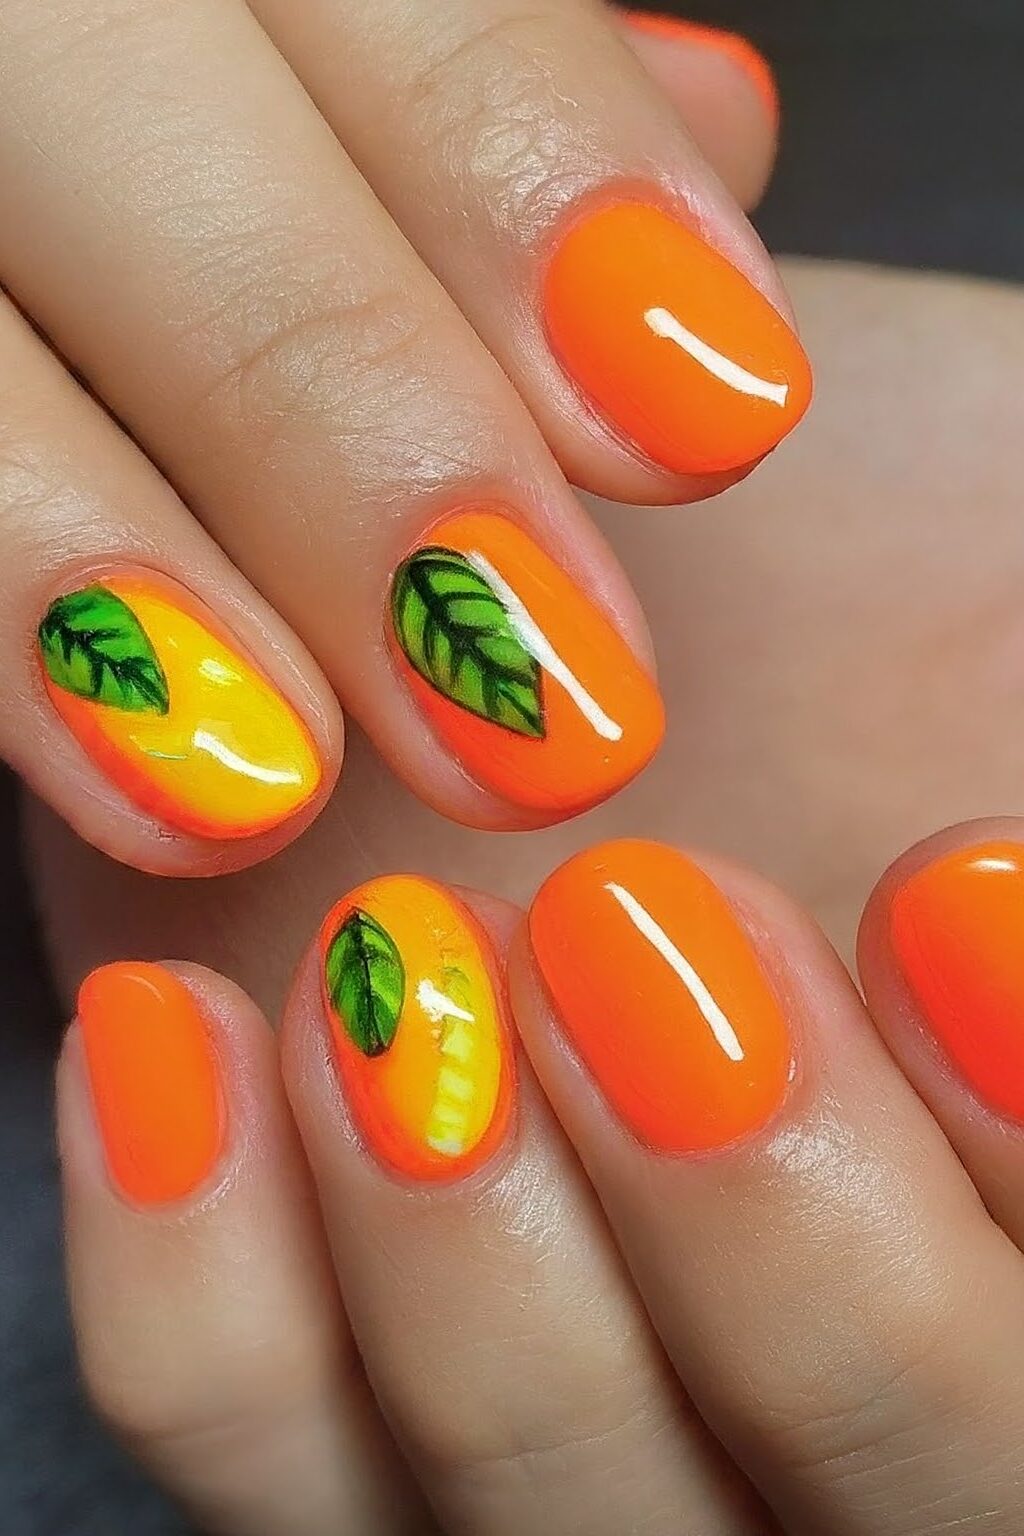
Starting with a neon orange polish that glows in the dark, you create a base that’s both eye-catching and playful.
This neon hue is perfect for those who love to stand out, especially under nighttime lights where it reveals its glow-in-the-dark magic.
Next, the mango slices come into play. Using a jelly orange polish that resembles the translucent and juicy quality of mango flesh, paint thin, curved slices across your nails.
This step requires a fine liner brush for precision, allowing you to mimic the intricate details of mango slices accurately.
To add depth and a three-dimensional look, use a thicker gel or a builder gel to give the mango slices a raised effect on your nails.
This technique enhances the realism of the fruit, making it look as if actual mango slices are adorning your nails.
Seal everything with a top coat to ensure longevity and to maintain the glossy finish, which enhances the overall vibrancy of the design.
20. French with Glittery Pineapple
For a tropical twist on the classic French manicure, French with Glittery Pineapple design is a dazzling choice.
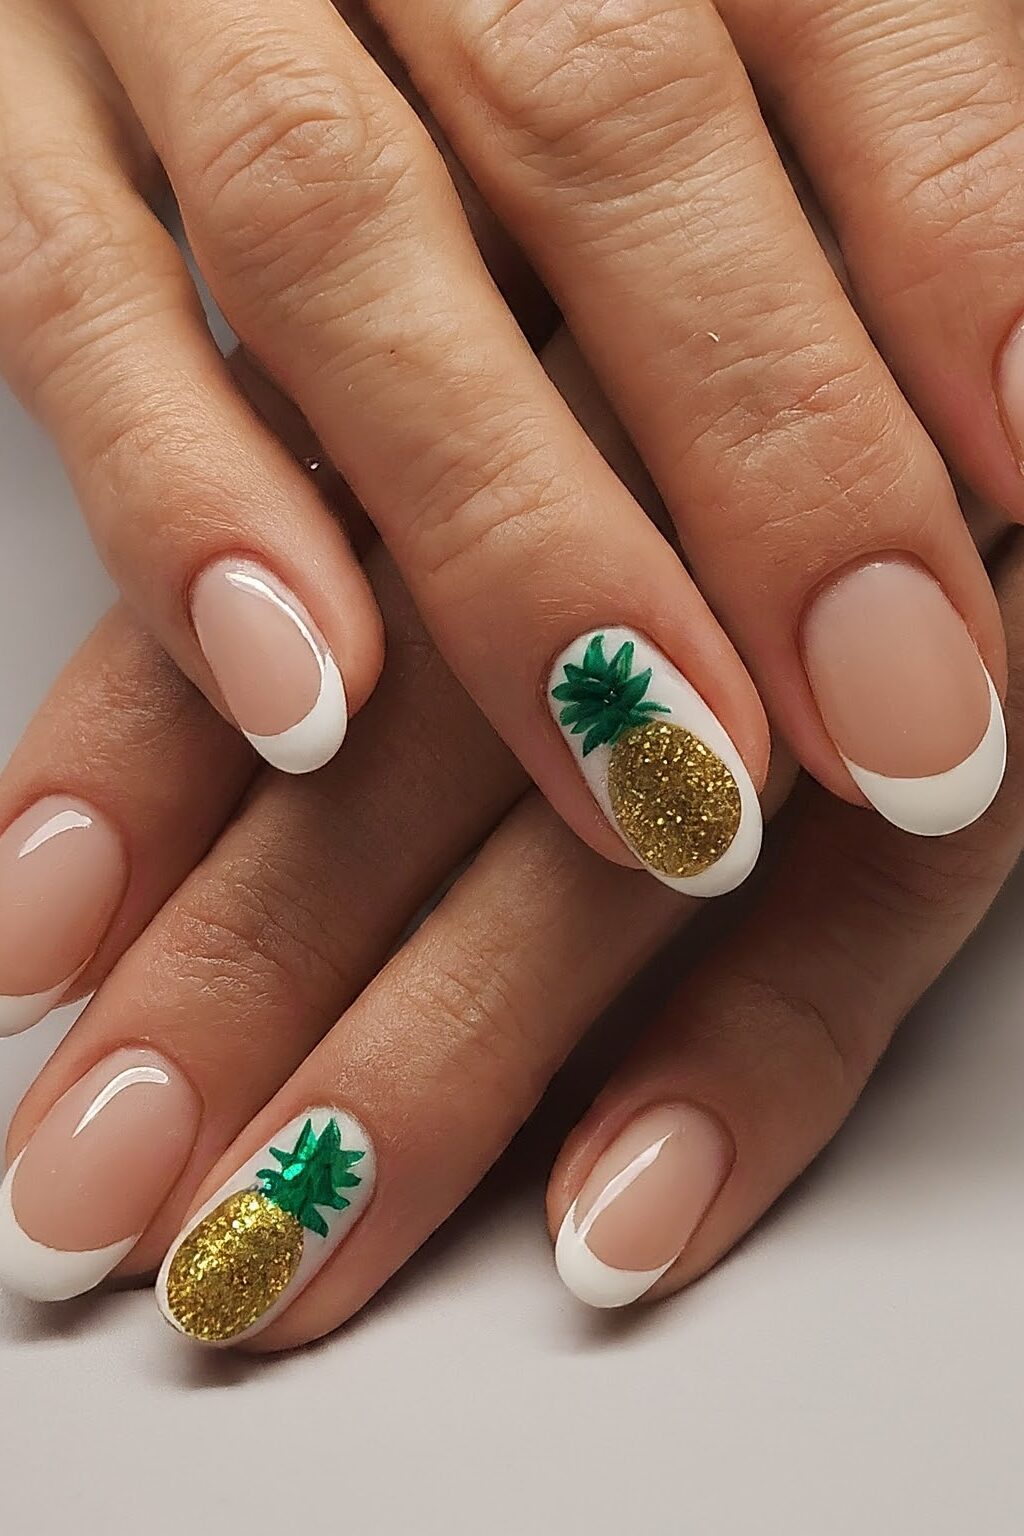
Begin by applying a pale pink or nude base to your nails, creating a soft and subtle backdrop. Once your base coat is dry, it’s time to add the French tip.
Next, the fun part begins. Using a fine-tipped nail art brush, paint small pineapple shapes on each French tip. Start with a bright yellow polish for the body and add green accents for the leaves.
To make the pineapples truly stand out, apply a thin layer of glitter polish over the yellow, giving your design a sparkling effect that catches the light beautifully.
Finish your French with Glittery Pineapple design with a clear topcoat.
Final Thoughts
Throughout this exploration of fruit nail design ideas, we have journeyed across a spectrum of vibrant, playful, and innovative styles ranging from the subtly elegant Peach & Cherry Blossom French nails to the boldly whimsical Mismatched Tropical manicures.
Each design encapsulates the joy and creativity inherent in nail art, demonstrating how the blending of colors, shapes, and themes can transform the humble nail into a canvas for personal expression and seasonal cheer.
As we wrap up our foray into these juicy trends, it’s clear that fruit nail art offers an exciting way to celebrate the beauty of nature, the playfulness of design, and the joy of color.


Leave a Reply
You must be logged in to post a comment.