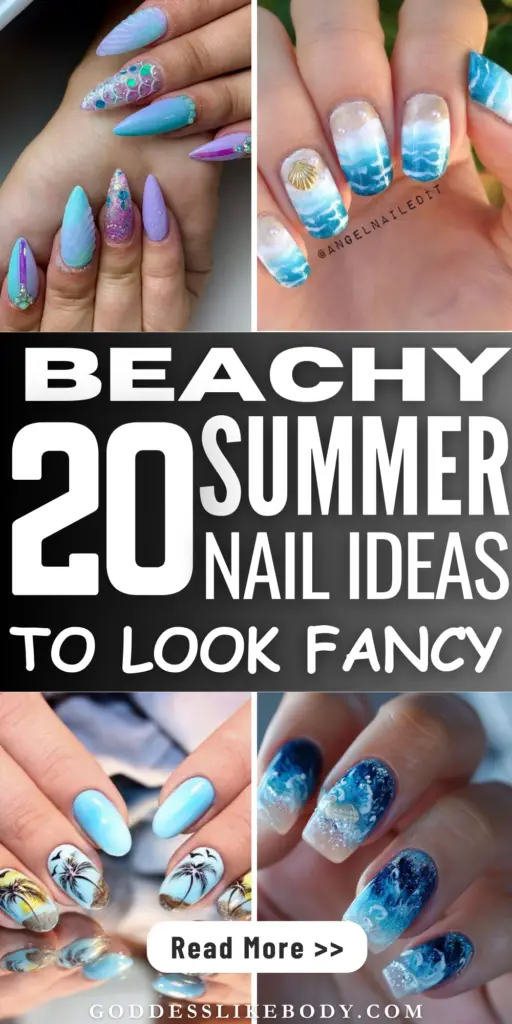
As summer 2024 approaches, beachy summer nails including dazzling beach nails and mermaid nails, are setting the trend for those looking forward to their beach vacation.
From the allure of tropical nail designs to the charm of beach nail art, these styles promise to turn you into a sea queen with fancy nail art that captures the essence of summer.
In this post , we will explore 20 captivating ideas for beachy, gorgeous nails that draw inspiration from the vibrant colors of the sea and sand.
Get ready to dive into a world where your nails become a canvas for expressing your love for the ocean and its boundless beauty.
Busy? Save this pin for later.
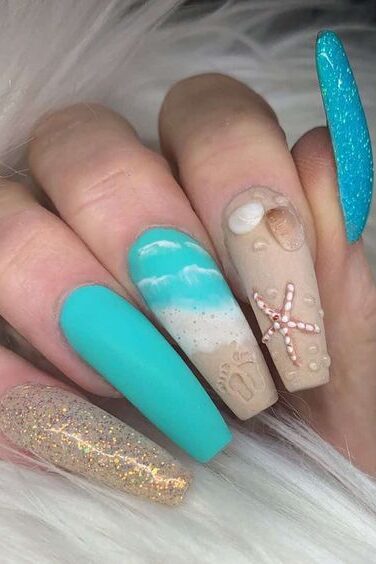
1. Seashell Glitter Tips
Seashell Glitter Tips are a stunning choice for anyone aiming to bring the spirit of the beach to their fingertips.
This design is particularly popular during the summer months, capturing the essence of the ocean with a touch of sparkle.
Step-by-Step Tutorial Overview
Base Preparation: Start with a sea-inspired color of gel polish over a milk bath nail underlay for a subtle, oceanic backdrop.
Adding Glitter: Apply a layer of Iridescent Seashell Glitter, using multiple thin coats to ensure even drying and curing.
Seashell Design: Use a thicker top coat gel with a skinny brush to draw intricate seashell patterns.
Final Embellishments: Enhance the design with pearls and rhinestones for an elegant finish.
Key Techniques
Gel Polish: Opt for shades like turquoise blue, reflecting the summer’s favorite ocean hues.
3D Elements: Incorporate seashell studs, starfish, and rhinestones to elevate the texture and visual appeal.
UV Builder Gel Techniques: For those who love DIY, a UV pure white builder gel can be used to create detailed shell textures, mimicking the look of a conch or scallop shells.
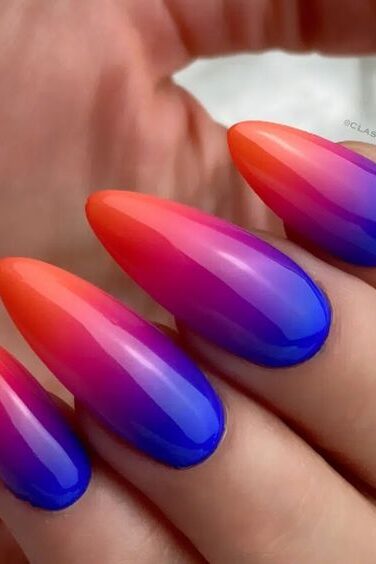
2. Sunrise Ombre
Sunrise Ombre nails, also known as Tequila Sunrise Ombre, capture the stunning hues of a morning sky with a gradient blend from vibrant orange to cheerful yellow.
Step-by-Step Tutorial Overview
Base Coat Application: Begin with a white nail polish base to make the colors pop.
Color Gradient Technique: Use makeup wedges to apply three strips of orange and yellow polish.
Blending: Gently blot the colors onto the nail, repeating to intensify the hue.
Top Coat: Seal with a clear polish for a glossy finish.
3. Palm Tree Stamp Art
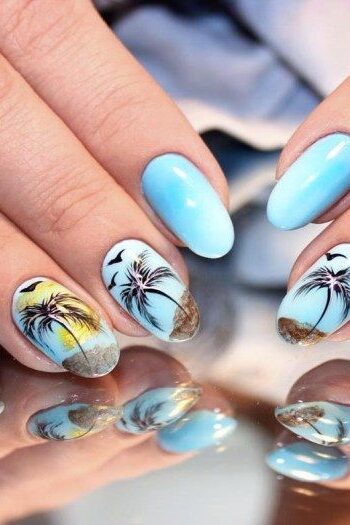
Palm Tree Stamp Art is a creative and fun way to bring a touch of the tropics to your beachy summer nails. Utilizing nail stamping plates like “Keep calm, and Shake Your Palm Fronds (M387)” and “Pretty Palms (CjS-301)” by Clear Jelly Stamper, you can achieve intricate palm tree designs that are perfect for any beach vacation.
Step-by-Step Tutorial Overview
Selecting Your Stamping Plate: Choose a plate with detailed palm tree patterns. Plates come in various sizes, from small (6 x 6) to XL (14 x 9), allowing for versatility in design.
Applying Polish: Apply your choice of polish, be it regular, gel, or shimmer, to the stamping plate.
Transferring the Design: Use a scraper to spread the polish evenly over the design, press the stamper onto the plate, then stamp the design onto your nail.
Finishing Touches: Admire your tropical nail art and add any final touches as desired.
4. Neon French Tips
Neon French Tips elevate the classic French manicure by incorporating vibrant neon colors, making them a standout choice for your beachy summer nails.
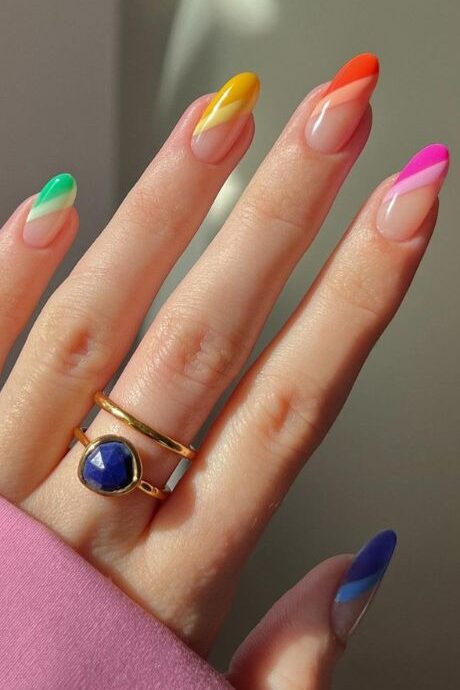
This trend sees a mix of traditional elegance with a bold, modern twist, perfect for those looking to add a pop of color to their beach vacation outfits.
Step-by-Step Tutorial Overview
Base Coat Application: Start with a clear or nude base coat to ensure a clean canvas.
Applying Neon Tips: Carefully paint the tips of your nails with your chosen neon color. For a precise line, use a thin brush or striping tape.
Sealing the Design: Apply a top coat to seal in the color and add a glossy finish.
5. Seashell Mosaic
Seashell Mosaic gel pedicure strips offer a durable and chic option that lasts up to 14 days. Known for their chip-resistant and ultra-shiny finish, these strips ensure a quick, wrinkle-free application without the need for UV drying.
The removal process is gentle and non-damaging, making them a convenient choice for frequent style changes.
Key Features and Benefits
Durability and Shine: The strips are designed to be ultra-shiny and resist chips, maintaining a pristine look throughout their wear.
Ease of Use: Quick application and no need for UV light to cure, making them ideal for home use.
Gentle Removal: Can be removed without damaging the natural nail, promoting nail health.
6. Mermaid Chrome
Mermaid Chrome nails are a dazzling trend that captures the mystical allure of mermaids with a modern chrome twist.
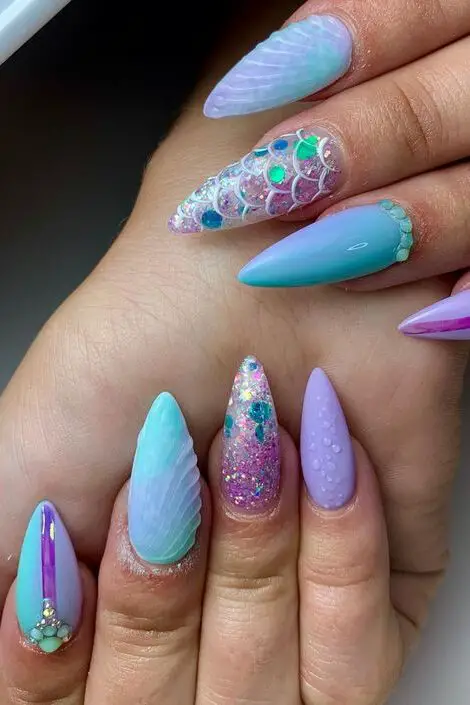
Application Process
Base Coat: Apply two coats of gel polish (black or white recommended for best effects).
Chrome Powder Application: Gently rub the Mermaid Chrome Nail Powder onto the nail using the provided applicator.
Top Coat: Seal with a rubber top coat to enhance the chrome effect and add durability.
Design Ideas
Explore various artistic designs like Undersea Geometry, Ocean Blue Ripple French, Crashing Waves, and Mermaid Marble. Each design allows for personal creativity and can be adapted to fit any style, from subtle and elegant to bold and dramatic.
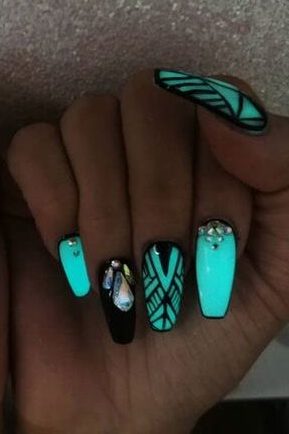
7. Neon French Chevron
Neon French Chevron nails blend the elegance of French tips with the vibrant energy of neon colors, arranged in a striking V-shaped chevron pattern.
This style is adaptable to various nail shapes such as square, ballerina, and coffin, making it a versatile choice for many.
Step-by-Step Tutorial Overview
Prepare Your Nails: Use tape to create precise lines for the chevron pattern.
Base Application: Start with a white polish on the tips of your nails to enhance the neon colors.
Apply Neon Colors: Using a brush, paint the chevron design with your chosen neon shades.
Add Embellishments: For an intricate look, embellish with glitter, rhinestones, or other decorative elements.
Customization Options
Color Combinations: Experiment with different neon color combinations to suit your personal style or seasonal trends.
Skin Tone Adaptation: Choose neon shades that complement your complexion for a harmonious look.
Tools and Techniques
Materials Needed: Finger paints or nail polish, tape for precision, brushes, and smile line brushes.
Techniques: Use stencils, tape, or freehand drawing to achieve the desired chevron pattern.
8. Sand Dollar Stencil
Sand Dollar Stencil Nail Art offers a touch of the ocean’s mystique with its unique, symmetrical design inspired by sand dollars, a fascinating marine animal known for their distinctive shells.
This nail art style uses a stencil to precisely replicate the sand dollar’s iconic pattern onto your nails, providing a creative and elegant beach-themed look.
Tools and Techniques
Stencil Use: A specific stencil mimicking the sand dollar’s shape is utilized to achieve the design.
Color Techniques: Artists often employ various colors and shading to render the sand dollars realistically.
Embellishments: Customizations such as glitter or rhinestones can be added to enhance the visual appeal.
Step-by-Step Guide
Prepare Your Nails: Ensure your nails are clean and apply a base coat.
Position the Stencil: Place the sand dollar stencil securely on the nail.
Apply Paint: Use a sponge or brush to apply polish over the stencil.
Peel and Perfect: Carefully remove the stencil and touch up any edges.
Final Touches: Add embellishments and seal with a top coat for durability.
9. Watermelon Slices
The Watermelon Slices nail design is a delightful nod to summer’s favorite fruit, featuring translucent pink ombré that mimics the natural coloring of watermelon.
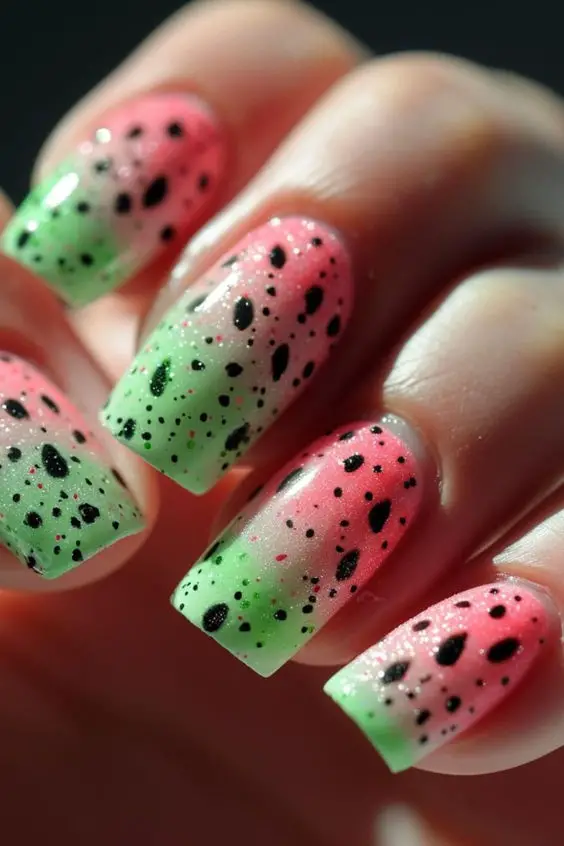
Step-by-Step Tutorial Overview
Base Coat Application: Begin with a clean base coat to ensure a smooth canvas.
Sticker Application: Place the watermelon slice stickers strategically on the nails.
Sealing the Design: Apply a clear top coat to protect and enhance the design.
Key Techniques
DIY Techniques: For those who prefer painting, the tutorial by Sandy and Hannah demonstrates using white acrylic paint and a thin brush to create the watermelon print and French tip design.
Versatility and Occasions
The Watermelon Slices nail design is not only charming but also versatile, suitable for various events from casual outings to more festive occasions like parties and weddings.
Tutorial and Design Creators
Presenters: The tutorial is led by Sandy and Hannah, who provide clear, easy-to-follow instructions on creating this fun summer look.
10. Pineapple Grid
The Pineapple Grid nail design, a popular trend that combines the tropical allure of pineapples with a structured grid pattern.
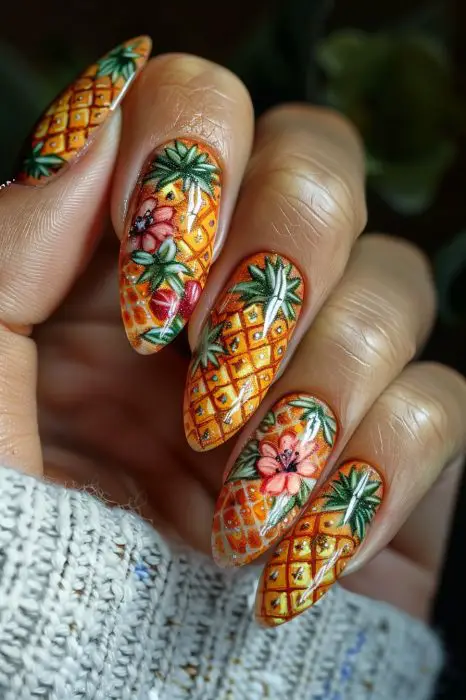
This nail art is not only visually striking but also versatile, making it suitable for various styles and occasions.
Techniques for Creating Pineapple Grid
Freehand Drawing: Use a thin brush and nail polish to draw the pineapples and grid lines directly onto the nail.
Stencils or Guides: For a more precise design, employ nail stencils or guides that outline the pineapple and grid shapes.
Nail Decals or Wraps: Apply pre-made decals or wraps that feature pineapple and grid designs for an easier application.
Durability and Application
Application Surfaces: This design can be applied to both natural and artificial nails, such as acrylic or gel, enhancing durability and longevity.
Cultural Significance: Pineapples symbolize hospitality and warmth, adding a meaningful layer to this nail art choice.
This nail design offers a fun and festive way to express personal style while paying homage to the symbol of hospitality.
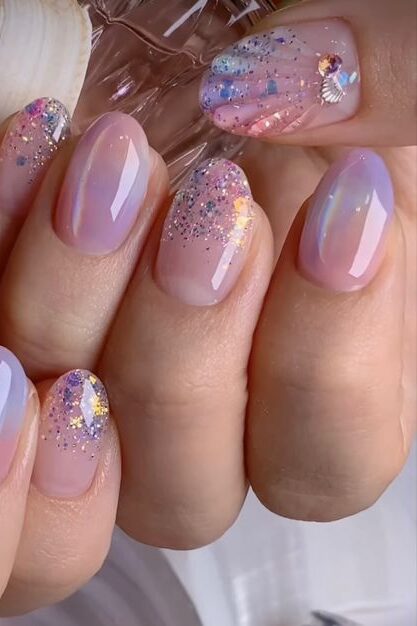
11. Glitter Dipped Tips
Glitter Dipped Tips, also known as Regal Nails from Derby, KS, offer a modern twist on the classic French manicure.
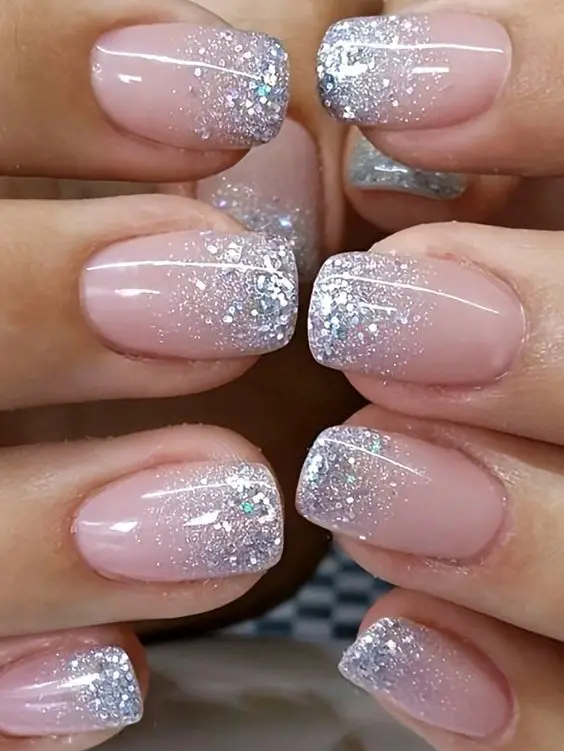
This design incorporates a dazzling blend of pink and white glitter, using a technique called “dip powder nails” that ensures a long-lasting finish.
Step-by-Step Application Process
Nail Preparation: Start by pushing back the cuticles and filing the nail plate to create a rough texture, ensuring better adhesion.
Base Application: Apply Revlon Nail’s Viviane clear base coat to the entire nail.
Dipping Process:
Dip the tip of your nail into the “Dreamy” pink dip powder from West Coast Dips.
Use a fluffy brush to blend the glitter upwards, creating a seamless gradient.
Glitter Application:
Apply a thin layer of base liquid, then dip into “Elegance” glitter powder using an eyeshadow brush for precise placement.
Adjust glitter pieces with a stick or toothpick as needed.
Sealing the Design: Finish with a gel base and top coat from West Coast Dips for a glossy and durable finish.
Tips for Perfect Results
Use a Peel Base: Apply Hollow Taco’s peel base for an easy removal process.
Control Glitter Application: Tap off excess liquid from the brush before applying to avoid clumps.
Final Touches: Use a toothbrush to gently remove any excess powder from around the nails.
12. Seashell Studs
Seashell studs are a chic choice for enhancing your beachy summer nails, blending elegance with a playful marine theme.
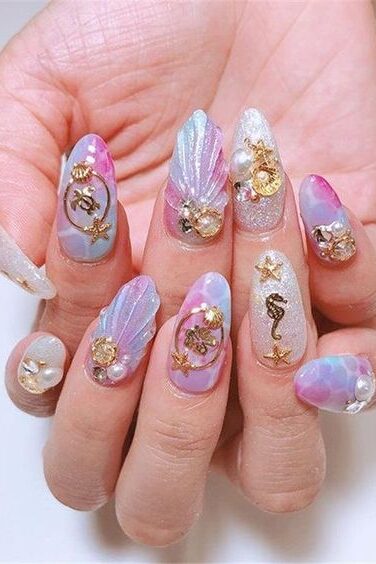
These small, seashell-shaped studs or gems add a unique touch to any manicure, making them perfect for various occasions like parties, weddings, or a day at the beach.
Application Process
Nail Preparation: Ensure nails are clean and apply a base coat of gel or dip powder polish for durability.
Stud Placement: Use a strong nail glue or adhesive to apply the seashell studs on the nails.
Customization: Choose from different colors and types of seashell studs to match your style.
Sealing the Design: Finish with a top coat to secure the studs and enhance the overall look.
13. Neon Coral Flames
Neon Coral Flames nail art is a hot trend that combines the vibrant energy of neon colors with the dynamic shape of flames, perfect for those looking to make a bold statement.
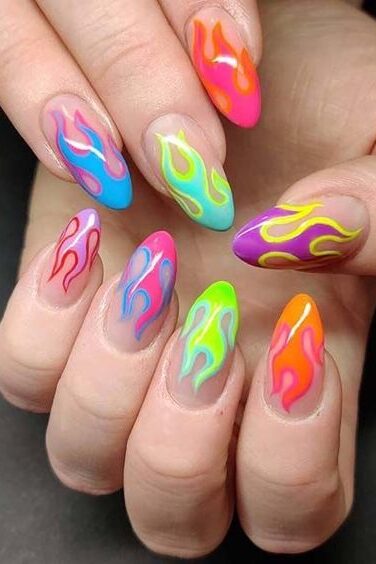
Application Tips
Preparation: Start with a base coat of white gel polish to make the neon colors pop.
Color Application: Apply neon coral gel polish in the shape of flames.
Detailing: Add sugared flame details for texture and depth.
Curing: Ensure to cure under a UV lamp between each coat as confirmed by creator Zara.
Finishing Touches: Apply a top coat to smooth out the design and enhance durability.
14. Tropical Fruit Mix
The Tropical Fruit Mix nail design is a vibrant choice, perfect for adding a splash of color to your summer and spring manicures.
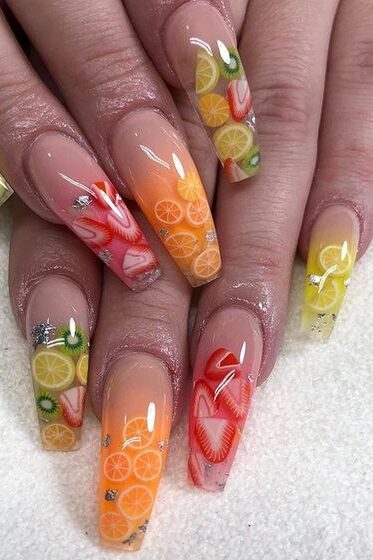
This design features a delightful array of tropical fruits like pineapples, watermelons, coconuts, and mangoes, each rendered in their vivid, natural hues or enhanced with luxurious gold and silver chrome effects. Here’s what you need to know about this trendy nail art:
Key Features and Customization
Base Materials: Can be created using nail polish, gel polish, or acrylics.
Durability: Lasts up to two weeks with proper care.
Seasonal Popularity: Especially popular during the summer and spring.
Customization: Allows for the addition of favorite fruits or specific colors.
Design Varieties and Eco-friendly Options
Design Options: Includes styles like minimalistic, mismatched, 3D, watercolor, vintage, French, beach-themed, food-inspired, and fruit basket nails.
Eco-friendly Choices: Consider using LDS Healthy Lacquer for a toxin-free, vegan, and cruelty-free option.
Unique Styles and Effects
Glow-in-the-Dark: Citrus nails that glow in the dark can offer a surprising and delightful twist.
Nature-Inspired Elements: Combine with motifs like leaves, flowers, and trees for a more intricate design.
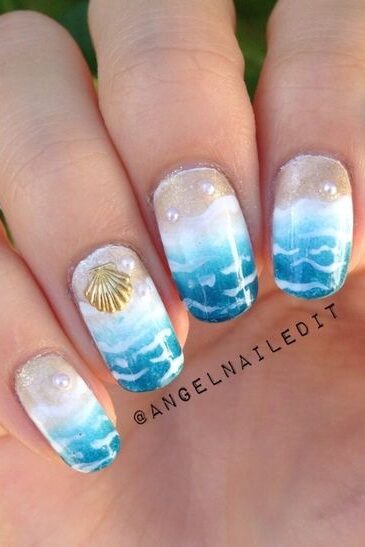
15. Ocean Wave Glitter
Ocean Wave Glitter nails capture the serene beauty of the sea with their cool blue and white shades, featuring an ombre or gradient effect that mimics tranquil ocean waves.

This design is perfect for beach vacations or any occasion where you want to carry a bit of the ocean’s calm with you.
Design Varieties
From blue swirl nails to wave nails, these designs are versatile enough for various events, including prom, making them a superb choice for special occasions.
Step-by-Step Creation Guide
Base Preparation: Start with a sand-colored base.
Adding Details: Apply white polish to mimic sea foam, followed by various shades of blue for the waves.
Embellishments: Incorporate clear nail gems to represent bubbles and use metallic gems for added sparkle.
Additional Creative Ideas
For those who love a challenge, consider drawing small ocean creatures like fish or seahorses to enhance the thematic depth of your nail art.
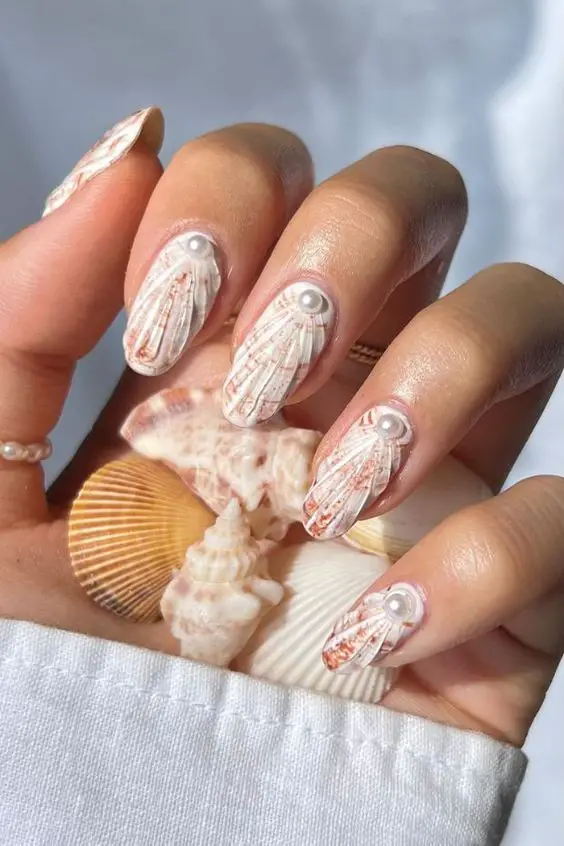
16. Seashell French Tips
Seashell French Tips offer a chic twist to the classic French manicure, incorporating elements of the sea for a refreshing summer look.

Suitable for various nail types, this design is versatile, embracing both short and long nails, and can be applied on acrylic, gel, or natural nails.
Key Design Process
Base Coat Application: Begin with a clear base coat to protect your natural nails.
Applying the French Tip: Use shades of pink from DnD gels or Eye Gel Beauty for the tip. Apply the color in a thick layer to ensure vibrancy.
Creating the Seashell Effect: With a thick IBD gel, sculpt the tip into a teardrop or seashell shape. This step must be done swiftly to prevent the gel from running.
Curing and Finishing: Cure the design under UV light and seal with a thin top coat to avoid over-saturation.
Advanced Options
For those seeking a more intricate design, consider visiting a professional salon to achieve 3D effects that mimic real seashell textures.
These can include designs inspired by conch shells or scallop shells, often enhanced with pearls or gems for a luxurious finish.
17. Neon Palm Print
Neon Palm Print nails are a striking choice for those looking to add a vibrant splash to their beachy summer nails.
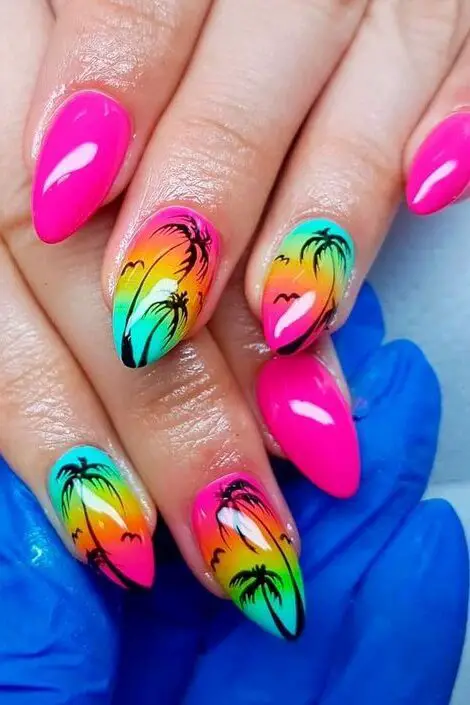
This design is characterized by its use of bright coral and turquoise colors, often complemented by other neon shades like pink, orange, yellow, and green, making it a standout option for various occasions.
Application Techniques:
Preparation: Start with a clean base, applying a base coat to protect your nails.
Color Application: Use Deluxe Gel Polish for the base color and add neon accents using Cat Eye Gel Polish.
Detailing: Employ a fine detail brush for hand-painted designs or opt for pre-made decals or wraps for ease.
Finishing Touches: Seal the design with a top gel for durability and a vibrant finish.
Customization for Seasons:
Spring: Incorporate pastel hues and floral accents.
Summer: Opt for vibrant, bold colors.
Autumn: Use warm tones.
Winter: Choose icy blue, shimmering silver, and sparkling white.
Nail artists recommend using high-quality products to ensure the longevity and vibrancy of the nail art. Whether you’re attending a casual gathering or a more formal event, this nail design can be adapted to suit your style and the occasion.
18. Starfish & Sand Dollar Duo
Starfish and Sand Dollar Duo nail designs captivate with their marine-inspired aesthetics, featuring the iconic shapes of starfish and sand dollars.
These designs can range from simple to complex, incorporating various techniques and styles to suit any preference.
19. Hidden Message Nails
Creating Hidden Message Nails
Hidden message nails are a fascinating choice for those who love a bit of mystery and fun with their manicure.
This design reveals a secret message only under specific conditions, such as in the dark or when temperature changes occur.
Required Materials
Base Polishes: Two shades of red gel polish (opaque and semi-sheer)
Top Coats: Clear gel top coat
Special Ingredients: Loose glow-in-the-dark pigment, thermal powder
Step-by-Step Guide
Base Preparation: Apply an opaque red gel polish as your base color.
Top Coat Application: Add a layer of clear gel top coat.
Mixing Pigment: Combine the loose glow-in-the-dark pigment with clear gel top coat to create a glowing paste.
Message Painting: Use this mixture to paint your hidden message. Techniques can vary from using Liquid Palisade for thin lines to freehand painting with a fine brush.
Techniques for Different Effects
Glow in the Dark: Utilize a light-colored base to enhance the effect of glow-in-the-dark polishes, especially cold light colors like green and blue.
Thermal Change: Apply a thermo color-changing polish that turns clear at 86 degrees Fahrenheit, revealing the hidden message when warm.
Design Variations
Freehand Landscape: Incorporate a glow-in-the-dark landscape with hidden messages using the Liquid Palisade trick.
Thermal Messages: Use thermal polish for a dynamic design that changes with temperature.
20. Sea Glass Shards
The Sea Glass Shards nail design, inspired by the tumbled stones found along the beach, features a captivating mix of blues, greens, and milky whites.
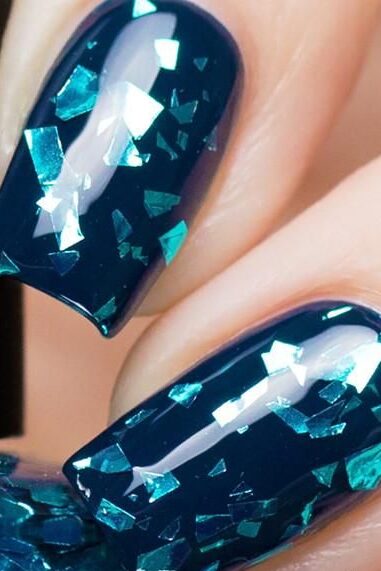
This design is perfect for those aiming to add a touch of oceanic charm to their summer look.
Application Instructions
Base Coat: Start with any base coat to protect your nails.
Glitter Placement: Manually place the bright blue metallic foil glitter for your desired effect.
Top Coat: Finish with a clear top coat for durability and shine. For a frosted look, apply a matte top coat like Essie Gel Couture Matte or OPI Stay Matte.
Design Variations
3D Charms: Enhance the design by adding small ocean-themed charms.
Color Mixing: Experiment by mixing different shades to customize your look.
Texture: Incorporate different textures for a more dynamic appearance.
Despite its popularity, the Sea Glass Shards polish is currently sold out, with restocks being unpredictable. This elusive nature adds to its allure, making it a coveted item among nail art enthusiasts.
Conclusion
Throughout this exploration of beachy summer nails, we’ve navigated the vibrant and creative realm of nail art, showcasing twenty unique styles that capture the essence of the summer season.
The journey through these summer-inspired nail designs underscores the power of nail art to transform the mundane into the extraordinary, turning each nail canvas into a story of summer adventures and oceanic dreams.
By choosing from the multitude of styles presented, ranging from the bold and vivid Neon Coral Flames to the subtle elegance of Sea Glass Shards, enthusiasts are equipped to make a statement that transcends the season.
As we move beyond this collection, may these ideas inspire further creativity, inviting every reader to dive into the world of beachy summer nails, where the possibilities are as endless as the summer horizon.


Leave a Reply
You must be logged in to post a comment.