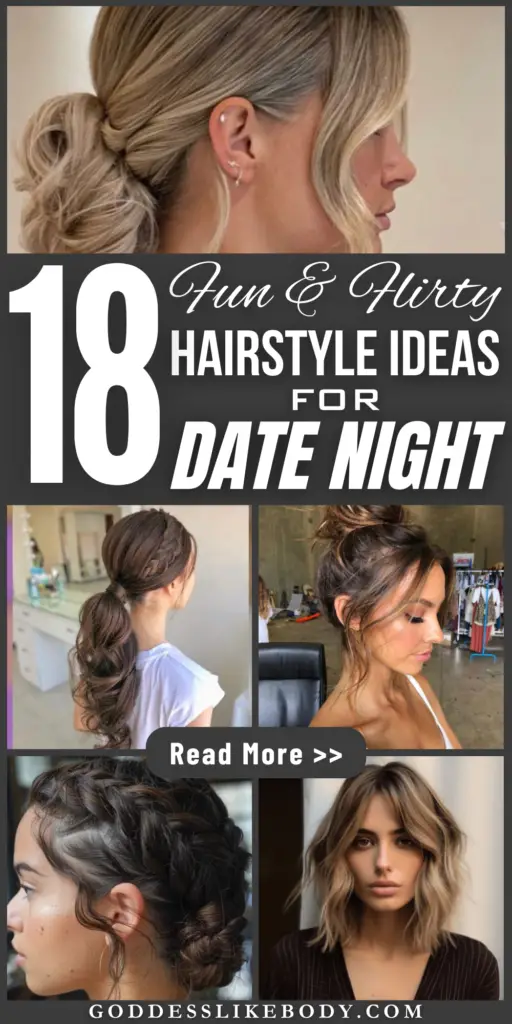
Are you preparing for a date night and looking to make a lasting impression? Fun and flirty hairstyles can transform your look, adding that extra touch of charm and sophistication.
This post shows you how to achieve date-night-ready hair, showcasing 18 irresistible hairstyles that range from the soft glamour of Hollywood waves to the playful spontaneity of slicked-back hair.
Each style, detailed with techniques like using a curling iron or incorporating a hair bow, is designed to elevate your look effortlessly.
Busy? Save this pin for later.
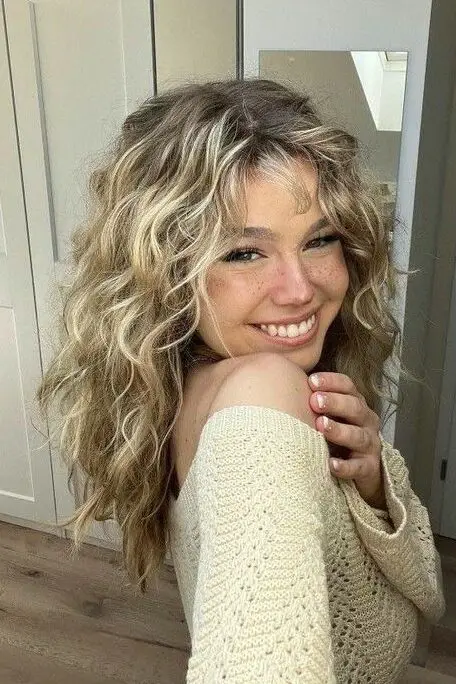
1. Textured Waves with Beachy Spray
DIY Sea Salt Texturizing Spray Recipe
To achieve the effortless soft beach waves that are perfect for any date night, start by creating your own sea salt texturizing spray. Here’s a simple recipe to follow:
Ingredients:
1 cup warm water
1 tablespoon sea salt
1-2 teaspoons argan or avocado oil
4-5 drops of essential oil (optional, for scent)
Instructions:
Combine all ingredients in a spray bottle.
Shake well to ensure the sea salt dissolves completely.
Adjust the oil based on your hair type: more oil for dry hair, less for oily hair.
For extra hold, especially for curly or styled hair, add a bit of hair gel to the mix.
Preparing Your Hair
Before applying the spray, prepare your hair to ensure the best results:
If your hair is straight and fine, avoid washing it for up to three days to allow natural oils to build up.
Use a volumizing conditioner, particularly if you frequently color or highlight your hair.
Styling with Tools
If your hair doesn’t naturally hold waves:
Use a curling iron or wand to add a few strategic waves.
Consider tools like the T3 Airbrush Duo for blow drying and a Babyliss 1.5 inch curling iron for deeper waves.
Final Touches
After styling:
Allow your hair to cool.
Gently tousle with your fingers to break up the curls, creating a more natural, textured look.
Apply a light mist of DIY sea salt spray to enhance the texture and add a beachy feel.
2. Voluminous Half-Up Ponytail
To achieve a voluminous half-up ponytail that adds a touch of glamour to your date night look, follow these steps using minimal products for maximum impact.
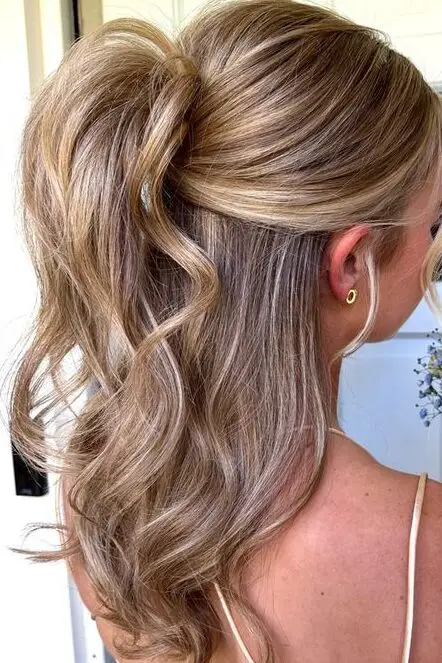
This style works best on day-old hair, where natural oils help to hold the style better.
Preparation with Dry Shampoo:
Start by applying IGK Direct Flight Dry Shampoo to your hair. Focus on the roots and areas that require more volume.
For best results, apply the dry shampoo before bed, allowing it to absorb oils overnight.
Creating the Ponytail:
Gather the top half of your hair, from above your ears, ensuring you maintain volume at the crown.
Secure this section with a clear elastic at your desired height. For a more voluminous look, position it higher on the head.
Styling Tips:
To achieve a sleek look, smooth the sides with a brush. For a more textured style, use a wide-tooth comb.
Tease the ponytail lightly with a comb to add volume.
Wrap a small strand of hair around the clear elastic to conceal it, securing the end with a bobby pin.
Finishing Touches:
Pull out a few strands around your face to soften the look and add a natural, flirty touch.
Give the ponytail and your loose hair a final spray with dry shampoo to ensure the volume holds throughout the evening.
3. Sleek High Ponytail with Wrap-Around Detail
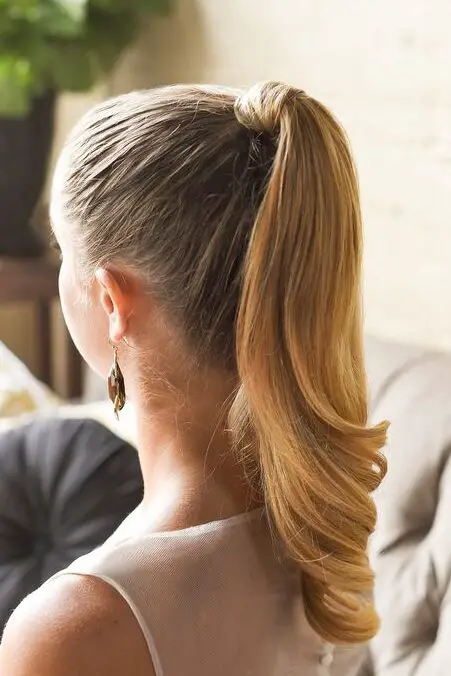
To create a sleek high ponytail with wrap-around detail, perfect for a sophisticated date night look, follow these straightforward steps:
Smooth and Secure the Base:
Brush your hair back into a high ponytail, ensuring there are no bumps or loose strands. Use a fine-tooth comb for a sleek finish.
Secure the ponytail tightly at the crown of your head with a sturdy hair tie.
Create the Wrap-Around Detail:
Take a small section of hair from the underside of your ponytail and wrap it around the base to conceal the hair tie.
Secure the end of this section underneath the ponytail with a bobby pin, ensuring it’s hidden for a polished look.
Enhance the Sleekness:
Apply a small amount of smoothing serum or lightweight gel to the surface of your hair and along the ponytail to tame flyaways and add a glossy finish.
For extra sleekness, you can use a straightener on the ponytail to ensure it is perfectly straight.
Maintain the Style:
Finish with a light mist of hairspray to hold everything in place throughout your evening.
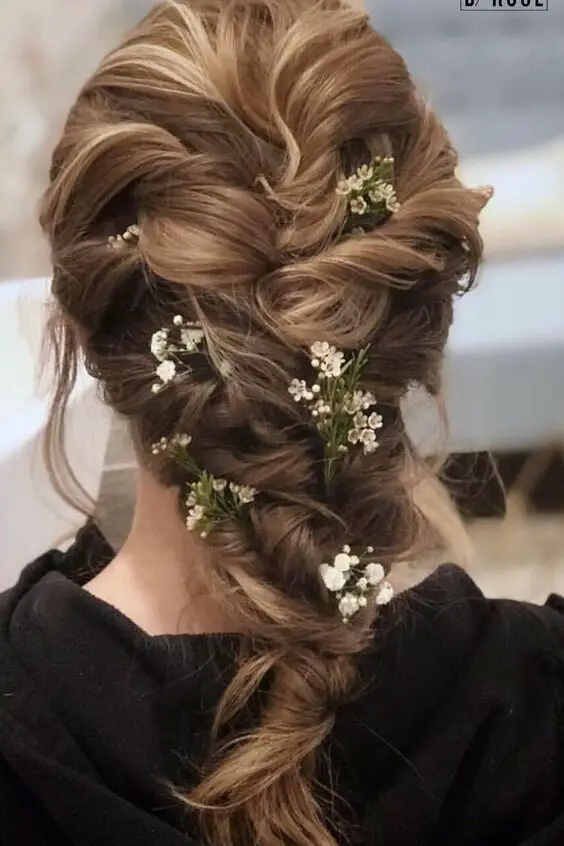
4. Romantic Braid with Delicate Flowers
To create the enchanting Romantic Braid with Delicate Flowers, begin by dividing your hair into five equal sections. Each section will form the base of your flower braid design.
Follow these steps to achieve a whimsically romantic look perfect for any date night:
Forming the Petals:
Gently curve the right and left side of each section to create a petal shape.
Braid each section, tapering towards the end to enhance the flower-like appearance.
Moisturizing and Securing:
Soften thick hair by moisturizing with a mixture of leave-in conditioner and water.
Use bobby pins to secure each little twist in place, ensuring they hold throughout the evening.
Adding Volume and Detail:
Twist two small sections from either side of your head into a small ponytail and secure with a clear elastic.
Braid this ponytail and then twist it around into a circular shape to mimic a flower, securing with another clear elastic.
Final Touches:
Connect the last two twists, creating a topsy tail for added intricacy.
Consider using hair extensions for added fullness and volume.
Intertwine delicate flowers throughout the braid for a truly romantic finish.
5. Playful Bubble Braid
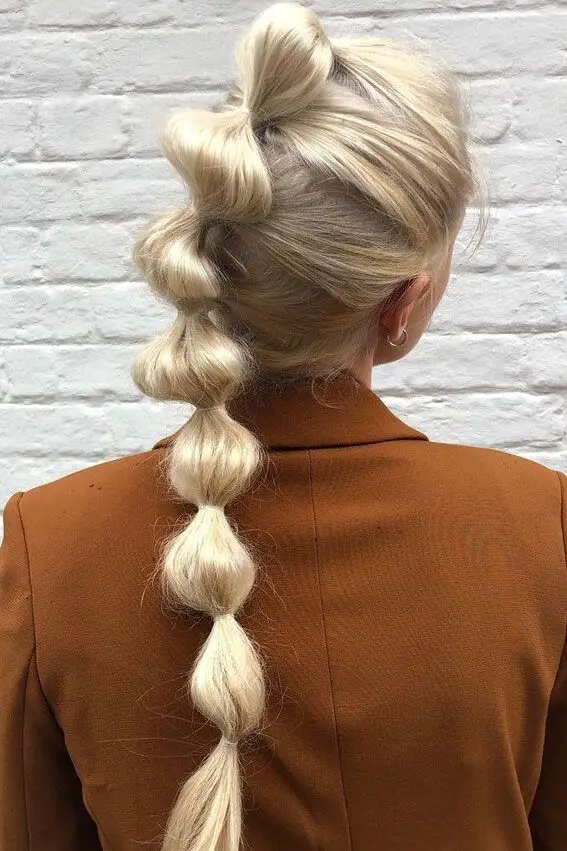
To craft a Playful Bubble Braid, an ideal choice for adding a whimsical touch to your date night ensemble, follow these steps to ensure your hairstyle stands out:
Preparation:
Start with hair that is either straight or has slight waves. This style works best on medium to long hair.
Brush your hair thoroughly to remove any tangles, ensuring a smooth base for your braid.
Creating the Braid:
Pull your hair back into a high or low ponytail, depending on your preference, and secure it with a hair tie.
Add another elastic a few inches down from the first, then gently pull apart the section of hair between the elastics to create a “bubble.”
Repeat this process along the length of the ponytail, spacing the elastics evenly and puffing out each section to form bubbles.
Enhancing the Bubbles:
For more pronounced bubbles, lightly tease each section with a fine-tooth comb before expanding it.
Apply a light mist of hairspray to each bubble to help maintain its shape throughout the evening.
Personalizing Your Look:
Integrate small, decorative hair accessories like pearls or sparkly clips along the braid for an added touch of elegance.
Consider weaving in a thin ribbon or a strand of small flowers to complement your outfit and add a romantic flair.
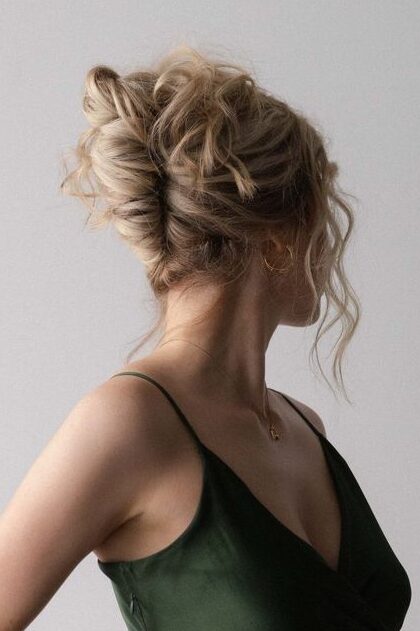
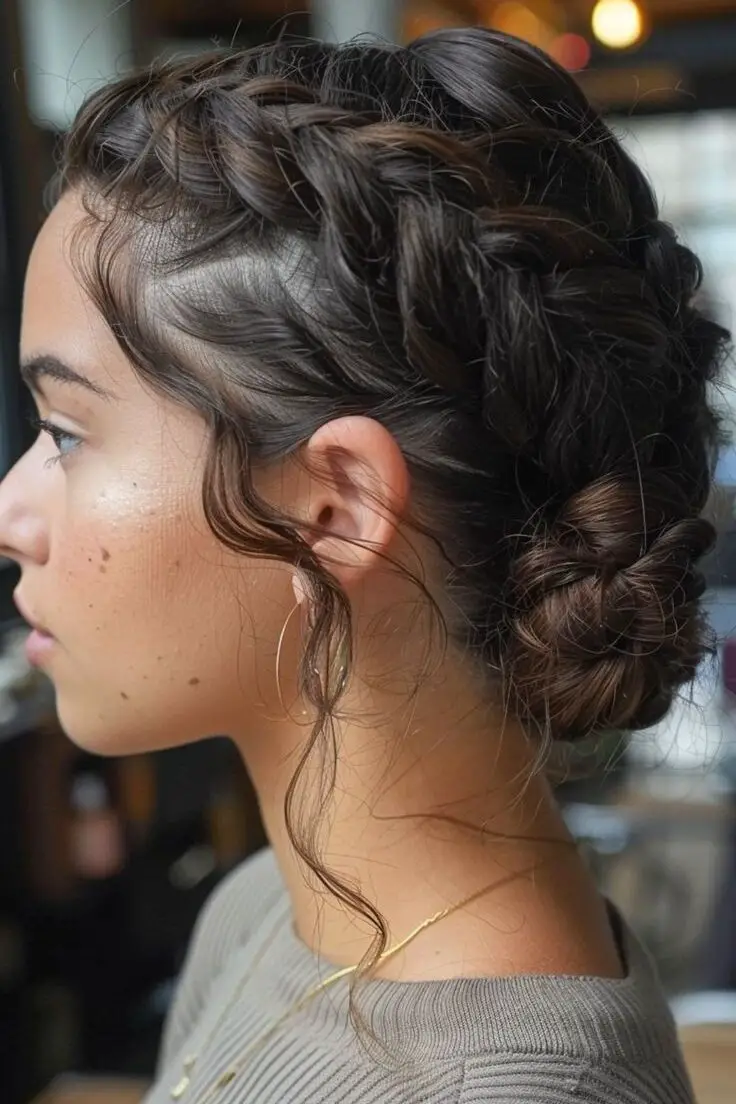
6. Textured Chignon with Wispy Strands
To achieve a Textured Chignon with Wispy Strands, a hairstyle that beautifully marries elegance with a touch of casual grace, follow these detailed steps:
Preparation:
Lightly spray your hair sections with hairspray and curl them away from the face to start forming the base of your chignon.
After curling, gently comb through the hair with a wide-tooth comb, and apply a texture spray to add grit and hold, setting the stage for a textured look.
Forming the Chignon:
Separate the hair framing your face and pull the rest back into a low ponytail, securing it firmly with a hair elastic or bungee.
Divide the ponytail into two equal sections. Tie these sections into a simple knot, then wrap the ends counterclockwise underneath the bun, pinning them securely into place.
Adding Texture and Volume:
To enhance the texture, pull out small strands around the face. This not only frames the face beautifully but also adds a soft, romantic touch to the hairstyle.
Gently fan out the bun with your fingers to make it appear fuller and more textured, giving it a slightly undone, yet chic look.
Product Recommendations:
For hold and protection, consider using products like Kenra Hot Spray 20 or Kenra Color Maintenance Thermal Spray to keep your hairstyle intact and vibrant throughout the evening.
To maintain the volume and texture, Kenra Volume Spray 25 or Kenra Dry Texture Spray 6 are excellent choices.
Personalization Tips:
For a unique touch, integrate a few braids within the chignon or adorn it with flowers or small, elegant hair accessories that complement your outfit.
7. French Twist with a Modern Edge
To achieve a French Twist with a Modern Edge, perfect for a sophisticated date night, follow these streamlined steps that combine traditional elegance with a contemporary flair:
Preparation and Base:
Start by applying a light mousse or volumizing spray to damp hair. This helps to add texture and volume, essential for a fuller-looking twist.
Blow dry your hair smooth with a round brush, focusing on lifting the roots to maximize volume.
Forming the Twist:
Gather your hair at the nape of your neck. Use a comb to smooth the sides as you twist the hair upwards towards the crown of your head.
Keep twisting until the hair naturally folds into the classic French twist shape. Secure the twist with long bobby pins, sliding them horizontally for a firm hold.
Modernizing the Style:
Instead of a completely smooth and polished finish, opt for leaving a few strands loose around the face or pull out some layers to create a softer, more relaxed look.
Apply a texturizing spray or gently tease some sections at the top for a more volumized, modern appearance.
Securing the Style:
Ensure the twist is secure by using additional bobby pins where necessary. Hide these pins under the overlapping layers of hair to maintain a clean, elegant look.
Finish with a flexible-hold hairspray to keep everything in place without stiffness, allowing some natural movement.
8. Hollywood Waves with Side Part
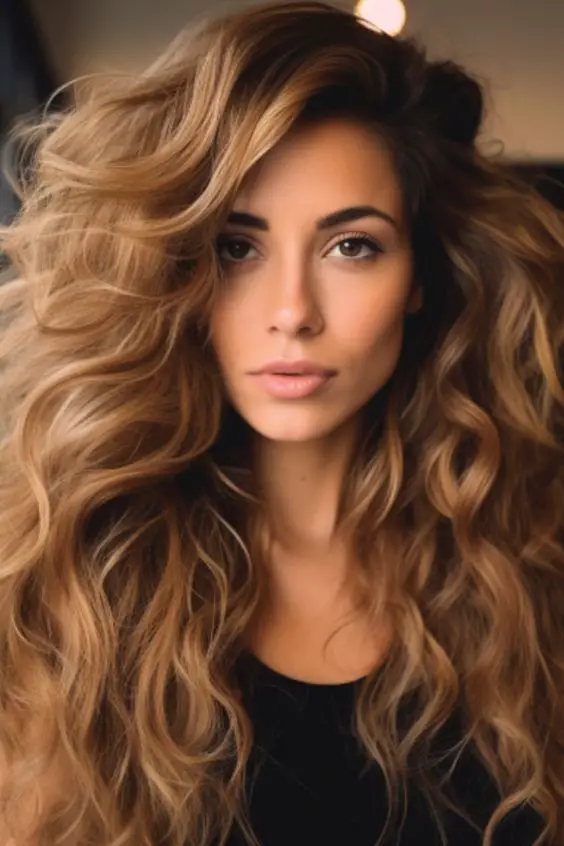
To achieve the timeless elegance of Hollywood Waves with a Side Part, ideal for a glamorous date night, follow these precise steps:
Preparation
Wash and Condition: Start with freshly washed and conditioned hair to ensure smoothness and shine.
Apply Heat Protectant: Generously apply a heat protectant to guard against damage from styling tools.
Creating the Waves
Section Your Hair: Divide your hair into sections, clipping away the top layers to focus on the lower sections first.
Curling: Use a large barrel curling iron to curl each section away from your face, creating uniform waves.
Set the Curls: Pin each curl to your head to cool down in shape for a more defined wave.
Forming the Side Part
Determine the Part: Choose the side that suits your face shape best, and create a deep part using a tail comb.
Smooth the Top: Gently brush the top section to smooth out the part while maintaining the volume.
Finishing Touches
Release and Brush Out Curls: Once cooled, release the curls and gently brush through them with a wide-tooth comb to form soft waves.
Apply Finishing Spray: Mist a light finishing spray to add shine and hold the waves in place throughout the evening.
9. Sleek Low Bun with Statement Earrings
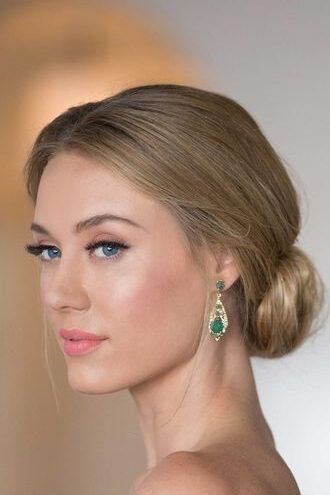
To create a Sleek Low Bun with Statement Earrings, perfect for a chic and sophisticated date night look, follow these detailed steps:
Preparation:
Begin by brushing your hair to ensure it is smooth and free of tangles.
Apply a light serum or smoothing cream to add shine and reduce frizz.
Forming the Bun:
Gather your hair into a low ponytail at the nape of your neck and secure it with a hair tie.
Twist the ponytail tightly and wrap it around the base to form a bun.
Secure the bun with bobby pins, making sure it’s tight and neat.
Enhancing the Sleekness:
For an ultra-sleek look, use a fine-tooth comb to smooth down any flyaways.
Apply a strong hold hairspray to keep everything in place.
Adding the Statement Earrings:
Choose a pair of bold earrings that complement your outfit. Large hoops or sparkly drop earrings work well.
Make sure your earrings are visible by tucking hair behind your ears or adjusting the bun slightly lower.
10. Headband Braid with a Textured Ponytail
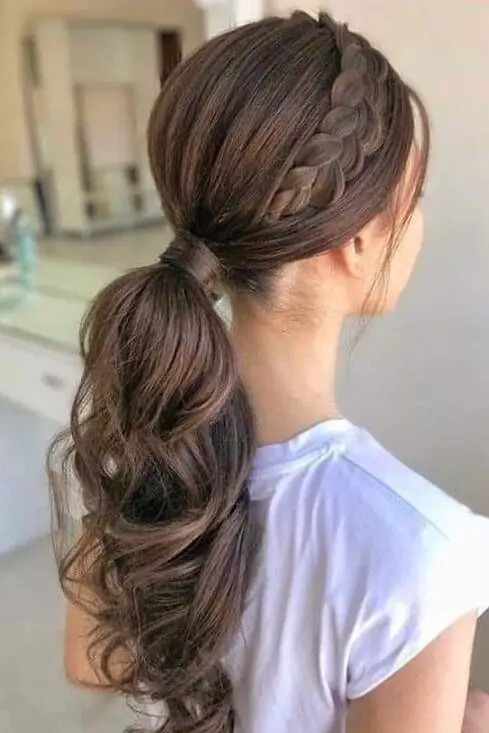
To create the Headband Braid with a Textured Ponytail, an enchanting choice for a playful yet polished date night look, follow these steps:
Starting the Braid:
Begin by selecting a small section of hair at the front of your head, near your forehead. Braid this section across the top of your head like a headband, securing the end behind your ear with a bobby pin.
Creating the Ponytail:
Gather the rest of your hair into a high ponytail, ensuring it’s smooth and sleek. Secure it with a hair tie.
Adding Texture:
To give your ponytail a voluminous, textured look, use a teasing comb at the roots of the ponytail. Lightly backcomb the hair for added volume.
Enhancing the Braid:
Optionally, pull gently at the edges of the braided section to make it fuller and more pronounced, adding an elegant touch to the headband effect.
Final Styling:
Spray your hair lightly with a flexible-hold hairspray to maintain the style without stiffness. This will help keep both the braid and the ponytail intact through the night.
11. Dutch Braid with Waterfall Effect
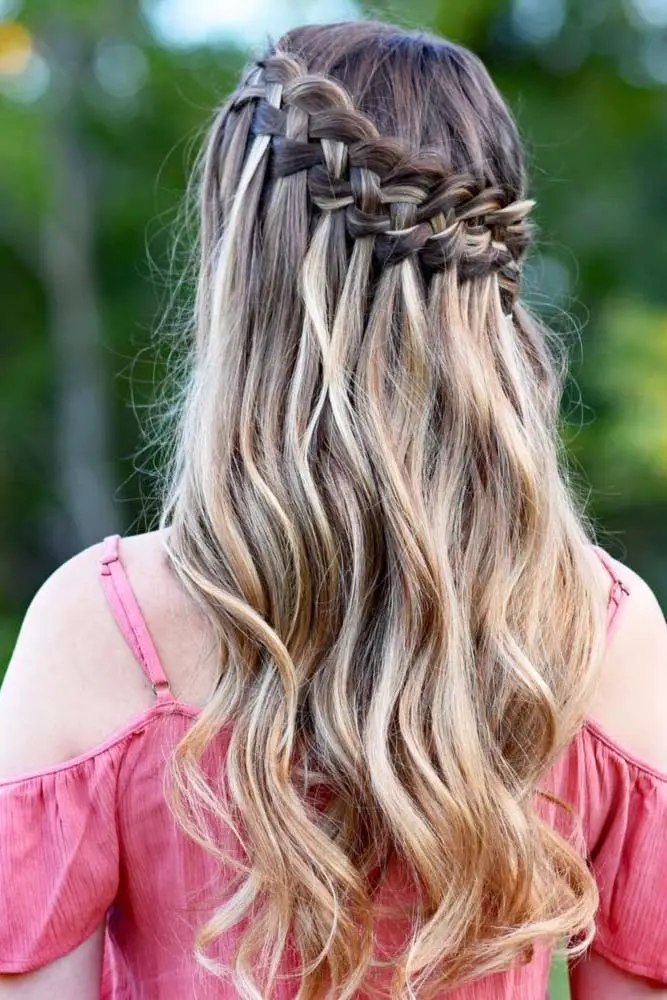
To create the Dutch Braid with Waterfall Effect, a captivating choice for a whimsical yet elegant date night look, follow these simple steps:
Start with the Base:
Begin by brushing your hair to ensure it’s smooth and free of tangles. This hairstyle works best on hair that is medium to long in length.
Creating the Dutch Braid:
Part your hair on one side. Start braiding at the crown on the heavier side of the part, picking up small sections and adding them to the braid as you work diagonally across the head.
As you braid, drop small sections of hair from the outermost part of the braid to create the waterfall effect. These dropped sections should be thin to ensure a delicate look.
Securing the Braid:
Continue the braid around the back of your head. Once you reach the opposite side, secure the braid behind your ear with bobby pins, subtly tucking it under nearby hair to camouflage the ends.
Enhancing the Waterfall Effect:
Gently pull on the loops of the braid to widen them slightly, which enhances the waterfall look. Be careful not to pull too hard to avoid unraveling the style.
Styling the Remaining Hair:
Curl the dropped sections with a curling iron to add soft waves, enhancing the flowing effect of the waterfall.
12. Messy Bun with Face-Framing Tendrils
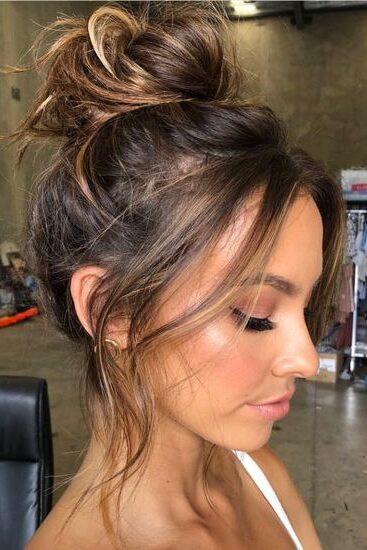
To create a Messy Bun with Face-Framing Tendrils, perfect for a relaxed yet romantic date night look, follow these steps:
Preparation:
Start with dry or slightly damp hair for easier styling.
Apply a texturizing spray or mousse to give your hair some grip and volume.
Creating the Bun:
Pull your hair back into a high or low ponytail, depending on your preference, and secure it loosely with a hair tie.
Twist the ponytail around the base to create a bun, securing it with another hair tie or bobby pins. Allow some strands to fall out naturally or pull a few out gently to create the tendrils.
Styling the Tendrils:
Use a curling iron or straightener to lightly curl the loose strands around your face. This adds softness to your look and frames your face beautifully.
Apply a light hairspray or serum to the tendrils to enhance their shape and add a subtle shine.
Finishing Touches:
Gently pull at the bun to loosen it slightly and give it a more tousled, casual appearance.
Spritz your entire hairstyle with a flexible-hold hairspray to keep everything in place without stiffness.
13. Chunky Braid Headband
Step-by-Step Guide to Creating a Chunky Braid Headband
Parting the Hair:
Begin by parting your hair on the side, close to the ear. This will set the stage for where the braid will rest.
Isolating the Section:
Isolate a thick section of hair directly behind and above the ear. This section will form the main part of your braid.
Braiding:
Divide the isolated section into three equal parts.
Start braiding these sections into a regular three-strand braid. Ensure the braid is not too tight to allow for later adjustments.
Widening the Braid:
As you braid, gently pull the braid outward at intervals to widen it, giving the chunky appearance desired.
Securing the Braid:
Continue braiding until you reach the end of the hair.
Secure the braid with a clear elastic.
Positioning the Braid:
Lift the braid up and over your head, positioning it like a headband.
Tuck the end of the braid underneath your hair on the opposite side to hide the elastic.
Final Adjustments:
Secure the braid with another clear elastic behind the ear on the opposite side to ensure it stays in place.
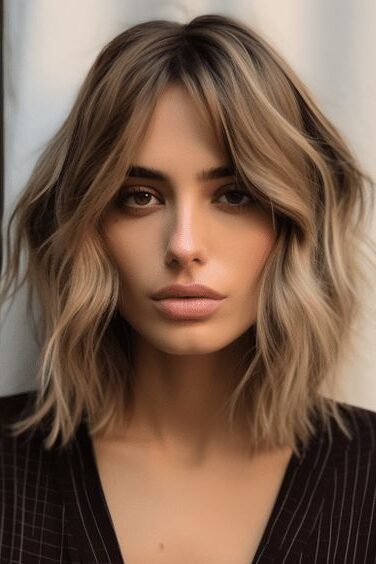
14. Textured Lob with Curtain Bangs
Stylist and Procedure
Nicole from Voltage Salon will craft a textured lob with curtain bangs to enhance the client’s hair, aiming for a fuller and thicker appearance.
Goal of the Haircut
The primary objective is to create a blunt bob that not only looks thicker but also features a uniquely textured fringe.
Haircut Steps
Initial Preparation: Remove any top knots and thoroughly brush the hair.
Cutting Technique: Establish a blunt edge to augment thickness while preserving texture.
Texturizing: Employ a texturizing technique to lighten the weight and boost volume.
Internal Layering: Implement internal layering to introduce texture and movement to the mid-shaft.
Styling
Technique: Add a soft texture using a curling iron on a low heat setting.
Products Used: Apply “Miracle in a Can” for a fresh, bedhead look.
Client’s Feedback
The client expressed satisfaction with the outcome, appreciating the enhanced look of her hair.
Trend Overview
The textured lob with flipped-out bangs is currently in vogue, offering a nod to the 70s with a modern twist.
Preparation for Styling
The mannequin used had received a lob cut a few days prior to the styling session.
Styling Tools and Products
Curling Iron: Harry Josh 1.25 inch Marcel iron
Texturizing Paste: Not Your Mother’s Coast and Castle dry texture paste
Finishing Spray: Virtual Labs create the finale spray
Styling Process
Create subtle waves or flips starting from the lower sections and moving upwards, enhancing the textured effect.
Finishing Touches
Use a wide-tooth comb and hairspray, focusing particularly on styling the front bang section to perfection.
Recommendation
This haircut is particularly recommended for those with fine hair, as it significantly enhances body and movement.
15. Braided Crown with Loose Curls
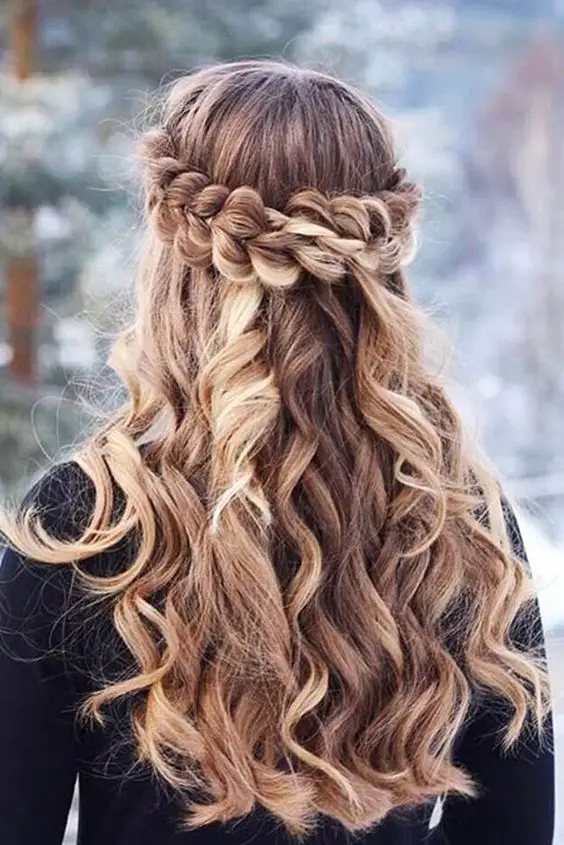
To create the Braided Crown with Loose Curls, a hairstyle that exudes romance and elegance, follow this straightforward guide:
Preparation:
Begin by applying a volumizing mousse to damp hair, especially if you have fine hair, to add body and texture.
Dry your hair completely and use a curling wand to curl the ends if your hair is straight. This adds softness and movement essential for the final look.
Creating the Base:
Divide your hair into two sections with a center part. Ensure each section is tangle-free by gently brushing through.
Start the Dutch braid on one side of your head, just behind the ear. Use a three-strand braid technique, crossing the sections under one another and gradually adding hair from the top of the scalp.
Forming the Crown:
Continue the braid across the back of your head and then up the other side, towards your forehead. Secure the end with a small elastic.
Repeat the process on the other side so that both braids meet and overlap at the top of your head.
Securing the Style:
Tuck the ends of the braids underneath each other around the crown of your head to hide the elastics. Secure with bobby pins, making sure they are hidden beneath the braids for a seamless look.
Use extra bobby pins underneath the braid for added support.
Finishing Touches:
Gently pull on sections of the braid to make them fuller and more pronounced, creating an illusion of thickness.
Apply a generous amount of hairspray to ensure the style holds throughout your event.
16. Textured Pixie with a Pop of Color
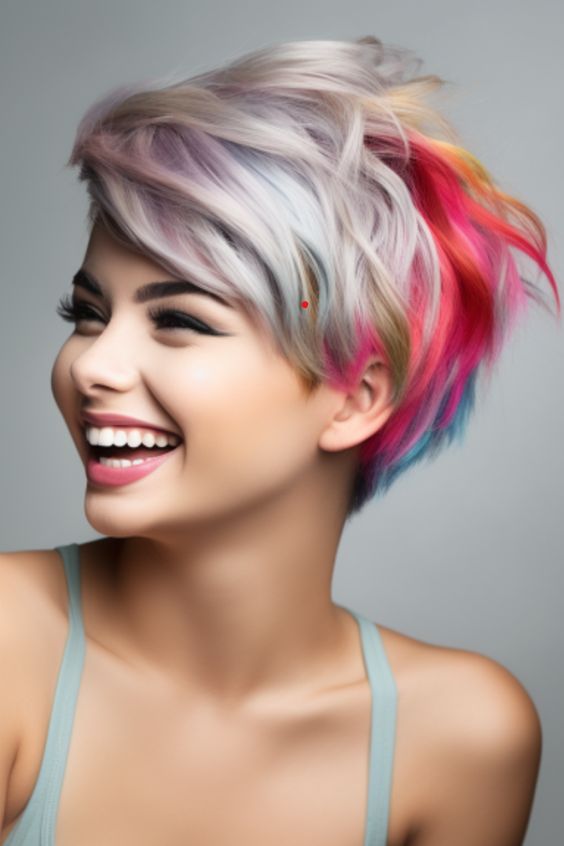
To create a Textured Pixie with a Pop of Color, a bold and stylish choice for your date night, follow these steps to ensure your hairstyle makes a statement:
Choosing the Color:
Opt for a vibrant shade that complements your skin tone. Popular choices include deep reds, bold blues, or even pastel hues for a softer look.
Preparing Your Hair:
Ensure your hair is clean and dry. Apply a heat protectant if you plan to use any heat styling tools.
Texturizing Your Pixie:
Use a small amount of texturizing paste or wax. Work the product through your hair with your fingertips to create volume and texture.
Adding the Color:
For temporary color, choose hair chalks or color sprays that wash out easily. Apply carefully to select strands to highlight the textured areas.
Styling Tips:
Arrange your hair to maximize the impact of the color. Focus on areas that catch the light, or define the layers in your pixie cut.
Maintaining Your Style:
Finish with a light spray of hairspray to hold the style in place throughout your evening.
17. High Ponytail with Braided Details
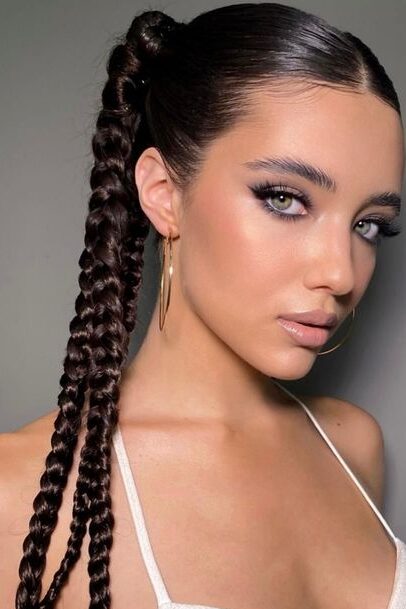
To achieve a High Ponytail with Braided Details, an intricate and stylish look perfect for a special date night, follow these steps carefully:
Preparation and Sectioning
Straightening: Begin by straightening your hair using a blow dryer and Dax hair grease to eliminate any knots and tangles.
Parting: Part your hair into four equal sections in a square grid pattern. This ensures even distribution for the braiding process.
Applying Products
Smoothing Gel: Apply Blue Eco styling gel to smooth down the hair, focusing particularly on the baby hairs at the front for a sleek look.
Protection: Before starting the braiding, wrap a strip around the ponytail base to protect the hair.
Braiding Technique
Starting the Braid: Attach an elastic band to the base of the ponytail. Begin braiding by gradually adding pieces of Expressions pre-stretched braiding hair.
Continuing the Process: Repeat the braiding process for each of the four sections, ensuring uniformity and tightness.
Securing the Style
Forming the Ponytail: Once all sections are braided, gather the braids and secure them high on the head with elastic bands to form the ponytail.
Styling Baby Hairs: Style the baby hairs using an edge control product and a dedicated brush to refine the look.
Finishing Touches
Applying Sheen: For a glossy finish, lightly spray the hairstyle with olive oil sheen.
Brushing Tips: Brush through the ponytail to ensure it remains manageable, especially in hot weather conditions.
18. Sleek Bob with Dramatic Side Part
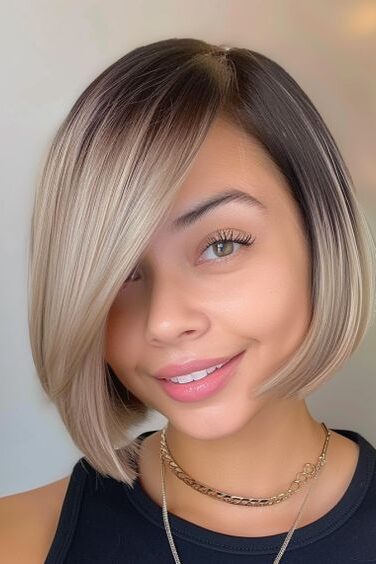
To achieve a Sleek Bob with a Dramatic Side Part, perfect for a sophisticated and polished date night look, follow these detailed steps:
Preparation:
Start with clean, damp hair. Apply a smoothing serum to help control frizz and enhance shine.
Blow Drying:
Using a round brush, blow dry your hair smooth. Focus on lifting at the roots to add volume, especially on the side where the hair will be parted.
Creating the Side Part:
Once your hair is dry, use a tail comb to create a sharp side part. The part should be on whichever side of your head suits your facial features best.
Straightening:
Use a flat iron to straighten your hair in sections, ensuring each strand is sleek and smooth. Pay special attention to the ends for a polished look.
Adding Shine:
Apply a light hair oil or shine spray to give your sleek bob a glossy finish.
Final Touches:
For added hold, lightly mist your hair with a flexible-hold hairspray. This will keep your style in place without sacrificing movement.
Final Thoughts
Through the exploration of 18 fun and flirty hairstyles, this guide aims to empower readers with diverse options for showcasing their personal style and confidence on date night.
Emphasizing techniques that cater to a range of hair lengths and textures, this compilation brings forth the joy of experimenting with one’s look, encouraging one to step out of their comfort zone while embracing the beauty of transformation.
Reflecting on the array of hairstyles presented, it becomes evident that the perfect date night look transcends mere aesthetics, embodying the essence of individuality and self-expression.

Leave a Reply
You must be logged in to post a comment.