Exploring hairstyles for curly hair unveils a world of both chic simplicity and voluminous personality, reflecting the unique charm of curly hair styles.
Your locks offer unparalleled opportunities for both daily looks and special occasions, ranging from hairstyles for curly hair short to luxurious hairstyles for long curly hair.
Embracing your natural curls means dropping the straightener and moving towards styles that highlight your hair’s natural beauty and texture.
This post dives into 18 cute curly hairstyle ideas, designed for women looking to enhance their curls without compromising on style or health.
You’ll discover a variety of curly hair styles, including easy-to-maintain options and creative looks that can transform your everyday style.
Busy? Save this pin for later.
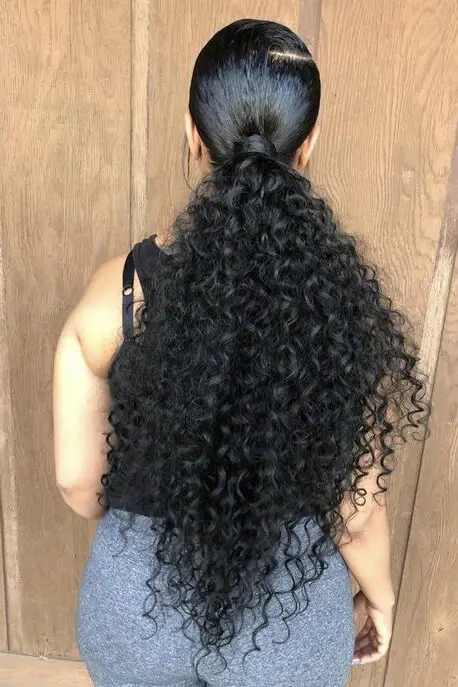
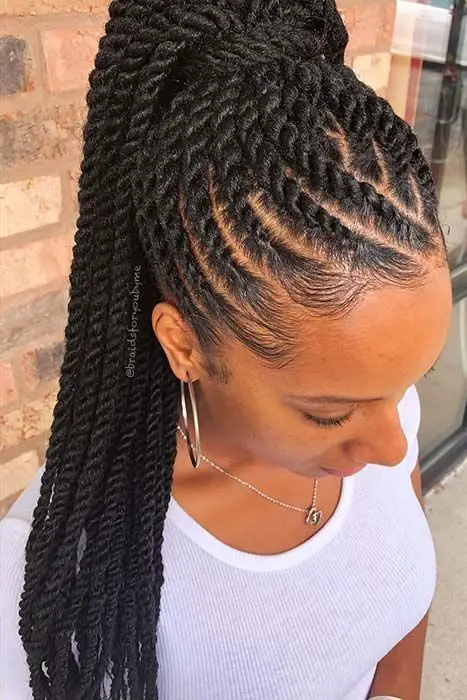
1. Sky-High Ponytail
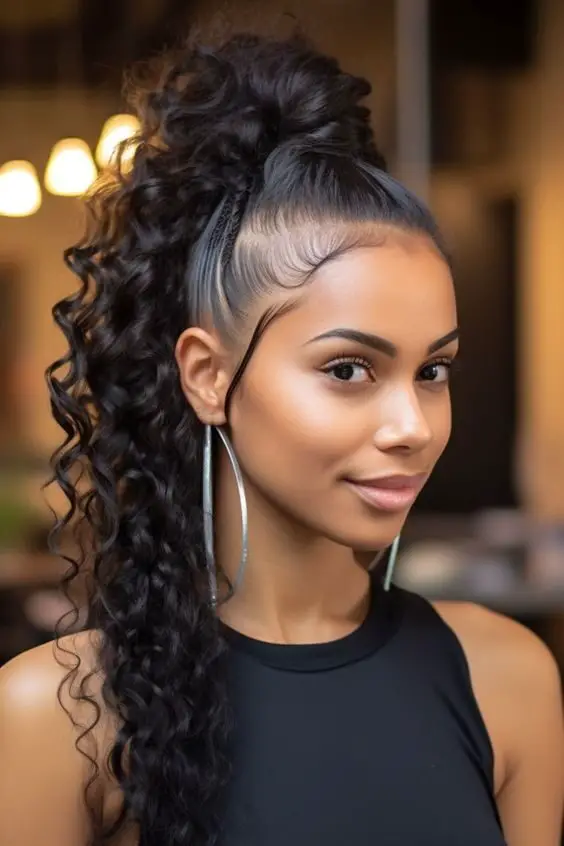
Preparation and Application
Detangle and Define: Start by gently detangling your curly hair with a wide-tooth comb or a detangling brush to ensure there are no knots. Apply a curl-defining cream or mousse to damp hair, focusing on the roots and mid-lengths to enhance curl definition and hold.
Ponytail Formation: Flip your head upside down, gather your hair at the crown, and secure it with a hair tie. For added height, wrap a second hair tie or a hair bungee around the base, pulling the ponytail upwards.
Styling and Securing
Sleek and Smooth: For a sleeker look, apply a small amount of hair gel or edge control product to smooth down any flyaways. Wrap a small section of hair around the base of the ponytail and secure it with a bobby pin for a polished appearance.
Securing Flyaways: Use hairpins to carefully secure any loose curls or flyaways around the ponytail, ensuring everything looks neat and tidy.
Finishing Touches
Enhance and Control: Finish by spraying a flexible-hold hairspray to keep the style in place and control frizz throughout the day. Optionally, apply Argan Oil or a glossier olive oil spray to give your hair a soft feel and a subtle shine, enhancing the overall look of your sky-high ponytail.
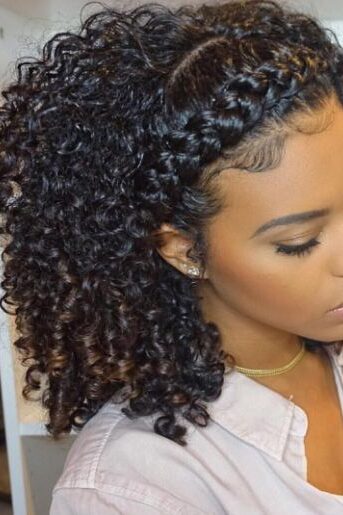
2. One-Minute Side Braid
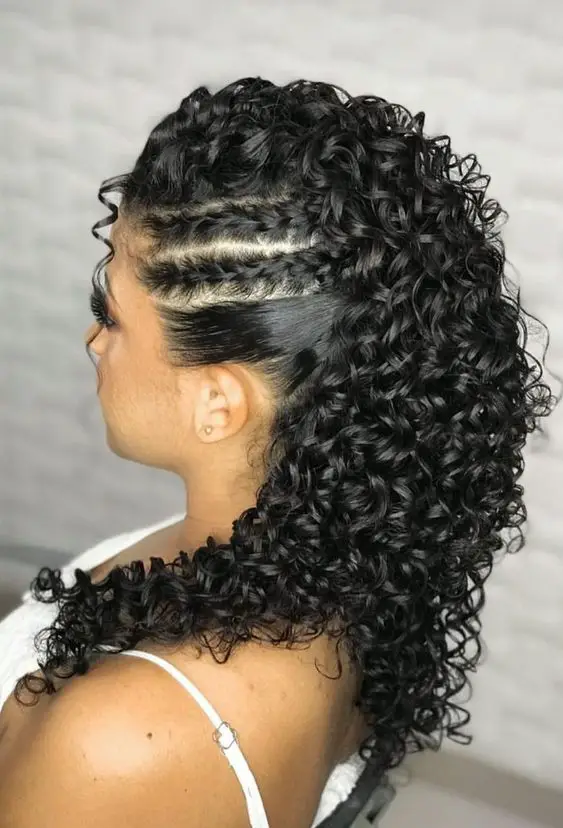
Preparation and Braiding Technique
Detangle and Condition: Begin by thoroughly detangling your hair using water and a conditioner or suitable hair product to ensure smoothness.
Parting the Hair: Choose your preferred side and part your hair accordingly.
Starting the Braid: From the front of your head, start braiding, choosing either left to right or right to left direction.
Incorporating Hair: Gradually incorporate hair from the back to the front as you braid.
Direction Change: Once you reach halfway down your head, switch the braiding direction from front to back.
Braid Placement: Continue the braid behind the ears and bring it halfway down the head.
Securing and Finishing Touches
Securing the Braid: Flip the braid to the opposite side and continue braiding the rest of the hair. Secure the ends with a hair tie.
Managing Frizz: Apply a small amount of hair product to the ends and twirl them to create a neat, small curl if they appear frizzy.
Adding Volume: Gently fluff out the braid to add volume and fix any stray parts sticking up.
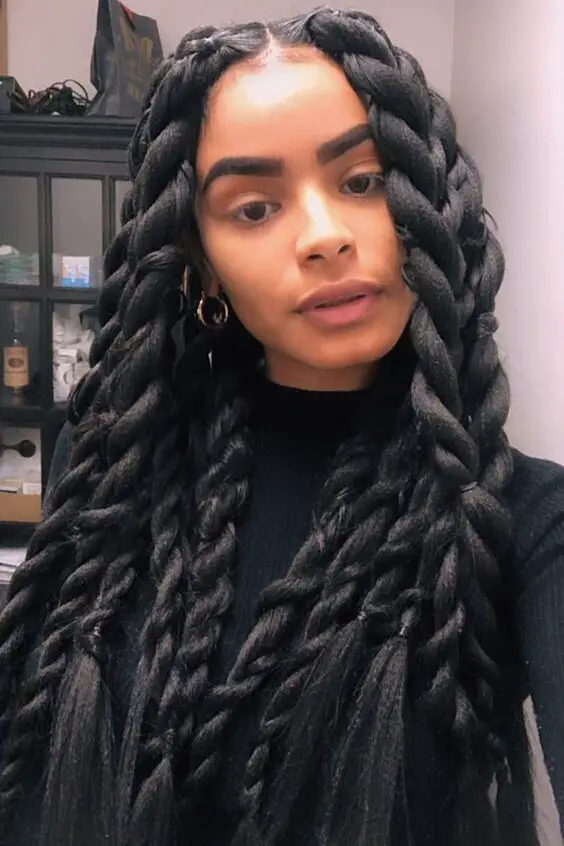
3. Marley Twists
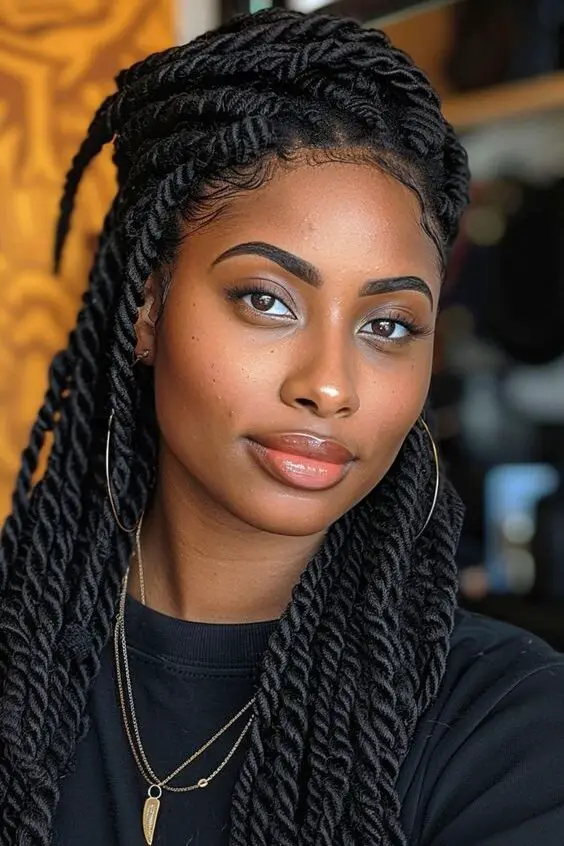
Preparation and Installation
Moisturize Your Hair: Start by moisturizing both the Marley hair and your natural hair. Use a leave-in conditioner and a cream or oil to lock in moisture.
Apply Styling Products: Apply Cream of Nature with Cantu Shea Butter for hold and shine to your natural hair. For the edges, use a small amount of Shine and Jam Conditioning Gel to lay them down smoothly.
Section and Detangle: Divide your hair into sections, detangling each part thoroughly to prevent any tangles during the twisting process.
Twisting Technique
Invisible Root Method: For a natural look, use the Invisible Root Method by braiding the hair at the roots before twisting. Alternatively, you can start directly with twisting.
Twist the Hair: Take two strands of Marley hair and twist them around each other tightly. Ensure to smooth out any gel or product to avoid buildup.
Secure the Ends: To finish, make a knot with a piece of the wavy hair at the end of each twist or dip the ends in hot water to seal them.
Maintenance and Care
Night Routine: Protect your twists at night by wearing a silk or satin bonnet. Apply a curl activating mousse or cream daily to maintain the curl pattern.
Regular Moisturization: Keep your scalp and twists moisturized by applying oil regularly. Use a spray bottle to mist your hair lightly with water.
Avoid Over-Washing: Be cautious when washing your hair; focus on the scalp and avoid soaking the twists completely. Use a dry shampoo or gently dab the scalp with a damp cloth if needed.
4. Chic Half-Bun
Preparation and Styling
Start with a Middle Part: Begin by parting your hair in the middle to ensure symmetry in your style.
Create Volume: Leave some hair loose in the middle to add volume at the bottom, enhancing the bun’s fullness.
Part Hair from Ear to Ear: For a clean and organized look, part your hair straight across from one ear to the other.
Smooth the Hairline: Apply gel around the hairline to achieve a sleek, smooth finish.
Creating the Bun
Gather and Secure the Ponytail: Brush up the front half of your hair and gather it into a ponytail just above eye level.
Twist and Wrap: Divide the ponytail in half, twist one section, and then wrap it around the base to form the bun.
Secure with Bobby Pins: Use at least three bobby pins to secure the bun firmly in place.
Finishing Touches
Adjust and Refine: Bring loose twists around to cover the base of the bun and pin them down securely.
Smooth Edges with Gel: Apply gel to your edges and use a hair toothbrush to refine and smooth them down.
Refresh Curls: If necessary, refresh the curls at the bottom to maintain a lively and vibrant look.
5. Low Bun With Braids
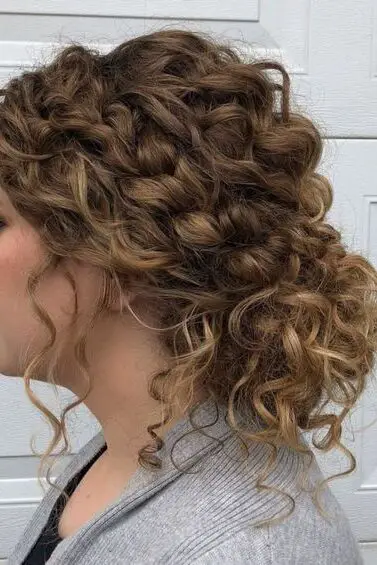
Preparation and Braiding Technique
Start by Curling the Hair: Begin by curling your hair to add texture and volume. Once curled, gently brush through the curls with a dressing out brush to soften them.
Apply Shine Spray: Use a shine spray to manage flyaways and give your hair a sleek, glossy look.
Section the Hair: Section off the front part of your hair from above the ears and clip it aside. This will be used later to add detail to the bun.
Creating the Low Bun
Form the Base of the Bun: Take the bottom half of your hair and brush it smoothly to the back of your head. Twist this section and secure it with bobby pins at the nape of your neck.
Secure the Ponytail: Gather the remaining hair into a low ponytail at the nape and secure it with a clear elastic band.
Braid and Secure: Split the ponytail in half. Twist one section towards your head and pin it across to the opposite side. Repeat with the other section.
Finishing Touches
Enhance the Bun: Cross the tail ends of the ponytail to the opposite side and pin them. This adds a crisscross pattern that looks intricate.
Volume and Texture: Apply texture powder to the bun. Gently pinch and pull at each loop and twist to create a voluminous effect.
Frame Your Face: Leave a few strands of hair out to softly frame your face. This adds a touch of elegance to the overall look.
Final Adjustments: Bring the front sections back, twisting them towards the head, and secure with pins at the top of the bun. Adjust these twists to add more volume.
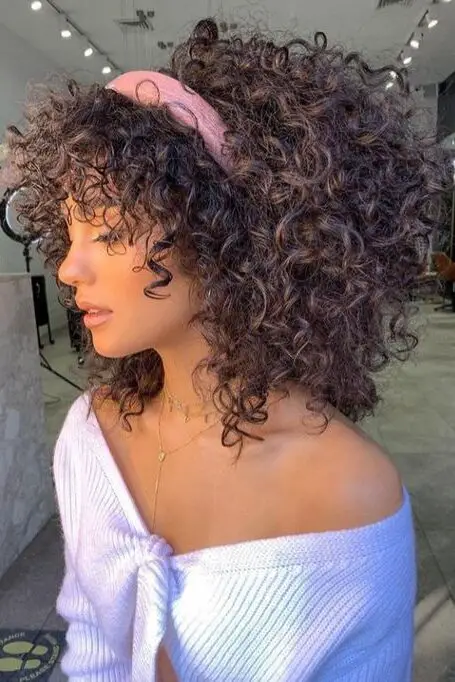
6. Headband Charm
Headbands, with their versatile charm, are not just functional; they elevate your curly hairstyle with minimal effort.
Here’s how you can incorporate headbands into your curly hair routine to achieve different stylish looks:
Versatile Styles with Headbands
Side Pineapple Puff: Brush your hair up to one side and secure it into a high, voluminous pineapple puff using an elastic band. Place a headband near your hairline to add a neat touch and to keep any stray hairs in place.
Top Knot Bun: Achieve a sophisticated look by pulling your hair into a high bun and accentuating it with a light pink satin headband. This style is perfect for both casual outings and formal events.
Side Swept Curly Afro: Enhance a side-swept curly afro by incorporating a patterned headband. Choose a headband with a matching neckpiece to add an extra dimension to your look.
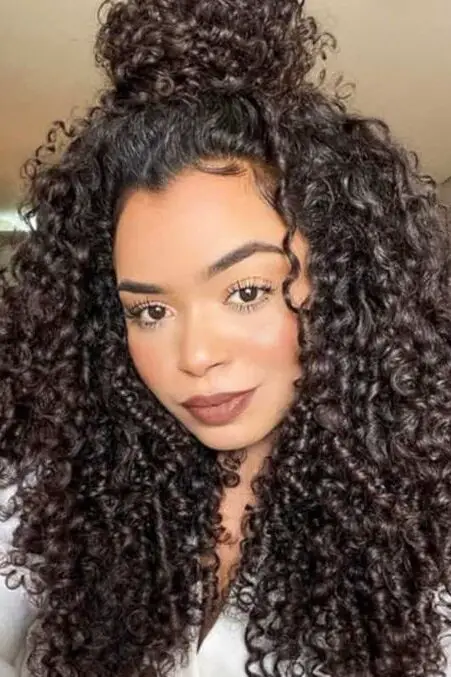
Half-Up Hairstyle with The Swoop: Use a large purple headband adorned with faux pearls to complement a dramatic front swoop in a half-up hairstyle. This adds a regal flair to your appearance.
Loose Crown Braids with a Twisted Bang: Brighten this style with an orange plaited headband. It not only adds a pop of color but also helps manage any flyaways effectively.
Fall Back Locs: For those with locs, a grey headband can be utilized to neatly hold your hair back, giving a tidy yet stylish look.
Headband Varieties and Trends
Colors and Types: Headbands come in a plethora of colors like white, green, lime, purple, pink, orange, and black, with options in solid or beady designs. This variety allows you to match your headband with your outfit or mood seamlessly.
7. Pineapple Updo
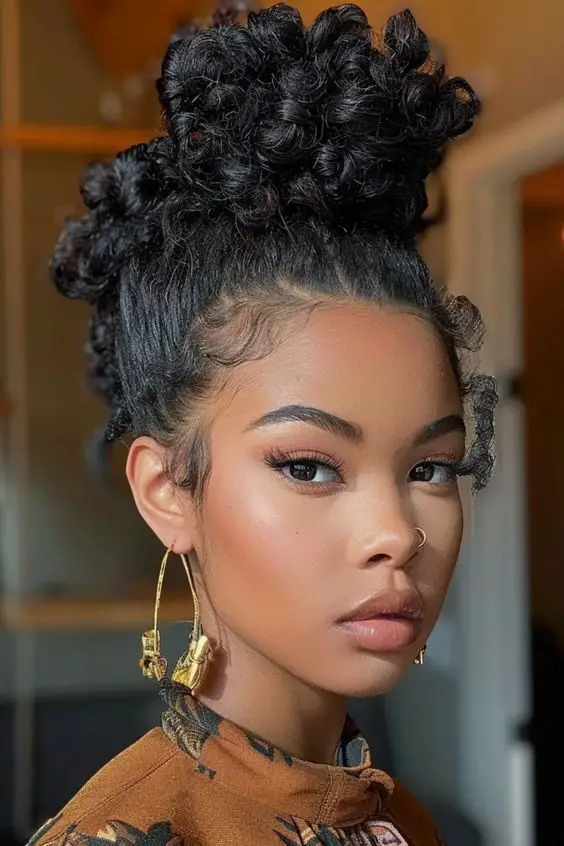
Preparation and Styling
Moisturize and Detangle: Begin by applying a leave-in conditioner like Garnier Fructis Curl Nourish Butter Cream to damp or dry curls. Detangle gently to minimize breakage.
Gather and Secure: Using a silk scrunchie or soft fabric, loosely gather your hair into a high ponytail at the crown of your head. Avoid twisting to keep curls intact.
Nighttime and Daytime Variations
Nighttime Pineapple: Position the ponytail at the front hairline to create a ‘unicorn pineapple’, securing it with a silk scrunchie or puff cuff.
Daytime Pineapple: For a voluminous look during the day, gather hair loosely at the top, smooth with hands, and secure with an invisible hair tie or silk scrunchie.
Maintenance Tips
Protect Your Curls: Sleep on a silk or satin pillowcase to reduce frizz and breakage.
Refresh in the Morning: Remove the scrunchie and shake your head gently to loosen curls. Apply a curl refreshing spray to revive and style as usual.
Special Considerations
For Active Lifestyles: The pineapple updo is ideal for keeping curls out of the way during workouts or outdoor activities.
Adapting to Hair Length and Type: Adjust the tightness and placement of the ponytail based on your hair length and curl type to optimize curl preservation.
8. Headband Braid with Curls
Preparation and Protection
Apply Heat Protectant: Start by applying HSI Thermal Protectant with Argan Oil to shield your hair from heat damage. For those with hair that’s difficult to curl, also apply Hairset 22 for extra protection.
Curling Process: Use the second largest barrel of the HSI Four Piece Interchangeable Curling W Set to curl all hair away from the face. Initially, the curls might look ordinary, but they will fluff up and shine after settling for about 10 minutes.
Braiding Technique
Starting the Braid: Begin by creating a Dutch braid at the front. Take three strands; move the right strand under the middle, then the left strand under the middle, adding more hair to each strand as you go.
Securing the Braid: Continue the pattern until you reach the level of your eyebrows. Then, tie the braid with a small section of hair from the back, tucking the ends under to conceal them.
Finishing the Style
Release and Cover: Let down the clipped top section of your hair to cover the elastic band, ensuring a seamless look.
Use of Products: Avoid using Sexy Hair Texturizing Spray Clay as it’s not recommended. Instead, opt for Sexy Hair Matte Dry Wax to help maintain the style without the weight.
Styling Tips
Braid Thickness: You can choose to pull out the sides of the braid to make it appear thicker and fuller or keep it tightly braided for a more defined look.
Final Touches: If desired, tease the back of your hair for added volume or straighten and brush it back for a sleeker appearance. Use edge control products to maintain a neat front.
9. Double Dutch Braids
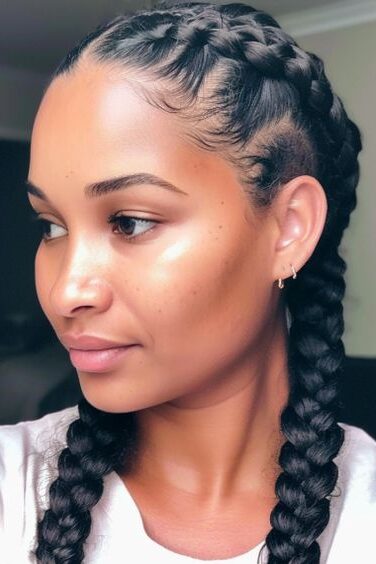
Preparation and Sectioning
Initial Hair Care: Start with freshly washed and conditioned hair to ensure smoothness and ease of styling.
Apply Products: Work a leave-in conditioner or curl cream through your hair to define curls and add moisture.
Dry and Section: Allow your hair to air dry or use a diffuser until it’s about 80% dry. Then, use a rat-tail comb to create a clear center part that continues down the back of your head, dividing your hair into two equal sections.
Braiding Technique
Secure One Side: Tie one section with a hair tie to prevent tangling while you work on the other.
Apply Smoothening Agents: On the free section, apply argan oil or smoothening cream and brush through to remove knots.
Start Braiding: At the front, pick up a small section and divide it into three. Begin a Dutch braid by crossing the right strand under the middle, then the left strand under the middle, adding more hair to each strand as you proceed.
Maintain Tightness: Keep the braid close to the head for a neat appearance, and secure any loose hairs with bobby pins as you move towards the nape of the neck.
Finalizing the Style
Complete the First Side: Once you reach the end of the hair, secure the braid with a hair tie. Repeat the braiding process on the other side, ensuring symmetry.
Adjust for Fullness: Gently pull apart the sections of each braid to create the illusion of thicker braids.
Set the Style: Apply a light-hold hairspray to maintain the look throughout the day.
10. Half-Up Half-Down Fishtail
Preparation and Styling
Start with Loose Waves: Before beginning the fishtail braid, curl your hair using a curling iron to create loose waves. This adds texture and volume, making it easier to style.
Create a Topsy Tail Ponytail: Gather the top half of your hair and secure it into a ponytail. Flip the ponytail through itself to create a ‘topsy tail’ which serves as the base for your fishtail braid.
Braiding Technique
Form the Fishtail: Take small sections from each side of the ponytail, cross them over to the opposite side, and continue adding new strands as you go. This technique helps in forming the intricate pattern of the fishtail braid.
Secure the Braid: Once you reach the end of the hair, leave about 2-3 inches unbraided and tie it off with a clear elastic band.
Finishing Touches
Pancake the Braid: Gently tug at the edges of the braid to loosen it. This step is crucial as it makes the braid appear fuller and more voluminous.
Apply Texture Spray: To add a final touch of volume and texture, spray a light coat of texture spray over your hair and gently run your fingers through the waves.
11. Bantu Knots
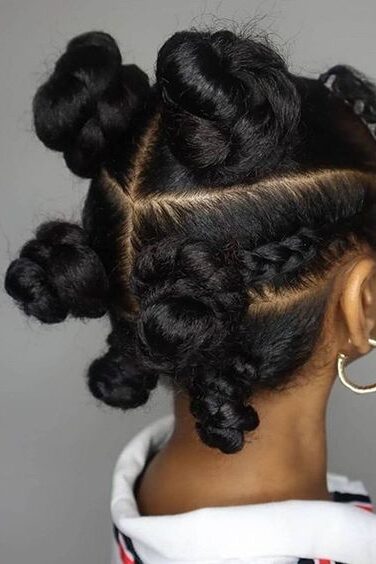
Preparation and Tools
Initial Hair Care: Start with hair that has been blown-out at a dry bar to ensure smoothness and ease of handling.
Parting and Sectioning: Create a deep side part and carefully map out where each Bantu knot will be placed to accommodate the part.
Moisturizing and Detangling: Moisturize the hair using a combination of water, oils, or a co-wash for better pliability and hold. Use a wide tooth comb and a brush to detangle and smooth each section.
Creating Bantu Knots
Applying Products: For each section, use a half pump of Cream of Nature Argan Oil Style and Shine Foaming Mousse or a similar alcohol-free mousse for more hold. Work the product into the hair with your fingers and a brush until it’s evenly distributed and the hair is dry.
Twisting and Wrapping: Twist the base of the hair counterclockwise and then wrap it around itself clockwise. Continue wrapping until the end is secured underneath the knot.
Securing the Knots: Use bobby pins at the base of each Bantu knot to secure them. Ensure the knots are loose enough to avoid pulling the scalp or weighing down the hair.
Styling and Maintenance
Curl Formation: Depending on the desired tightness of curls, adjust the size of the knots—smaller knots for tighter curls and larger ones for looser curls.
Overnight Care: If wearing the knots overnight, consider applying a silk or satin bonnet to protect the style. In the morning, gently unravel each knot and separate the sections carefully to avoid excessive frizz.
Finishing Touches: Use a white tooth comb to lift the roots and add body. For added texture and volume, apply a dry shampoo at the roots or a twisting souffle product throughout the hair for moisture and hold.
12. Textured Ponytail
Preparation and Styling
Initial Styling: Begin by styling and drying your curls. Use the T3 twirl trio to ensure each curl is perfectly defined.
Face-Framing Pieces: Gently pull a few curls forward around your face to soften the overall look.
Gathering Hair: Collect the remaining hair at the nape of your neck, securing it tightly with a ponytail holder.
Volume Creation: Loosen hair slightly at the crown to add volume. Use a sectioning comb to lift hair at the roots, enhancing the overall fullness.
Accessorizing and Securing
Accessorize: Elevate your ponytail with stylish accessories such as oversized scrunchies or a ponytail cuff to add a decorative touch.
Flyaway Control: Apply Kenra 25 hairspray to smooth any flyaways, maintaining a sleek appearance.
Texturizing and Detailing
Volume and Texture: Sprinkle Big Sexy Hair powder play volumizing and texturizing powder near the roots. Tease the hair around the crown downwards for added texture.
Detailing: Sweep hair over the ears, twist, and secure with bobby pins for a polished look.
Ponytail Perfection: Wrap a small strand of hair around the base of the ponytail to conceal the hair bungee, ensuring a seamless finish.
Final Touches
Section and Tease: Divide the ponytail into small horizontal sections. Tease each section near the base to enhance texture and volume.
Set with Hairspray: Finish with a spritz of Big Sexy Hair volumizing hairspray to ensure your textured ponytail holds its shape throughout the day.
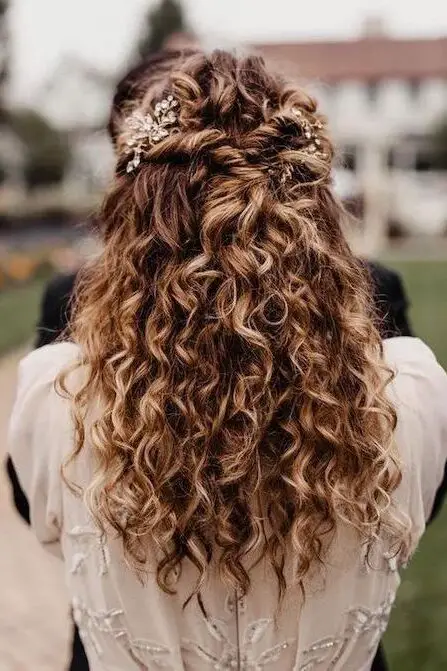
13. Waterfall Braid with Highlights
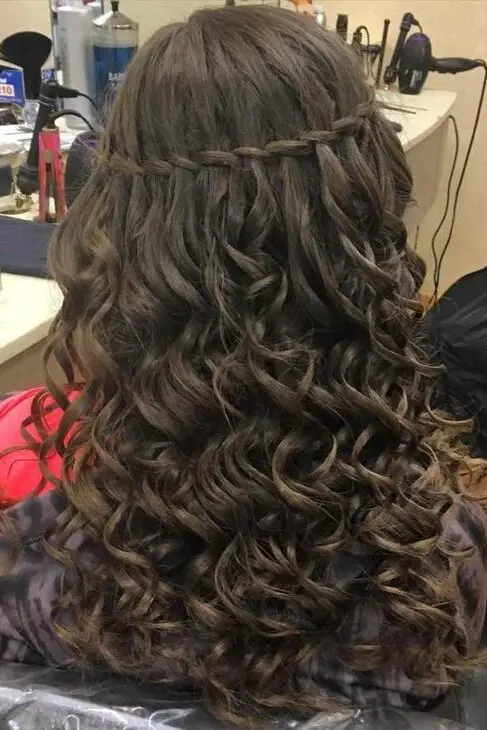
Step-by-Step Guide to Creating a Waterfall Braid with Highlights
Begin with a Deep Side Part: Start by parting your hair deeply on one side. Select a small section from the right side and divide it into three parts. This sets the foundation for your braid.
Initiate the French Braid: Cross the top piece of hair closest to your hairline over the middle piece, followed by the bottom piece over the new middle piece. This begins the French braid formation.
Create the Waterfall Effect: When you reach the top of your head, continue by splitting the bottom piece in half. Drop one half to create the ‘waterfall’ effect and add a new section from the top into the braid.
Incorporate Triangle Sections: As you move around the head, integrate triangle-shaped pieces from the top section to maintain the flow of the braid.
Secure the Braid: Once you reach the front again, transition to a normal braid and secure it with a clear elastic band at the end.
Enhance with Texture Powder and Hairspray: To give your braid a fuller and more lived-in appearance, apply texture powder followed by a light spray of hairspray. This helps to hold the style in place.
Optimal Conditions: This hairstyle works best on second-day hair, as it tends to hold the braid better than freshly washed hair. The dry hair allows the waterfall pieces to naturally curl into beautiful ringlets, enhancing the overall look.
14. Space Buns with Headband

Preparation and Styling
Initial Hair Care: Begin with freshly washed hair, applying a curl-defining cream or mousse to damp hair. This enhances the natural texture and provides hold for the style.
Drying Technique: Allow your curls to air dry or use a diffuser until they are about 80% dry, ensuring they retain their natural bounce and volume.
Creating the Buns
Parting: Start by parting your curly hair following its natural pattern. This step is crucial for achieving a balanced and harmonious look.
Forming Ponytails: Part your hair in the middle and gather half of your hair up into high ponytails on each side, securing them with hair bungees.
Bun Formation: Wrap your hair around the base of each ponytail to create buns. Secure the buns with bobby pins, leaving the ends out for a playful, cute look.
Accessorizing with a Headband
Headband Placement: Place the headband around your head, just above your space buns. This not only adds a stylish accessory but also helps to keep any stray hairs neatly in place.
Adjusting Curls: Let your curls fall naturally over the headband or tuck them in for a more polished appearance. Use hairspray or hair gel for additional hold, especially if you have longer hair.
Final Touches
Enhancing Texture: Make your hair look thicker by fanning out the buns. This technique adds volume and showcases the rich texture of your curls.
Styling Variations: For a unique twist, consider adding some braids or twists to your space buns, or if you have short hair, use smaller sections to adapt the style to your length.
15. French Braid Updo
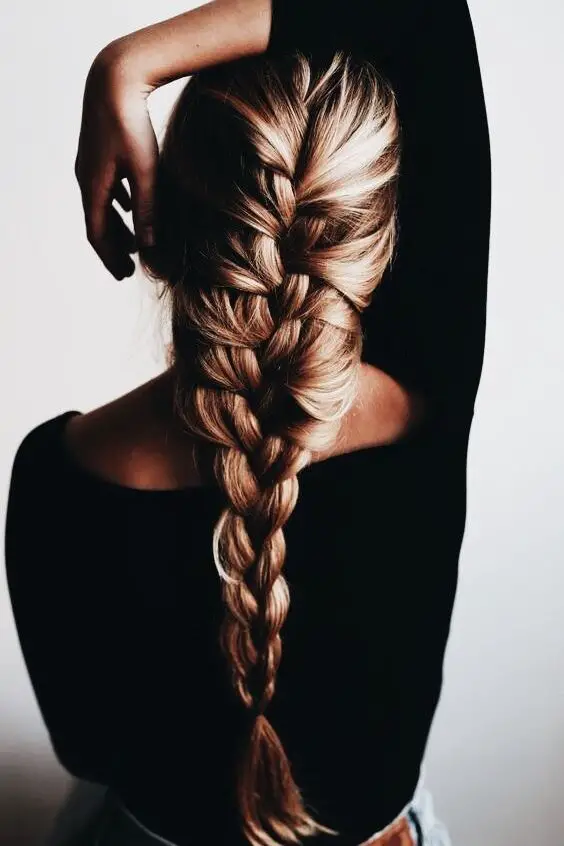
Preparation and Styling
Detangle and Moisturize: Begin by detangling your hair with a paddle brush and apply Garnier Fructis One-Minute Hair Mask or a leave-in conditioner to ensure your hair is moisturized and easy to manage.
Parting: Use a comb to part your hair evenly down the middle, preparing it for the braiding process.
Braiding Process
Sectioning for Braid: Section off a triangle of hair at the front of one side and divide it into three sections. This will be the start of your French braid.
Creating the French Braid: Start braiding by crossing the right strand over the middle, then the left strand over the new middle strand. After a few stitches, begin incorporating hair only from one side to create a diagonal French braid.
Continuing the Braid: As you move towards the nape of your neck, continue adding hair to the braid, keeping the tension consistent for a neat appearance.
Forming the Updo
Securing the Braid: Once you reach the nape, continue braiding downwards without adding more hair and secure the end with a hair tie.
Creating the Bun: Twist the remaining hair into a bun at the nape and secure it firmly with bobby pins, ensuring it sits neatly against your head.
Finishing Touches
Adjust and Set: Adjust the braid and bun as necessary to ensure they are symmetrical and well-positioned. Apply a light hold hairspray to set the style in place.
Smooth Flyaways: Use Eco Styler Gel to lay down any baby hairs or flyaways, focusing on the front and top sections of your hair for a polished look.
16. Chunky Twists
Preparation and Styling Products
Hair Washing: Start by using OGX Extra-Strength Hydrate and Repair Argan Oil of Morocco shampoo and conditioner to cleanse and condition your hair.
Apply Serums and Creams: Post-wash, apply OGX Nourishing Coconut Milk Anti-Breakage Serum, Recovery Oil Combining Creme, and Argan Oil of Morocco Extra Penetrating Oil for added moisture and strength.
Use Styling Products: Before beginning the twists, apply Locking Coconut Cream Air Dry Cream and a light amount of gel to ensure the twists hold their shape and style.
Twisting Technique
Section Hair: Divide your hair into sections based on the desired thickness of each twist.
Twist Formation: For each section, pull the hair down from the root and twist tightly without splitting the tips to maintain connectivity and create the chunky effect.
Secure the Twists: Use small elastic bands or bobby pins at the ends if necessary to secure the twists.
Maintenance and Night Routine
Night Care: Retwist your hair into bigger twists at night using the same products for easier morning styling.
Morning Styling: In the morning, untwist and style as desired. This routine helps maintain the twist’s definition and reduces frizz.
17. Finger Coils

Essential Steps for Creating Finger Coils
Prepare Your Hair: Begin by cleansing your hair with a gentle CG-friendly cleanser and apply a moisturizing conditioner. Ensure your hair is thoroughly washed on your designated wash day.
Apply Products for Slip: Use a generous amount of leave-in conditioner or a curl cream mixed with gel to ensure maximum slip, which aids in smoother coiling.
Section and Detangle: Divide your hair into equal parts and clip them. Detangle each section using a wide-toothed comb or detangler, ensuring there are no knots.
Coil Each Section: Take small sections of hair and apply a styling product that offers hold, like a gel or cream. Starting close to the roots, twirl the hair around your finger tightly, following your natural curl pattern down to the ends.
Secure the Coils: Ensure each coil is wrapped tightly around your finger and secured all the way to the ends to prevent unraveling.
Dry Your Coils: You can choose to air-dry your coils or use a hair-dryer with a diffuser attachment to speed up the drying process. Avoid touching the coils while they are drying to prevent frizz.
Fluff and Style: Once your hair is completely dry, gently fluff the roots with your fingers or a pick to add volume. Optionally, apply a light oil for added shine.
18. Flat Twists with Beads
Preparation and Styling Steps
Wash and Condition: Begin by washing and conditioning your hair using Wakati products to ensure it’s clean and manageable.
Stretching the Hair: Lightly stretch your hair using a blow dryer set on low heat to prepare it for styling.
Sectioning for Twists: Divide your hair into two main sections. Further divide each section to start the flat twisting process.
Twisting Pattern: Create a mix of single and curved flat twists across your head. Ensure to keep the pattern consistent for a neat look.
Adding Beads and Securing
Incorporating Beads: Utilize gold metallic beads from Tarah Chi for decoration. String these beads onto your twists using a beader tool, available at beauty supply stores.
Bead Placement: To ensure the beads stay aligned, part a line in the middle of the section where the flat twist will lie. This helps in maintaining a straight line of beads in the middle of the twist.
Securing Twists: After adding beads, secure the ends of the flat twists to prevent unraveling.
Maintenance and Care
Moisturizing: Regularly spritz your hair with water and apply Cantu leave-in conditioner to keep the twists hydrated.
Handling Beads: Be cautious as the gold metallic beads may tarnish over time. Consider this when planning long-term wear.
Night Care: Protect your hairstyle by covering your hair with a silk scarf or bonnet at night to reduce frizz and maintain the style’s integrity.
Conclusion
Throughout this exploration of curly hairstyles, we’ve journeyed from everyday looks like the sky-high ponytail and chic half-bun to special occasion styles such as Marley twists and the elegant waterfall braid with highlights.
Each style offers a unique way to celebrate the beauty of curly hair, emphasizing that with the right technique and care, curly hair can be versatile, manageable, and stunningly beautiful.
Embracing curly hair’s natural texture opens up a world of styling opportunities that are both protective and stylish, ensuring that every curl pattern is catered to.
Whether opting for a low maintenance daily look or a more elaborate style for a special event, the key is to work with your hair’s natural properties, using products and styles that enhance rather than hide your curls.

Leave a Reply
You must be logged in to post a comment.