Finding the perfect design that matches your personality and style can often feel like searching for a needle in a haystack.
However, if you adore the grace and beauty of our feathered friends, look no further than these cute bird nail ideas that offer a unique and sweet twist to your manicure routine.
This post will show you 17 delightful bird nail designs, ranging from pastel bird silhouettes that evoke the softness of spring to vivid tropical toucan prints that transport you to an exotic paradise.
Busy? Save this pin for later.

1. Pastel bird silhouettes
If you’re seeking a gentle and artistic touch for your nails, pastel bird silhouettes offer a beautiful and serene choice.
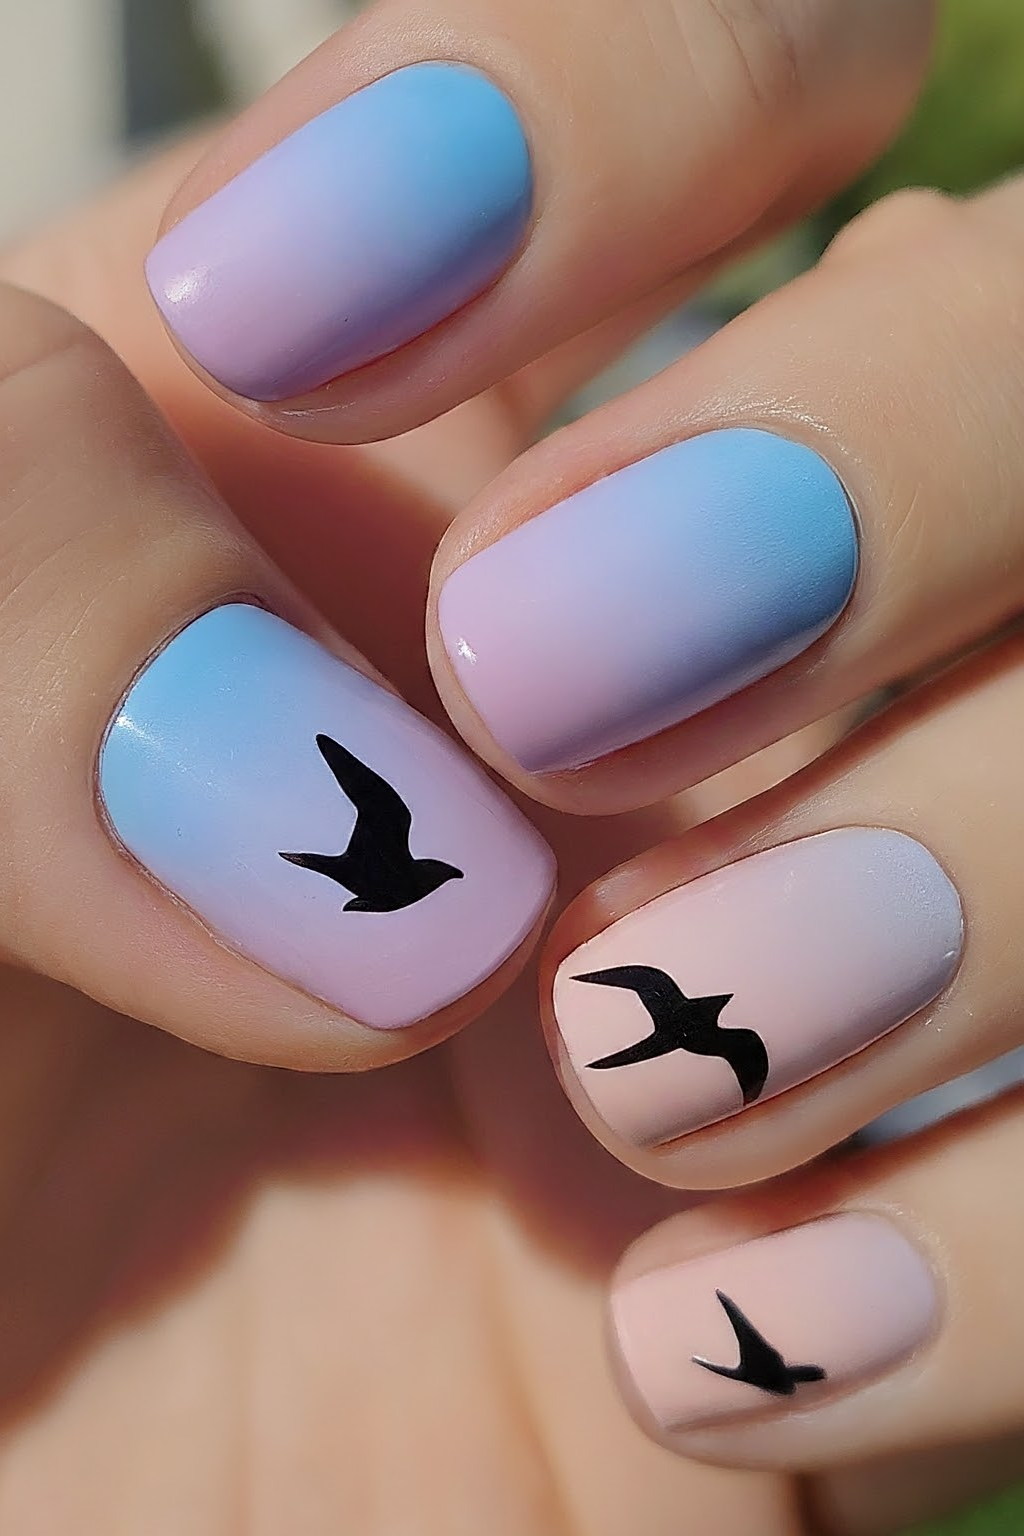
This nail art design beautifully captures the essence of birds in a subtle yet striking way, using soft pastel backgrounds and delicate bird outlines to create a peaceful sky scene right at your fingertips.
To achieve this look, start by applying a coat of white nail polish as your canvas. Once dry, layer with a soft blue to mimic the sky.
You can add depth by gently blending in hints of lavender or light pink towards the bottom, creating a dreamy sunset effect. The key here is to keep the colors light and airy to maintain the pastel theme.
Next, the silhouette of the birds is drawn over the serene background. Using a black gel pen or a fine brush, trace the outlines of simple bird shapes—perhaps a lone bird in flight or a small flock perched on a wire. These silhouettes should be minimalistic, focusing on clean lines to contrast against the soft pastel backdrop.
2. Robin’s egg blue with feather accents
For a chic and stylish look that captures the essence of spring, Robin’s egg blue with feather accents is a must-try.
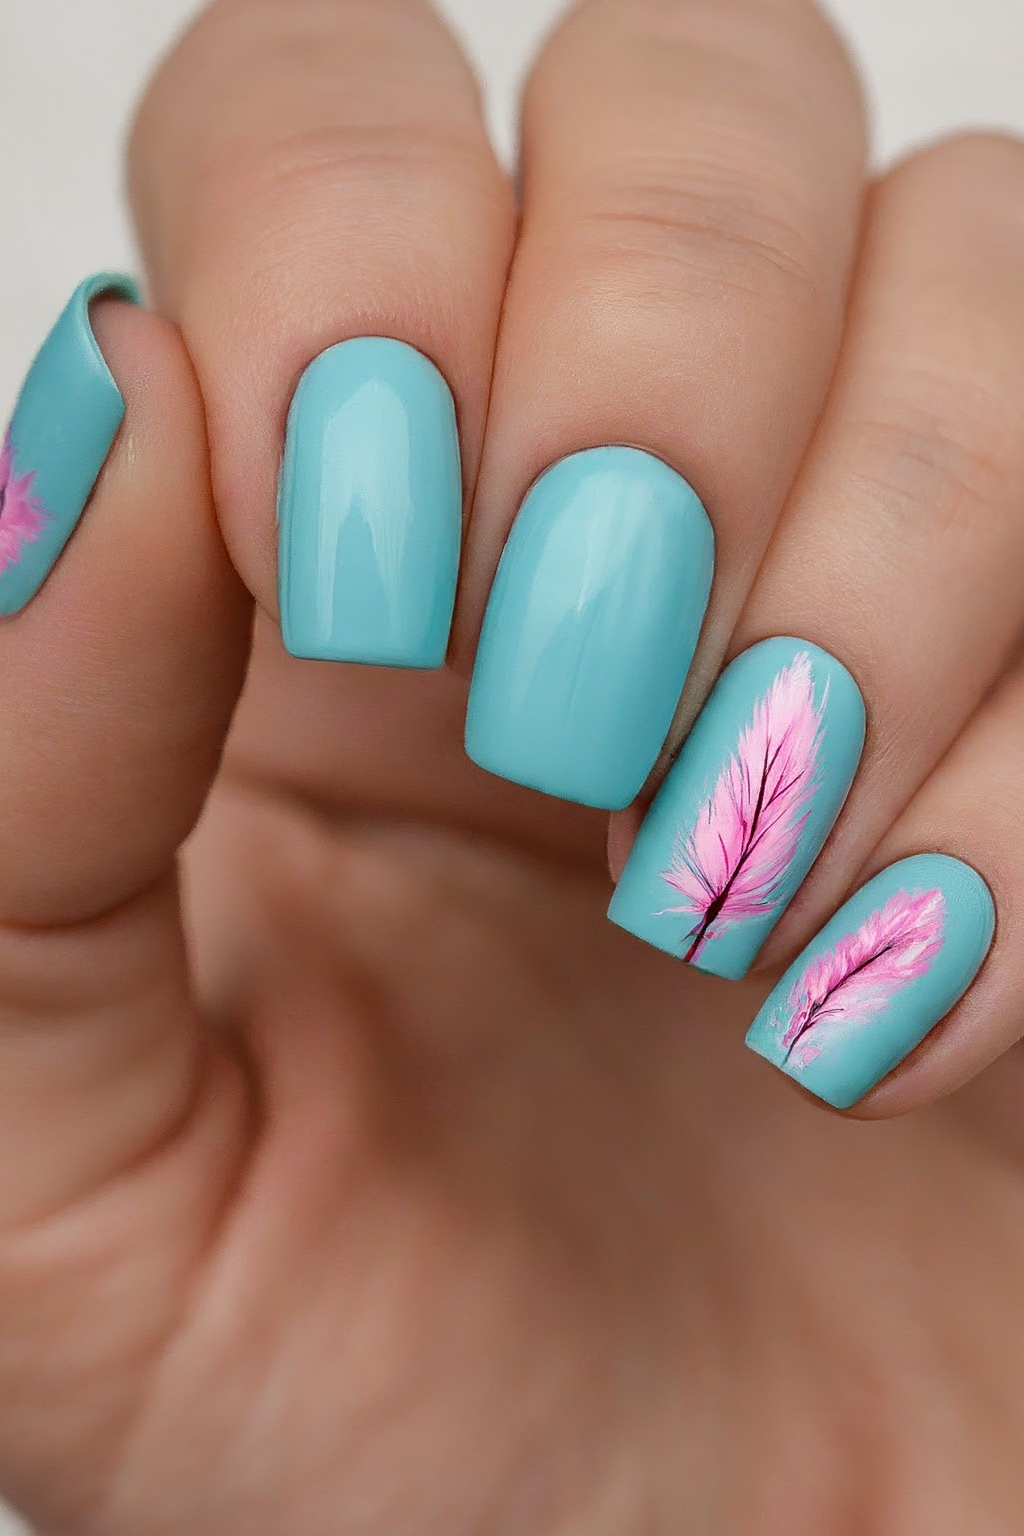
This design combines the tranquil beauty of Robin’s egg blue with the whimsical touch of multicolored feathers, creating a playful yet elegant manicure perfect for any occasion.
Start by painting your nails with a vibrant Robin’s egg blue, a color that’s always trending due to its subtle charm. This shade serves as a fantastic canvas for more creative elements.
Once the base coat is dry, the real fun begins with the feather accents. You can create these by cutting small pieces of a feather—think pink, purple, or a three-tone blue—and fitting them onto your nails while the polish is still tacky.
To apply the feathers, place them carefully on the nail, adjusting their position to achieve the desired look. Once in place, immediately apply a clear top coat to seal the feathers. This not only protects your design but also gives your nails a glossy, finished appearance.
Experiment with the placement of the feathers. You might choose to have a single feather running down the center of each nail or smaller feather pieces scattered across the nails to create a more textured look.
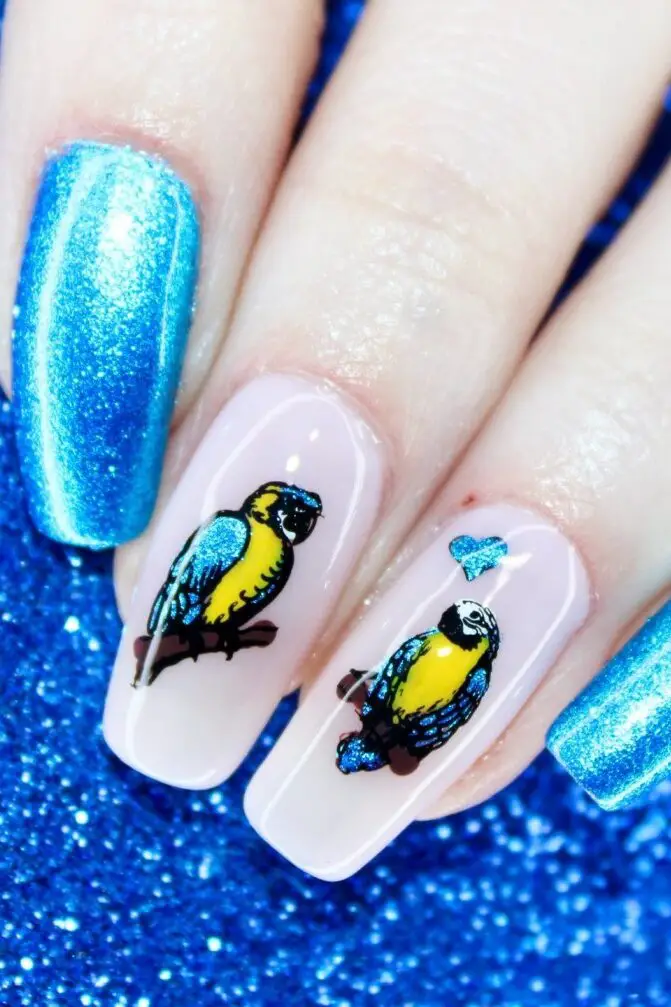
3. Colorful parrot motifs
Parrots are celebrated for their vivid and colorful plumage, which has inspired countless artists and designers across various mediums.
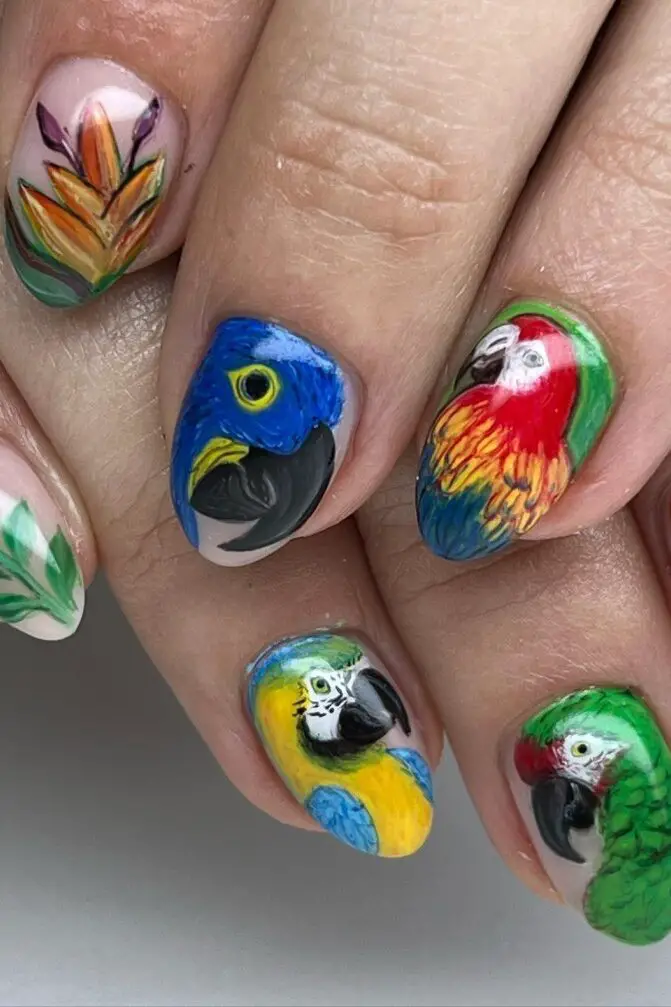
To bring this lively theme to your nails, start with a bright base color like turquoise or lime green to set the perfect tropical backdrop.
Then, using fine brushes or nail art pens, paint intricate parrot designs. You can opt for a full parrot or just focus on creating detailed feather patterns using a spectrum of colors such as fiery reds, deep blues, and sunny yellows.
4. Minimalist swallow designs
For those of you who cherish simplicity and elegance in your nail art, minimalist swallow designs are a delightful choice.
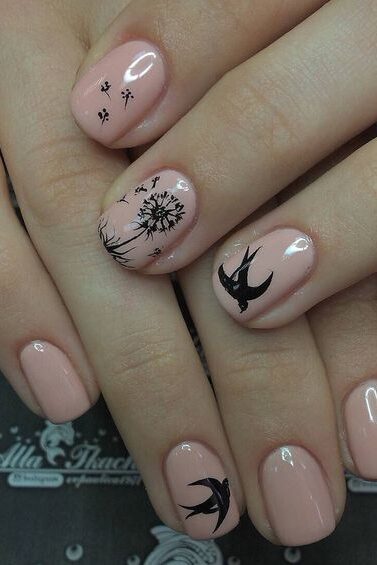
These designs capture the essence of swallows in flight with clean, uncluttered lines, making them not just a style statement but a subtle nod to the beauty of nature.
To create this look, opt for a neutral palette like soft grays or creamy whites as your base. These colors provide a calm backdrop that really allows the simple silhouette of the swallow to stand out.
Using a fine-tipped brush or a nail pen, delicately draw the outline of a swallow in mid-flight. The key here is precision and minimalism—each line should be purposeful and clear, without any unnecessary detail.
5. Gold foil bird patterns
If you’re aiming for a touch of luxury and intricate detail in your nail art, gold foil bird patterns are an exquisite choice.
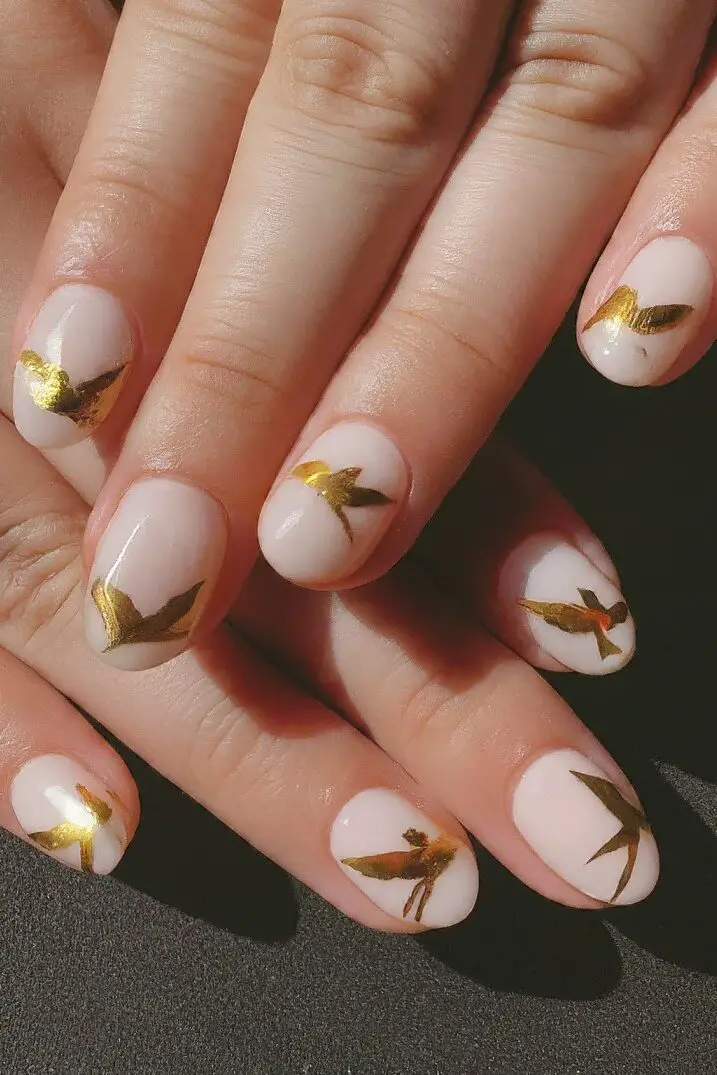
This technique uses thin sheets of gold foil to create glamorous and eye-catching designs that are sure to turn heads.
To start, choose a base color that complements gold well, such as deep burgundy or a rich navy blue.
Apply a thin coat of this color and let it cure under a lamp if you’re using gel polish. The base color sets the stage for the gold foil, enhancing its warm tones.
Once your base is dry, it’s time to work with the gold foil. Gold foil can be tricky to handle because it’s extremely delicate and light.
Using a pair of tweezers, carefully lift a small piece of gold foil. Tear off smaller pieces to create a more textured look, or use larger sections for a bold statement.
Apply a thin layer of non-wipe top coat over the base color where you want to place the foil. Gently lay the gold foil onto the tacky surface of your nail.
You don’t need to cover the entire nail; a few strategically placed patches can look incredibly stylish. Press down gently to ensure it adheres well.
After placing the gold foil, seal your design with another layer of top coat to protect it. This top coat should be very thin to avoid disturbing the foil but thick enough to fully encapsulate the delicate material. Curing it under a lamp will help solidify your glamorous design.
6. Nest and Eggs nail art
If you’re enchanted by the beauty of nature and want to bring a touch of it into your everyday style, nest and eggs nail art is a delightful way to do so.
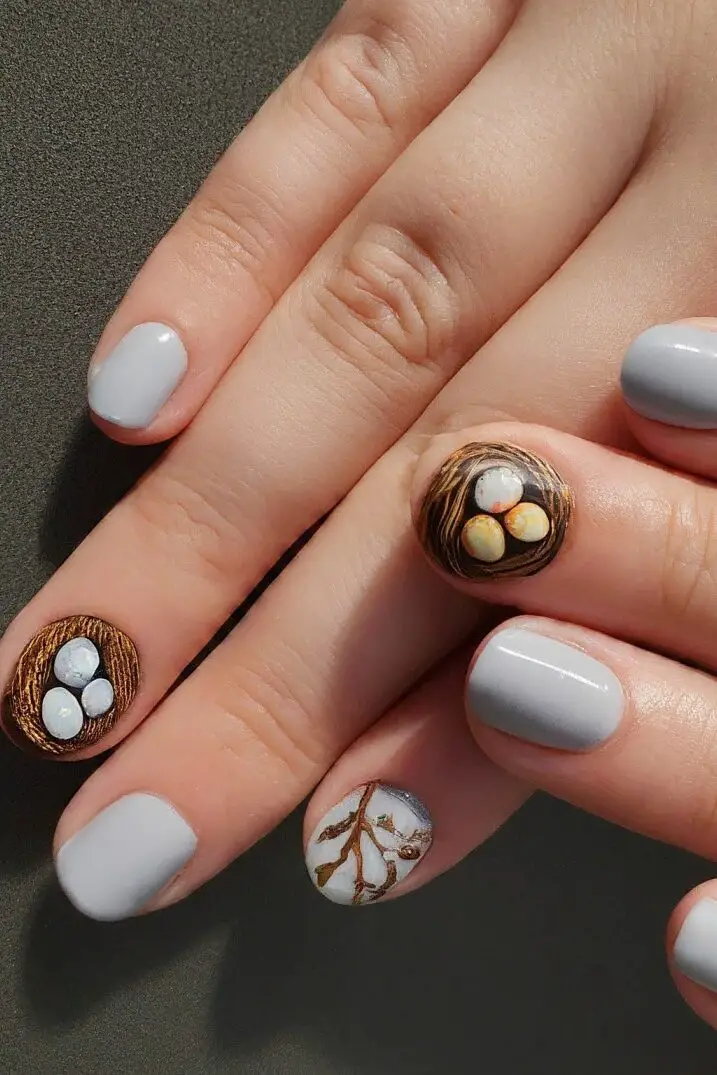
This design is not only cute but also quite symbolic, representing new beginnings and the nurturing aspect of nature.
It’s perfect for seasons like spring or during Easter celebrations, but honestly, it’s so subtly beautiful that you can wear it any time of the year.
To create this charming nail art, you’ll start with a base color that resembles the natural environment.
Soft earth tones or pastel shades work wonderfully as they mimic the colors you might find in a bird’s natural habitat. Once your base color is dry, the creativity really begins.
Using a small brush or a dotting tool, start sketching out the nest. You’ll want to use a brown or neutral shade for this.
Begin by painting a circular or oval shape on your nail, and then add intricate lines and strokes to simulate the woven texture of a bird’s nest.
This part of the process allows you to showcase your artistic flair, as each stroke adds to the realism and depth of the nest.
Next, inside your beautifully crafted nest, you’ll add the eggs. For the eggs, use the dotting tool to place small white or speckled dots.
You can vary their size and how many you place to create a more dynamic and realistic look. The speckles on the eggs can be made using a slightly darker color like gray or light brown, which adds an extra layer of detail that makes the design pop.
7. Floral bird cages
If you’re looking to add a touch of elegance and whimsy to your nail art, floral bird cages are a perfect choice.
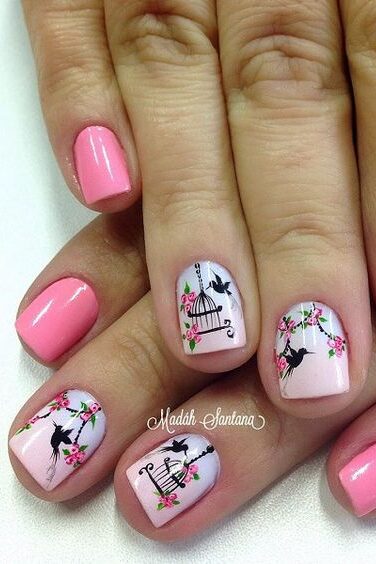
These designs are inspired by the intricate metalwork and painting of traditional bird cages, often decorated with delicate floral patterns.
To create the floral bird cage design on your nails, start with a light base color like soft pink or sky blue to set a gentle background.
Once your base is dry, use a fine brush to paint the outlines of a bird cage. You can opt for a simple circular design or an elaborate Victorian-style cage – the choice is yours.
Inside the cage, paint small flowers, vines, or leaves to bring the floral theme to life. These can be done in vibrant colors to contrast with the base, or in soft pastels for a more subdued look.
Techniques like watercolor effects or stamping can be used to add depth and texture to the flowers, making them appear more realistic.
8. Penguin nail designs
These charming designs are perfect for adding a playful touch to your manicure and are sure to bring a smile to anyone who sees them.
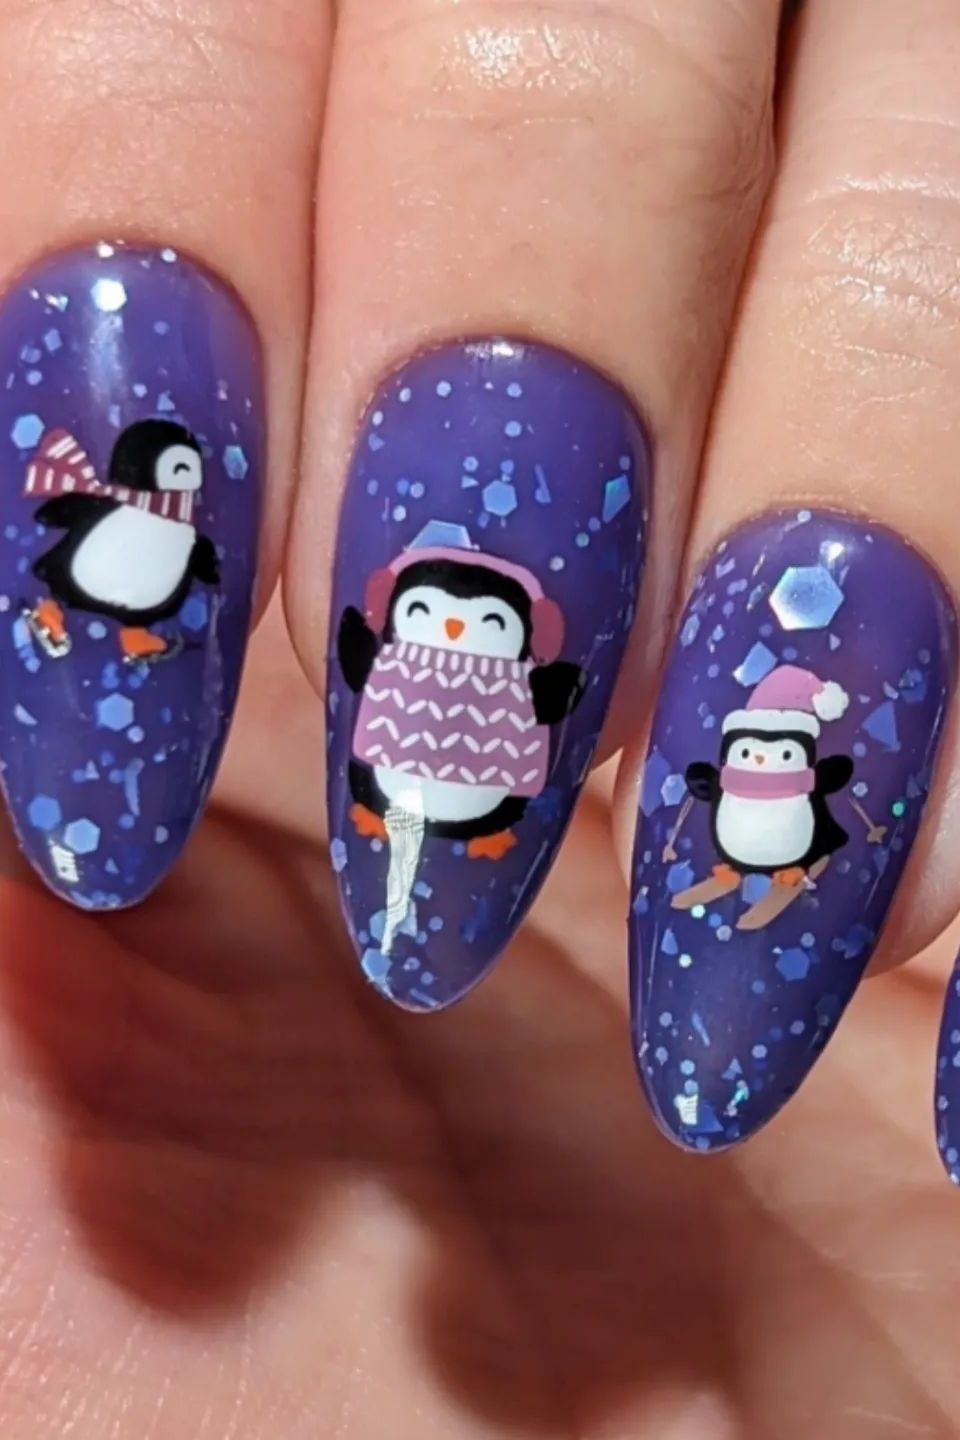
To create your own penguin nail art, start with a base coat of white polish to represent the penguin’s belly. Once that’s dry, use black polish to add the outline of the penguin’s body.
You can keep the shapes simple with basic curves that mimic the round body and head of a penguin. For a touch of realism, add small orange dots for the beak and feet, which will stand out against the black and white.
The eyes can be dotted on with a fine brush or a toothpick dipped in black polish, giving your penguin character and life.
If you’re feeling creative, you can also add accessories like tiny scarves or hats using red or green polish, which is great for a holiday-themed look.
9. Tropical toucan prints
These prints are inspired by the distinctive features of toucans, particularly their colorful beaks and striking plumage, which make them one of the most visually captivating birds in the tropical regions of Central and South America.
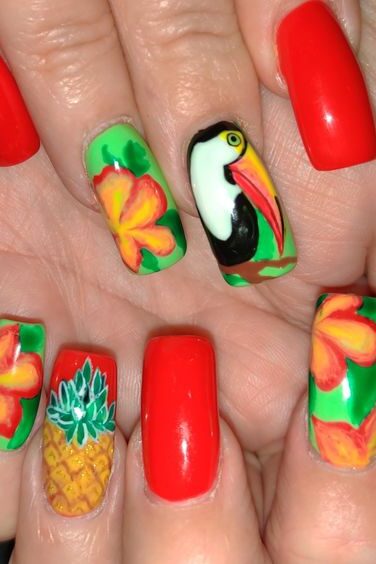
Tropical Toucan Prints capture the essence of these unique birds and their lush, verdant environments.
When you incorporate these designs into your nail art, you’re not just adding beauty to your nails; you’re also embracing a piece of the tropical wilderness. This can transform your nails into a bold fashion statement that radiates fun and creativity.
To create this look, you might start with a bright base color, like a neon green or a deep turquoise, to set the perfect tropical backdrop.
Then, using a combination of gel polishes or nail pens in colors like red, orange, yellow, and lime green, you can begin to paint the intricate details of the toucan.
The large, colorful beak and the vibrant feathers are the highlights of this design, so focus on these elements to really capture the spirit of the toucan.
Given the complexity and detail involved in painting a toucan, it’s essential to plan your design carefully. You might consider sketching out the toucan on paper first or using a stencil to help guide your painting.
10. Lovebird couple motifs
Renowned for their strong pair bonds and affectionate behavior, lovebirds epitomize love and togetherness, making this design ideal for expressing romance through your manicure.
To capture the essence of lovebirds in your nail art, envision a design that reflects their colorful, intimate, and social nature.
Start with a soft, pastel background to mimic the gentle ambiance of a lovebird’s habitat. On this serene backdrop, paint a pair of lovebirds using vibrant hues.
These birds are often depicted in art as sitting close together, sometimes preening each other or sharing a perch, symbolizing their deep connection.
11. Feathered wings on nails
This design is perfect for those who love to incorporate elements of nature into their style, especially with a celestial twist.
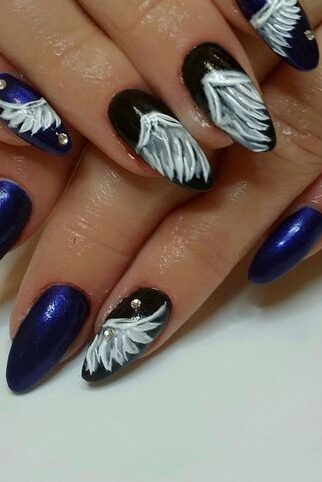
Starting your feathered wings design, you’ll first want to apply a base coat to protect your nails and ensure a smooth canvas.
Once that’s dry, choose a soft background color like sky blue or pale lavender to evoke a sense of airiness and light.
For the wings, you’ll begin by painting the outline of a feather using a fine-tipped brush. You can use a black or dark grey polish to draw the central shaft of the feather, extending from the base of your nail to the tip.
From this line, use lighter, wispy strokes to create the delicate barbs of the feather, giving it a realistic texture. These strokes should be fine and gently curved, mimicking the natural flow of a bird’s feather.
12. Owl-themed nail art
Owl-themed nail art is not only adorable but it’s also quite versatile, allowing for a range of creative expressions, from cute and simplistic to detailed and majestic.
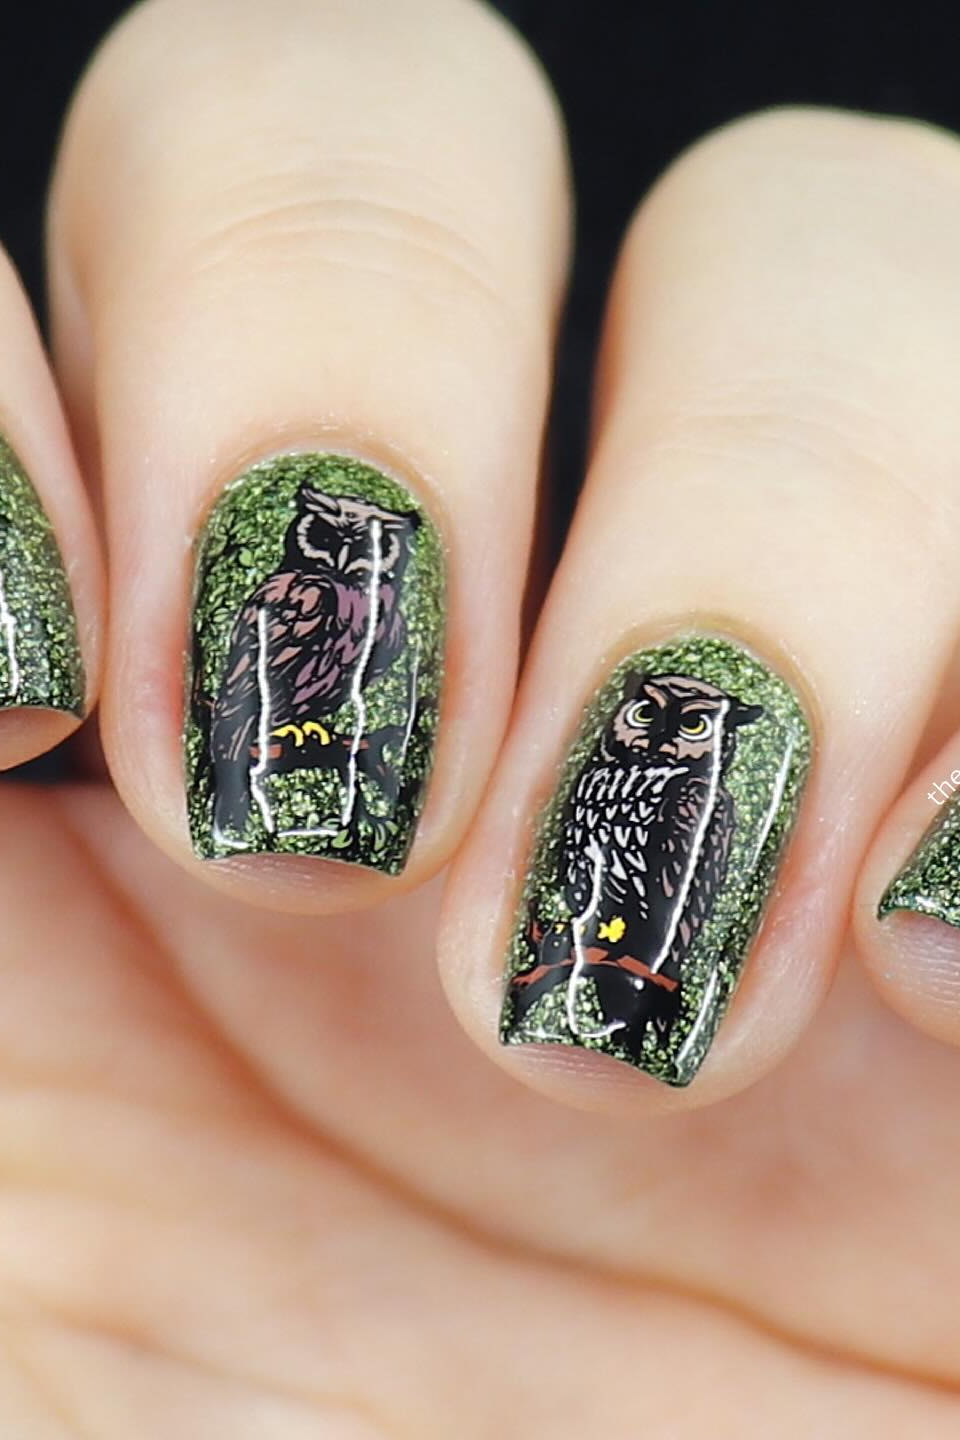
To start your owl-themed manicure, choose a soft, neutral base color like taupe or soft grey, which will mimic the natural colors of an owl’s plumage.
This serves as a perfect canvas for more detailed work. For the owls, you might want to use a fine-tipped brush or a bobby pin to create the intricate details of the owl’s face and feathers.
The eyes of the owl are a focal point and can be dramatized with large, expressive circles filled in with white and a dot of black or yellow for the pupils.
This will make your owl designs pop and bring them to life on your nails. Adding small strokes around the eyes can mimic the textured appearance of feathers, enhancing the overall realism of the design.
13. Flamingo-inspired patterns
These designs capture the essence of the graceful flamingo, known for its iconic pink hue and distinctive shape, making your nails stand out with a fun, tropical vibe.
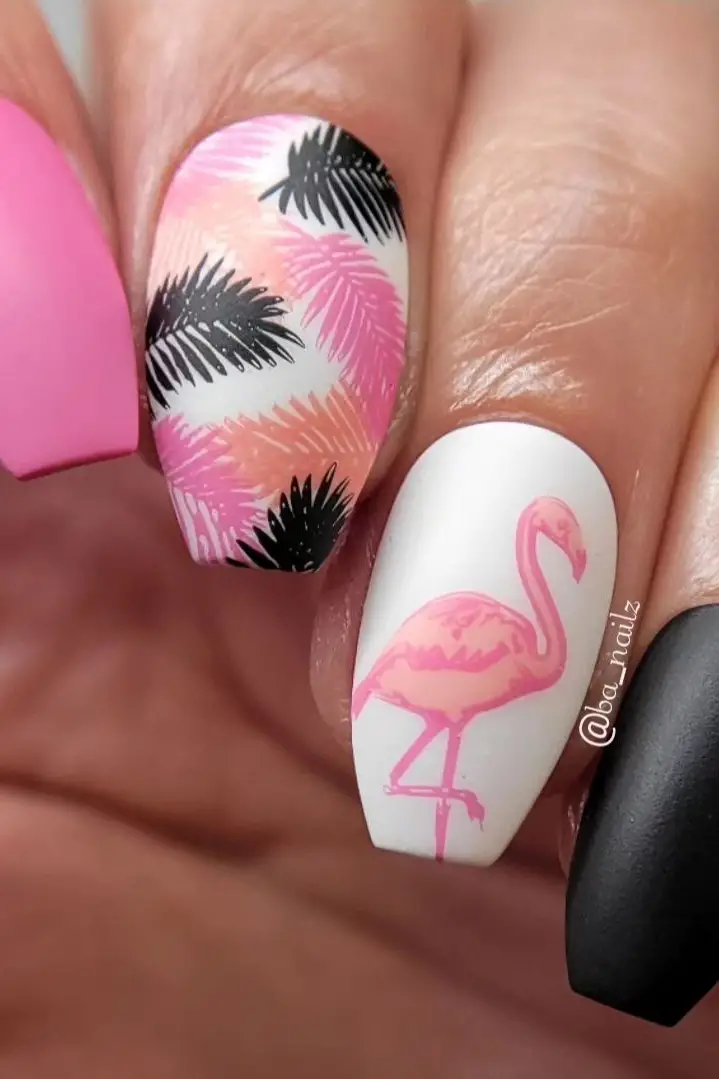
To achieve this summery look, start with a light green polish as your base. This fresh color sets the perfect background, reminiscent of the flamingo’s natural lush surroundings.
Once your base coat is dry, it’s time to bring the flamingo to life. Using dark pink polish, begin by painting a half-circle at the tip of your nail. This will form the body of the flamingo.
Next, with a nail art brush dipped in the same dark pink, draw a curvy line starting from one side of the half-circle to create the neck and head of the flamingo.
It might sound tricky but think of it as sketching the number “2” on your nail. This simple shape helps you map out the flamingo’s form without needing intricate details just yet.
For the finer elements, switch to a light pink polish. Inside the dark pink outline, paint a smaller half-circle to define the flamingo’s wing.
Then, using a toothpick or a dotting tool, add a tiny dot of light pink to represent the eye. With the same tool, dip into black polish to dot in the pupil and draw the beak, giving your flamingo its charming face.
14. Hummingbird and flower designs
If you’re drawn to the intricate beauty of nature, hummingbirds and flower designs on your nails can be a mesmerizing choice.
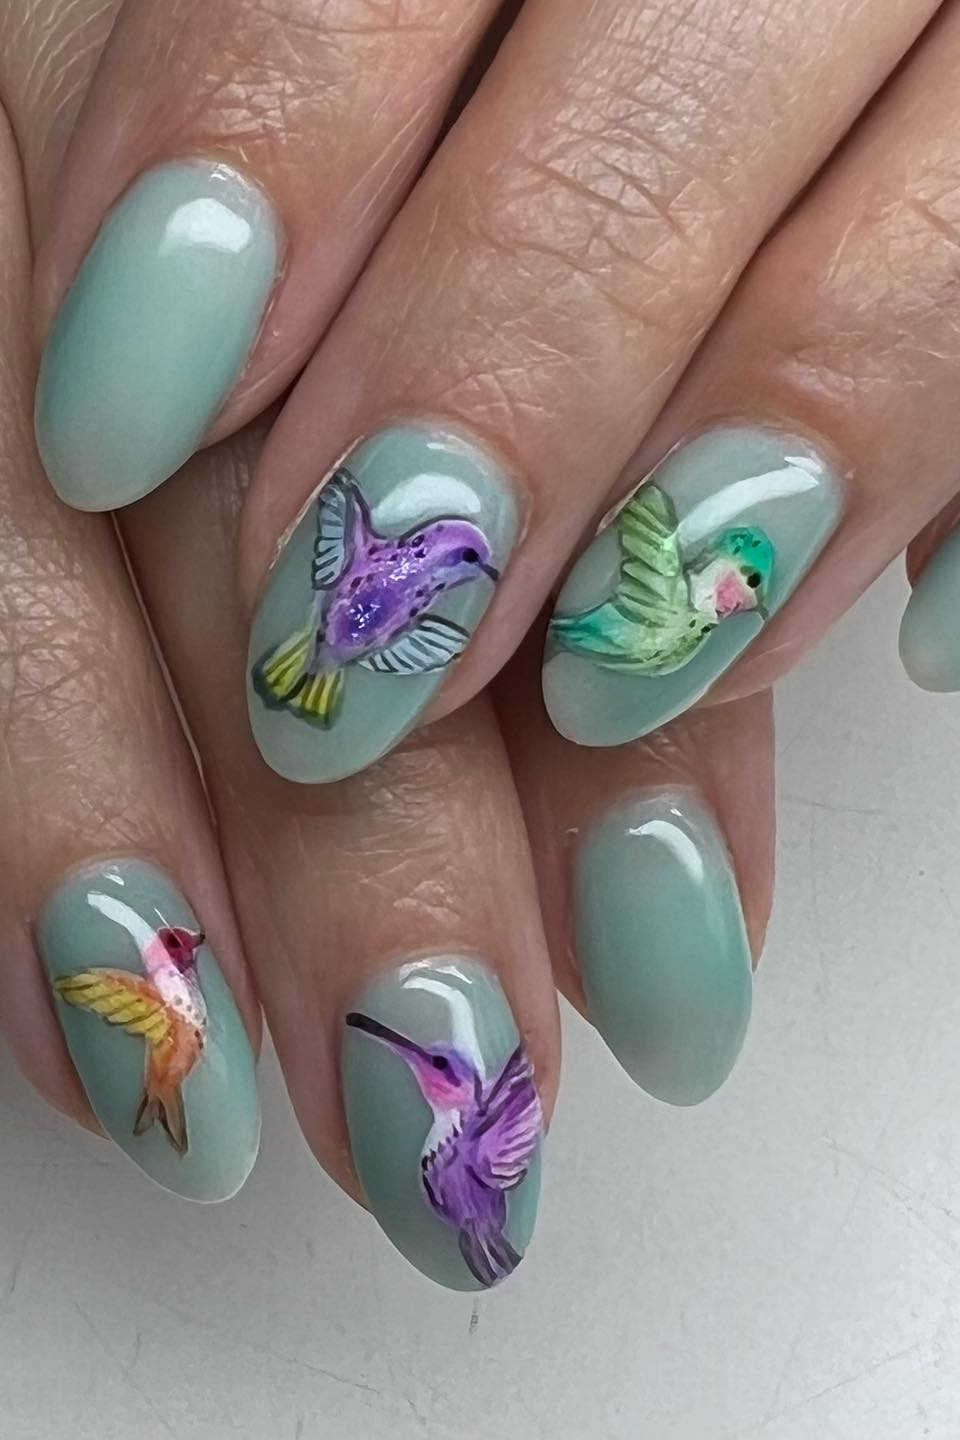
These designs not only celebrate the vivid colors and dynamic energy of hummingbirds but also incorporate the delicate beauty of flowers, creating a perfect harmony on your nails.
To begin your hummingbird nail art, you might want to choose a bright base color like turquoise or a soft green, which sets a vibrant backdrop that mimics the bird’s natural habitat.
Then, with a palette of yellow, turquoise, and green, you can mix these colors to create the perfect shade for the hummingbird’s body.
The use of a fine-tipped brush is crucial here as it allows you to add intricate details like the feathers and the tiny, pointed beak, which is essential for achieving the realistic look of the hummingbird.
For the flowers, which are a vital part of this design due to their role in the hummingbird’s life, selecting colors that attract these birds is a smart move.
Incorporating shades of red mixed with a bit of black can make the flowers stand out and appear more vibrant.
You can paint these around the hummingbird, creating a scene where it seems like the bird is hovering over or dipping into the flowers.
Adding small strokes of darker blue can enhance the hummingbird’s wings, giving them a more defined and wispy look.
15. Chickadee and berries motif
Known for their distinctive black cap and bib, white cheeks, and gray back and wings, chickadees are small, active songbirds that bring a touch of whimsy wherever they appear.
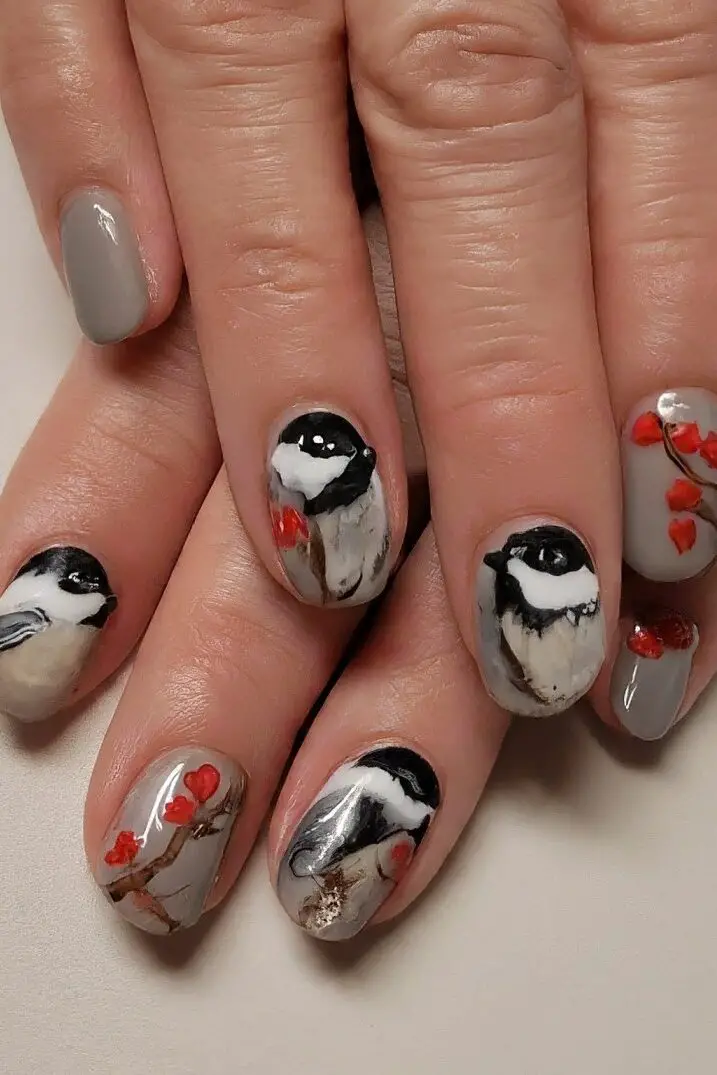
This design not only captures the essence of these adorable birds but also incorporates the vibrant colors of berries, creating a visually striking look on your nails.
To start, choose a soft, neutral base color like pale gray or a muted blue to mimic the natural hues of a chickadee’s habitat.
Once your base is set, the artistry begins with painting the chickadee. Focus on the bird’s iconic black and white face, using fine brushes to detail the small, precise features that make a chickadee instantly recognizable.
Next, add the berries. Opt for bright, bold colors like red or purple to contrast beautifully against your subtle base.
You can depict the berries as small clusters near the chickadee, perhaps as if the bird is perched beside them, ready to peck.
16. Peacock feather nails
If you’re ready to take your nail art to the next level, peacock feather nails are a stunning choice that blends vibrant colors with intricate designs.
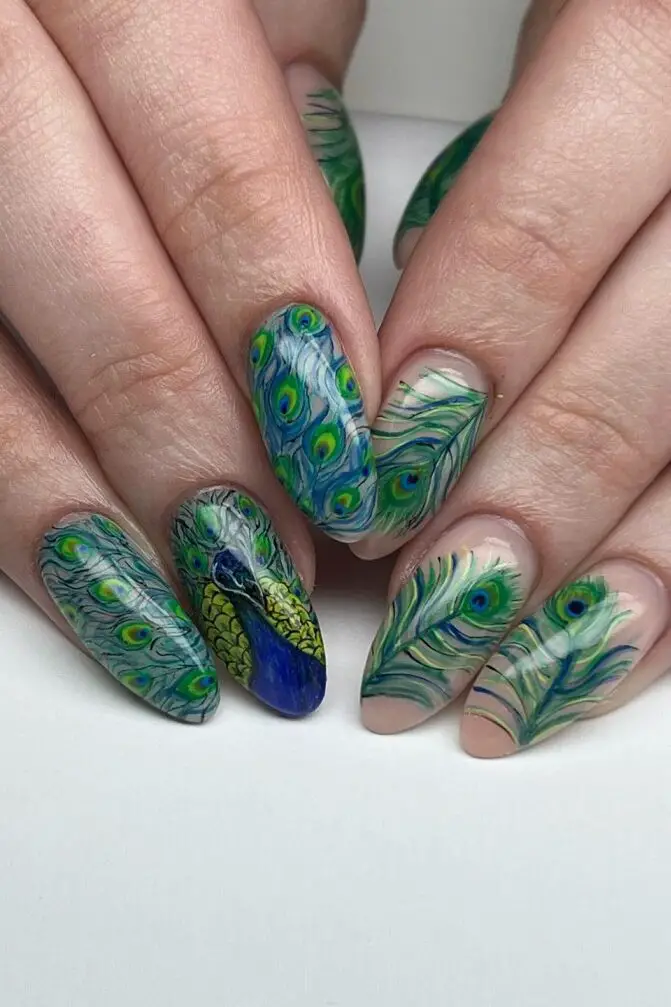
This particular style is a bit more advanced, so it might be a great step up if you’re already comfortable with basic nail art techniques.
Start by painting your nails with a black base to really make the colors pop. Once that’s dry, use a striping brush to create an hourglass shape on each nail.
This shape forms the foundation of the feather. Next, fill in this shape with white paint using a long detailer brush, which is slightly thicker and shorter than the striping brush, allowing for more precise application.
After the white paint has dried, it’s time to add some color. Begin with dark purple to paint a rounded heart shape at the center of the nail.
Fill the center of this shape with blue paint, blending slightly where the two colors meet to create a smooth transition.
17. Sparrow silhouette with heart accents
This design combines the gentle beauty of sparrows with the universal symbol of love—hearts—creating a nail art theme that’s not only visually appealing but also rich in symbolism.
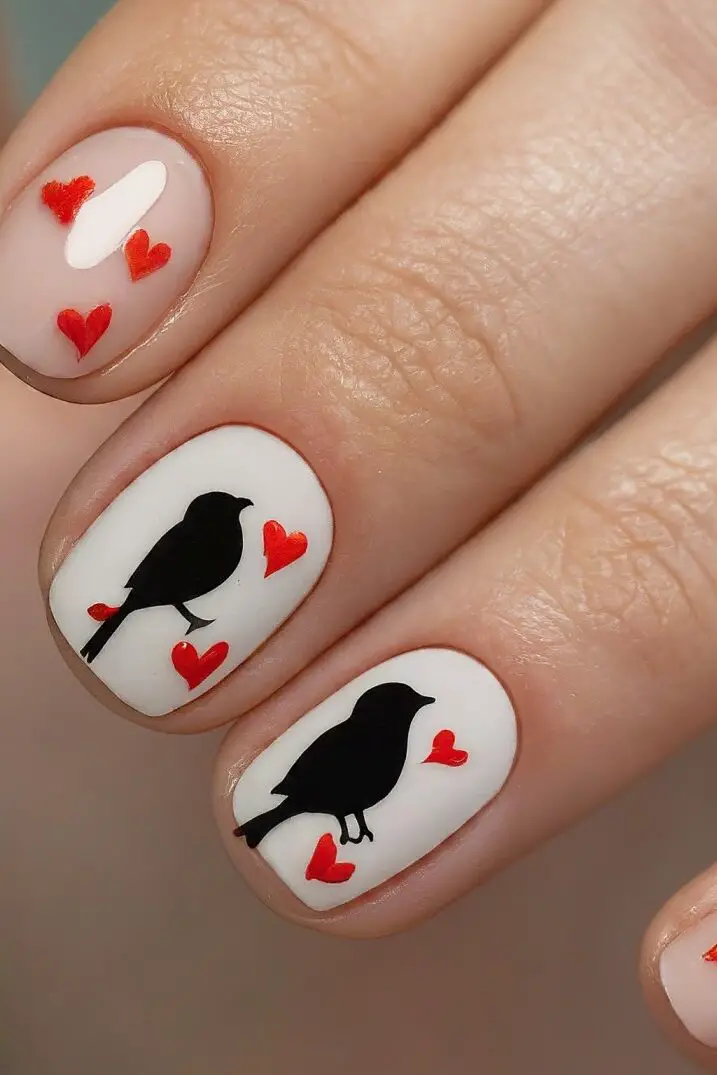
To start, choose a pale or soft background color like sky blue or light pink, which provides a serene canvas reminiscent of a clear sky or a gentle dawn.
This subtle backdrop will make the darker silhouette of the sparrow stand out, providing a stunning visual contrast.
Using a fine-tipped brush, carefully paint the silhouette of a sparrow on one or two accent nails. The sparrow doesn’t have to be overly detailed; a simple outline capturing the essence of the bird in flight or perched can be incredibly effective.
Next, add small heart accents around the sparrow. These can be painted in a slightly darker or contrasting shade like deep red or vibrant pink to draw attention and add a pop of color.
The hearts should be subtle yet noticeable, enhancing the theme without overwhelming the delicate sparrow silhouette.
Final Thoughts
Through exploring a diverse palette of nail art designs inspired by the natural world of birds, this post has presented a creative avenue for expressing personal style and affection for nature.
These designs not only enhance the beauty of the wearer but also serve as a canvas for artistic expression, connecting the wearer to the rich colors and textures of the natural world.
Adopting aspects from the bird kingdom into nail art serves as a powerful reminder of the beauty that surrounds us, encouraging a closer connection to nature and its myriad of inspirations.


Leave a Reply