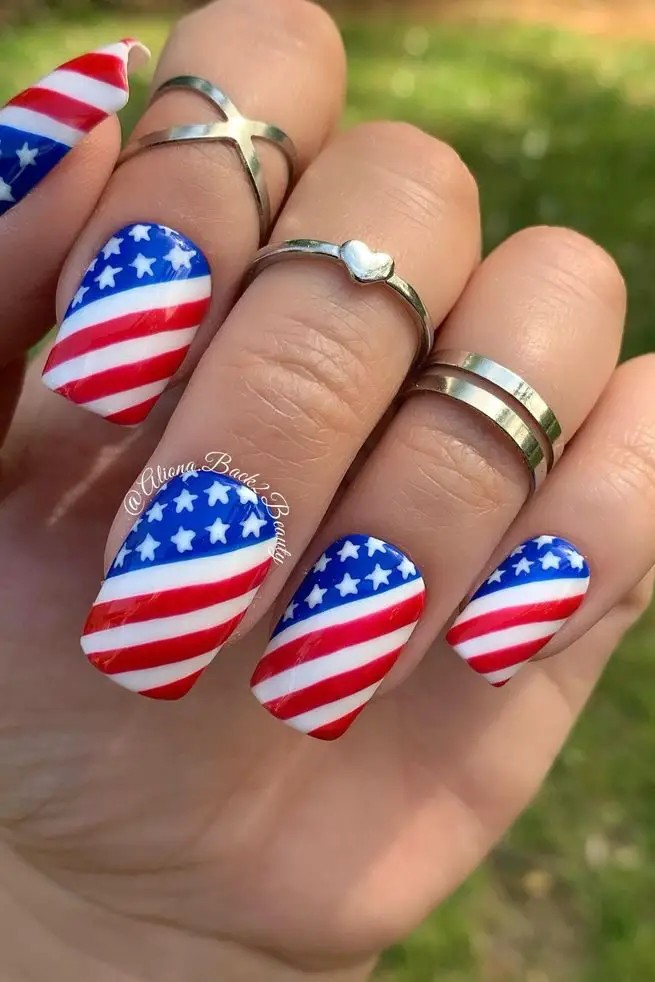
As the 4th of July approaches, you’re likely searching for the perfect way to celebrate, and what better avenue than through creatively expressing your patriotism right at your fingertips?
With 16 stunning 4th of July nail designs, from stripes and dots to more intricate American nails ideas, this article is your go-to guide.
These designs are perfect for showcasing your independence day spirit, offering a range of options from the classic red, white, and blue motifs to modern interpretations that pay homage to this significant day.
Busy? Save this pin for later.
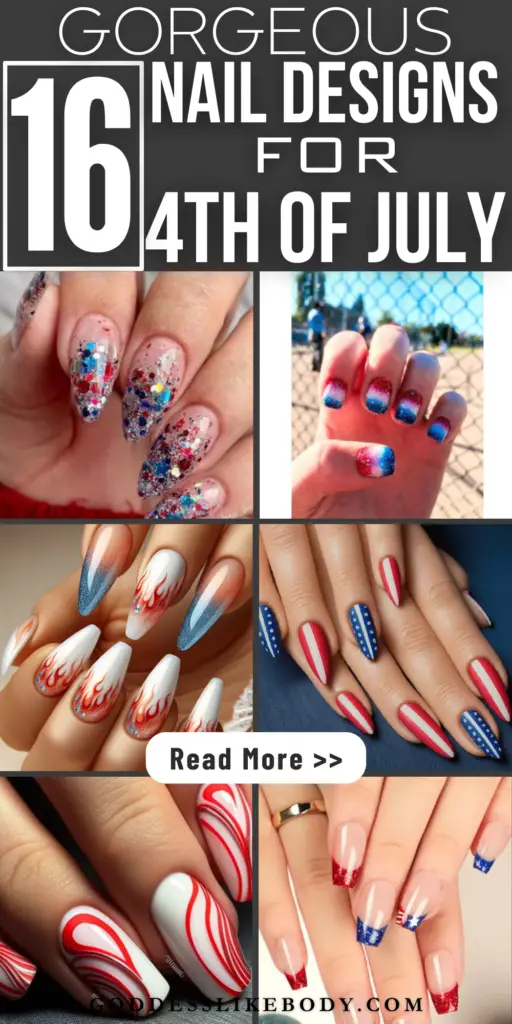
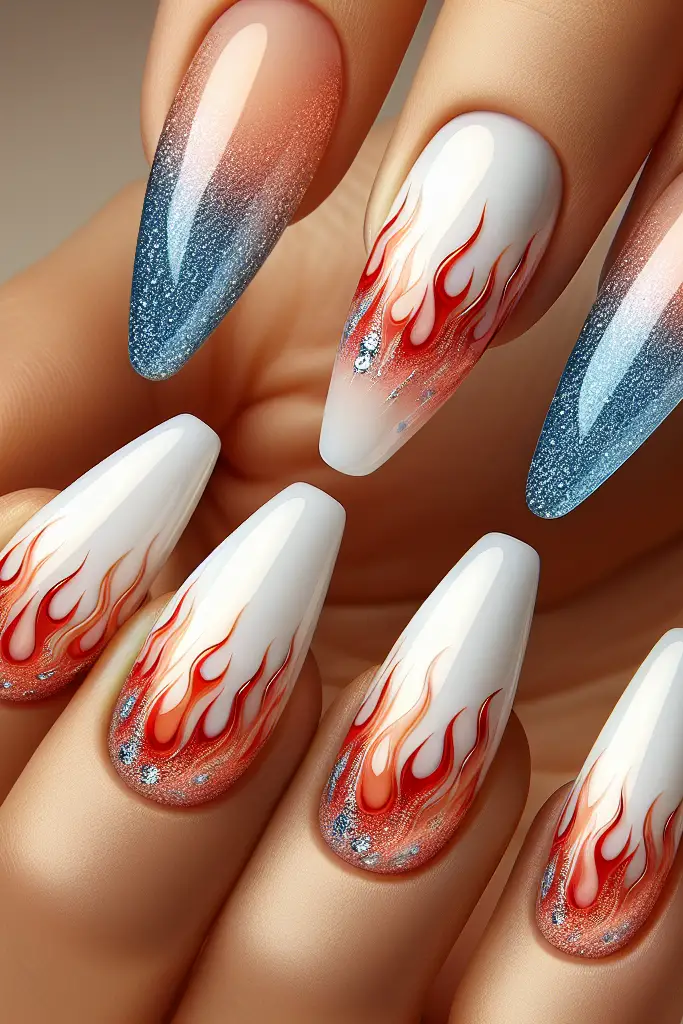
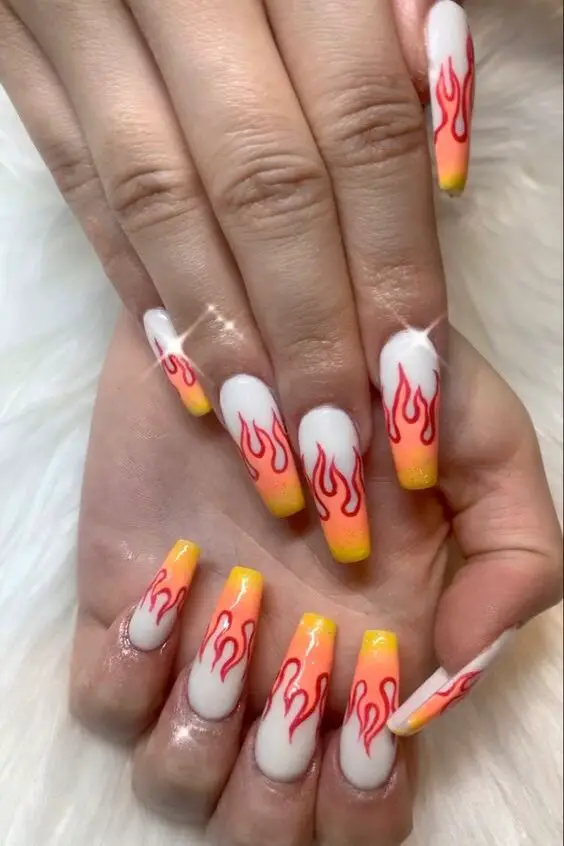
1. Patriotic Flames: Red & Orange flames, tiny blue glitter tips (white base)
Inspired by the vibrant essence of flames, this 4th of July nail design utilizes a striking combination of red, white, and blue polishes to ignite your patriotic spirit.
Begin by applying a protective base coat to ensure both nail protection and longevity of your design.
Once dry, paint your nails with a white base color to serve as a vivid backdrop for the flames.
Using a nail art brush or even a bobby pin for convenience, start crafting your flames at the nail base.
Initiate with a thin red line that mimics the flicker of a flame, followed by a broader white stroke above it, and cap it off with a fine blue line to integrate the patriotic theme. Ensure each nail replicates this fiery pattern.
Allow your artwork to dry completely before sealing it with a top coat, which not only adds a glossy finish but also extends the durability of your nail art.
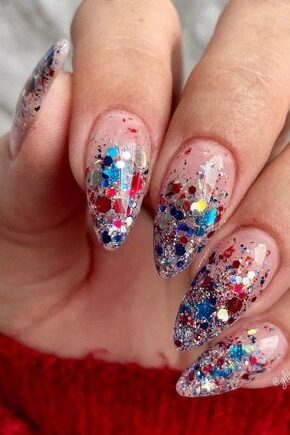
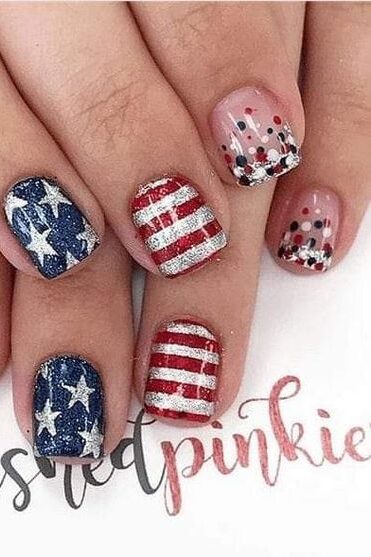
2. Firework Frenzy: Red, white, blue glitter dots (clear base)
Imagine capturing the spectacular burst of fireworks on your nails this 4th of July. The Firework Frenzy design transforms your nails into a celebratory explosion of colors, perfect for any festive occasion.
Here’s how you can achieve this dazzling look without delving into a step-by-step guide, focusing instead on the overall effect and the tools you’ll need.
Start by applying a clear base coat to protect your nails and enhance the forthcoming colors. Once dry, create a stunning backdrop with a gradient effect using blue or black nail polish.
This can be achieved by applying your base color first and then gently sponging on the second color while it’s still wet, blending beautifully into a night-sky effect.
Now, for the fireworks: using a detail brush, strategically place various sized dots and thin lines in white, silver, or gold across your nails, mimicking the random, yet awe-inspiring pattern of fireworks in the sky.
Each nail can tell a different story of a firework’s burst, making your nail art unique and lively.
To finish, seal your artwork with a top coat to add gloss and ensure your nail design lasts through the celebrations.
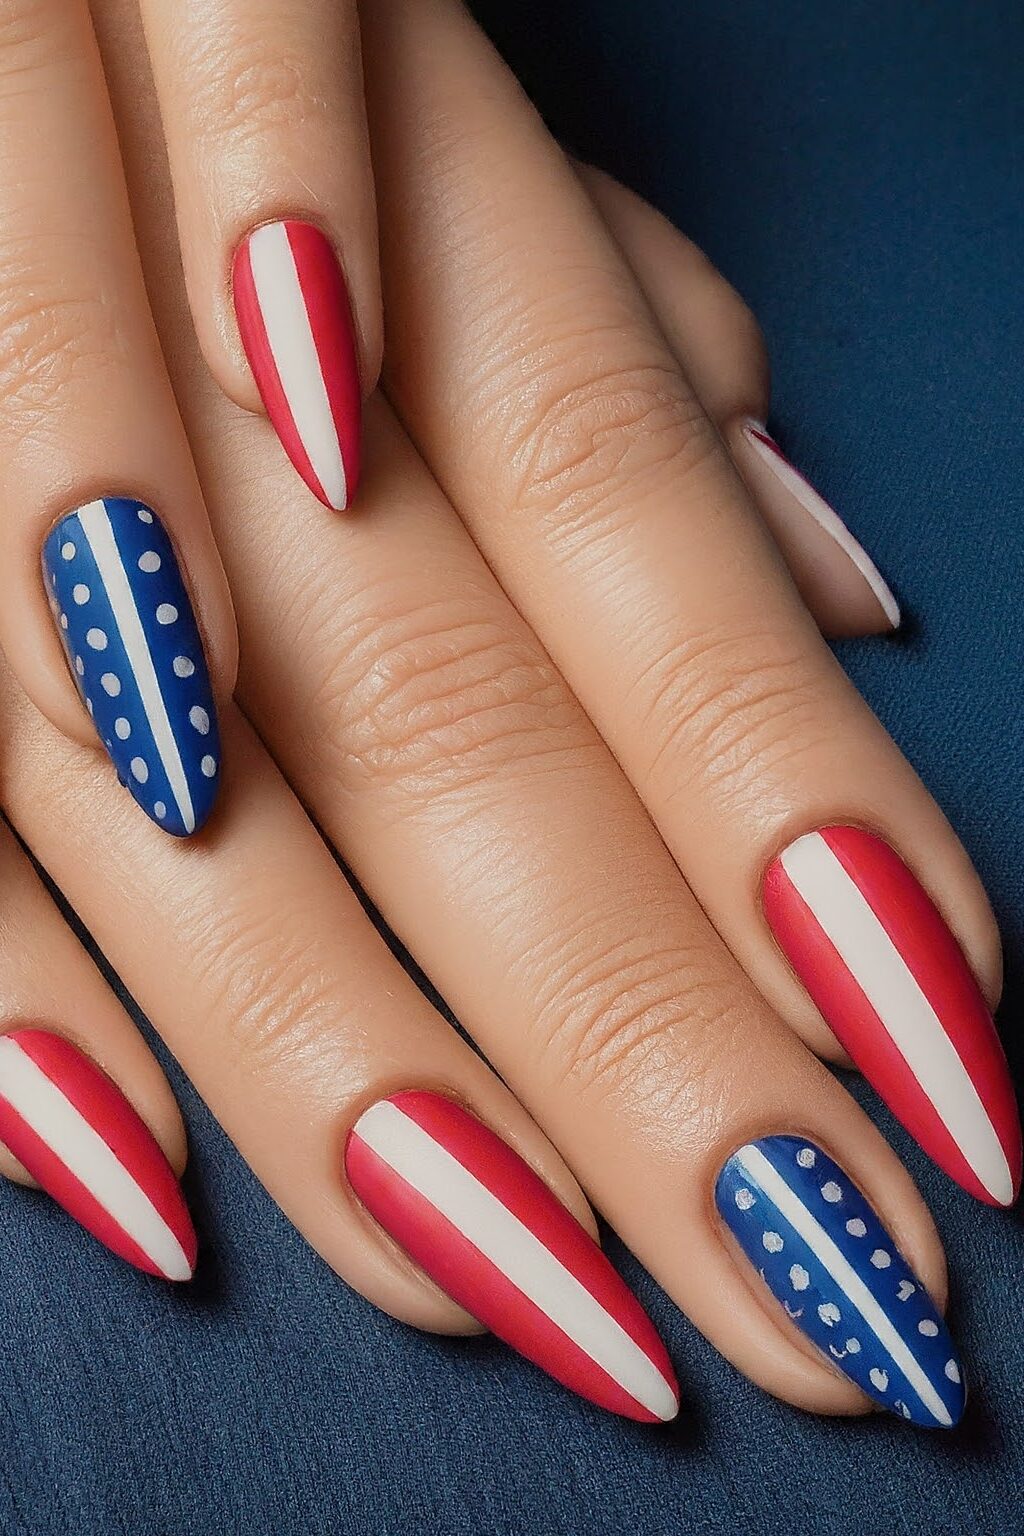
3. Star-Spangled Stripes: Red & White stripes, single thicker blue stripe (center)
Embrace the patriotic spirit with the “Star-Spangled Stripes” nail design, a perfect blend of simplicity and national pride.
This design features bold red and white stripes complemented by a prominent blue stripe at the center, symbolizing the colors of the American flag. Here’s how to achieve this eye-catching look:
Preparation: Start by applying a clear base coat to protect your nails and enhance the polish’s adherence. Allow it to dry completely.
Base Color: Paint your nails with a crisp white polish to serve as the background for the stripes. This will make the colors pop and ensure a clean, bright appearance.
Creating Stripes: Using a thin brush or striping tape, carefully paint 4-5 thin red lines across each nail. The precision in spacing is key to achieving a neat, uniform look.
Central Blue Stripe: At the top of each nail, add a thicker blue stripe. This central feature draws the eye and adds a unique twist to the traditional stripe pattern.
Detailing: For an added touch of festivity, place small white dots along the blue stripe using a dotting tool. This mimics the stars in the American flag and brings an extra dimension to the design.
Finishing Touches: Once your masterpiece is dry, apply a top coat to seal in the design and add a glossy finish, ensuring your nails look stunning and are chip-resistant throughout the Independence Day celebrations.
4. Confetti Nails (4th of July): Red, white, blue star confetti (clear base)
Celebrate Independence Day with a playful twist on your nails using the Confetti Nails design.
This look features a clear base sprinkled with red, white, and blue star confetti, creating a vibrant and festive effect that’s perfect for any 4th of July celebration. Here’s how you can achieve this fun and patriotic look:
Base Preparation: Start with a clear base coat to protect your nails and ensure a smooth surface for the confetti to adhere to.
Applying Confetti: While the base coat is still slightly tacky, use tweezers to carefully place star-shaped confetti on your nails. For an authentic confetti effect, overlap some stars while scattering others more sparsely.
Sealing the Design: Once you are satisfied with your confetti placement, apply at least two coats of a top coat. This not only secures the confetti but also gives your nails a glossy, finished look.
For those who prefer a subtle yet thematic nod to the holiday, consider applying the confetti design to only your ring finger or thumbnail.
Paint the other nails in solid colors or opt for a simple French manicure to maintain focus on the confetti feature. This design is particularly striking on longer nails, as they provide a larger canvas for your patriotic artwork.
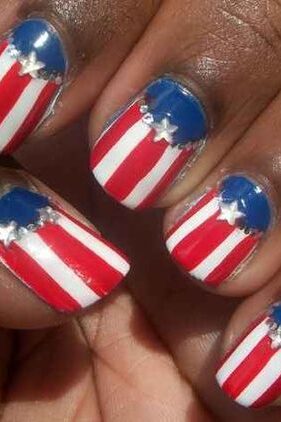
5. American Flag Half-Moon: Blue crescent moon (base), red & white stripes (top)
Embodying the spirit of the American flag, the Half-Moon nail design offers a creative twist by combining a blue crescent moon at the base with vibrant red and white stripes at the top.
Here’s how you can achieve this festive look:
Preparation: Begin with a clean, buffed nail surface. Apply a gel base coat to protect your nails and create a smooth canvas for your design.
Blue Crescent Moon: Using nail tape or a guide sticker, carefully place it in a half-moon shape at the nail base. Apply a blue polish and allow it to dry before gently removing the tape to reveal a crisp crescent.
Red and White Stripes: With the blue base set, use fine nail polish liners or a thin brush to add red and white stripes. Start from the cuticle and work towards the tip, alternating colors to mimic the flag’s stripes.
Enhancements: For a more dramatic effect, incorporate elements like tiny star-shaped Swarovski crystals or metallic nail stickers along the stripes. These additions bring a touch of glamour and celebration to your nail art.
Sealing the Design: Finish with a top coat to seal in your artwork, ensuring longevity and a glossy finish that will catch the eye at any 4th of July celebration.
This design not only pays homage to the iconic American flag but also adds a modern twist with its unique layout and sparkling enhancements, making your nails a standout feature of your Independence Day ensemble.
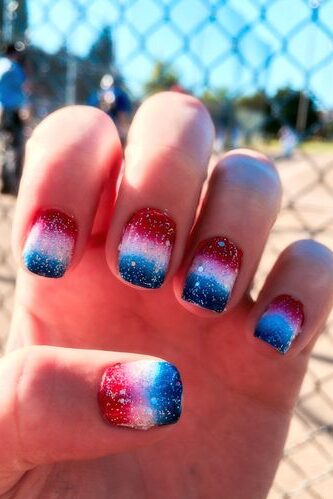
6. Patriotic Gradient: Red (base) to white (middle) to blue (tips)
Embrace the spirit of Independence Day with the stunning Patriotic Gradient nail design, showcasing a seamless transition from red at the base, through white in the middle, to blue at the tips.
Here’s how you can achieve this vibrant look:
Base Preparation: Start with a clear base coat to protect your nails and provide a smooth surface for the colors to adhere to.
Once dry, apply a red polish as the base color of your gradient. This vibrant red will form the foundation of your patriotic theme.
Creating the Gradient: For the gradient effect, use a makeup sponge. Paint a stripe of white polish next to the red on the sponge, and then a stripe of blue at the other end. The colors should slightly overlap on the sponge to ensure a smooth gradient.
Application: Gently dab the sponge onto your nail, starting from the base and moving towards the tip, pressing slightly to blend the colors on the nail itself.
You may need to reapply the polish to the sponge and repeat a few times to achieve the desired opacity and blend.
Clean Up: Use a small brush dipped in nail polish remover to clean up any polish outside your nails. This step will help create a neat, professional-looking finish.
Top Coat: Seal your design with a clear top coat. This not only protects your nail art but also gives a glossy finish that enhances the vibrancy of the red, white, and blue colors.
Customization: Add a personal touch by incorporating tiny stickers or rhinestones at the transition points or along the cuticle line for an extra sparkle during the 4th of July celebrations.
This gradient technique is not only perfect for showing off your patriotic spirit but also versatile enough to be adapted with different colors for other occasions.
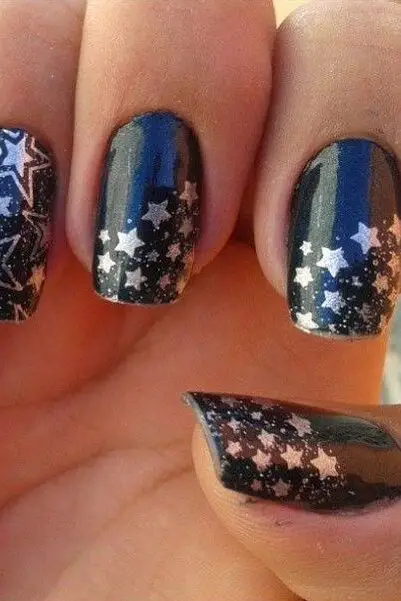
7. Glittering Stars on Blue: Navy blue base, white stars with silver glitter
Imagine the night sky on the Fourth of July, sparkling with stars and the soft glow of fireworks. That’s the inspiration behind the “Glittering Stars on Blue” nail design.
This design features a deep navy blue base that mimics the midnight sky, adorned with twinkling white stars enhanced by touches of silver glitter. Here’s how you can achieve this enchanting look:
Base Layer: Begin with a clear base coat to protect your nails and ensure a smooth application. Once dry, apply a navy blue polish as your base color. This dark backdrop serves as the perfect night sky for your stars.
Star Decals: Choose star decals that vary in size and shape to create a more dynamic and realistic starry effect. Carefully place these decals on your nails, considering the composition to avoid overcrowding.
Silver Highlights: To add a glittering effect, use a small brush to apply silver glitter polish around each star. This step brings a sparkling dimension to your design, making the stars appear as if they are truly shimmering in the night sky.
Seal the Design: After your starry sky has dried, apply a clear top coat. This not only protects your design but also enhances the overall shine, ensuring your nails dazzle just like the Fourth of July fireworks.
This nail design offers versatility—it can be dressed up for a glamorous Independence Day party or toned down for a casual backyard BBQ.
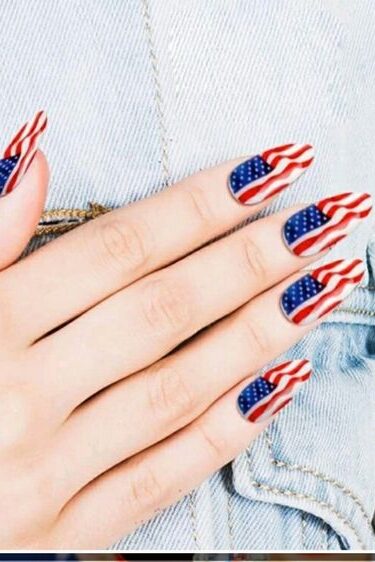
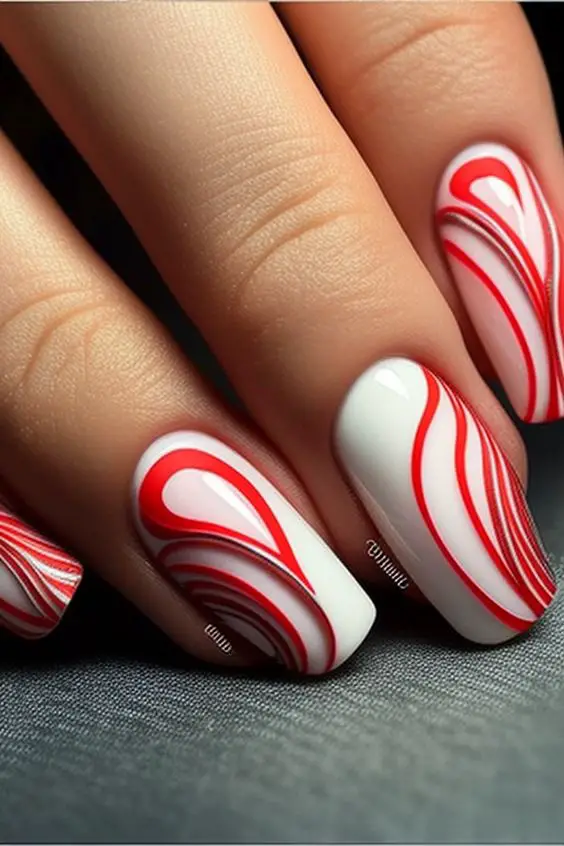
8. American Flag Wavy Lines: Red & White wavy stripes (freehand)
Embrace a playful approach to showing your patriotic spirit with the American Flag Wavy Lines nail design.
This artistic rendition of the flag features freehand red and white wavy stripes, offering a unique twist on traditional American flag motifs. H ere’s a quick guide to achieving this look:
Materials Needed:
- White nail polish
- Red nail polish
- Scotch tape
- Scissors
- Clear top coat polish
Step-by-Step Guide:
Prepare Your Nails: Start by applying two coats of white nail polish on all your nails, allowing them to dry completely to form a solid base.
Create Your Tape Stencils: While your base coat dries, paint a piece of Scotch tape with two coats of red nail polish. Allow this to dry thoroughly before moving to the next step.
Cut and Apply the Tape: Once the red polish on the tape has dried, use scissors to cut thin strips. These strips will be used to create the wavy red lines on your nails. Carefully place them over your white base in a wavy pattern.
Seal the Design: After positioning the tape and ensuring every stripe is perfectly placed, cover all nails with a clear top coat of polish. This not only seals in your design but also gives it a glossy, professional finish.
Tips for Perfection:
For a sharper look, use a stamping kit to add precise star details.
Consider using the tape technique for crisp lines and a neat overall appearance.
This design is not just suitable for the Fourth of July but also works wonderfully for Memorial Day, Veteran’s Day, or any event where you want to display your American pride. The wavy lines add a dynamic touch to the traditional flag design, making your nails a standout accessory at any patriotic gathering.
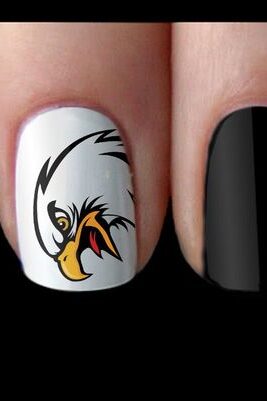
9.Eagle Power: Black bald eagle stencil/freehand (white base)
Unleash your patriotic spirit with the “Eagle Power” nail design, which features a majestic black bald eagle on a pristine white base.
This design is both a nod to American symbolism and a striking fashion statement. Here’s how you can channel the power and freedom symbolized by the eagle into your 4th of July celebration look:
Materials Needed:
- White nail polish
- Black nail polish or a black nail art pen
- Top coat polish
- Optional: Bald eagle stencil or a steady hand for freehand drawing
Creating the Eagle Design:
Base Preparation: Apply a white nail polish as the base on your nails, ensuring a smooth and even coat. Let it dry completely.
Eagle Design: If using a stencil, place it firmly on the nail. Carefully apply black polish over the stencil. For a freehand design, use a nail art pen to draw the eagle. Start with the outline and fill in the details with gentle strokes.
Detailing: Add any additional touches such as the eagle’s eye or feathers to enhance the realism of the design.
Seal the Design: Apply a clear top coat to protect your artwork and add a glossy finish.
Tips for a Perfect Eagle:
Practice the eagle design on paper before attempting it on your nails.
Keep cotton swabs and nail polish remover handy to correct any mistakes quickly.
This nail design not only celebrates the 4th of July but also showcases a bold expression of freedom and strength, making your nails a focal point of your Independence Day ensemble.
10. Firecracker Tips: White base, red circle with yellow flame detail (tips)
Ignite your 4th of July celebration with the “Firecracker Tips” nail design, a vibrant and explosive addition to your festive look.
This design captures the essence of fireworks with its bright colors and dynamic details, perfect for adding a spark to your Independence Day festivities.
Materials and Tools:
- Base Coat: Vitamin Base Coat – Natural Collection
- White Nail Polish: for the base
- Red Glitter Polish: for the red circle
- Yellow Flame Detail: using Glitter Nail Polish – PS… – Pure Gold
- Detailing Tools: Dotting Tool and Pointed Drawing Brush (small)
Design Overview:
Preparation: Ensure your nails are clean and apply a base coat for protection and enhanced polish adherence.
Apply White Base: Once the base coat dries, apply a smooth layer of white nail polish.
Red Circle Creation: At the nail tips, carefully paint a red glitter circle symbolizing the burst of a firecracker.
Add Yellow Flame Details: Using a small drawing brush, add delicate yellow flame strokes emanating from the red circle to mimic the firecracker’s spark.
Final Touches: Seal your design with a clear top coat to ensure longevity and a glossy finish.
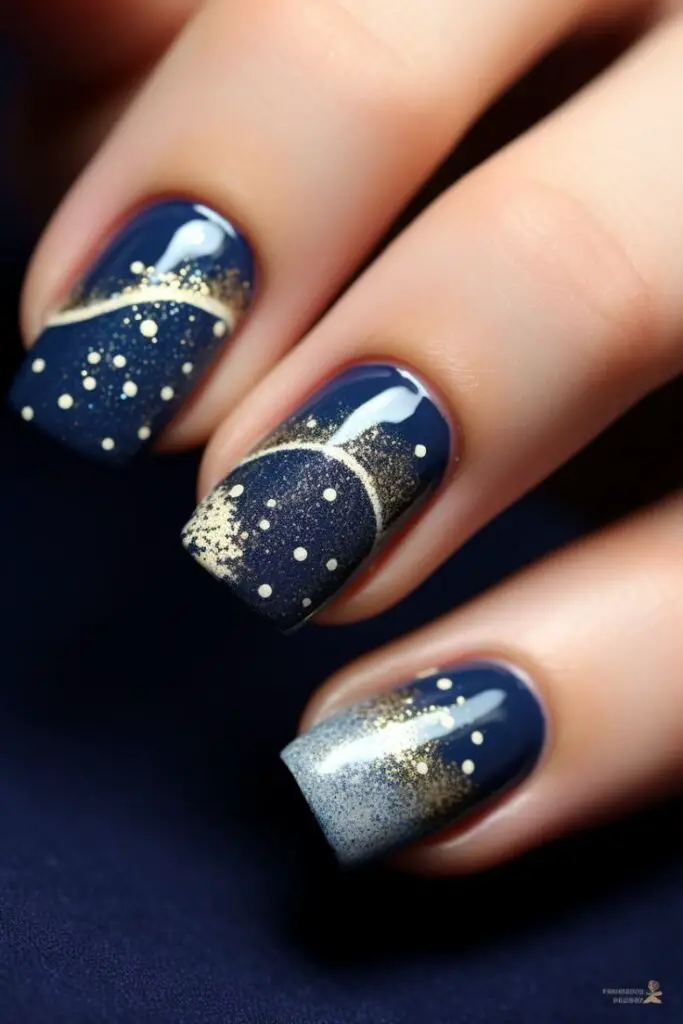
11. Starry Night with Fireworks: Dark blue base, white star dots, red & yellow glitter fireworks
Capture the magic of a starlit sky combined with the vibrant bursts of fireworks in this “Starry Night with Fireworks” nail design.
Starting with a dark blue base, this design incorporates white star dots and red and yellow glitter to mimic the dazzling fireworks display often seen during festive celebrations.
Techniques and Colors:
Base Layer: Apply a dark blue polish to represent the night sky. This deep, rich color sets the perfect stage for the stars and fireworks that follow.
White Star Dots: Using a fine dotting tool, add small white dots to simulate stars. Space them out across the nails to achieve a natural starry look.
Red and Yellow Glitter Fireworks: Add bursts of red and yellow glitter to bring the fireworks to life. You can use a thin brush to create small, explosive patterns that resemble fireworks.
Top Coat: Seal your design with a glossy top coat to enhance the shine and ensure the longevity of your nail art.
Products Used:
- Dark blue nail polish
- White nail polish for dots
- Red and yellow glitter polish
- Fine dotting tool and thin brush
- Glossy top coat
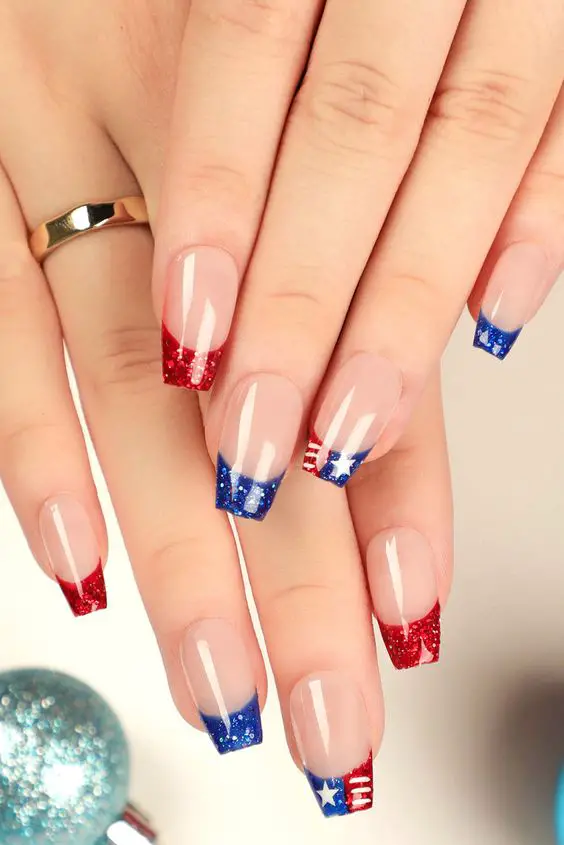
12. Patriotic French Tips: Red & Blue tips (classic French manicure)
Embrace a chic and subtle nod to Independence Day with the Patriotic French Tips nail design.
This style is an elegant twist on the classic French manicure, incorporating the vibrant colors of the American flag. Here’s a quick look at how you can achieve this festive yet sophisticated nail art:
Essential Steps:
Base Coat Application: Start by applying a clear base coat to protect your nails and ensure a smooth surface for further polish application.
Painting the Tips: Carefully paint the tips of your nails with blue nail polish. Remember to leave a slight gap at the very tip for a more defined French tip look.
Adding White and Red: Once the blue polish has dried, use tape or a fine brush to create clean, straight lines. Then apply white polish next to the blue, followed by red polish at the tip of the nail.
Top Coat for Shine: Seal your design with a clear top coat. This not only adds a lustrous shine but also prolongs the durability of your nail art.
Variations to Explore:
Glitter Accents: For a more dazzling effect, consider adding a stroke of glitter over the blue or red polish.
Pattern Play: Experiment with different patterns or symbols like stars within the blue sections for an added patriotic flair.
This design is perfect for those who prefer a more understated yet thematic celebration of the 4th of July.
It pairs beautifully with any festive outfit, making it ideal for both formal and casual Independence Day events.
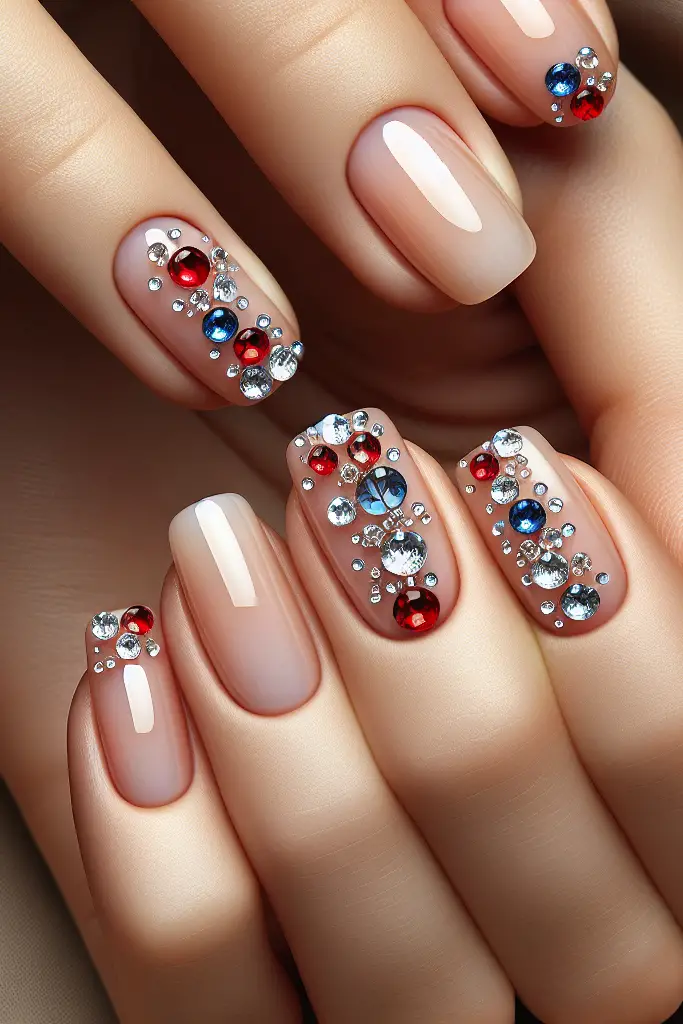
13. Red, White, & Blue Gems: Clear base, single red, white, blue gemstone (each nail)
Adding a touch of elegance and patriotism to your nails for the 4th of July can be both fun and simple with the Red, White, & Blue Gems design.
This method involves adorning your nails with single gemstones in the colors of the American flag, set against a clear polish base. Here’s how you can create this eye-catching look:
Materials Needed:
- Clear nail polish
- Red, white, and blue gemstones
- Nail glue or a clear top coat for adherence
- Tweezers or a wax pencil for precise placement
Step-by-Step Guide:
Prepare Your Nails: Apply a clear base coat to protect your nails and provide a smooth surface for the gemstones.
Placement of Gems: Once the base coat is slightly tacky, use tweezers or a wax pencil to pick up a gemstone. Start with a red gem, followed by white, and then blue, placing one gem on each nail.
Adhere Gems: Apply a small dot of nail glue or a dab of clear top coat on the spot where you want to place the gem. Gently press the gemstone onto the nail, holding it for a few seconds to ensure it adheres well.
Seal the Design: Finish with a clear top coat over the entire nail to seal in the gems and add a glossy finish.
Tips for Durability:
Opt for synthetic crystals or glass gems for better sparkle and durability.
Ensure the gems have a slight curve on their underside to fit the natural curvature of your nails and prevent snagging.
For an extended wear, apply an additional layer of top coat after two days to protect your nail art.
This design is not only perfect for celebrating Independence Day but also adds a glamorous touch to any outfit, making your nails a standout feature of your festive look.
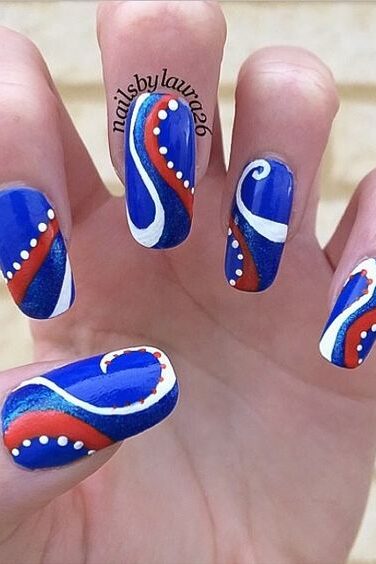
14. Patriotic Paisley: Red, white, blue paisley design
Start by painting your nails with a white nail polish as the base color, allowing it to dry completely. This will ensure that the colors of the paisley design stand out vividly.
Once the base is set, place paisley nail vinyls on the nails where you desire the design. Press down gently to ensure they adhere well and prevent any polish from seeping underneath.
Next, paint over the vinyls with red nail polish, filling in the open spaces of the paisley design. Allow this layer to dry thoroughly before proceeding.
The key is patience—make sure each layer is completely dry to avoid smudging. Once the red polish is set, carefully remove the vinyls, starting from one corner and slowly pulling upwards to reveal the design.
For an added touch of creativity, use a toothpick or a dotting tool to add blue polka dots to the design. This introduces another layer of color contrast and enhances the festive look.
If a mistake is made, don’t worry. Just use a clean-up brush dipped in nail polish remover to make corrections.
Finally, seal your artistic creation with a clear top coat. This not only adds a beautiful shine but also protects your design, ensuring it looks great throughout your 4th of July celebrations.
15. Textured Stripes (Red & White): Red & White textured stripes (striping tool/textured polish)
For a festive and tactile addition to your 4th of July ensemble, consider the Textured Stripes nail design, utilizing red and white hues to bring a vibrant, patriotic flair to your nails.
This design leverages the unique visual appeal of textured polish, combined with a striping tool to create precise, engaging patterns.
Materials Needed:
- Red textured nail polish
- White textured nail polish
- Striping tool or thin brush
Creating Textured Stripes:
Base Preparation: Start with a clear base coat to protect your nails and provide a smooth canvas for the textured polish.
Apply Base Color: Choose either red or white textured polish as your base color and apply it to all nails. Allow it to dry completely.
Stripe Application: Using the striping tool, draw straight or wavy lines with the alternate color (if you started with red, use white next, and vice versa). The textured polish will add a unique feel and look to the stripes.
Detailing: For a more intricate design, consider varying the thickness of the stripes or adding additional mini stripes within the larger bands.
Top Coat: Seal your design with a matte top coat to enhance the texture effect and ensure the longevity of your nail art.
Tips for Best Results:
Ensure each layer is completely dry before applying the next to avoid smudging.
Use a steady hand or tape for cleaner lines if you find freehand striping challenging.
This nail design not only celebrates the spirit of Independence Day but also adds a sophisticated, textured touch to your look, making your nails a focal point of your celebration.
16. American Flag Nail Art Stamp: American flag design stamp (nail art stamping kit)
For those looking to express their patriotism in a chic and effortless way, the American Flag Nail Art Stamp offers a fantastic solution.
This nail art technique involves using a specially designed stamping plate that features the American flag, allowing you to transfer the design directly onto your nails with precision and ease.
Key Features of the American Flag Nail Art Stamp:
Material and Size: The stamping plate is crafted from durable stainless steel, measuring 2.5″ x 4.75″. It’s designed to withstand frequent use, ensuring that you can celebrate many Independence Days with stunning nails.
Design Details: The plate includes various American flag elements, neatly etched to capture all features crisply when stamped. Before use, remember to remove the protective film covering the plate to unveil the clean design surface.
Usage Tips: For optimal results, it is recommended to use stamping polish, which is specifically formulated to deliver a thick, opaque color payoff that regular polishes can’t achieve. This ensures that every star and stripe is vivid and clear.
Care and Maintenance: The plate is brand new and arrives carefully packaged to prevent any scratches or damage during transit. To maintain its quality, store it in a cool, dry place away from direct sunlight.
Practical Information:
Price and Shipping: The stamping plate is available for purchase at a reasonable price, with additional shipping costs depending on your location. The estimated delivery time frames ensure that you can receive and use the stamp just in time for your 4th of July celebrations.
Purchase Protection: Thanks to Etsy’s purchase protection, you can shop with confidence knowing that you are covered in the event of any issues with your order.
Final Thoughts
Having explored an array of stunning 4th of July nail designs, each offering a unique expression of patriotism and creativity, we are reminded of the beauty in celebrating such significant occasions through personal style.
The diversity of techniques and inspirations – whether it’s the elegance of Star-Spangled Stripes or the playful charm of Confetti Nails – ensures that everyone can find a design that resonates with their spirit of Independence Day.
These nail art ideas stand as a testament to the creativity that the 4th of July inspires, encouraging us to express our patriotism in ways that are both meaningful and stylish.
By sidelining specific brands and price discussions, this article has focused on enriching your festive preparations with elaborate descriptions, fostering a more engaging and inclusive experience.
As we conclude, it’s clear that these nail designs do more than just adorn; they narrate stories of freedom, pride, and celebration, making this 4th of July not only a visual spectacle but an embodiment of American spirit at your fingertips.


Leave a Reply
You must be logged in to post a comment.