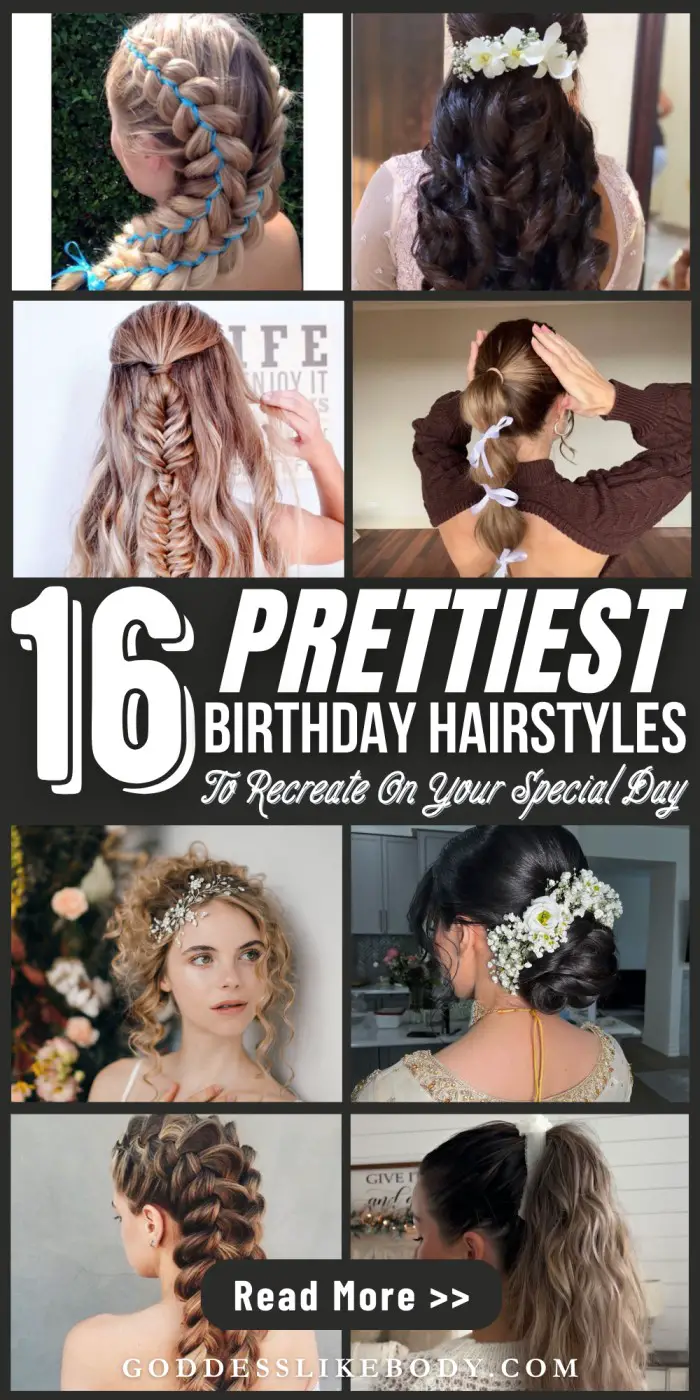
Hey there trendy students! School’s starting soon, and you’re getting ready to strut down those hallways with new notebooks and a fresh look.
If you’ve got long hair or medium-length locks, we’ve put together 16 cool Back to School Hairstyle Ideas that’ll make you stand out on day one.
We’ve included quick styles you can do in a snap as well as fancier options that take a bit more time. You’ll find something you like, no matter what you’re into.
Busy? Save this pin for later.
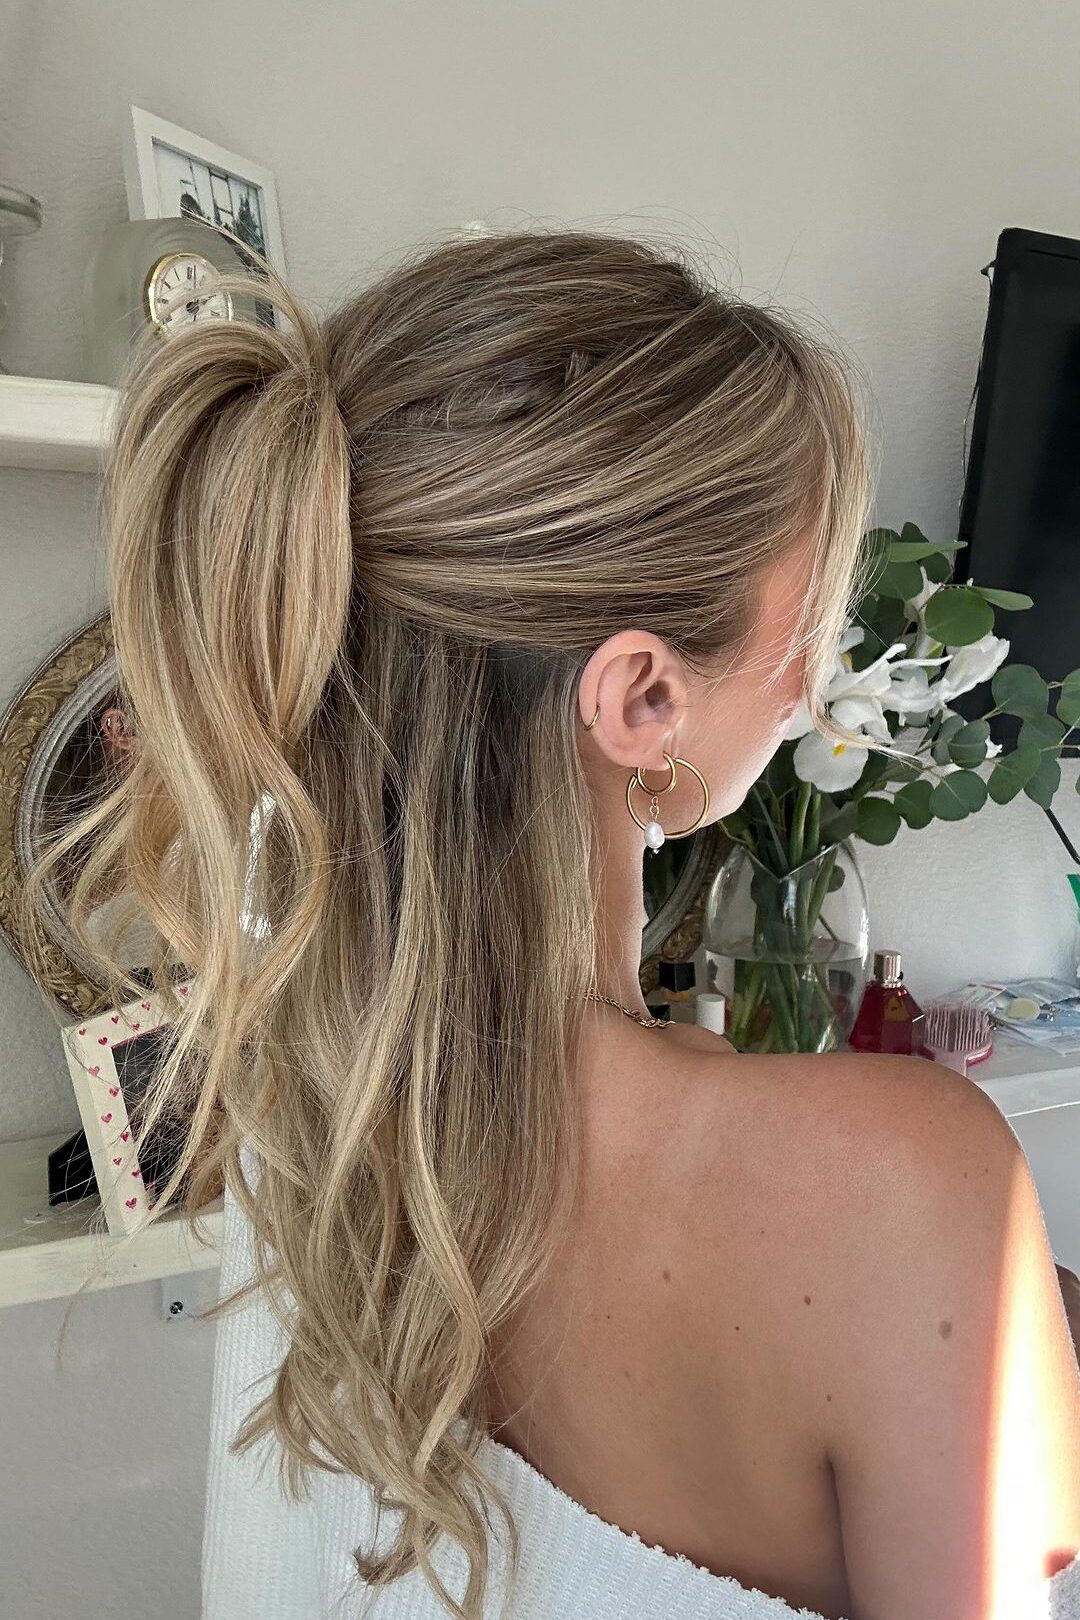
1. High Ponytail
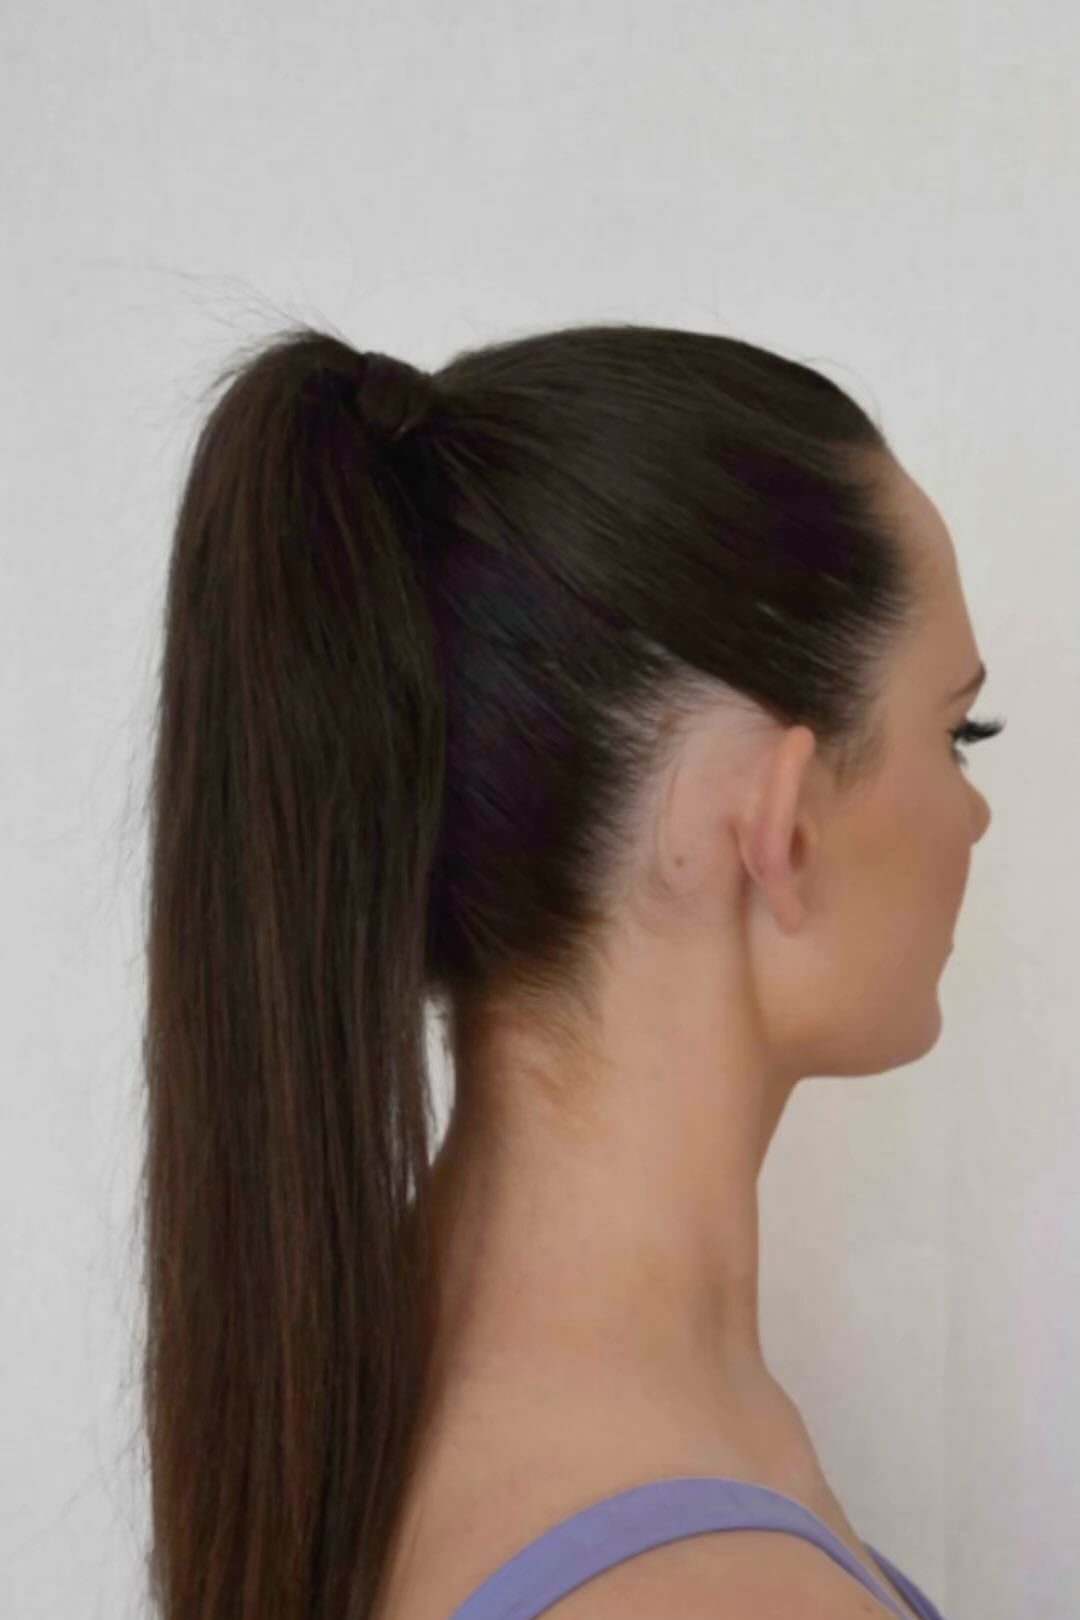
Ready to rock a classic look with a twist? The high ponytail is your go-to hairstyle for a quick and stylish ‘do that’ll have you out the door in no time. Here’s how to nail this look:
Gather and secure: Toss all your hair back and gather it into a tight ponytail. Secure it just above ear height or higher with a hair tie. For extra hold, use two hair ties if you’ve got thick locks.
Smooth it out: Use the sharp end of your brush to even out any bumps. This’ll give you that sleek, polished look.
Add some flair: Want to kick it up a notch? Try wrapping a thin strand of hair around the hair tie and secure it with a bobby pin. It’s a small touch that adds a big dose of elegance.
Frame your face: Leave out a couple of shorter strands in front to frame your face. This gives your high pony a more relaxed, effortless vibe.
Volumize: For extra oomph, try the “topsy tail” trick. Make a hole above your hair tie, then flip your ponytail through it. It’s an easy way to add instant volume!
2. Messy Bun
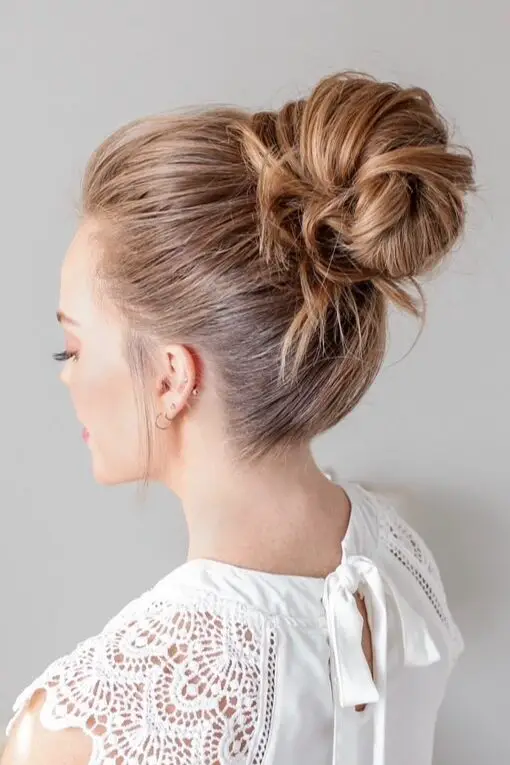
Ready to rock that effortlessly chic look? The messy bun is your new best friend! Here’s how to nail this super cute style in just a few minutes:
Start with a high ponytail: Gather your hair at the top of your head, in line with your cheekbones for a flattering look.
Create your bun: Twist your ponytail and wrap it around the base. Don’t worry about making it perfect – messy is the goal!
Secure it: Use a second hair tie to hold your bun in place. Pro tip: Pull your hair through the tie, then flip it and pull through again for that perfect messy look.
Loosen it up: Gently tug at the bun to make it bigger and softer. Pull out a few strands around your face for that effortless vibe.
Pin it down: Use bobby pins to secure any loose ends and shape your bun just how you like it.
3. Double Braids
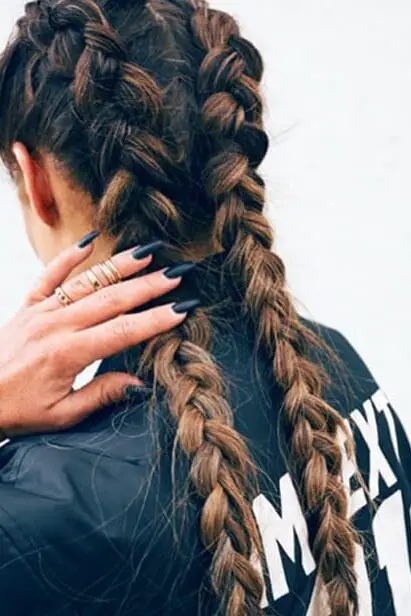
Ready to rock a classic look with a twist? Double braids are your go-to style for a cute and practical ‘do that’ll keep your hair in check all day long. Here’s how to nail this look:
Part your hair: Start by creating a smooth middle part with a comb. Take your time to make sure it’s straight and even.
Section it off: Divide your hair into two equal parts, one on each side of your head.
Start braiding: Begin each braid as close to your hairline as possible. Don’t worry about grabbing all your hair at once – you’ll add more as you go.
Dutch it up: For a trendy look, try Dutch braids. They’re like French braids but reversed – you cross the outside pieces under the middle one instead of over.
Keep it tight: As you braid, make sure to pull the sections tightly. This helps your style stay put all day.
Tie it off: Once you reach the nape of your neck, secure each braid with a hair tie.
4. Half-Up Half-Down
Want a style that’s both practical and pretty? The half-up half-down look is your new bestie! It’s perfect for those days when you can’t decide between wearing your hair up or down. Here’s how to rock this versatile ‘do:
Part and section: Start by parting your hair down the middle. Grab the top section of your hair, just above your ears.
Smooth it out: Use a comb to smooth the top section back. This gives you a clean, polished look.
Secure it: Tie the top section with a clear elastic. Don’t pull it too tight – you want it to look effortless!
Add some volume: Gently tug at the tied section to loosen it up a bit. This gives you that cool, relaxed vibe.
Style the rest: Leave the bottom half of your hair loose. You can keep it straight, add some waves, or even curl it for extra glam.
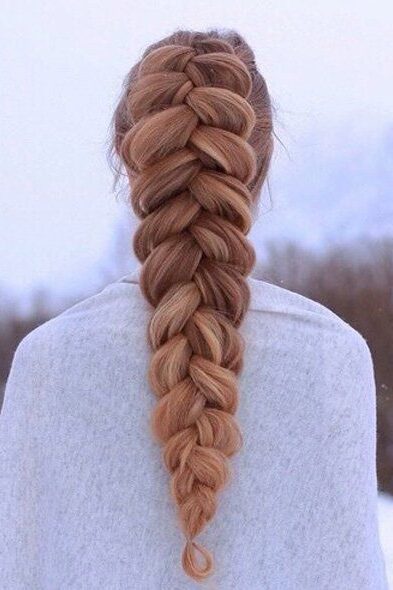
5. French Braid
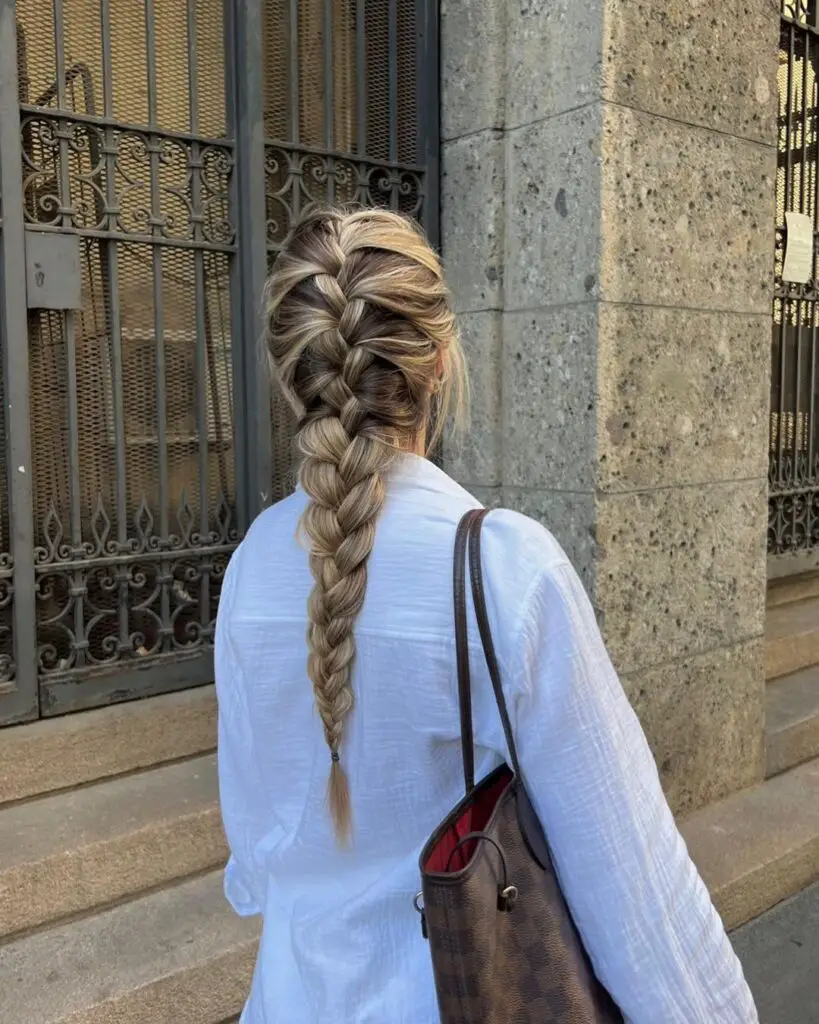
Ready to rock a classic look that’s both elegant and practical? The French braid is your go-to style! Here’s how to nail this timeless ‘do:
Start with a triangle: Grab a small section of hair at the front of your head, forming a triangle shape. Split this into three equal parts.
Begin the braid: Cross the right strand over the middle, then the left over the new middle. Do this a couple of times to get your braid started.
Add some hair: As you braid, pick up small sections of hair from each side and add them to your outside strands before crossing over. This is what makes it a French braid!
Keep it tight: Make sure to pull the strands snugly as you go. This helps your braid stay put all day.
Braid all the way down: Once you’ve incorporated all your hair, finish with a regular three-strand braid to the ends.
Secure and style: Tie off your braid with an elastic. For a more relaxed look, gently tug at the edges of your braid to loosen it up a bit.
6. Fishtail Braid

Ready to rock a super cool and intricate look? The fishtail braid is your new bestie! Don’t worry if it looks tricky – we’ve got you covered with these easy steps:
Split your hair: Divide your locks into two equal sections.
Start the magic: Take a thin strand from the outer edge of the left section. Cross it over and add it to the right section.
Keep it going: Now, grab a thin strand from the outer edge of the right section. Cross it over to the left section.
Repeat and groove: Keep alternating sides, always taking thin strands from the outer edges.
Tighten up: As you braid, keep it snug but not too tight. You want it to last all day!
Finish strong: When you reach the end, secure your braid with a cute hair tie.
Pro tip: For a messier, lived-in look, gently tug at the edges of your braid to loosen it up. It’ll give you that cool, effortless vibe.
7. Space Buns
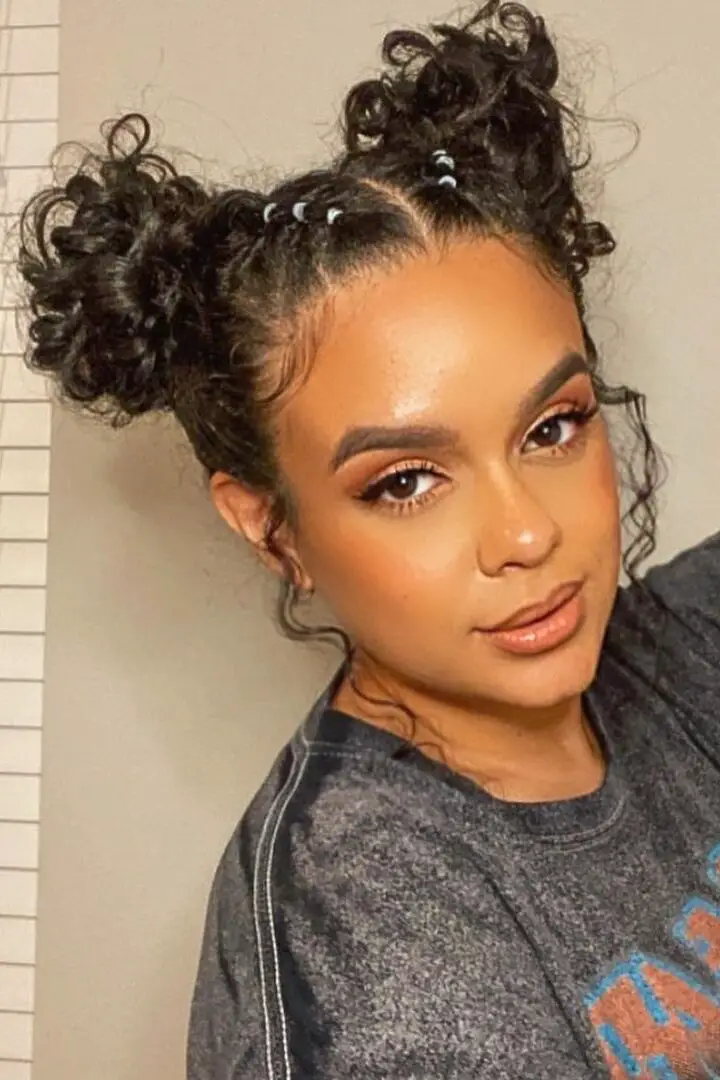
Ready to rock a totally ’90s vibe? Space buns are your go-to style! These cute double buns are super trendy and perfect for adding a fun twist to your back-to-school look. Here’s how to nail this awesome ‘do:
Part it up: Start by splitting your hair right down the middle. Make sure it’s even – you want your buns to be twins!
Ponytail power: Gather each side into a high ponytail. Position them where you want your buns to sit – usually right above your ears.
Twist and wrap: Now for the fun part! Twist each ponytail and wrap it around the base to form a bun. Secure with bobby pins or a hair tie.
Mess it up: Don’t stress about making them perfect. Gently tug at the buns to loosen them up for that cool, effortless vibe.
Frame your face: Pull out a few strands around your face for a softer look.
Pro tip: For extra hold, spray some dry shampoo or texturizing spray at your roots before styling. It’ll give your buns some serious staying power!
8. Sleek Low Bun

Ready to rock a super chic and polished look? The sleek low bun is your go-to style for those days when you want to look put-together in a flash. Here’s how to nail this classic ‘do:
Prep your hair: Start by brushing your hair thoroughly. For extra smoothness, apply some hair oil or smoothing cream.
Create your base: Part your hair down the middle (or to the side if you prefer). Use a boar bristle brush to smooth everything out. This is key for that sleek look!
Secure the ponytail: Gather your hair into a low ponytail, making sure it’s just below eye level. This is the perfect spot for your bun. Tie it with a clear elastic for a seamless look.
Make your bun: Twist your ponytail and wrap it around the base. Secure with bobby pins as you go. Don’t worry about perfection – you can adjust it later!
Polish it up: Use your boar bristle brush or a fine-toothed comb to smooth out any bumps or flyaways. A little hairspray can help tame those stubborn baby hairs.
Pro tip: For extra hold and shine, apply some mousse before you start styling. It’ll keep your bun looking fresh all day long!
9. Side Swept Curls

Ready to rock a glamorous look that’s perfect for prom or any special event? Side swept curls are your go-to style! This hairstyle works wonders for thick hair, but don’t worry if you’ve got thinner locks – we’ve got you covered too.
Start by grabbing your curling wand. If you’ve got a multi-barrel tool like the Nume Titan 3, even better! It’ll give you different curl sizes for added texture. Here’s how to nail this look:
Section it up: Split your hair into top and bottom halves.
Curl the bottom: Use a 19mm barrel for the lower section. Curl 1-1.5 inch pieces, alternating directions for fullness.
Tease and curl: For the top section, tease each piece before curling. This is your secret weapon for volume!
Frame your face: Curl the front pieces away from your face for that classic side-swept look.
Pin it up: Once curls are set, start pinning the bottom pieces to the side. Go lower at the back, higher in front for a cascading effect.
10. Bubble Ponytail
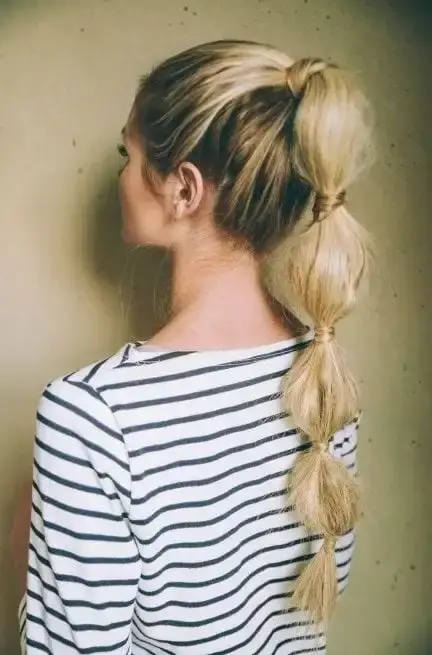
Ready to rock a super fun and playful hairstyle? The bubble ponytail is your new bestie! This trendy ‘do is perfect for school days and will have you turning heads in the hallways. Here’s how to nail this look:
Start with a high pony: Gather your hair into a high ponytail on top of your head. Use gel or hairspray to smooth down any flyaways.
Secure it: Use a clear elastic (or one that matches your hair color) to tie off your ponytail.
Create your bubbles: About an inch or two down from your first elastic, add another one. Gently tug at the sides of this section to create a rounded, bubble-like shape.
Keep it going: Repeat this process down the length of your ponytail, spacing the elastics evenly.
Perfect your bubbles: Make sure each bubble is about the same size. You can use the end of a comb to carefully fluff them out.
Lock it in: Finish off with a light mist of hairspray to keep everything in place.
Pro tip: For a fun twist, try adding a braid to your bubble ponytail. Just braid a small section before you start creating your bubbles!
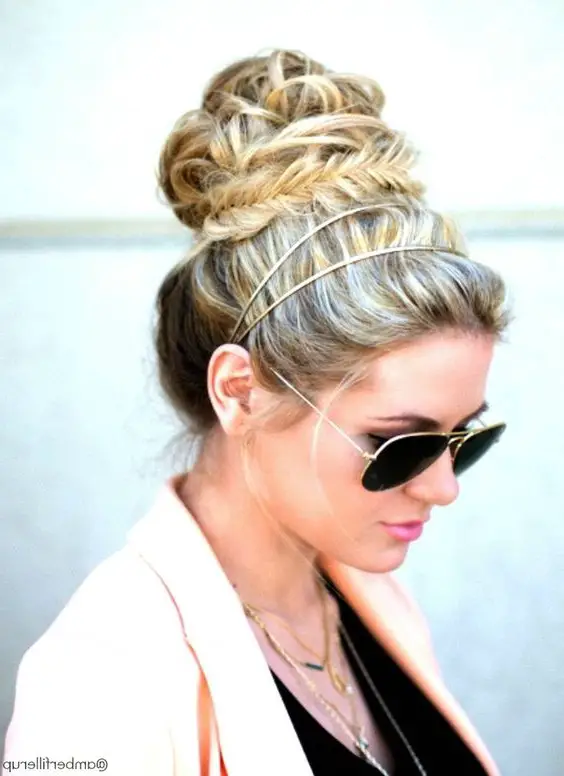
11. Top Knot

Ready to rock a super chic and easy hairstyle? The top knot is your new bestie! This versatile look can be sleek and sophisticated or messy and casual, perfect for those days when you want to look put-together in a flash.
Here’s how to nail this awesome ‘do:
Start with a high ponytail: Brush your hair up to the crown of your head. Don’t stress about perfection – a little messiness adds character!
Secure it: Use a hair tie to wrap around your ponytail. If you’ve got thick hair, you might need to double up.
Fan it out: Spread your ponytail around your hand, making it look like an octopus (fun, right?).
Create the bun: Wrap the hair tie around the base of your spread-out ponytail. Give it a couple of twists to start shaping your bun.
Wrap it up: Take the tail end of your ponytail and wrap it around the base. Secure with another hair tie or some bobby pins.
Mess it up: Gently tug at the bun to loosen it up and create that effortless vibe. Pull out a few strands around your face for a softer look.
Pro tip: For extra volume, try backcombing your ponytail before you wrap it into a bun. It’ll give you that perfect messy-chic look!
12. Twisted Crown
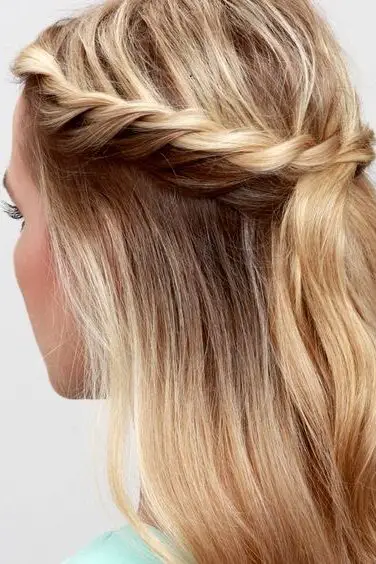
Ready to rock a super cute and easy hairstyle? The twisted crown is your new bestie! This awesome ‘do is perfect for those days when you want to look put-together in a flash. Here’s how to nail this look:
Grab your bobby pins: You’ll need about 8, but 4 will do in a pinch.
Part it right: Create a deep side part at the arch of your brow for that extra wow factor.
Section it up: Take two 1-inch sections of hair, one above the other, starting halfway at your part.
Twist and add: Pull the bottom section up and over the top one, then add more hair to the bottom section. Keep it tangle-free!
Keep twisting: Continue this pattern halfway down your head, stopping at your ear.
Pancake time: Use your fingers to gently pull on the twists, making them appear larger and fuller.
Pin it up: Create a circular shape with your twists, pinning them into place with an X of bobby pins.
Frame your face: Leave some front pieces out for a softer look.
Add some volume: Gently pull on small pieces at your crown for extra oomph.
13. Half-Up Top Knot

Ready to rock a super cute and easy hairstyle? The half-up top knot is your new bestie! This awesome ‘do is perfect for those days when you want to look put-together in a flash. Here’s how to nail this look:
Start with texture: Begin with beachy waves or your natural texture. This adds volume and makes the style more interesting.
Section it off: Grab the front section of your hair, starting from the sides of your forehead. Don’t go too far back – you want the knot to sit on top of your head, not at the crown.
Tie it up: Use a hair tie to secure the section into a half ponytail. Pull it through once, then on the second pass, only pull it halfway through to create a loop.
Mess it up: Gently tug at the bun to loosen it up and create that effortless vibe. Pull out a few strands around your face for a softer look.
Pin it down: If you’ve got any crazy pieces sticking out, use a couple of bobby pins to keep them in place.
14. Dutch Braid
Ready to rock a super cool and intricate look? The Dutch braid is your new bestie! Don’t worry if it looks tricky – we’ve got you covered with these easy steps:
Start with a triangle: Grab a small section of hair at the front of your head and split it into 3 equal parts.
Begin the magic: Take the right strand and cross it under the middle. Then, cross the left strand under the new middle.
Add some hair: As you braid, pick up small sections from each side and add them to your outside strands before crossing under. This is what makes it a Dutch braid!
Keep it tight: Make sure to pull the strands snugly as you go. This helps your braid stay put all day.
Braid all the way down: Once you’ve incorporated all your hair, finish with a regular three-strand braid to the ends.
Secure and style: Tie off your braid with an elastic. For a more relaxed look, gently tug at the edges of your braid to loosen it up a bit.
Pro tip: For extra hold and shine, apply some mousse before you start styling. It’ll keep your braid looking fresh all day long!
15. High Bun with Headband
Ready to rock a super cute and easy hairstyle? The high bun with headband is your new bestie! This awesome ‘do is perfect for those days when you want to look put-together in a flash. Here’s how to nail this look:
Start with a stretchy headband: Grab your comfiest, stretchiest headband. It’s a must-have for this style!
Prep your hair: Brush your hair up into a high ponytail. Don’t stress about perfection – a little messiness adds character!
Create the bun: Twist your ponytail and wrap it around the base. Secure with bobby pins or a hair tie.
Add the headband: Slide your stretchy headband over your head, positioning it just behind your ears.
Tuck and adjust: Gently tuck any loose strands into the headband. If it feels a bit loose, have a friend hold it in place while you style.
Final touches: Pull out a few face-framing pieces for a softer look. You can even add a micro-braid for extra flair!
16. Loose Beach Waves
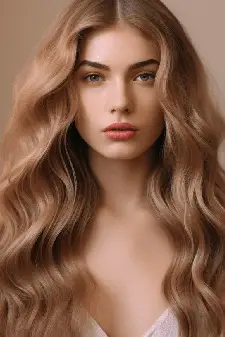
Start by applying a heat protectant spray to your hair. This will help protect your hair from damage during the styling process.
Next, use a curling iron to create loose waves throughout your hair. Be sure to curl your hair in alternating directions to create a natural look.
Once you have curled all of your hair, use your fingers to gently loosen the waves and create a more relaxed look.
Finally, apply a light hairspray to help hold your waves in place. To wrap up, these back-to-school hairstyles offer a variety of options for girls to express their style and feel confident as they head into the new academic year.
Final Thoughts
You’ve got a whole arsenal of awesome hairstyles to rock this school year! From the classic high ponytail to the trendy space buns, there’s something for every mood and occasion.
Don’t stress if you don’t nail these styles on the first try. Practice makes perfect, and half the fun is in experimenting!
Maybe you’ll even come up with your own twist on these looks. The key is to have fun with your hair and let your personality shine through.
Leave a Reply
You must be logged in to post a comment.