Life’s a whirlwind! Between work deadlines and social plans, busy women need long hairstyles that work just as hard as we do.
We want something effortless that can take us from boardroom meetings to dinner dates without a hitch. Luckily, there are tons of quick and easy options out there that are both stylish and versatile.
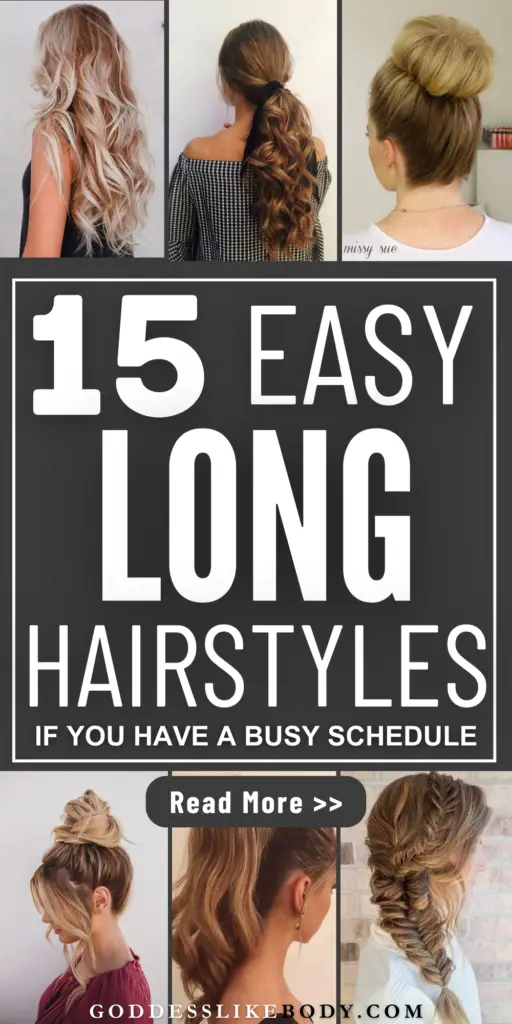
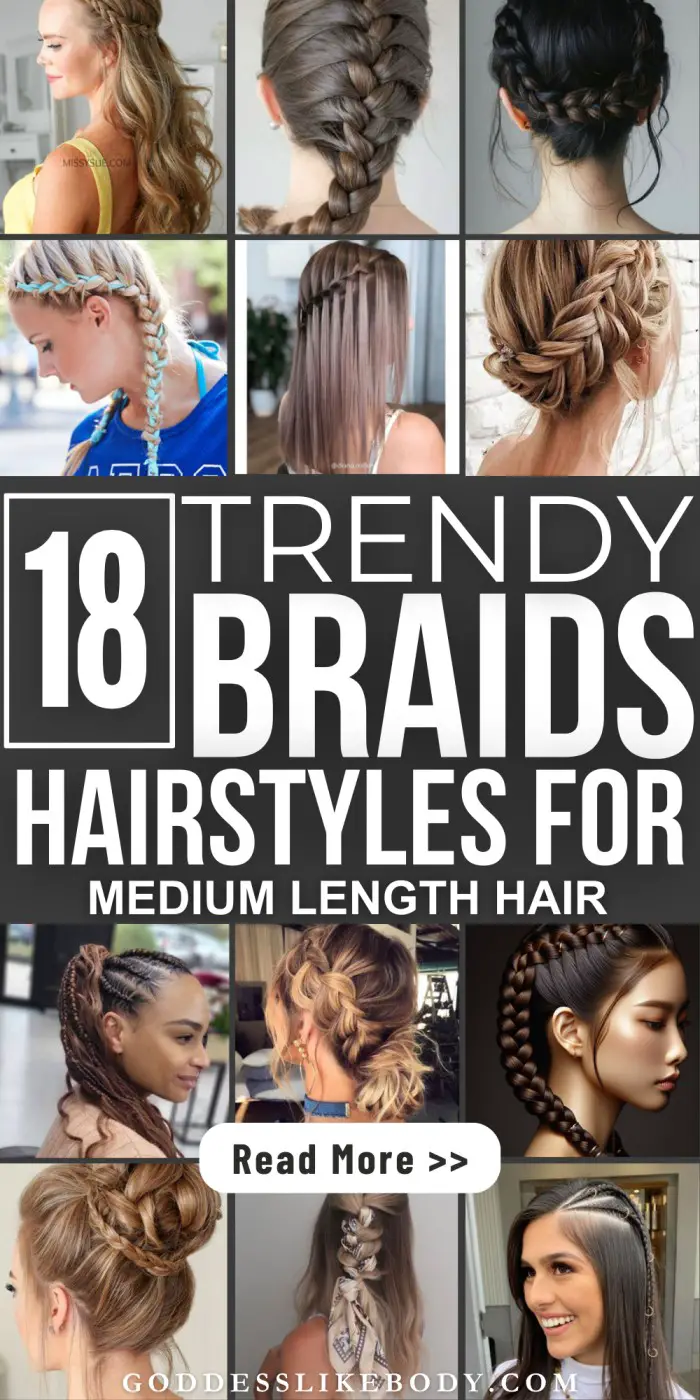
This post is your go-to guide for quick yet chic hair transformations. It walks you through 15 effortlessly stylish hairstyles, from the elegance of a braided crown to the casual allure of a side ponytail.
Dive into these styles to match your busy lifestyle without compromising on elegance or creativity.
Busy? Save this pin for later.
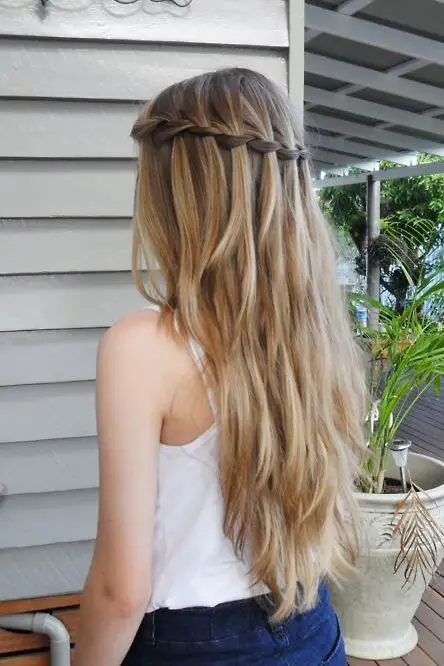
1. Waterfall Braid
Step-by-Step Guide to Creating a Waterfall Braid
Creating a waterfall braid starts by selecting a small section of hair from the front, between your eyebrow and the middle part of your head.
Here’s a straightforward guide to achieve this elegant hairstyle:
Divide the Hair: Take the small section and split it into three equal parts: top, middle, and bottom strands.
Begin Braiding: Cross the top strand over the middle one, then cross the bottom strand over the middle one.
Incorporate New Hair: Hold the strands in your right hand, using your thumb, index, and middle finger for positioning. With your left hand, pick up a new small section of hair and add this new hair to the top strand.
Continue the Pattern: Let go of the bottom strand temporarily and pick up a new piece of hair next to where the bottom strand was, making this the new bottom strand.
Repeat: Continue this process—adding new hair to the top strand, crossing it over the middle, and updating the bottom strand with new hair.
Secure the Braid: Once you reach the desired length, you can either tie it off at the top with an elastic or continue the braid into a basic three-strand braid before tying it off at the end.
For a half-up, half-down style, stop the braid at the back of your head, create another waterfall braid on the other side, and tie them together in the middle.
To manage the strands better, especially if you are braiding your own hair, you can temporarily place the bottom strand in your mouth to keep it out of the way.
Secure the final look with a bobby pin or an elastic, depending on your preference.
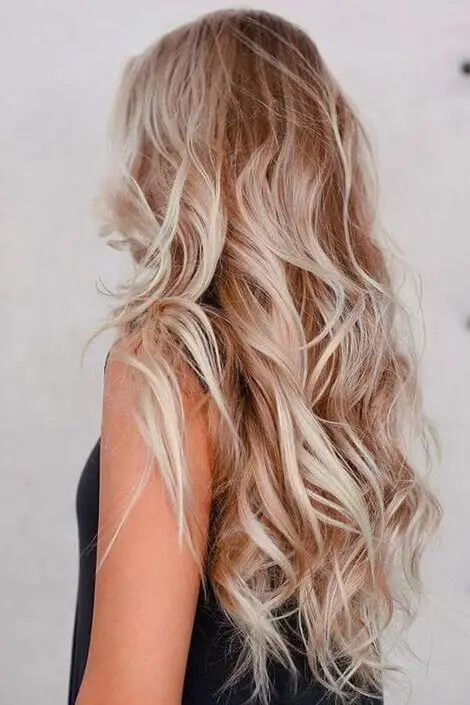
2. Loose Waves
Step-by-Step Guide to Creating Loose Waves
Creating loose waves is a versatile hairstyle that complements any occasion, from casual outings to formal events.
Here’s a straightforward guide to achieve this chic and effortless look:
Prepare Your Hair: Start by applying a heat protectant spray to your hair to prevent damage from heat styling.
Section Your Hair: Divide your hair into manageable sections. Smaller sections at the top and front can add more volume.
Curling: Use a 1.25-inch curling iron with a clip or a curling wand. Curl small sections of hair away from your face, holding the iron horizontally for the front sections to create a more undone wave.
Adjust the Curl: After curling each section, let the curls cool completely. This helps maintain the style throughout the day.
Loosen the Waves: Once the curls have cooled, gently run your fingers through your hair or use a wide-tooth comb to break up the curls and create loose waves.
Finish with Styling Products: Apply a dry texturizing spray to enhance the texture and volume. For added shine and to tame any frizz, lightly spray your hair with a shine spray.
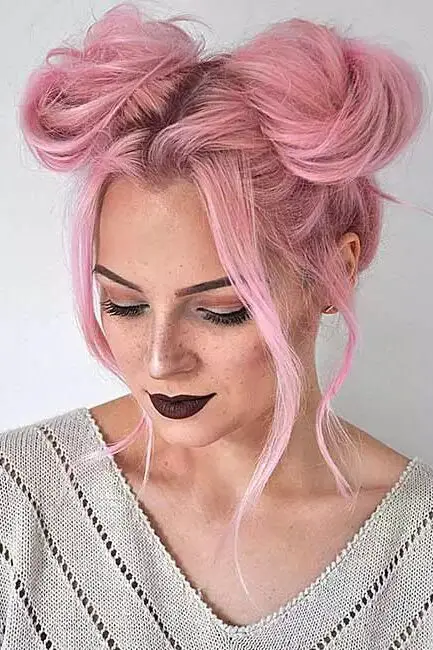
3. Space Buns
Step-by-Step Guide to Creating Space Buns
Space buns are a playful and trendy hairstyle that can be styled for both casual and formal occasions.
They are particularly favored for their ease of creation and the fun twist they add to your look.
Here’s how you can achieve this hairstyle:
Section Your Hair: Begin by parting your hair down the middle into two equal sections.
Create Ponytails: Tie each section into a high ponytail on either side of your head, just above your ears. Ensure they are symmetrical for a balanced look.
Twist and Wrap: Take one ponytail and twist it gently. Wrap the twisted hair around the base of the ponytail to form a bun. Secure it with bobby pins or a hair tie. Repeat the same with the other ponytail.
Adjust and Secure: Once your buns are in place, pull gently at the edges to make them fuller and more rounded. Use additional bobby pins to secure any loose ends or flyaways.
Add Flair: For an extra touch of flair, you can weave in some colorful ribbons or apply glitter spray for a sparkly effect, making it perfect for festivals or parties.
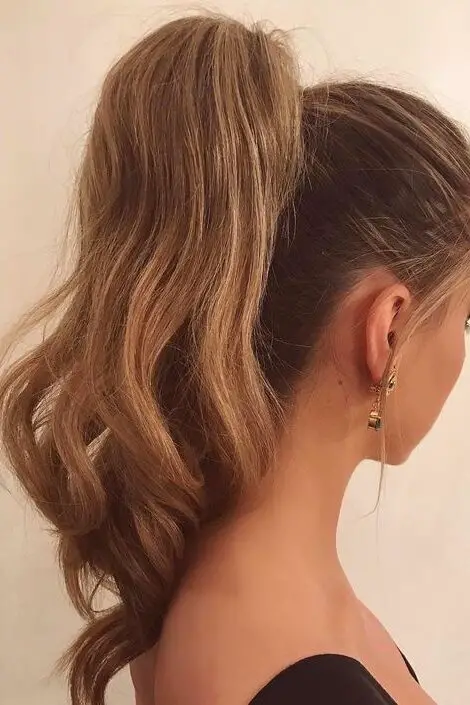
4. High Ponytail
Step-by-Step Guide to Creating a High Ponytail
A high ponytail is not only a classic hairstyle but also one of the easiest and most versatile options for busy women with long hair.
Here’s a simple guide to achieve a sleek and stylish high ponytail:
Brush Your Hair: Start by brushing your hair to remove any knots and tangles, ensuring it is smooth and manageable.
Add Volume: If you desire a voluminous ponytail, lightly tease the hair at the crown of your head with a fine-tooth comb.
Gather Your Hair: Using your hands, gather all your hair and pull it back. The key to a perfect high ponytail is to position it just right; aim for the crown of your head or slightly higher.
Secure the Ponytail: Use a sturdy hair tie to secure your ponytail. For added sleekness, you can wrap a small section of hair around the base of the ponytail to cover the hair tie, securing it with a bobby pin.
Smooth and Set: Apply a light hairspray or smoothing product to tame any flyaways and give your ponytail a polished look.
This hairstyle is ideal for a variety of occasions, from formal events to casual outings, making it a go-to choice for women who need a quick yet elegant hair solution.
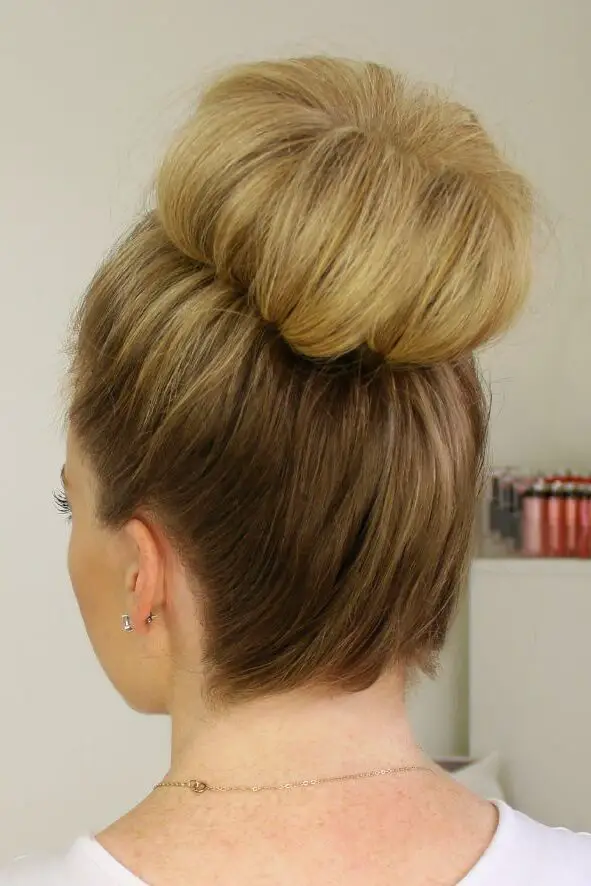
5. Sock Bun
Step-by-Step Guide to Creating a Sock Bun
Creating a sock bun is a stylish and practical choice for busy women. It’s quick, easy, and perfect for those days when you want to look polished without spending too much time on your hair.
Here’s how to master this hairstyle:
Prepare the Sock: Start by taking a sock and cutting off the toe part. Roll the sock down from the toes towards the top to create a donut shape. Fold the rolled sock over to create a smaller, tighter donut.
Make a Ponytail: Secure your hair into a ponytail at your desired height. If you have thick or layered hair, consider separating it into sections to make the next steps easier.
Create the Bun: Slide the sock donut over your ponytail, and spread your hair around it to cover it completely. Begin to roll the sock down towards the base of the ponytail, tucking your hair under as you go. Ensure the sock is completely covered.
Secure the Bun: Once the sock is rolled down to the base, use bobby pins to secure the bun in place. Insert the pins at an angle to catch both the bun and your hair for a firm hold.
Finishing Touches: Adjust the bun by spreading it out for even coverage and a fuller appearance. If any part feels loose, add more bobby pins to secure.
This hairstyle is ideal for second-day hair or when you want to avoid heat styling. It typically takes about five minutes to complete, making it a fantastic option for a quick morning routine.
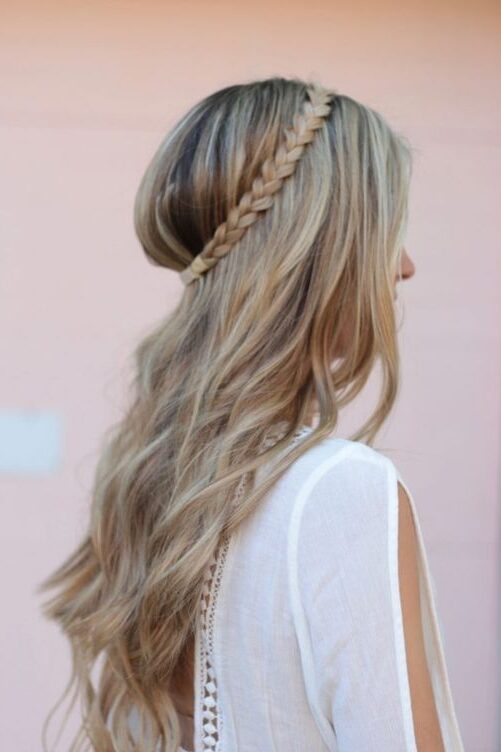
6. Headband Braid
Step-by-Step Guide to Creating a Headband Braid
The headband braid is a versatile and stylish option for busy women looking to elevate their hairstyle with minimal effort.
Here’s a simple guide to mastering the headband braid, suitable for all hair types:
Parting the Hair: Begin by parting your hair just above the ear. Take a small chunk of hair from behind the ear to start the braid.
Braiding: Braid this section up towards the top of your head. Secure the end of the braid with a small elastic to keep it from unraveling.
Securing the Braid: Pull the braid over to the opposite side of your head, tucking it behind your ear. Use bobby pins to secure the braid in place discreetly.
Repeating on the Other Side: Repeat the same process on the other side to ensure symmetry and balance in your hairstyle.
Styling Tips: For added volume, gently tease your hair at the crown before starting. Consider straightening or curling the rest of your hair to complement the braided headband.
Combining with Other Styles: This braid works beautifully with a loose bun or ponytail, making it a practical choice for both formal and casual settings.
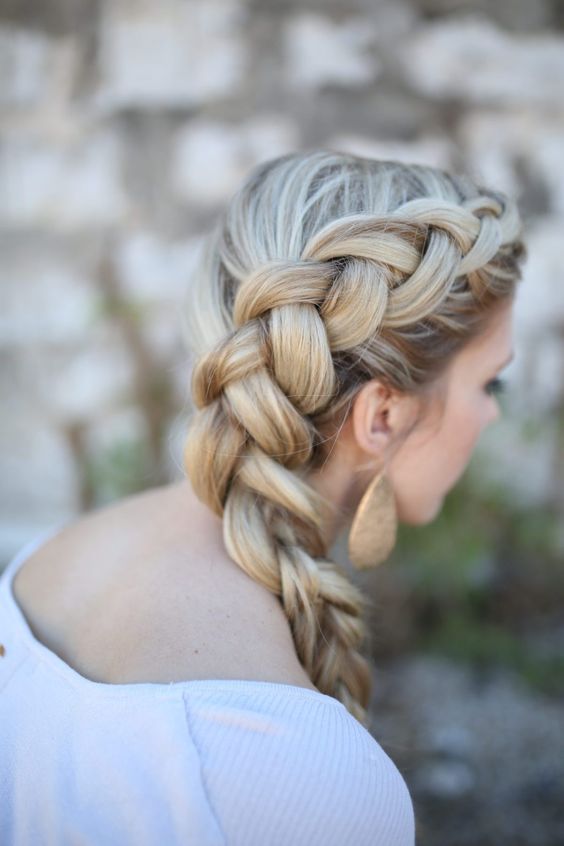
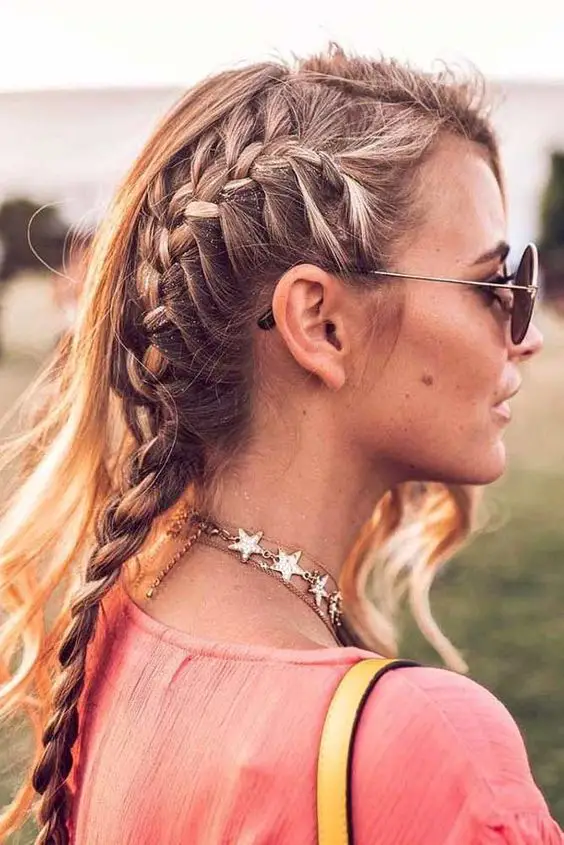
7. Dutch Braid
Step-by-Step Guide to Creating a Dutch Braid
The Dutch braid, often referred to as the inside-out braid, is a robust style perfect for combating the summer heat and humidity.
Here’s a straightforward guide to creating this durable and stylish braid:
Prepare Your Hair: Start with your hair either dry or slightly damp. Brush it back smoothly to remove any tangles. If your hair is freshly washed and too slippery, applying a texturizing mousse or dry shampoo can provide better grip and texture.
Sectioning the Hair: At your hairline, gather a good-sized section and divide it into three equal strands.
Start the Braid: Begin with a standard braid. For the Dutch effect, add a thin section of hair to the right strand before crossing it under the middle strand. Repeat this on the left side, continually adding small sections to each side strand before crossing under the middle.
Continue Braiding: Keep up this pattern until you reach the nape of your neck. From here, you can continue with a regular three-strand braid.
Securing the Braid: Tie off the braid with a hair tie. For a more relaxed and fuller appearance, gently tug at the outer strands of the braid to loosen it slightly.
Finishing Touches: If you desire a thicker braid, apply a plumping powder and carefully pull out sections to enhance the braid’s volume.
For those with shorter hair, consider a double Dutch braid to manage layers effectively. Adding clip-in extensions can also offer a fuller look.
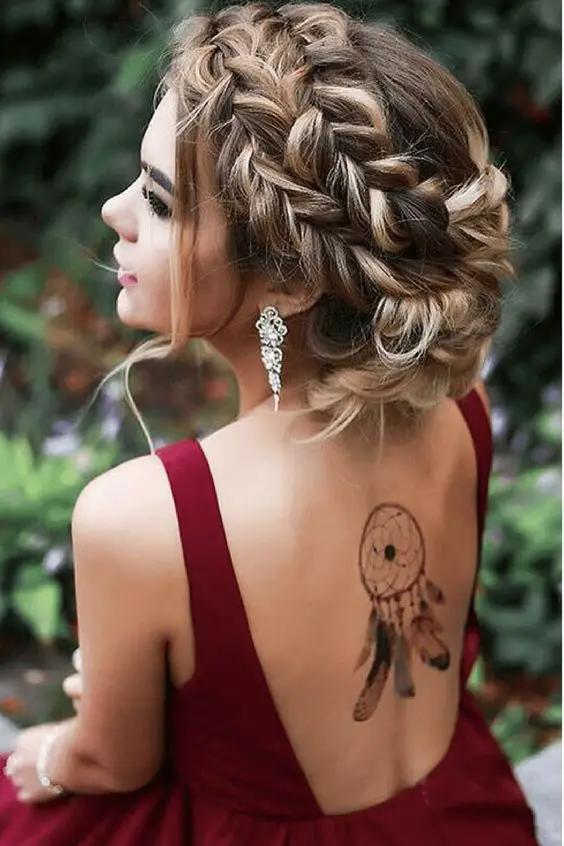
8. Braided Crown
Step-by-Step Guide to Creating a Braided Crown
Creating a braided crown is an elegant way to style your hair, perfect for both casual and formal occasions.
Follow these steps to achieve this look:
Start with a Deep Side Part: Begin by parting your hair deeply on one side.
Begin Braiding: Take a small section from the front of the part. Divide it into three and start a Dutch braid. Cross the right strand under the middle, then the left strand under the middle, gradually adding more hair from each side as you braid along your hairline.
Continue Around the Head: Keep braiding around the head. As you move past your ear, start adding larger sections of hair to maintain the thickness of the braid.
Add Volume: Gently tug at the edges of the braid to make it fuller and more pronounced.
Complete the Circle: Continue the braid around the back of your head and over the opposite ear. Once you reach the starting point, incorporate all remaining hair into the braid.
Secure and Wrap: Finish the braid and secure it with a small clear elastic. Wrap the tail of the braid around the head to meet the start of the braid.
Pin in Place: Use bobby pins to discreetly secure the end of the braid along the braided base, tucking in the ends for a seamless finish.
Adjust for Comfort and Style: Make any final adjustments to ensure the braid is comfortably secure and evenly styled around your head.
Perfect for those busy days or when you want to add a sophisticated touch to your outfit.
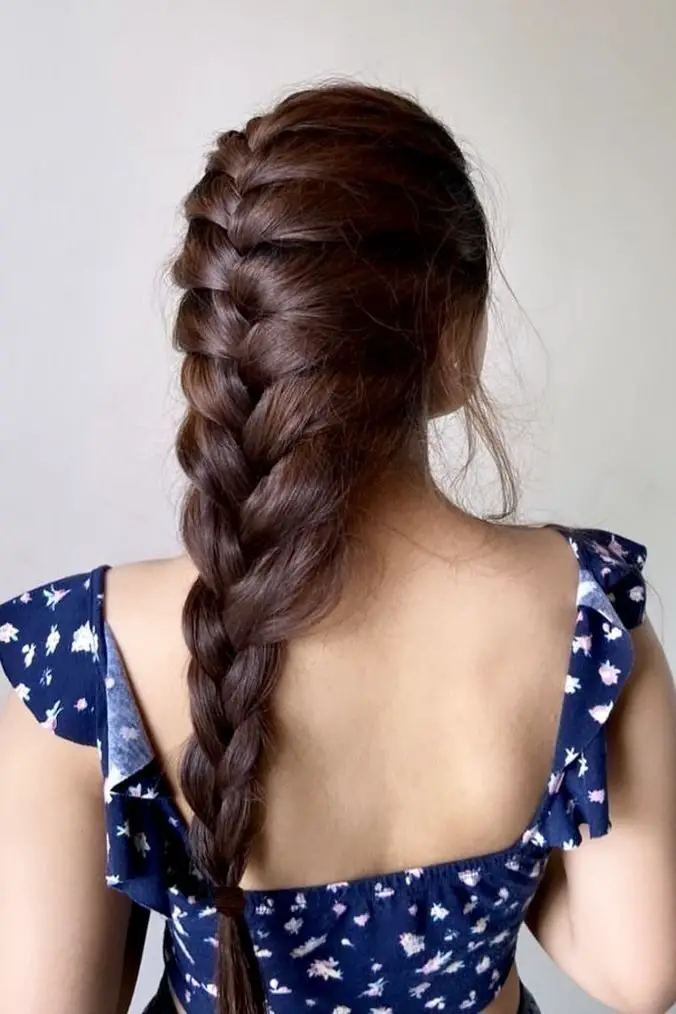
9. French Braid
Step-by-Step Guide to Creating a French Braid
A French braid is a timeless and sophisticated hairstyle that works perfectly for those needing to manage long hair while on the go.
Here’s how you can effortlessly create this classic look:
Start with Clean, Detangled Hair: Brush your hair thoroughly to ensure it’s smooth and free of tangles. This step is crucial for a neat braid.
Begin at the Top: Pick up a big section of hair at the crown of your head. Split this section into three equal parts.
Initiate the Braiding Process: Start by crossing the right strand over the middle strand, then the left strand over the new middle strand, similar to a traditional braid.
Incorporate More Hair: As you continue braiding, gradually add more hair from each side into the main strands before each cross-over. This technique helps secure the braid close to the scalp.
Continue Down the Head: Keep adding hair and braiding until you reach the nape of your neck. At this point, you can continue with a regular braid if you prefer.
Secure the Braid: Tie off the end of the braid with a hair tie. For a softer look, gently tug at the sides of the braid to loosen it slightly.
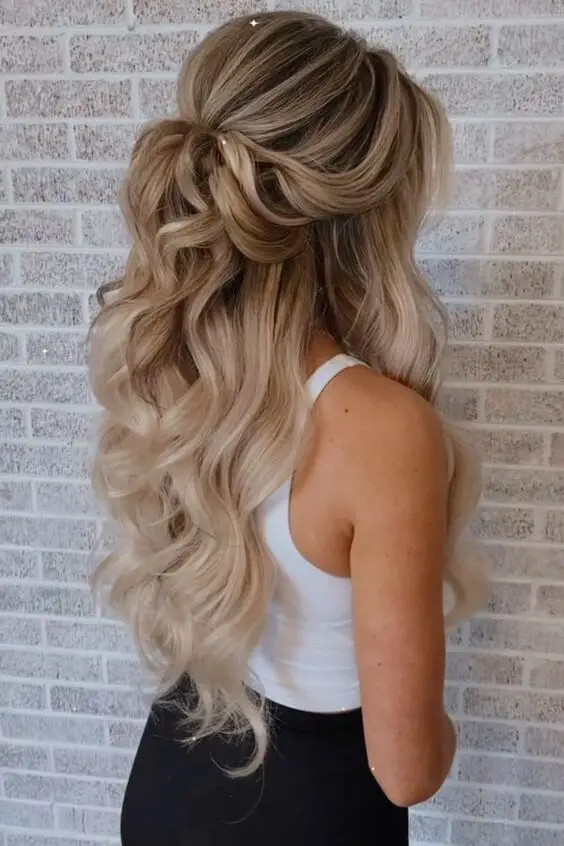
10. Half-Up Half-Down Hairstyle
Step-by-Step Guide to Creating a Half-Up Half-Down Hairstyle
The half-up half-down hairstyle combines elegance and practicality, making it a fantastic choice for busy women.
Here’s how to achieve this balanced look:
Prepare Your Hair: Brush your hair to ensure it’s smooth and free of tangles. This style works well on both straight and curly hair.
Section the Top Hair: Select the top half of your hair, from around the temples to the crown. You can adjust the amount of hair based on personal preference or the occasion.
Secure the Section: Pull the selected top section back and secure it with a hair tie. For a more sophisticated look, you can twist or braid this section before tying it up.
Add Volume and Texture: Gently tug at the crown to loosen the hair slightly, which adds volume. Optionally, apply a texturizing spray to the lower half of your hair to enhance its natural texture.
Personalize Your Style: Consider curling the loose ends with a curling iron for soft waves, or leave it straight for a sleek look. Accessories like decorative clips or flowers can add a unique touch to the hairstyle.
This versatile hairstyle is perfect for a variety of settings, from casual outings to more formal events, providing a stylish yet easy solution for long hair management.
11. Side Braid
Step-by-Step Guide to Creating a Side Braid
A side braid is a chic and simple hairstyle that can be dressed up or down, making it ideal for busy women.
Here’s how you can easily achieve this look:
Brush and Section Your Hair: Start by brushing your hair to ensure it’s smooth and free of tangles. Gather all your hair to one side, at the nape of your neck.
Start the Braid: Divide your hair into three even sections. Begin braiding by alternately crossing the right and left sections over the middle section.
Incorporate Hair: As you braid, gently pull in small sections of hair from the same side to keep the braid tight and neat.
Secure the Braid: Once you reach the end of your hair, secure the braid with a hair tie. For a softer look, you can slightly loosen the braid by tugging at the edges.
Add Accessories: Enhance your side braid with accessories like floral pins or a ribbon for a personalized touch.
12. Messy Bun
Step-by-Step Guide to Creating a Messy Bun
Creating a messy bun is a quick and stylish way to manage your long hair, especially on busy days.
Here’s a simple guide to achieve this effortlessly chic look:
Creating the Base:
Place your thumbs in front of your ears and trace upwards to the top of your head.
Hold the hair where the bun should sit, pulling out face-framing pieces.
Scoop up the remainder of the hair and secure it into a tight ponytail.
Forming the Bun:
Bring the ponytail to the left side and hold the base with your right hand.
Take a second hair tie, pulling the elastic over the top of the ponytail.
Stick your left hand down and through it to the front, flipping the hand down behind the ponytail, and grabbing onto the base.
Final Touches:
Tuck or pin the ends around the base.
Pull the bun until it reaches the desired size and shape.
You can adjust the tightness and the positioning of the bun to match your personal style or the specific requirements of your day’s activities.
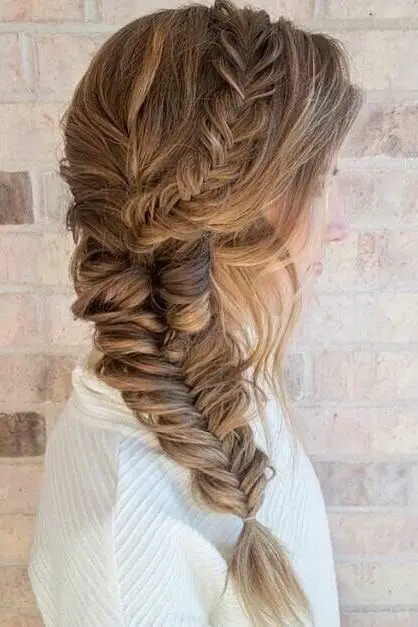
13. Fishtail Braid
Step-by-Step Guide to Creating a Fishtail Braid
A fishtail braid is a beautifully intricate hairstyle that appears complex but is surprisingly easy to create. Here’s how to master this elegant look:
Split Your Hair: Begin by gathering your hair into a ponytail at the back or side of your head, depending on where you want the braid to lie. Split the ponytail evenly into two sections.
Start Braiding: Take a small strand of hair from the outside of one section and cross it over to the inside of the opposite section. Repeat this on the other side, continuing to alternate sides and pulling small strands from the outside to the inside of each section.
Maintain Evenness: Keep the strands thin and even as you cross them over to ensure the braid looks uniform and neat.
Secure the End: Once you reach the end of your hair, secure the braid with a hair tie. Optionally, you can wrap a small strand of hair around the tie for a polished look.
Loosen the Braid: For a more relaxed and voluminous effect, gently tug at the edges of the braid to loosen it slightly.
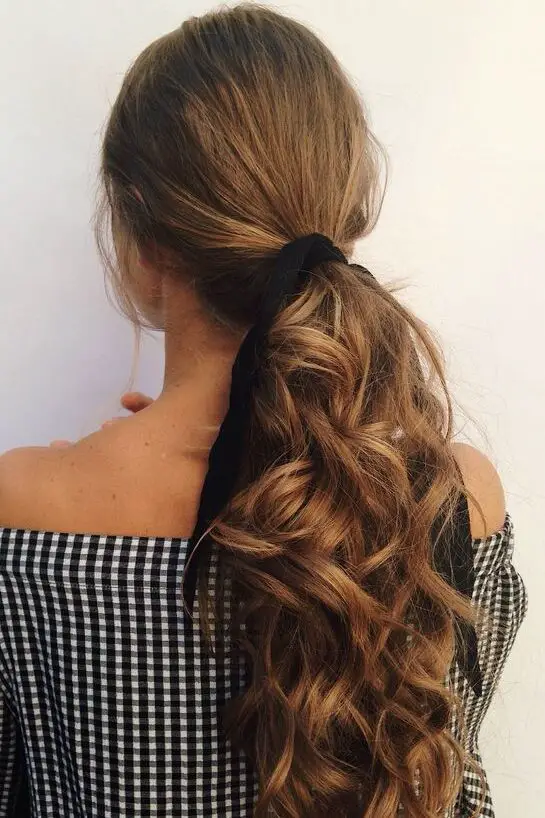
14. Low Ponytail
Crisscross Ponytail
To achieve a unique and voluminous low ponytail, begin by dividing your hair into three sections. Secure the middle section into a low ponytail at the nape.
Split each side section into two and cross the top part over the ponytail, securing the ends underneath with bobby pins. Repeat on the opposite side to enhance the crisscross effect.
Gently pinch and pull at the base of the ponytail to add volume.
Braided Low Ponytail
For a braided style, separate a section of hair from the crown to the ear and braid it down. Secure the braid’s end temporarily. Repeat on the other side.
Gather all remaining hair into a low ponytail at the nape. Join both braids at the back and loop the ponytail through the braids for a twisted look. Pull on the braids to make them more prominent.
Undone Low Ponytail with Braided Detail
Create an undone low ponytail by dividing your hair into three sections. Tie the middle section into a low ponytail and pull on the sides for a messier appearance.
Braid a small section of the ponytail and bring it across the band, pinning it underneath for a subtle braided detail.
Knotted Front Sections with Low Ponytail
Begin with two front sections separated from the rest. Tie the rest into a low ponytail. Twist the front sections over each other at the back and knot them under the ponytail.
Secure the ends and adjust the twist for added texture, ensuring it covers the ponytail band.
Sleek Low Ponytail
For a sleek and elegant look, tease the crown to add volume. Smoothly comb back all hair and gather it into a low ponytail at the nape, ensuring a sleek finish.
Split the ponytail into two, secure the top half with a clear elastic to add volume, and wrap a strand around the hair tie to conceal it.
Secure with bobby pins and gently pull on the sides of the ponytail for a fuller top.
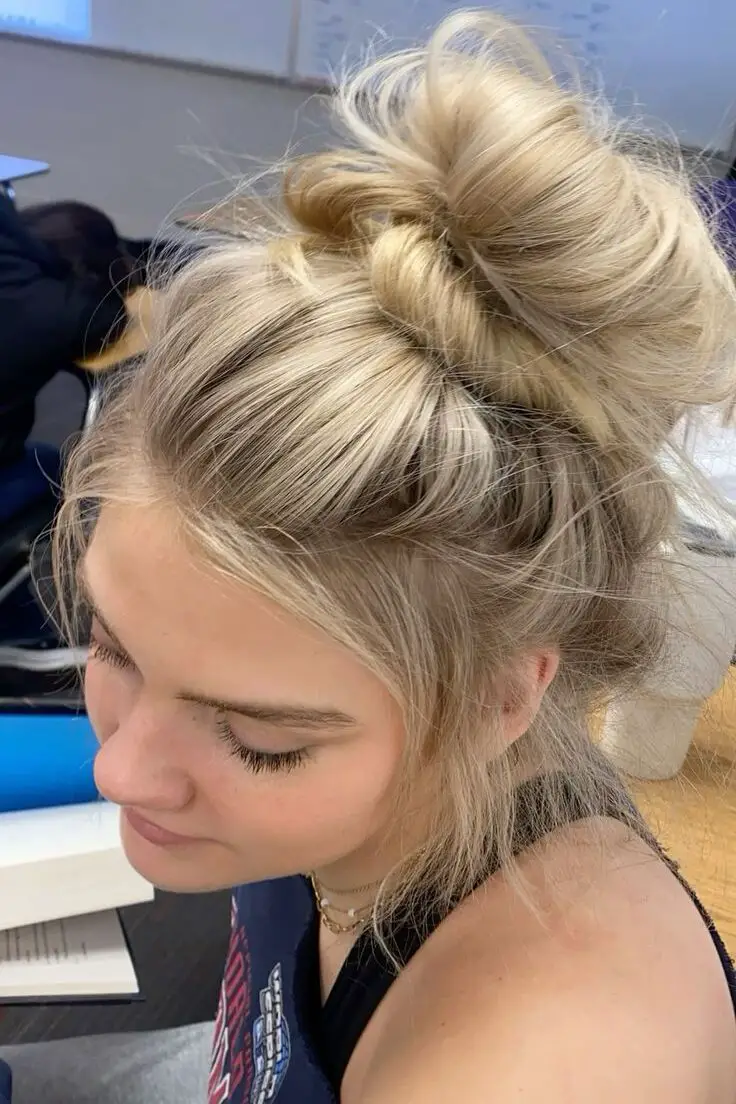
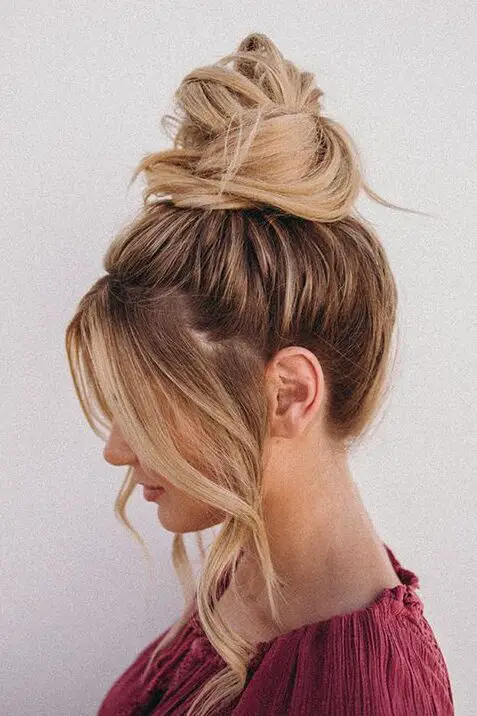
15. Top Knot
Step-by-Step Guide to Creating a Top Knot
The top knot is a stylish and versatile hairstyle perfect for busy women looking to keep their hair neatly away from the face and neck, especially during the warm summer months.
Here’s a straightforward guide to achieving a polished or casual top knot look:
Preparation: Start with either second or third-day hair for easier styling. If your hair is curly or textured, consider straightening it for a smoother base. Apply a small amount of gel or serum around the hairline to tame any frizz.
Creating the Ponytail: Pull your hair into a high ponytail at the crown of your head. Use a sturdy hair elastic to secure it. For added volume, backcomb the ponytail lightly.
Forming the Bun: Divide the ponytail into two sections. Twist these sections together and then wrap them around the base of the ponytail. Secure the bun with bobby pins, ensuring they’re discreetly placed.
Adding Volume and Texture: If you desire a more voluminous look, gently tug at the bun to loosen it slightly. Apply a texturizing spray or powder to add texture and volume.
Setting the Style: Use hairspray to set the hairstyle in place. For a messier look, tease the sides of your hair before spraying.
Customizing Your Style: For a personalized touch, leave a few strands of hair out before you begin, or pull small strands out after styling for a tousled look.
Final Thoughts
Navigating through the avenues of style for busy women, this post has offered an array of quick and effortless long hairstyles that encapsulate beauty in every strand, suitable for any occasion.
The significance of maintaining hair health through regular trims and conditioning is emphasized, underscoring the foundation of any versatile hairstyle.
As we wrap up, remember that the essence of these styles is not just in their visual appeal but in their ability to make sophisticated hairstyling accessible and manageable.
Leave a Reply
You must be logged in to post a comment.