Summer birthday celebrations call for a splash of color and creativity, especially when it comes to your nails.
For those searching for the perfect summer nail art ideas, “Summer Birthday Nail Designs” offers a treasure trove of aesthetic, festive nails that promise to make your special day even more memorable.
This post unfolds a collection of 15 enchanting nail designs for 2024, from the vibrant allure of neon French tips adorned with birthday sprinkle art to the delicate charm of pastel rainbows with tiny bows.
You’ll discover a spectrum of ideas tailored for those summer nails, ensuring each design resonates with the festive spirit of your birthday.
Busy? Save this pin for later.
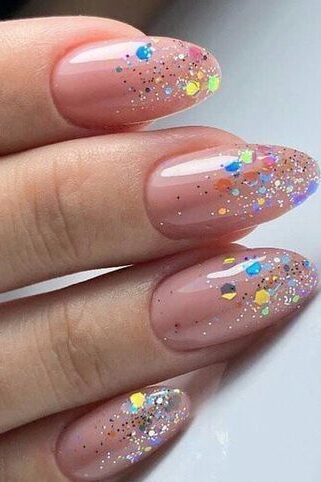
1. Confetti Ombre with Glitter Tips
Preparation and Base Application
Nail Preparation: Start by gently pushing back the cuticles and prepping the nails by removing any shine and cleaning the surface thoroughly. Use a pH-balancing swipe for a clean, acid-free surface to ensure optimal adhesion.
Base Coat Application: Apply protein bond as a base coat, which acts like double-sided tape for the product to adhere more effectively. It’s crucial to apply two coats, avoiding any contact with the skin for a neat finish.
Creating the Confetti Ombre Effect
Applying the Base Color: Apply a layer of clear base coat on all nails. Then, dip two nails at a time into Scarlet flawless pink dip powder, ensuring the entire nail is covered.
Adding Glitter Tips: After dusting off the excess Scarlet powder with a toothbrush, apply a clear base coat on the tips of the nails, similar to a French manicure. Dip the tips into glitter dip powder.
Blending for Ombre: Tap off the excess glitter. Use an ombre brush to blend the glitter upwards, creating a seamless fade effect. Add more glitter if necessary, ensuring it lays flat for a smooth finish.
Finishing Touches
Sealing the Design: Once the ombre and glitter are satisfactorily applied, cover with a thin layer of clear acrylic to protect the natural nail and seal in the design.
Top Coat for Shine: Apply a conversion top coat over the protein bond base for a high-shine finish that also seals in the glitters and confetti effectively.
Cleanup: Use a manicure cleanse to remove any tacky residue, ensuring a clean and glossy finish.
Tips for Perfect Results
Ensure the polish at the cuticle has the densest color, gradually fading as you move up the nail to create a dramatic ombre effect.
For a smooth transition, choose colors that are adjacent on the color wheel.
Take your time with the application since the polish doesn’t dry too quickly, allowing for adjustments.
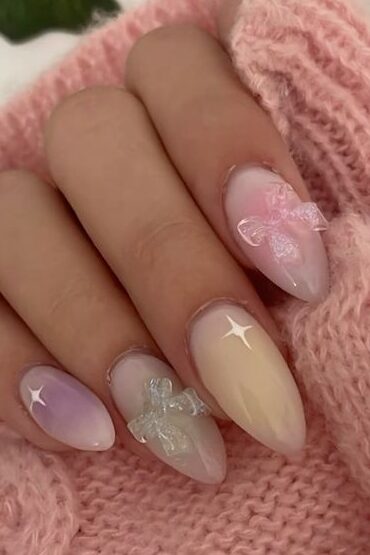
2. Pastel Rainbow with Tiny Bows
Preparation and Base Color Application
Nail Preparation: Begin by cleaning and shaping your nails. Apply a base coat of “Relevé” from the Ballet Collection, ensuring a smooth and even layer.
Base Color Setting: Allow the base coat to dry completely before proceeding to the color application.
Creating the Pastel Rainbow
Selecting Colors: Choose six shades from the Glitter Days Nautical Collection for the rainbow effect.
Applying Colors: Using the one stroke brush technique with a little angular brush, apply each color in thin stripes across the nail, blending slightly where they meet to create a soft rainbow transition.
Adding Tiny Bows
Painting Bows: With the Neo perfect painting fineliner, delicately draw tiny bows on each nail. Mix a small amount of paint with water for precise application.
Detailing: Use “Lights Out” for outlining the bows, enhancing their visibility and definition.
Finishing Touches
Top Coat Application: Seal your design with “In a Rush” top coat for a glossy finish and to ensure quick drying.
Drying: Allow your nails to dry completely, avoiding any smudges or chips.
Tips for Perfect Results
Ensure each stripe of color is evenly applied for a harmonious look.
Practice the bow drawings on paper before applying to nails to perfect your technique.
Keep your hand steady while detailing with the fineliner to maintain clean and crisp lines.
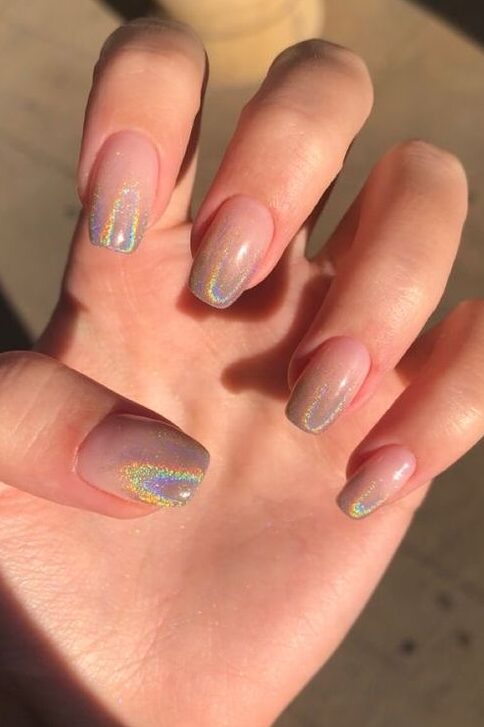
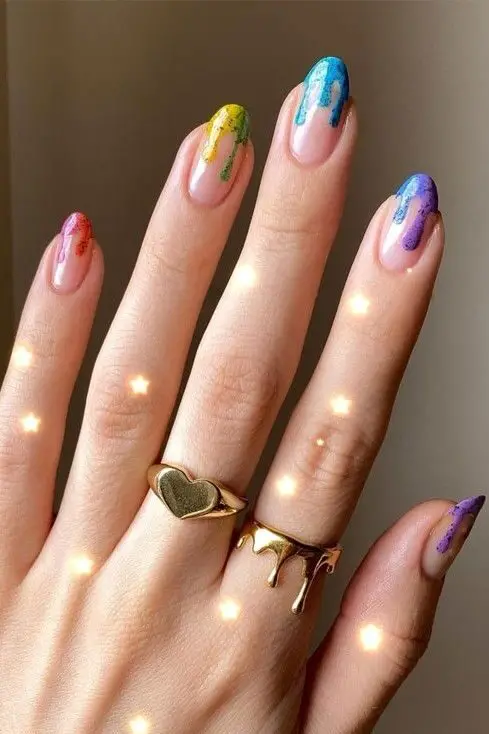
3. Holographic French Manicure with Birthday Accents
Preparation and Base Coat Application
Nail Preparation: Start by filing your nails into your desired shape, ensuring the edges are smooth.
Base Coat Application: Apply a clear base coat to protect your nails and enhance the adhesion of the holographic polish.
Applying the Holographic French Tip
Choosing Holographic Polish: Select a holographic nail polish from options like chrome, linear, or scattered holographic effects.
Taping for Precision: Use tape to section off the tips of your nails for a clean French tip application.
Polish Application: Apply the holographic polish on the tips over the tape. Carefully remove the tape while the polish is still wet to ensure sharp lines.
Adding Birthday Accents
Selecting Accents: Choose nail decals or stickers that feature birthday themes such as cakes, balloons, and confetti.
Applying Accents: Place the decals on the nail, preferably on the base of the nail to complement the holographic tips.
Sealing the Design
Top Coat Application: Apply a top coat to seal in the design and enhance the durability of your manicure.
Curing: If using gel-based products, cure under a UV/LED lamp to set the design firmly.
Tips for Optimal Results
Ensure the base coat is completely dry before applying holographic tips to avoid smudging.
Use tweezers for precise placement of delicate nail decals or stickers.
For a more personalized touch, mix and match decals related to personal interests or the theme of the birthday celebration.
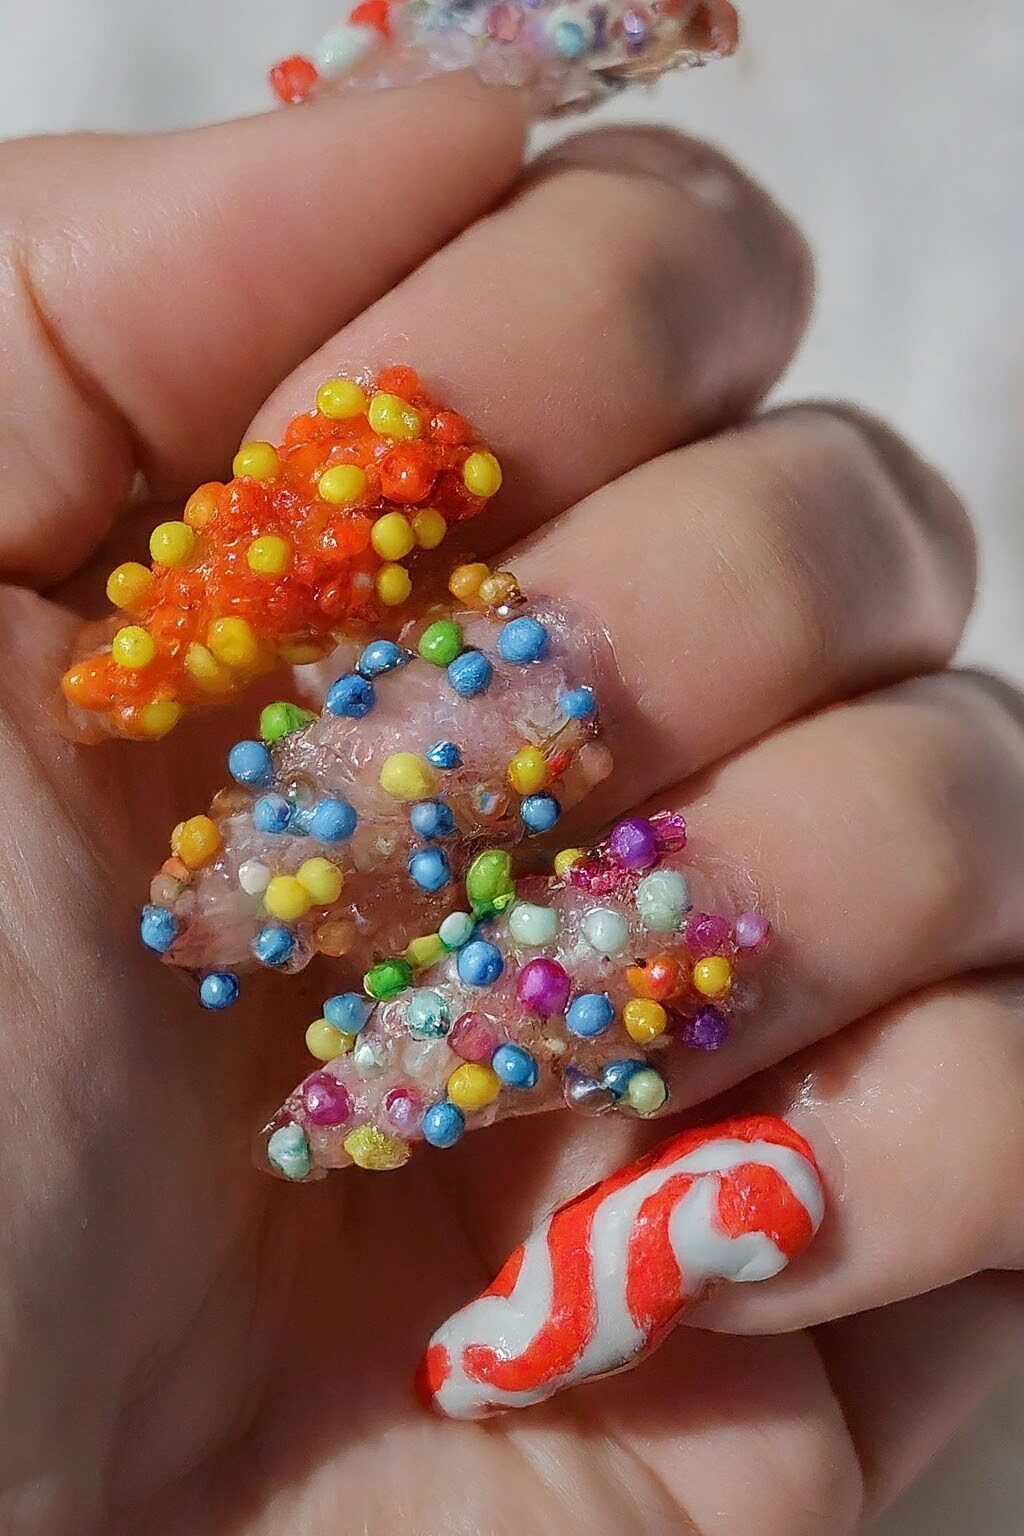
4. Jelly Bean Nails with Microbeads
Preparation and Base Coat Application
Nail Preparation: Begin by filing your nails to a desired shape and buffing the surface gently to ensure a smooth base.
Base Coat Application: Apply a clear or white base coat to help the colors pop and ensure better adhesion of the microbeads.
Creating the Jelly Bean Effect
Color Application: Choose vibrant, jelly bean-inspired colors and apply them to your nails. Consider using a dotting tool or small brush for precise spots that mimic the look of jelly beans.
Adding Microbeads: While the polish is still tacky, carefully place microbeads on the nails to create a textured, 3D effect. Use a tweezer for better placement accuracy.
Sealing the Design
Top Coat Application: Apply a generous layer of top coat to seal in the microbeads and the underlying nail polish. This will prevent the beads from falling off and extend the durability of your nail design.
Curing: If using gel products, cure under a UV/LED lamp for the recommended time to set everything in place.
Tips for Optimal Results
Test the bead colors on a piece of paper with the top coat to ensure they do not bleed or lose color.
Set up a protective surface under your working area to catch any stray beads and simplify cleanup.
Opt for a top coat that dries quickly to avoid smudging your design while placing the beads.
This process will help you achieve playful and colorful Jelly Bean nails with microbeads, perfect for adding a fun and festive touch to your summer birthday look.
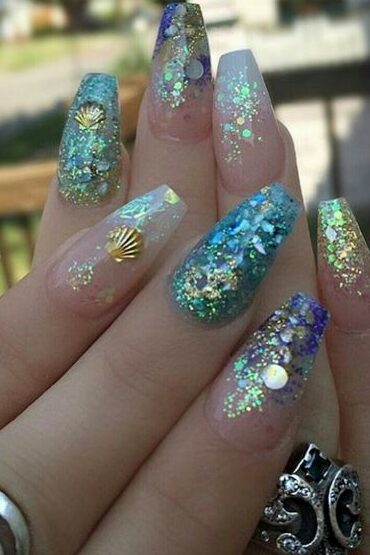
5. Mermaid Scales with Glitter Accents
Preparation and Base Coat Application
Nail Preparation: Ensure your nails are clean and shaped according to your preference.
Base Coat Application: Apply two coats of a teal glitter base using Sincerely Polish Jasmine to set the stage for the mermaid theme.
Creating the Mermaid Scales
Scale Formation: Using a detail brush and black paint, start drawing thin, curved scales beginning just below the cuticles.
Scale Expansion: Continue the pattern toward the tip of your nail, maintaining the curved shape for a consistent mermaid scale appearance.
Adding Glitter and Accents
Glitter Application: Dab a heavier glitter, Sally Hansen: Mermaid Tears, on the tips using a makeup sponge for a concentrated sparkle.
Sandy Effect: Sponge OPI My Vampire is Buff on the tips over the glitter to mimic a sandy ocean floor effect.
Sealing the Design
Top Coat Application: Seal your artistic work with a layer of Seche Vite Topcoat to protect and enhance the shine of your mermaid scales.
Tips for Optimal Results
Ensure each scale is uniformly thin to achieve a delicate, realistic mermaid tail effect.
For a 3D look, mix different sizes of glitter in the tips to reflect light beautifully.
Use a light hand when sponging on the sandy effect to avoid overpowering the glitter beneath.
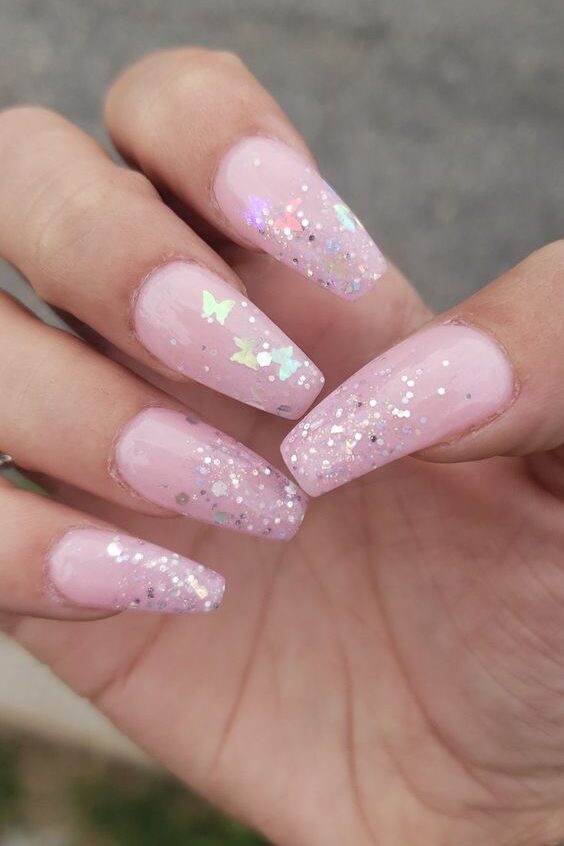
6. Sparkly Butterflies on Soft Pink Base
Preparation and Base Coat Application
Nail Preparation: Start by cleaning and shaping your nails for a smooth application.
Base Coat Application: Apply two coats of R dot S nail gel polish in shade 115 for a soft pink base, ensuring each layer is dry before the next.
Creating the Butterfly Effect
Applying Glitter: Use a Natalie base ridge detailer brush to apply The Beatles color uh 30, a pink glittery polish, over the base. For a denser sparkle, add additional coats of glitter.
Butterfly Design: Utilize Macart transfer foil gel on the thumb and ring finger to create a sparkly effect. For the butterfly shapes, apply a thicker and thinner layer of glitter in a sweeping motion to mimic the wings.
Adding Details and Accents
Galaxy Effect: On the index finger, create a galaxy-like effect using white polish with a detailer brush for added drama.
Crystal Embellishments: Apply crystals on the middle finger before the top coat to add a touch of elegance.
Butterfly Decals: Place butterfly nail decals or stickers strategically to enhance the butterfly theme.
Sealing the Design
Top Coat Application: Seal your design with a glossy top coat to enhance durability and shine.
Curing: Cure under a UV/LED lamp if necessary, to set the design firmly.
Tips for Optimal Results
Ensure the base coat is fully dry to prevent smudging.
Use tweezers for precise placement of crystals and decals.
Experiment with different sizes of glitter on the tips for a unique light-reflecting effect.
7. Chrome Nails with Birthday Cake Charm
Preparation and Base Coat Application
Nail Preparation: Begin by ensuring your nails are clean, dry, and free of any old polish. Shape them to your desired style.
Base Coat Application: Apply a chrome base coat to achieve a reflective, mirror-like finish. Allow it to dry completely.
Applying the Chrome Effect
Chrome Powder Application: Gently dab chrome powder over the base coat using a sponge applicator. Ensure even coverage for a flawless reflective surface.
Buffing: Use a soft brush to gently buff the chrome powder into the base coat, enhancing the metallic shine.
Attaching the Birthday Cake Charm
Selecting the Charm: Choose a small, birthday cake-shaped charm that complements the chrome base.
Attaching the Charm: Apply a small dot of nail glue on the nail where you want to place the charm. Carefully set the charm in place and press down lightly.
Sealing the Design
Top Coat Application: Apply a clear top coat to seal in the chrome effect and the charm. This not only protects your nail art but also enhances the overall shine.
Curing: Allow the top coat to dry naturally or use a UV lamp for faster curing, ensuring the charm is securely attached.
Tips for Optimal Results
Make sure the base coat is completely dry before applying the chrome powder to avoid any smudging.
Handle the charm with tweezers for precise placement.
Consider using a gel top coat for added durability, especially if you’re wearing the charm for an extended period.
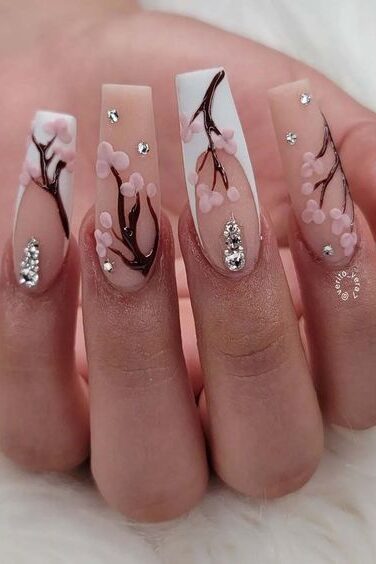
8. Delicate Floral Vines with Tiny Crystals
Preparation and Base Coat Application
Nail Preparation: Start by ensuring your nails are clean and shaped to your liking.
Base Coat Application: Apply a clear base coat to protect your nails and enhance the adhesive surface for the upcoming designs.
Creating the Floral Vines
Choosing Colors: Opt for soft pastel shades to paint the delicate floral vines. Use a fine brush for precision.
Painting Vines: Gently draw thin, wavy lines starting from the base of the nail up towards the tip, mimicking the natural growth of vines.
Adding Tiny Crystals
Selecting Crystals: Choose small, clear crystals that complement the soft colors of your floral vines.
Placing Crystals: While the vine paint is still tacky, carefully place the crystals along the lines using tweezers for precision.
Sealing the Design
Top Coat Application: Apply a layer of top coat to seal in the design and the crystals, ensuring longevity and enhancing the overall shine.
Tips for Optimal Results
Use a dotting tool to create tiny dots along the vines for added detail and texture.
Consider using a matte top coat for a unique, modern finish that contrasts beautifully with the sparkle of the crystals.
Keep the design simple and elegant; avoid overcrowding the nails with too many elements.
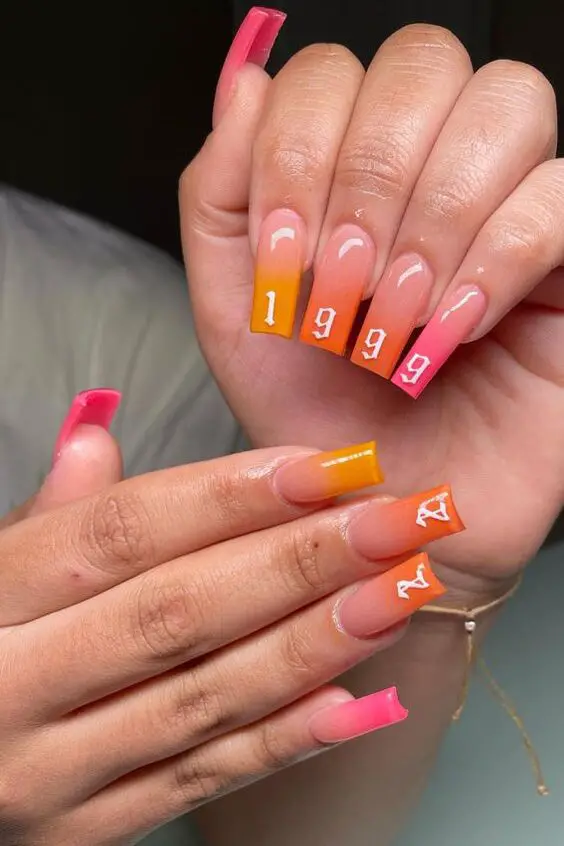
9. Watercolor Ombre with Birthday Messages
Preparation and Base Coat Application
Nail Preparation: Begin by cleaning and shaping your nails. Ensure the surface is smooth and free of any oils or residue.
Base Coat Application: Apply a light base coat to help subsequent colors adhere better and to prevent staining from pigmented polishes.
Creating the Watercolor Ombre
Choosing Colors: Select soft, watercolor-friendly shades that blend well together, such as pastels or muted tones.
Applying the Watercolor: Use a small sponge to dab the chosen polishes onto your nails, blending them slightly where they meet to create a fluid, watercolor effect.
Adding Birthday Messages
Selecting a Pen: Use a fine-tip nail art pen in a contrasting color to write short birthday messages or wishes on each nail.
Writing Messages: Carefully write the messages, such as ‘Happy B-Day!’ or ‘Celebrate,’ ensuring each word is legible and aesthetically placed.
Sealing the Design
Top Coat Application: Apply a clear top coat to seal in the artwork and protect your nail design.
Drying Time: Allow ample time for the nails to dry completely to avoid smudging the delicate watercolor and written elements.
Tips for Optimal Results
Keep the sponge slightly damp when applying the watercolor polish to ensure a smooth blend.
Practice writing the messages on paper before applying to nails to perfect your technique.
Choose a top coat that won’t smear the ink to maintain the clarity of your birthday messages.
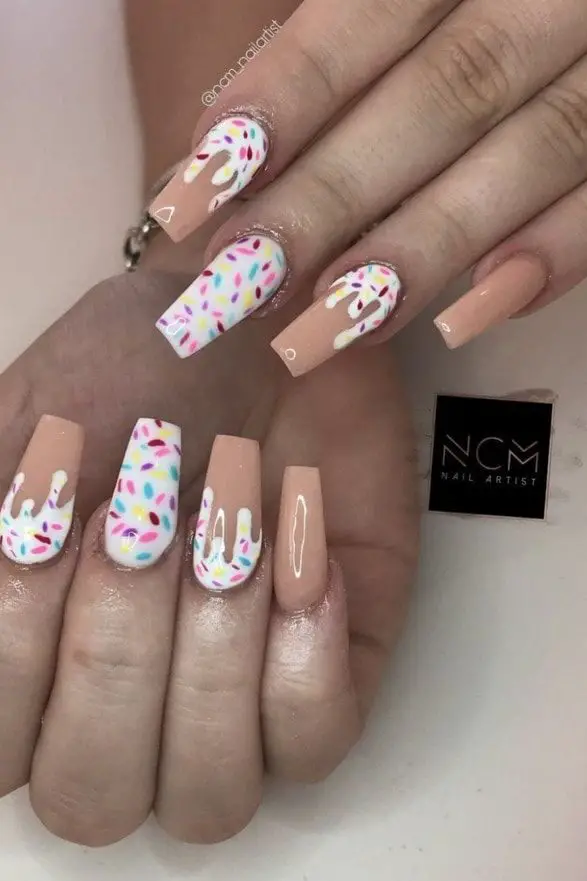
10. Neon French Tip with Birthday Sprinkle Art
Preparation and Base Coat Application
Nail Preparation: Start by thoroughly cleaning and shaping your nails to the desired length and style.
Base Coat Application: Apply a clear base coat to protect your nails and enhance the brightness of neon colors.
Applying Neon French Tips
Selecting Neon Polish: Choose a vibrant neon polish for the tips. Options like electric blue, fiery orange, or hot pink are perfect.
Taping for Precision: Use nail tape to achieve clean lines for your French tips. Place the tape slightly below where you want the color to start.
Polish Application: Paint the tips with your chosen neon polish. Remove the tape immediately after painting to ensure sharp lines.
Adding Birthday Sprinkle Art
Choosing Sprinkle Colors: Select tiny, multi-colored nail decals that resemble birthday cake sprinkles.
Applying Sprinkles: While the tip polish is still tacky, carefully place the sprinkle decals using tweezers for precision.
Sealing the Design
Top Coat Application: Seal your design with a high-gloss top coat to protect your nail art and enhance the neon colors’ vibrancy.
Drying: Allow your nails to dry completely, ensuring the decals and polish are set in place.
Tips for Optimal Results
Ensure the base coat is completely dry before applying the neon polish to prevent smudging.
Use a fine-tip brush or a toothpick to adjust the position of the sprinkle decals precisely.
Consider using a quick-dry top coat to reduce waiting time and avoid any accidental smudges.
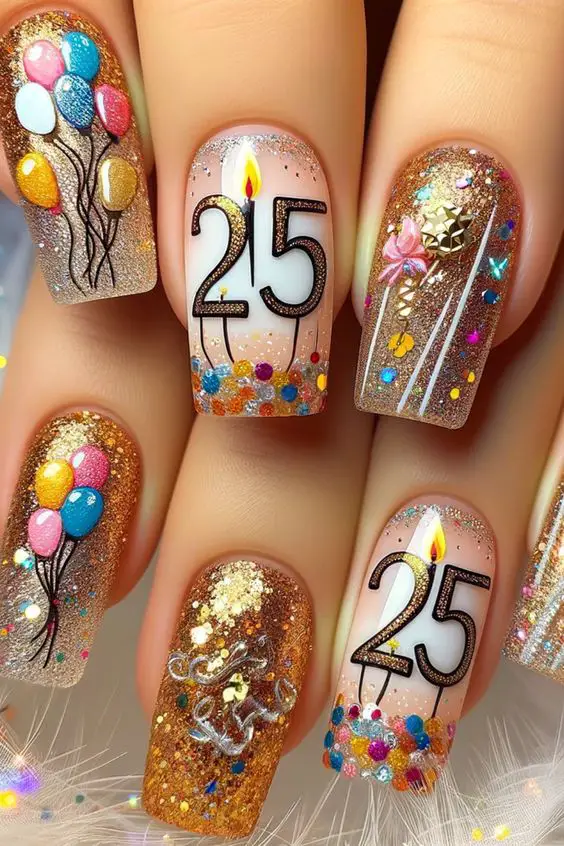
11. Ombré Glitter Fade with Birthday Candles
Preparation and Base Coat Application
Nail Preparation: Start by cleaning your nails and buffing them gently to ensure a smooth application surface.
Base Coat Application: Apply a clear base coat to protect your nails and create a smooth canvas for the glitter.
Creating the Ombré Glitter Fade
Choosing Glitter Polish: Select a fine glitter polish that transitions well from your chosen base color to create a fading effect.
Applying Glitter: Start at the tip of the nail, applying a dense layer of glitter. Gradually decrease the amount of glitter as you move toward the nail base to create the fade effect.
Adding Birthday Candles
Candle Design: Use a thin brush to paint small candle shapes starting at the cuticle, making sure they appear to ‘stand’ on the glittery base.
Flame Details: Add a tiny flick of yellow or gold polish at the tip of each candle to represent the flame.
Sealing the Design
Top Coat Application: Apply a clear top coat to seal in your design, ensuring longevity and enhancing the overall shine.
Tips for Optimal Results
Ensure the base coat is fully dry before starting with the glitter to prevent any smudging.
Use a sponge to dab on the glitter for a more concentrated and even application.
For the candles, you can alternate colors to enhance the festive look of your nail design.
This method provides a sparkling backdrop with playful elements, perfect for celebrating your summer birthday with flair and creativity.
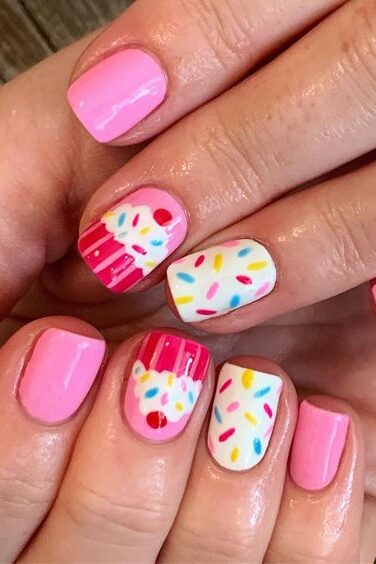
12. Cupcake Nail Art with Sprinkles and Cherries
Preparation and Base Coat Application
Nail Preparation: Start by ensuring your nails are clean, filed, and buffed to a smooth finish.
Base Coat Application: Apply a pastel pink base coat to set a sweet, cupcake-themed backdrop.
Creating the Cupcake Design
Cupcake Base: Use a sponge to dab on a lighter shade at the nail tip to mimic the fluffy top of a cupcake.
Icing Effect: With a fine brush, add swirls of white polish over the lighter base to represent icing.
Adding Sprinkles and Cherries
Sprinkles: Choose tiny, multi-colored dot decals and apply them randomly over the white icing to simulate sprinkles.
Cherry on Top: Place a small red rhinestone at the peak of the icing swirl to represent a cherry.
Sealing the Design
Top Coat Application: Cover with a glossy top coat to protect your design and enhance the colors’ vibrancy.
Tips for Optimal Results
Ensure each layer is dry before applying the next to avoid smudging.
Use tweezers for precise placement of rhinestones and decals.
Keep the overall design playful and colorful to reflect a festive birthday theme.
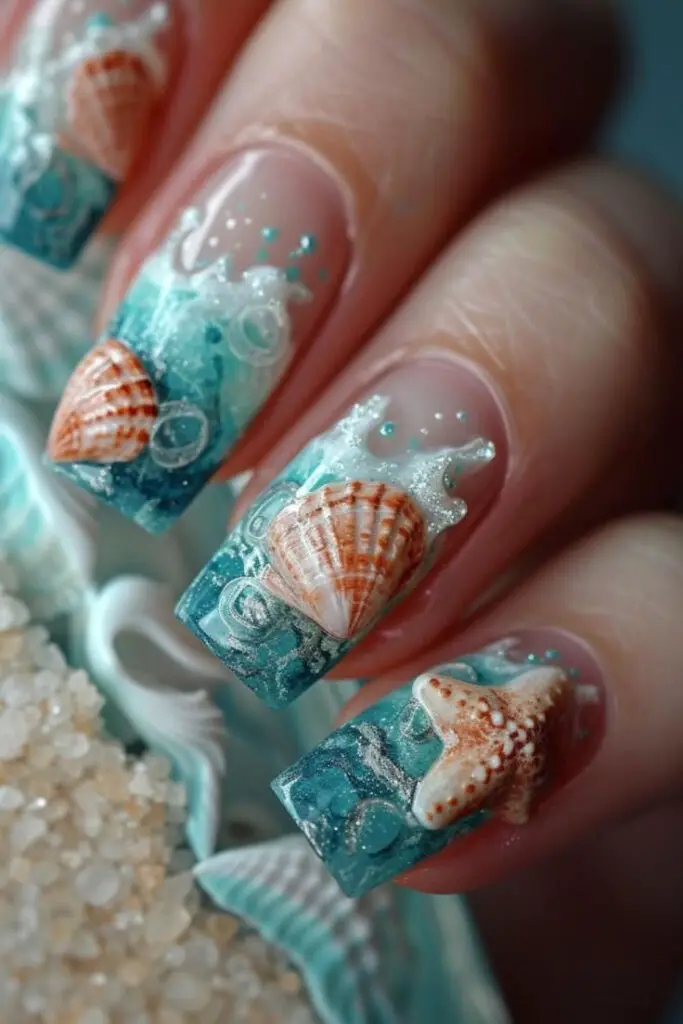
13. Seashell and Starfish Accents on Beachy Waves
Preparation and Base Coat Application
Nail Preparation: Begin with a thorough cleaning of your nails, ensuring they are free from previous polish and debris. Shape them to mimic the gentle curve of a wave for thematic consistency.
Base Coat Application: Apply a base coat of a pale blue polish to set a serene ocean backdrop, ensuring it’s evenly coated and dry before proceeding.
Creating Beachy Waves
Wave Patterns: Use a thin brush to paint wavy lines with a darker blue shade over the pale base, simulating the rhythmic motion of ocean waves.
Blending Techniques: Softly blend the edges of the waves into the base color to create a more natural sea-like effect.
Adding Seashell and Starfish Accents
Choosing Accents: Opt for small, flat decals or stickers that feature seashells and starfish. Ensure they are suitable for nail art to prevent lifting or discomfort.
Application of Accents: Place the decals strategically along the wave patterns, using tweezers for precise placement. Aim for a balanced look that suggests a natural scattering of shells and starfish on the shore.
Sealing the Design
Top Coat Application: Apply a clear top coat to encapsulate the entire design, securing the decals in place and enhancing the depth of the oceanic backdrop.
Drying Time: Allow ample time for the top coat to dry completely, ensuring the longevity of your nail art.
Tips for Optimal Results
Ensure that the decals are pressed flat against the nail to avoid edges catching and lifting.
Use a sponge to dab on the darker blue polish for a softer, more integrated wave effect.
Consider adding a touch of fine glitter over the wave areas to mimic the sparkling ocean under sunlight.
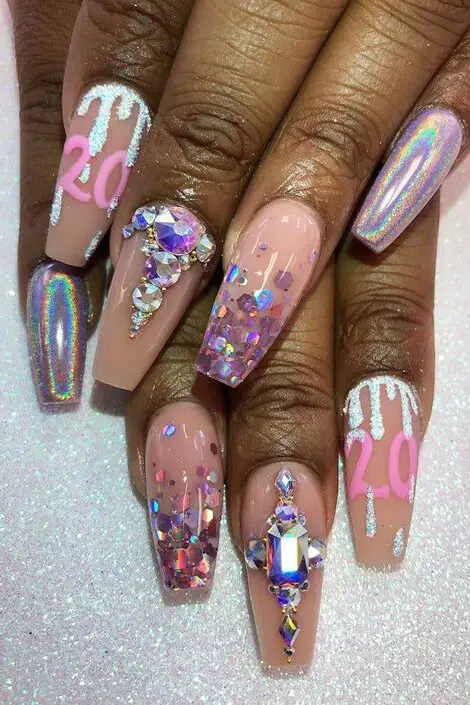
14. Gradient Glitter with Personalized Birthday Banner
Preparation and Base Coat Application
Nail Preparation: Begin with a thorough cleaning of your nails to ensure they are free from oils and debris. Shape them as desired.
Base Coat Application: Apply a clear base coat to protect your nails and create a smooth canvas for the glitter gradient.
Creating the Gradient Glitter
Selecting Glitter Polish: Choose two to three glitter polishes that blend well together, ranging from subtle to vibrant.
Applying Glitter: Start with the lightest color at the nail base, applying it about halfway up the nail. Gradually blend the next color until reaching the tip, creating a seamless gradient effect.
Designing the Personalized Birthday Banner
Banner Creation: Use a thin brush or a striping tool to paint a miniature banner across the tip or base of the nail.
Adding Text: Carefully write a personalized message or name on the banner using a fine-tip nail art pen.
Sealing the Design
Top Coat Application: Apply a high-gloss top coat to seal in your design and enhance the durability of the manicure.
Curing: Allow ample time for the nails to dry completely, ensuring the design is set and smudge-free.
Tips for Optimal Results
Use a makeup sponge to dab on the glitter polish for a denser, more even application.
Practice the banner and text on paper before painting it on your nails to ensure precision.
Keep the rest of the nail design simple to allow the gradient glitter and personalized banner to stand out.
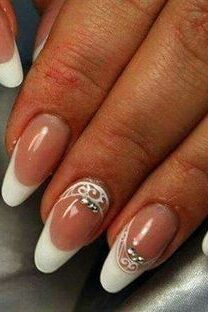
15. French Manicure with Birthday Tiara Design
To craft the elegant French Manicure with Birthday Tiara Design, follow these steps for a regal and celebratory look:
Nail Preparation:
Begin by ensuring your nails are clean and shaped. Push back the cuticles and buff the nail surface for a smooth application.
Base Coat Application:
Apply a clear base coat to protect your nails and enhance the adhesion of the polish.
French Tip Application:
Paint the tips of your nails with a classic white polish. Use a striping brush for precision to achieve the perfect smile line.
Tiara Design:
Select a metallic or glitter polish to draw the tiara. Carefully use a fine-tip brush to create the crown design at the base of your nail, above the cuticle.
Adding Sparkles:
Embellish your tiara with small rhinestones or a glitter top coat for that extra sparkle, mimicking the elegance of a birthday crown.
Top Coat Sealing:
Seal your design with a high-gloss top coat to protect your artwork and add an extra layer of shine, ensuring your nails look fabulous throughout your birthday celebration.
Final Thoughts
Embarking on the exploration of summer birthday nail designs introduces a vast realm of creativity and personal expression, each offering a unique way to celebrate one’s special day.
The beauty of these designs lies not just in their visual appeal but in their ability to transform a simple gesture of self-care into an integral part of birthday festivities.
These handpicked designs serve as more than just a guide; they are a celebration of individuality, creativity, and the joyous essence of summer birthdays.
Leave a Reply